Advertisement
Quick Links
Advertisement

Related Manuals for Hanna Instruments HI96716C


Summary of Contents for Hanna Instruments HI96716C
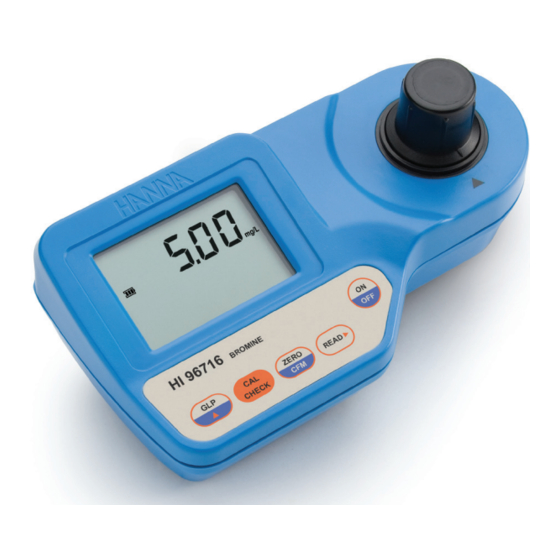
- Page 1 HI96716C Bromine ISM...
- Page 2 If you need additional technical information, do not hesitate to e‑mail us at tech@hannainst.com or view our worldwide contact list at www.hannainst.com. All rights are reserved. Reproduction in whole or in part is prohibited without the written consent of the copyright owner, Hanna Instruments Inc., Woonsocket, Rhode Island, 02895, USA.
- Page 3 PRELIMINARY EXAMINATION .................... GENERAL DESCRIPTION ....................ABBREVIATIONS ......................SPECIFICATIONS ......................PRECISION AND ACCURACY ....................PRINCIPLE OF OPERATION ....................FUNCTIONAL DESCRIPTION ....................ERRORS AND WARNINGS ....................GENERAL TIPS FOR AN ACCURATE MEASUREMENT ............. STARTUP ........................MEASUREMENT PROCEDURE .................... VALIDATION PROCEDURE ....................CALIBRATION PROCEDURE ....................
- Page 4 Please examine this product carefully. Make sure that the instrument is not damaged. If any damage occurred during shipment, please contact your local Hanna Instruments Office. Each HI96716 Ion Selective Meter is supplied complete with: • Sample Cuvettes and Caps (2 pcs.) •...
- Page 5 HI96716 is an auto diagnostic portable microprocessor meter that benefits from Hanna Instruments’ years of experience as a manufacturer of analytical instruments. It has the advanced optical system based on a special tungesten lamp and a narrow band interference filter that allows most accurate and repeatable readings.
-
Page 6: Required Reagents
Range 0.00 to 10.00 mg/L Resolution 0.01 mg/L Accuracy ±0.08 mg/L ±3% of reading @25 °C (77 °F) Typical EMC Deviation ±0.01 mg/L Light Source Tungsten lamp Light Detector Silicon Photocell with narrow band interference filter @525 nm Adaptation of the Standard Methods for the Examination of Water and Method Wastewater, 4500‑Cl G., DPD method. - Page 7 Precision is how closely repeated measurements agree with each other. Precision is usually expressed as standard deviation (SD). Accuracy is defined as the nearness of a test result to the true value. Although good precision suggests good accuracy, precise results can be inaccurate. The figure explains these definitions.
- Page 8 The optical system of Hanna Instruments’ HI96 series colorimeters is based on special subminiature tungsten lamps and narrow‑band interference filters to guarantee both high performance and...
- Page 9 A microprocessor controlled special tungsten lamp emits radiation which is first optically conditioned and beamed to the sample contained in the cuvette. The optical path is fixed by the diameter of the cuvette. Then the light is spectrally filtered to a narrow spectral bandwidth, to obtain a light beam of intensity I or I.
-
Page 10: Instrument Description
INSTRUMENT DESCRIPTION 1) GLP/ key 2) CAL CHECK key 3) ZERO/CFM key 4) READ /TIMER key 5) ON/OFF key 6) Liquid Crystal Display (LCD) 7) Cuvette alignment indicator 8) Cuvette holder KEYPAD DESCRIPTION • ON/OFF: to turn the meter on and off. •... - Page 11 DISPLAY ELEMENTS DESCRIPTION 1) The measuring scheme (lamp, cuvette, detector), appears during different phases of zero or reading measurement 2) Error messages and warnings 3) The battery icon shows the charging level of the battery 4) The hourglass appears when an internal checking is in progress 5) Status messages 6) The chronometer appears when the reaction timer is running 7) The month, day and date icons appear when a date is displayed...
- Page 12 Light Low: There is not enough light to perform a measurement. Please check the preparation of the zero cuvette. No Light:The instrument cannot adjust the light level. Please check that the sample does not contain any debris. b) on sample reading Inverted cuvettes: The sample and the zero cuvette are inverted.
- Page 13 c) during calibration procedure Standard Low: The standard reading is less than expected. Standard High: The standard reading is higher than expected. d) other errors and warnings Cap error: Appears when external light enters in the analysis cell. Assure that the cuvette cap is present. Cooling lamp: The instrument waits for the lamp to cool down.
- Page 14 The instructions listed below should be carefully followed during testing to ensure best accuracy. • Color or suspended matter in large amounts may cause interference, therefore these should be removed by treatment with active carbon and by prior filtration. • For a correct filling of the cuvette: the liquid in the cuvette forms a concavity on the top; the bottom of this concavity must be at the same level of the 10 mL mark.
- Page 15 • Shaking the cuvette can generate bubbles in the sample, causing higher readings. To obtain accurate measurements, remove such bubbles by swirling or by gently tapping the cuvette. • Do not let the reacted sample stand too long after reagent is added, or accuracy will be lost. •...
- Page 16 To compensate the meter for the sample turbidity or color, the measurement takes place in two phases. First, the meter is zeroed using the unreacted sample. After the reagents are added the reacted sample is measured. • Turn the meter on by pressing ON/OFF. The display briefly shows all tags on. •...
- Page 17 • Press ZERO/CFM and the lamp, cuvette and detector icons will appear on the display, depending on the measurement phase. • After a few seconds, the display will show “-0.0-”. The meter is now zeroed and ready for measurement. • Remove the cuvette. •...
- Page 18 • Press and hold READ /TIMER for three seconds. The display will show the countdown prior to measurement. The beeper is playing a beep at the end of countdown period. Alternatively, wait for 2 minutes and 30 seconds then just press READ /TIMER. In both cases, the lamp, cuvette and detector icons will appear on the display, depending on the measurement phase.
- Page 19 Use the validation procedure to ensure that the instrument is properly calibrated. Warning: Do not validate the instrument with any standard solutions other than the Hanna Instruments CAL Check™ Standards, otherwise erroneous results will be obtained. • Turn the meter on by pressing ON/OFF.
- Page 20 • After a few seconds, the display will show “-0.0-”. The meter is now zeroed and ready for validation. • Remove the cuvette. • Place the CAL Check Standard HI96716‑11 Cuvette B into the cuvette holder and ensure that the notch on the cap is positioned securely into the groove. •...
- Page 21 Note: It is possible to interrupt calibration procedure at any time by pressing CAL CHECK or ON/OFF keys. Warning: Do not calibrate the instrument with standard solutions other than the Hanna Instruments CAL Check™ Standards, otherwise erroneous results will be obtained.
- Page 22 • Press ZERO/CFM and the lamp, cuvette and detector icons will appear on the display, depending on the measurement phase. • After a few seconds the display will show “-0.0-”. The meter is now zeroed and ready for calibration. The blinking “READ” asks for reading calibration standard. •...
-
Page 23: Date Input
• After measurement the instrument will show for three seconds the CAL Check Standard value. Note: If the display shows “STD HIGH”, the standard value was too high. If the display shows “STD LOW”, the standard value was too low. Verify that both CAL Check™ Standards HI96716-11 Cuvettes, A and B are free from fingerprints or dirt and that they are inserted correctly. - Page 24 • Press GLP/ to edit the desired month (01‑12). If the key is kept pressed, the month number is automatically increased. • When the correct month has been set, press ZERO/CFM or READ /TIMER to confirm. Now the display will show the day blinking. •...
- Page 25 • The instrument displays “Stor” for one second and the calibration is saved. • The instrument will return automatically to measurement mode by displaying dashes on the LCD.
-
Page 26: Last Calibration Date
In the GLP mode, the last user calibration date can be consulted and the factory calibration can be restored. LAST CALIBRATION DATE To display the calibration date: • Press GLP/ to enter GLP mode. The calibration month and day will appear on the main display and the year on the secondary display. - Page 27 • Press READ /TIMER to enter in the factory calibration restore screen. The instrument asks for confirmation of user calibration delete. • Press ZERO/CFM to restore the factory calibration or press GLP again to abort factory calibration restore. • The instrument briefly indicates “done” upon restoration of factory calibration prior to returning to measurement mode.
- Page 28 To save battery, the instrument shuts down after 10 minutes of non‑use in measurement mode and after 1 hour of non‑use in calibration mode. If a valid measurement was displayed before auto‑shut off, the value is displayed when the instrument is switched on.
- Page 29 To replace the instrument’s battery, follow the steps: • Turn the instrument off by pressing ON/OFF. • Turn the instrument upside down and remove the battery cover by turning it counterclockwise. • Extract the battery from its location and replace it with a fresh one. •...
- Page 30 Reagent Set HI93716-01 Reagents for 100 tests HI93716-03 Reagents for 300 tests Other Accessories HI96716-11 CAL Check™ Standard Cuvettes (1 set) HI740029P 9V battery (10 pcs.) HI731318 Cloth for wiping cuvettes (4 pcs.) HI731331 Glass cuvettes (4 pcs.) HI731335 Caps for cuvettes (4 pcs.) HI93703-50 Cuvette cleaning solution (230 mL) HI740318...
-
Page 31: Recommendations For Users
To validate your warranty, fill out and return the enclosed warranty card within 14 days from the date of purchase. Hanna Instruments reserves the right to modify the design, construction or appearance of its products without advance notice. - Page 32 World Headquarters Hanna Instruments Inc. Highland Industrial Park 584 Park East Drive Woonsocket, RI 02895 USA www.hannainst.com Local Office Hanna Instruments USA 270 George Washington Highway Smithfield, RI 02917 Phone: 800.426.6287 Fax: 401.765.7575 e‑mail: tech@hannainst.com MAN96716 Printed in ROMANIA...
Need help?
Do you have a question about the HI96716C and is the answer not in the manual?
Questions and answers