Advertisement
Quick Links
Advertisement

Related Manuals for Hanna Instruments HI96715


Summary of Contents for Hanna Instruments HI96715
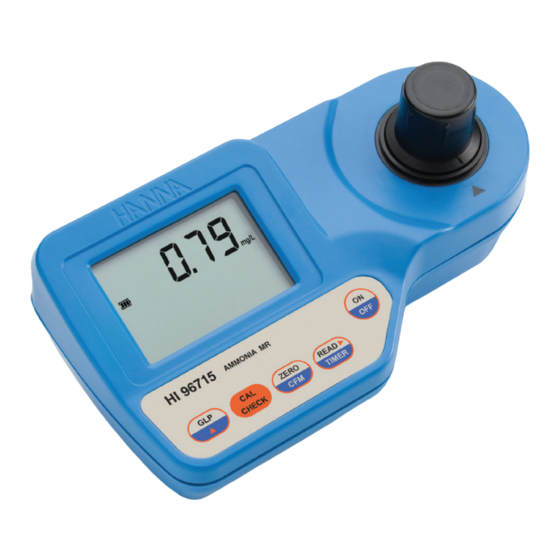
- Page 1 HI96715C Ammonia Medium Range ISM...
- Page 2 If you need additional technical information, do not hesitate to e‑mail us at tech@hannainst.com or view our worldwide contact list at www.hannainst.com. All rights are reserved. Reproduction in whole or in part is prohibited without the written consent of the copyright owner, Hanna Instruments Inc., Woonsocket, Rhode Island, 02895, USA.
- Page 3 PRELIMINARY EXAMINATION ..................... GENERAL DESCRIPTION ..................... ABBREVIATIONS ....................... SPECIFICATIONS ....................... PRECISION AND ACCURACY ....................PRINCIPLE OF OPERATION ....................FUNCTIONAL DESCRIPTION ....................ERRORS AND WARNINGS ....................GENERAL TIPS FOR AN ACCURATE MEASUREMENT .............. STARTUP .......................... MEASUREMENT PROCEDURE ..................... VALIDATION PROCEDURE ....................CALIBRATION PROCEDURE ....................
- Page 4 Please examine this product carefully. Make sure that the instrument is not damaged. If any damage occurred during shipment, please contact your local Hanna Instruments Office. Each HI96715 Ion Selective Meter is supplied complete with: • Sample Cuvettes and Caps (2 pcs.) •...
- Page 5 The validation procedure is extremely user friendly. Just use the exclusive Hanna Instruments ready‑made, NIST traceable standards to verify the performance of the instrument and recalibrate if necessary.
-
Page 6: Required Reagents
Range 0.00 to 9.99 mg/L (NH ‑N) Resolution 0.01 mg/L for measurement 0.1 mg/L for calibration and validation Accuracy ±0.05 mg/L ± 5% of reading @25 °C (77 °F) Light Source Light Emitting Diode Light Detector Silicon Photocell with narrow band interference filter @466 nm Method Adaptation of the ASTM Manual of Water and Environmental Technology, D1426‑93, Nessler Method. - Page 7 Precision is how closely repeated measurements agree with each other. Precision is usually expressed as standard deviation (SD). Accuracy is defined as the nearness of a test result to the true value. Although good precision suggests good accuracy, precise results can be inaccurate. The figure explains these definitions.
- Page 8 The optical system of Hanna Instruments’ HI96 colorimeter is based on a Light Emitting Diode (LED) combined with a narrow‑band interference filter to guarantee both high performance and...
-
Page 9: Instrument Description
INSTRUMENT DESCRIPTION 1) GLP/ key 2) CAL CHECK key 3) ZERO/CFM key 4) READ /TIMER key 5) ON/OFF key 6) Liquid Crystal Display (LCD) 7) Cuvette alignment indicator 8) Cuvette holder KEYPAD DESCRIPTION • ON/OFF: to turn the meter on and off. •... -
Page 10: Operating Modes
OPERATING MODES • Measurement mode: default operation mode, enables both validation and measurement. • Calibration mode: may be entered by keeping CAL CHECK pressed for three seconds (the “CAL” tag appears), it enables calibration of the instrument. • GLP mode may be entered by pressing GLP/ (“GLP” appears), it enables consulting of user calibration date or restore factory calibration. - Page 11 The instrument shows clear messages when erroneous condition appears. Messages are also displayed when the obtained values are outside expected range. The beeper is playing a beep on errors. a) on zero reading Light High: There is too much light to perform a measurement. Please check the preparation of the zero cuvette.
- Page 12 Under range: A blinking “0.00” indicates that the sample absorbs less light than the zero reference. Check the procedure and make sure you use the same cuvette for reference (zero) and measurement. Over Range: A flashing value of the maximum concentration indicates an over range condition.
- Page 13 Battery low: The battery must be replaced soon. Dead battery: This indicates that the battery is dead and must be replaced. Once this indication is displayed, normal operation of the instrument will be interrupted. Change the battery and restart the meter. The instructions listed below should be carefully followed during testing to ensure best accuracy.
- Page 14 • It is important that the sample does not contain any debris. This would corrupt the reading. • In order to avoid reagent leaking and to obtain more accurate measurements, it is recommended to close the cuvette first with the supplied HPDE plastic stopper and then with the black cap.
- Page 15 Prepare the instrument for measurement as follows: • Unpack the instrument by removing the dust protection sleeve from the instrument cuvette holder. • Place the battery in the instrument as described in the “BATTERY REPLACEMENT” chapter. • Place the instrument on a flat table. •...
- Page 16 • Place the cuvette into the cuvette holder and ensure that the notch on the cap is positioned securely into the groove. • Press ZERO/CFM and the lamp, cuvette and detector icons will appear on the display, depending on the measurement phase. •...
- Page 17 • Add 4 drops of HI93715B‑0 Second Reagent to the cuvette. Replace the cap and swirl the cuvette to mix. • Replace the cuvette into the cuvette holder and ensure that the notch on the cap is positioned securely into the groove. •...
- Page 18 Alternatively, wait for 3 minutes and 30 seconds and just press READ /TIMER. In both cases, the lamp, cuvette and detector icons will appear on the display, depending on the measurement phase. • At the end of measurement, the instrument directly displays concentration in mg/L of ammonia nitrogen (NH ‑N) on the LCD.
- Page 19 Use the validation procedure to ensure that the instrument is properly calibrated. Warning: Do not validate the instrument with any standard solutions other than the Hanna Instruments CAL Check Standards, otherwise erroneous results will be obtained. For accurate validation, please perform test at room temperature: 18 to 25 °C (64.5 to 77.0 °F)
- Page 20 • Remove the cuvette. • Place the CAL Check Standard HI96715‑11 Cuvette B into the cuvette holder and ensure that the notch on the cap is positioned securely into the groove. • Press CAL Check and the lamp, cuvette and detector icons together with “CAL CHECK” will appear on the display, depending on the measurement phase.
- Page 21 Note: It is possible to interrupt calibration procedure at any time by pressing CAL CHECK or ON/OFF keys. Warning: Do not calibrate the instrument with standard solutions other than the Hanna Instruments CAL Check Standards, otherwise erroneous results will be obtained. For accurate calibration, please perform test at room temperature: 18 to 25 °C (64.5 to 77.0 °F)
- Page 22 • Remove the cuvette. • Place the CAL Check Standard HI96715‑11 Cuvette B into the cuvette holder and ensure that the notch on the cap is positioned securely into the groove. • Press READ /TIMER and the lamp, cuvette and detector icons will appear on the display,...
-
Page 23: Date Input
“STD LOW”, the standard value was too low. Verify that both CAL Check Standards HI96715-11 Cuvettes, A and B are free of fingerprints or dirt and that they are inserted correctly. • Then the date of the last calibration (e.g.: ”01.08.2009”) appears on the display, or “01.01.2009”... - Page 24 • Press GLP/ to edit the desired month (01‑12). If the key is kept pressed, the month number is automatically increased. • When the correct month has been set, press ZERO/CFM or READ /TIMER to confirm. Now the display will show the day blinking. •...
- Page 25 • The instrument displays “Stor” for one second and the calibration is saved. • The instrument will return automatically to the measurement mode by displaying dashes on the LCD.
-
Page 26: Last Calibration Date
In GLP mode, the last calibration date can be verified and the factory calibration can be restored. LAST CALIBRATION DATE To display the calibration date: • Press GLP/ to enter GLP mode. The calibration month and day will appear on the main display and the year on the secondary display. - Page 27 • Press READ /TIMER to enter in the factory calibration restore screen. The instrument asks for confirmation of user calibration delete. • Press ZERO/CFM to restore the factory calibration or press GLP/ again to abort factory calibration restore. • The instrument briefly notifies “donE” when restores factory calibration and returns to measurement mode.
- Page 28 To save battery, the instrument shuts down after 10 minutes of non‑use in measurement mode and after 1 hour of non‑use in calibration mode. If a valid measurement was displayed before auto shut off, the value is displayed when the instrument is switched on. The blinking “ZERO”...
- Page 29 To replace the instrument’s battery, follow the steps: • Turn the instrument off by pressing ON/OFF. • Turn the instrument upside down and remove the battery cover by turning it counterclockwise. • Extract the battery from its location and replace it with a fresh one. •...
- Page 30 Reagents for 100 tests HI93715-01 Reagents for 300 tests HI93715-03 Other Accessories CAL Check Standard Cuvettes (1 set) HI96715-11 9V battery (10 pcs.) HI740029P Cloth for wiping cuvettes (4 pcs.) HI731318 Glass cuvettes (4 pcs.) HI731331 Caps for cuvettes (4 pcs.)
-
Page 31: Recommendations For Users
If the repair is not covered by the warranty, you will be notified of the charges incurred. If the instrument is to be returned to Hanna Instruments, first obtain a Returned Goods Authorization Number from the Customer Service Department and then send it with shipment costs prepaid. - Page 32 World Headquarters Hanna Instruments Inc. Highland Industrial Park 584 Park East Drive Woonsocket, RI 02895 USA www.hannainst.com Local Office Hanna Instruments USA 270 George Washington Highway Smithfield, RI 02917 Phone: 800.426.6287 Fax: 401.765.7575 e‑mail: tech@hannainst.com MAN96715 Printed in ROMANIA...
Need help?
Do you have a question about the HI96715 and is the answer not in the manual?
Questions and answers