Advertisement
Quick Links
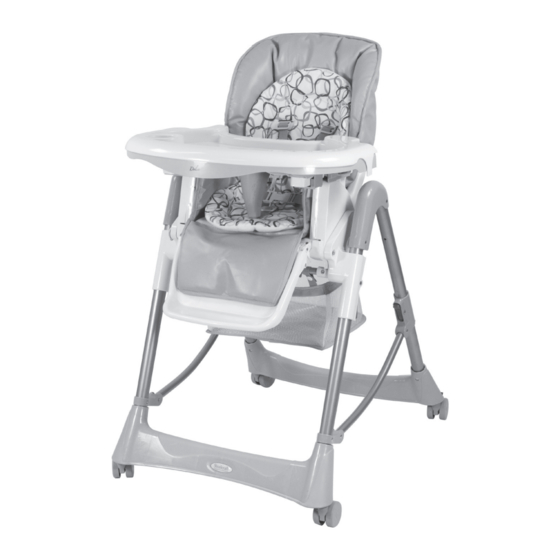
Dolce
Hi-Lo High chair
BRITAX CHILDCARE PTY. LTD A Britax International company.
(Incorporated in Victoria) A.B.N. 55 006 773 600
99 Derby Road, Sunshine, Victoria 3020, Australia
Phone: (03) 9288 7288 Fax: (03) 9311 5798
CUSTOMER SERVICE
1300 303 330 - Australia 0508 688 822 - New Zealand
Due to our continuing program of development, Britax reserves the right to alter
the specifications, color or design without any further notice.
The Steelcraft trademark is the property of Britax Childcare Pty.Ltd - Australia.
The Britax trademark is the property of Britax Excelsior Limited - UK.
Visit the Britax website at: www.britax.com.au or email us at au-custserv@britax.com
Due to the variations in the style and design of our products the illustrations used
in this instruction booklet are generic.
This product is designed to comply with Australian Standard AS 4684-2009
2010 Copyright Britax Childcare Pty. Ltd. Australia
IMPORTANT!
KEEP FOR FUTURE REFERENCE
Series No. YS 89-1
Art No.4001411
Advertisement

Related Manuals for Steelcraft Dolce


Summary of Contents for Steelcraft Dolce
- Page 1 CUSTOMER SERVICE 1300 303 330 - Australia 0508 688 822 - New Zealand Due to our continuing program of development, Britax reserves the right to alter the specifications, color or design without any further notice. The Steelcraft trademark is the property of Britax Childcare Pty.Ltd - Australia.
-
Page 2: Care And Maintenance
WARNINGS CARE AND MAINTENANCE KEEP FOR FUTURE REFERENCE • To prolong the life of your high chair keep it clean and do not READ ALL INSTRUCTIONS CAREFULLY BEFORE ASSEMBLY leave it in the direct sunlight for extended periods of time. AND USE OF THIS HIGH CHAIR. - Page 3 NOTES WARNING Continued • Always apply the brakes when not moving the high chair. • Do not allow children to stand on the seat. • Use on a flat , even and horizontal floor and never use near stairs. • Do not elevate the high chair on any structure or table. •...
- Page 4 NOTES PARTS LIST 2 x Lower Leg Moulding 1 x Frame 1 x Seat Assembly 1 x Seat Support Bar 1 x Adjustable Footrest 1 x Base tray 1 x Removable tray...
- Page 5 12. TO USE THE HIGHCHAIR PARTS LIST • Place the high chair on a horizontal, flat and even floor ensuring all wheels are in contact with the floor. • The high chair must not be placed on a table or similar surface to elevate the child.
- Page 6 11. TO FOLD/UNFOLD THE HIGHCHAIR (Cont) 01. TO ASSEMBLE THE HIGHCHAIR Ensure that the seat supports are facing in towards the Press the folding release levers then slide them up until middle between the front and rear legs. Ensure the labels they click into position.
- Page 7 01. TO ASSEMBLE THE HIGHCHAIR 10. TO RECLINE THE HIGHCHAIR WARNING: Insert the leg mouldings onto the corresponding legs. Use DO NOT ADJUST WITH THE a phillips head screwdriver to install the screws and secure CHILD IN THE CHAIR. the leg mouldings to the legs of the high chair. Lift and hold the recline latch located on the back of the seat and tilt the seat assembly back to the desired position.
- Page 8 01. TO ASSEMBLE THE HIGHCHAIR (Cont) 09. TO ADJUST THE HEIGHT OF THE HIGHCHAIR WARNING: Rotate the seat assembly until the two holes in the front of DO NOT ADJUST WITH THE the seat assembly align with the two holes in the frame. CHILD IN THE CHAIR.
- Page 9 07. TO ATTACH AND USE THE TRAY (Cont) 01. TO ASSEMBLE THE HIGHCHAIR (Cont) When the tray is not in use you can store the tray by To attach the wheels, insert the pin of each wheel sliding it onto the pegs located on the rear legs. assembly into the corner of leg mouldings and push in to secure.
- Page 10 02. TO ATTACH THE BASKET 07. TO ATTACH AND USE THE TRAY (Cont) Align both tray slots with the arm rests and slide the tray Attach the basket hangers onto the studs at both sides of back onto the arm rests to the desired position and release the seat back.
- Page 11 07. TO ATTACH AND USE THE TRAY 04. TO SECURE YOUR CHILD IN THE HARNESS WARNING: WARNING: THE TRAY IS NOT DESIGNED USE THE HARNESS AT ALL TO HOLD THE CHILD IN THE HIGHCHAIR. THE CHILD TIMES. IS TO BE SECURED BY THE SAFETY HARNESS AT ALL TIMES WHILE IN THE HIGHCHAIR.
- Page 12 05. TO ADJUST THE SHOULDER STRAPS 06. TO INSTALL THE PADDED SEAT INSERT PLEASE NOTE: The shoulder straps can be positioned at To install the padded seat insert, release the harness two heights. Choose a shoulder strap height that is close buckles and disconnect the harness shoulder straps from to the child’s shoulders.
Need help?
Do you have a question about the Dolce and is the answer not in the manual?
Questions and answers