Table of Contents
Advertisement
Advertisement
Table of Contents

Related Manuals for Evo Professional classic


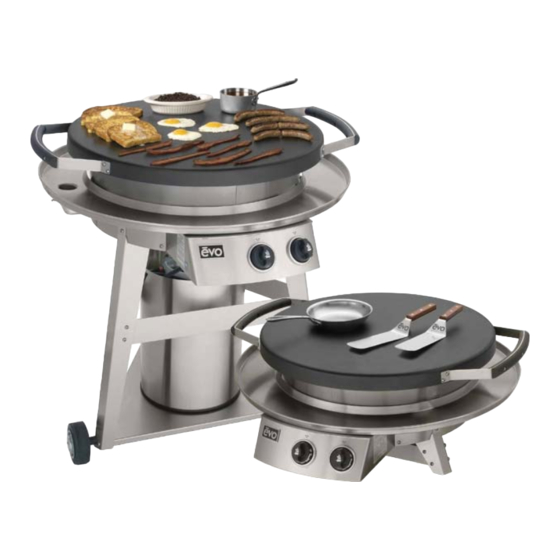
Summary of Contents for Evo Professional classic
- Page 1 ® the natural way to cook the natural way to cook ® Installation Instructions and Owner’s Manual For Outdoor RESIDENTIAL Use Only Some parts may contain sharp edges as especially noted in this manual. Wear protective gloves as necessary. Publication rev_2013...
-
Page 2: Warnings
Warnings FOR YOUR SAFETY FOR YOUR SAFETY 1. Do not store or use gasoline or other If You Smell Gas: fl ammable vapors and liquids in the 1. Shut off gas to appliance. vicinity of this or any other appliance. 2. -
Page 3: Limited Warranty
The maximum liability to Evo, Incorporated in any event, shall not exceed the purchase price of the product paid by the original consumer-purchaser. -
Page 4: Table Of Contents
Table Of Contents Assembly Note Your Evo Flattop Grill is shipped either Warnings ---------------------------------------------------2 partially assembled or fully assembled. Limited Warranty ----------------------------------------3 Table Of Contents / Assembly Note ---------------4 If you have purchased a partially assembled Introduction -----------------------------------------------5 unit, then you will need to follow the instruc-... -
Page 5: Introduction
Notes To Installer or Person Assembling Grill: Leave these instructions with consumer. To Consumer: Keep these instructions for future reference. Complete Now For Future Reference Serial # _____________________________ Date of Purchase ______________________ Place of Purchase _____________________... -
Page 6: Safety Reminders
(skillets, pots, pans) directly on the burn- Lay cardboard on the ground when unpacking. ers. Only the Evo cooking grill surface is to be placed Assemble grill parts on the cardboard to avoid scratching over the burners. Only use grill with the supplied grill surfaces. -
Page 7: Know Your Grill From Front To Back
Know Your Grill From Front To Back Front of Grill 1 - Control panel with inner and outer burner control knobs 6 - Solid rubber wheels mounted on stainless steel axel and electronic ignition. Right side of panel contains serial and nylon bearings provide durable transport for your grill. -
Page 8: Top Of Grill
Know Your Grill From Front To Back Top of Grill 12 - Hood constructed of easy to clean stainless steel for 15 - Thermometer constructed from stainless steel gives converting your grill into a patio oven, for roasting, smoking, accurate temperature readings inside hood for roasting and steaming or warming. -
Page 9: Back Of Grill
Know Your Grill From Front To Back Back of Grill 18 - Rear handle for lifting and pushing your grill into position. 22 - Electronic ignition is battery operated. The ignitor uses one AAA-type battery (installed in ignitor). 19 - Stainless steel waste tray mounted to slide rails under drip pan provides overfl... -
Page 10: Parts List
Use & Care Manual 1/4” - 20 Hex Nut Hood Thermometer Evo Thermometer - Stainless Steel 1/4” NPT Securing Nut - Nickel Plated Bronze You may have extra hardware after completing as- sembly of your grill. This is normal, as in some cases... -
Page 11: Assembling The Grill
Assembling The Grill Some parts may contain sharp edges. Wear protective gloves as necessary. Legs to Lower Rack Position bottom of right leg with label marked RIGHT to Phillips Screw (10) lower rack and slide over axle. Visually align screw holes and place phillips screw (10) into fi... -
Page 12: Leg Supports To Leg Frame
Assembling The Grill Some parts may contain sharp edges. Wear protective gloves as necessary. Leg Supports To Leg Frame Propane (LP) models have two leg supports (left-side and front) that are installed using philips screws and nyloc hex nuts. The third leg support (right-side) is a removable with keyway cutouts that install over pre-installed fasteners (see Removable Leg Support below). -
Page 13: Leg Assembly To Burner Unit
Assembling Your Evo Grill Some parts may contain sharp edges. Wear protective gloves as necessary. Leg Assembly To Burner Unit Stand completed leg assembly in an upright position with the control panel facing forward. Place burner unit over leg assembly with control panel centered between front legs with right and left wheels on each side. -
Page 14: Drip Pan To Burner Unit
Assembling Your Evo Grill Some parts may contain sharp edges. Wear protective gloves as necessary. Drip Pan To Burner Unit Lower drip pan over burner skirt with the round clean-out hole of drip pan positioned on the left side of the control panel. -
Page 15: Rear Handle To Burner Unit
Turn hood right side up with handle facing upward. Grasp face of thermometer and hold jam nut from under- neath. Turn thermometer onto nut. Make sure the Evo logo is parallel to the handle and facing the outside edge of hood. -
Page 16: Installing Lp Tank To Grill
Installing LP Tank To Grill Removing Leg Support Propane (LP) Models Only From right side of grill, grasp removable leg support at each end and lift upward. Once the leg support is disengaged from the keyway fasteners, lift leg support outward. -
Page 17: Connecting Lp Regulator To Tank
Installing LP Tank To Grill Connecting Regulator To Tank Valve Refer to the diagram at the right and complete the fol- Handwheel Coupling Nut lowing steps: Be sure both grill burner valves are in the Off position. Make sure the gas tank valve handwheel is in the closed position. -
Page 18: Specifi Cations Natural Gas Piping
Installing Natural Gas Connection To Grill General Specifi cations For Piping Note: Contact your local city inspection depart- Gas Main Supply ment for building codes regarding the installation of Outside Wall Natural Gas connection and outdoor gas appliances. In the absence of Local Codes, you must conform to the latest edition of ANSI Z223.1. -
Page 19: Installing Natural Gas Connection To Grill
Installing Natural Gas Connection To Grill Installing Natural Gas Hose Your natural gas grill is shipped with the natural gas quick-disconnect hose preinstalled to the control manifold. To complete assembly, the hose must be routed under the heat shield and through the rear leg. -
Page 20: Checking For Gas Leaks
fl ame tested. As a safety precaution, we recommend you recheck all fi ttings Perform leak checks even if your grill was dealer or for leaks before using your Evo grill. Shipping and store assembled. handling may loosen or damage a gas fi tting. -
Page 21: Abnormal Gas Operation / Venturi Tubes
Recognizing Abnormal Gas Operation Abnormal Gas Operation Right Wrong Flame Flame Excessive Yellow Tip Yellow Tipping Light Blue Light Blue Dark Blue Dark Blue Any of the following are considered to be abnormal operation and may require servicing: • Excessive yellow tipping of the burner fl ame (See diagram above). •... -
Page 22: Grill Maintenance, Cooking Techniques
fl avors. For griddle cooking you should condition the cook surface with the grill cleaning kit supplied with your Evo grill. The grill cleaning kit contains a professional 3M brand grill screen handle, grill screens, and grill polishing pad. Use the polishing pad after the grill screen to achieve an ultra clean, smooth cooking surface for the most delicate foods and applications. - Page 23 Lean fi sh such as Flounder, Sole, Sea Bass, Cod, Monk Fish and Red Snapper are usually purchased in the form of fi llets. Fillets of fi sh are ideal to cook on the Evo grill because they are fl at and will cook quickly and effi ciently. Because lean fi sh tends to fl...
- Page 24 By placing wood chips such as alder, mesquite or apple wood directly on Evo’s hot cook surface and covering the surface with Evo’s hood, you can quickly convert your Evo grill into a smoker. Depending on the size of the wood chips, you may want to use the method of placing the chips into a metal container such as folded aluminum foil.
Need help?
Do you have a question about the Professional classic and is the answer not in the manual?
Questions and answers