Table of Contents
Advertisement
Certifi cation: ANSI Z21.58-2002/CGA 1.6B-2002
Part #: Residential models: 10-0091-NG, 10-0091-LP, 10-0093-NG, 10-0093-LP
Report# 141-S-02-5
Copyright © 2013
the natural way to cook
the natural way to cook
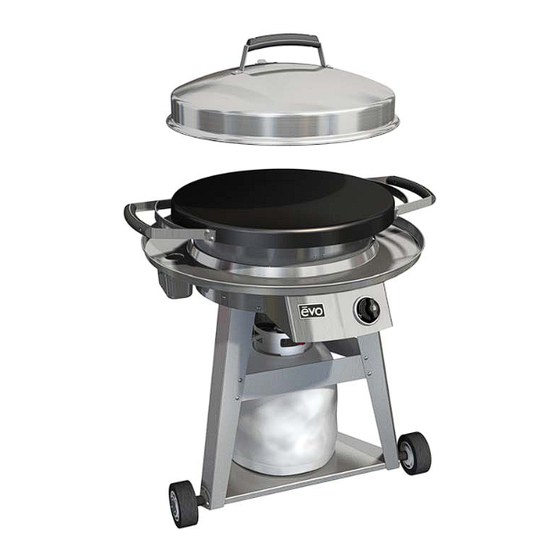
Companion Classic Series
Owner's Manual
®
®
For Outdoor
Use Only
Some parts may contain sharp edges
as especially noted in this manual.
Wear protective gloves as necessary.
1
Advertisement
Table of Contents

Related Manuals for Evo Classic Series


Summary of Contents for Evo Classic Series
- Page 1 ® the natural way to cook the natural way to cook ® Companion Classic Series Owner’s Manual For Outdoor Use Only Certifi cation: ANSI Z21.58-2002/CGA 1.6B-2002 Part #: Residential models: 10-0091-NG, 10-0091-LP, 10-0093-NG, 10-0093-LP Report# 141-S-02-5 Copyright © 2013 Some parts may contain sharp edges as especially noted in this manual.
-
Page 2: Warnings
Warnings FOR YOUR SAFETY FOR YOUR SAFETY 1. Do not store or use gasoline or other If You Smell Gas: fl ammable vapors and liquids in the 1. Shut off gas to appliance. vicinity of this or any other appliance. 2. -
Page 3: Limited Warranty
The maximum liability to Evo, Incorporated in any event, shall not exceed the purchase price of the product paid by the original consumer-purchaser. -
Page 4: Table Of Contents
Table Of Contents Assembly Note The Evo Companion Series Wheeled Cart is Warnings ................2 Limited Warranty ..............3 shipped either a partially assembled or fully Table Of Contents ..............4 assembled. These instructions do not include Assembly Note ..............4 Notes ................... -
Page 5: Notes
Notes To Installer or Person Assembling Grill: Leave these instructions with consumer. To Consumer: Keep these instructions for future reference. Complete Now For Future Reference Serial # _____________________________ Date of Purchase ______________________ Place of Purchase _____________________... -
Page 6: Safety Reminders
Also see your Use & cooking utensils (skillets, pots, pans) directly on the burn- Care Manual. ers. Only the Evo cooking grill surface is to be placed Safety Cap over the burners. Only use grill with the supplied grill Installed cooking surface. -
Page 7: Know Your Grill
7,8, and 14. 1 - Control panel and burner control knob. Right side of panel 8 - Wheeled cart allows the Evo Companion Grill to be easily contains serial number, certifi cation number and safety in- wheeled on a patio or deck. -
Page 8: Installing Cook Surface & Hood
Cook Surface Tab Step serious personal injury and property damage. Resting Hood On Drip Pan The Evo Companion hood can be removed from the cook surface and temporally mounted to the drip pan between cooking operations. To make this possible, there is a hook mounted to the underside of the hood fastened by the same screws that secure the hood handle. -
Page 9: Installation And Storage Of Lp Tank
Use Standard 20lb LP Tank Fit vinyl tank cover over LP tank and place tank inside wheeled cart, fi tting LP tank ring inside ring of Evo lower rack. LP tanks have a circular ring welded to the bottom of the tank. -
Page 10: Connecting Regulator To Tank Valve
Installation and Storage of LP Tank Connecting Regulator To Tank Valve Refer to the diagram at the right and complete the fol- lowing steps: Handwheel Coupling Nut Be sure both grill burner valves are in the Off position. Make sure the gas tank valve handwheel is in the closed position. -
Page 11: Installing Natural Gas Connection To Grill
Installing Natural Gas Connection To Grill General Specifi cations For Piping Note: Contact your local city inspection depart- Gas Main Supply ment for building codes regarding the installation of Outside Wall Natural Gas connection and outdoor gas appliances. In the absence of Local Codes, you must conform to the latest edition of ANSI Z223.1. -
Page 12: Installing Natural Gas Hose
Installing Natural Gas Connection To Grill Installing Natural Gas Hose Your natural gas grill is shipped with the natural gas quick-disconnect hose preinstalled to the control mani- fold. To complete assembly, the hose must be routed under the heat shield and through the rear leg. Hose routed under heat shield. -
Page 13: Checking Gas Connection To Grill
fl ame tested. As a safety precaution, we recommend you recheck all fi ttings for leaks before using your Evo grill. Shipping and handling may loosen or damage a gas fi tting. TO PREFORM A LEAK CHECK YOU WILL NEED A SOLUTION OF SOAP AND WATER AND A BRUSH OR RAG TO WET ALL GAS CONNECTIONS. -
Page 14: Grill Maintenance, Cooking Techniques, And Recipes
Lean fi sh such as Flounder, Sole, Sea Bass, Cod, Monk Fish and Red Snapper are usually purchased in the form of fi llets. Fillets of fi sh are ideal to cook on the Evo grill because they are fl at and will cook quickly and effi ciently. Because lean fi sh tends to fl... - Page 15 Overall, cooking on Evo’s fl attop cook surface does not involve the same charring of food that is typically done with an open-fl...
Need help?
Do you have a question about the Classic Series and is the answer not in the manual?
Questions and answers