Nokia N86 8MP User Manual
Hide thumbs
Also See for N86 8MP:
- User manual (191 pages) ,
- Service manual (232 pages) ,
- User manual (376 pages)
Table of Contents
Advertisement
Quick Links
Advertisement
Table of Contents

Related Manuals for Nokia N86 8MP


Summary of Contents for Nokia N86 8MP
- Page 2 PERSONAL INFORMATION Name Position Complete Address Telephone Mobile SCHOOL INFORMATION School Name Complete Address Region / Division / Province District Telephone Email Website School Head Name Position Telephone Mobile TEXT2TEACH INFORMATION Mobile Phone Date Phone IMEI Received Globe SIM Card Date SIM No.
-
Page 4: Table Of Contents
Charging the Mobile Phone Resetting the Mobile Phone IV. THE TV SET Parts of the TV Set Connecting the Phone to the TV 14-15 V. USING NOKIA EDUCATION DELIVERY (NED) Nokia Education Delivery (NED) Running NED Viewing the Videos Playing a video 18-20 ... -
Page 5: Introduction
Globe Telecom, and SEAMEO-INNOTECH, Text2Teach is expanding to reach more schools in the Philippines. The Nokia mobile phone is equipped with an exclusive application called “Nokia Education Delivery (NED)” that allows the teacher to select from 389 interactive, educational videos in Math, Science, and English. These videos were pre-loaded into the phones for the teachers to choose from. -
Page 6: Philippine Implementation Team
B. Philippine Implementation Team AYALA FOUNDATION INC. Ayala Foundation, Inc.’s (AFI) mission is to improve the quality of life of the Filipino by contributing to the eradication of poverty in all its forms. AFI is committed to working for national development by harnessing the full potential of corporate social responsibility;... - Page 7 Nokia Siemens Networks provides equipment, services and solutions for communications networks globally. Nokia provides the private sector funding for Text2Teach. They are the lead in the development and enhancement of the Nokia Education Delivery (NED) technology which allows the teachers to select from the hundreds of educational audio/video materials specifically created for the project.
- Page 8 SEAMEO INNOTECH is also in charge of the teacher training, monitoring of project, and ensuring that the educational materials are integrated into the national Basic and long-term impact of the project as an intervention for improving quality of teaching and learning. DEPARTMENT OF EDUCATION The Department of Education is a national government agency committed to a culture of excellence in public service.
-
Page 9: The Text2Teach Package
II. THE TEXT2TEACH PACKAGE The Text2Teach package includes the following: Mobile Phone & Nokia RCA / Video Cable Globe SIM Card Education Delivery Teacher’s Guide Text2Teach User’s Television Set Manual Headset Phone Charger Li-Ion Battery... - Page 10 Mobile Phone – Mobile device where the NED application and videos are stored. Text2Teach requires phones with at least 8GB memory capacity with TV output capability. Nokia Education Delivery (NED) software – The software installed in the mobile phone used to access and download the educational video/audio materials. ...
-
Page 11: The Mobile Phone
III. THE MOBILE PHONE A. Different Keys of the Phone In Vertical Position Right Soft Key Left Soft Key Directional Keys Menu Clear key, In Horizontal Position Right Soft Key For going back to the previous screen Clear key, Deletes a character Center Key Enter key Directional keys... -
Page 12: Charging The Mobile Phone
B. Charging the Mobile Phone 1. Connect the charger that came with the mobile phone package, to a 220V wall outlet. 2. Connect the power cord to the device. If the battery is completely discharged, it may take a while before the charging indicator starts scrolling. -
Page 13: The Tv Set
IV. THE TV SET A. Parts of the TV Set Front Panel: Power On/Off Video Cable TV/AV Volume Connection Back Panel: Connection for Speaker, Karaoke or sound system Video Cable Connection Power On/Off Remote Control: TV/AV selector Volume... -
Page 14: Connecting The Phone To The Tv
B. Connecting the Phone to the TV Connecting the phone to the TV is easy. All you need is the mobile phone, RCA cable and TV. Step 1 Using the RCA cable that came with your phone, connect the TV out to the mobile phone. - Page 15 Step 3 Using the remote or TV/AV button, press the TV/AV button until you reach video02 If the TV screen displays the same output as that on the phone screen, then your connection is correct and successful and you are now ready to show the video lesson for the day to your class.
-
Page 16: Using Nokia Education Delivery (Ned)
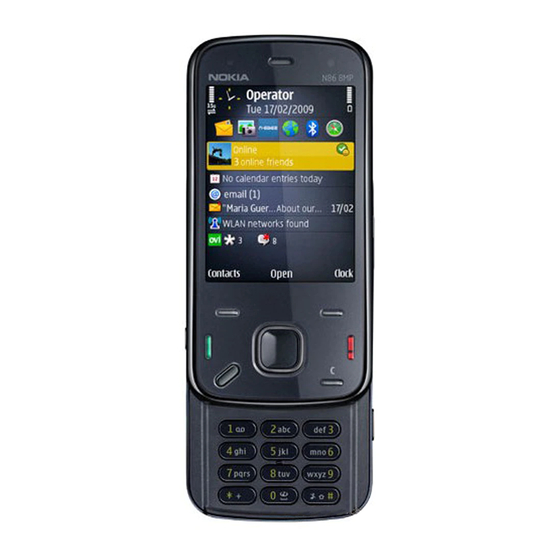
Using a mobile phone, teachers and trainers can access and download videos from a constantly updated catalog over a mobile network. The Nokia device with TV-out connector can be connected to a normal TV or a video projector to play the videos to a class. For the Text2Teach package given to you, the mobile device is the Nokia N86 8MP. -
Page 17: Running Ned
Step 1 (Option 2) On Active Standby Screen, press the right soft key to run NED. Figure A.1.1 Step 2 The display goes to the “Nokia Education Delivery” welcome screen (Figure A.1.2). After a few seconds, a drop-down menu will appear. Figure A.1.2... -
Page 18: Playing A Video
C. Viewing the videos After the NED welcome screen, the next screen is a drop-down main menu (Figure B.1.1). Playing a Video Step 1 Choose ‘Video’, and then press the center key. Figure B.1.1 Step 2 The display goes to the ‘Choose A Catalog’ screen (Figure B.1.2). Using the Directional Keys (up and down), choose the desired grade level (5 Grade / 6... - Page 19 Step 3 The next screen lets you Choose A Subject (Figure B.1.3). Again, using the directional keys, choose the subject you want to teach. Figure B.1.3 Step 4 The next screen shows the title of the videos for the subject you have chosen (Figure B.1.4).
-
Page 20: Searching For A Video
Step 5 Press the center key to play the selected video. Figure B.1.5 Searching for a Video NOTE: You should be at the ‘Choose A Video’ Screen to use the search video feature. Step 1 Press the left soft key located on the lower left side when phone is held on horizontal position (Figure B.1.6) to access the Search Videos feature. - Page 21 Step 2 Press the center key to enter the Video Code desired. (Figure B.1.7) Figure B.1.7 Step 3 Type the video code. Make sure the code you are entering is within the catalog you chose. For Example: The code ‘EM9511’ is under Grade 5, Math. This is in the teacher’s guides.
-
Page 22: Deleting A Video
Step 4 Press the center key again to play the selected video. (Figure B.1.9) Figure B.1.9 Deleting a Video USE THIS OPTION ONLY UPON THE ADVISE / INSTRUCTION OF THE TEXT2TEACH SECRETARIAT. NOTE: You should be at the ‘Video title’ Screen to delete a video. Step 1 Press the left soft key to show the pop-up menu. -
Page 23: Volume Control
Step 2 Choose the ‘Yes’, to delete the video, and ‘No’, to retain the video. Figure B.1.11 Volume Control To increase/decrease the volume, press the up and down directional key (Figure B.1.12) when the video is in play mode. Increase volume Decrease volume... -
Page 24: Downloading Videos
C. Downloading Videos This feature is applicable when additional or updates educational videos have been developed. The videos can be accessed by the schools using Globe’s mobile Internet technology USE THIS OPTION ONLY UPON THE ADVISE / INSTRUCTION OF THE TEXT2TEACH SECRETARIAT. -
Page 25: Updating The Catalog
Step 3 Enter the Server URL (http://203.177.165.52/ideaf62c79) and then press ‘OK’ (Figure C.1.3). Figure C.1.3 Updating the Catalog This is done when a new or updated video, or a new category (e.g., new subject or grade level) has been added. Note: If downloading a video will be done for the first-time, first go to the Main Menu >... - Page 26 Step 2 The display goes to the ‘Choose An Option’ screen (Figure C.1.5). Using the up and down directional keys, choose ‘Update Catalog’, and then press the center key. Figure C.1.5 Step 3 The display goes to the ‘Select access point’ (Figure C.1.6). Using the up and down directional keys, choose ‘myGlobe CONNECT’, which is the applicable mobile Internet connection, and then press ‘Select’.
-
Page 27: Downloading Videos
Step 4 Once the updating of the catalog is done, The screen on Figure C.1.7 will be displayed. Press the right soft key to go back. Figure C.1.7 Downloading Videos This feature is applicable when additional or updated educational videos have been developed. Step 1 Choose ‘Catalog’... - Page 28 Step 2 The display goes to the ‘Choose A Catalog’ screen. Using the up and down directional keys, choose the desired grade level (5th Grade/6th Grade), and then press the center key. (Figure C.1.9) Figure C.1.9 Step 3 The next screen lets you choose the subject (Science, Math, English). (Figure C.1.10) Using the up and down directional keys, choose the desired subject and then press the center key.
- Page 29 Step 4 The next screen shows the title of the videos for the subject you have chosen. (Figure C.1.11) Using the up and down directional keys, choose the desired video, and then press the center key. Figure C.1.11 Step 5 Press the center key to mark the selected video (Figure C.1.12).
- Page 30 Step 6 The status shown will be changed from ‘Mark To Download’ to ‘Download Marked’. (Figure C.1.13) Press the left soft key to download the video. Figure C.1.13 Step 7 Using the up and down directional keys, choose the ‘Download Now’, to download the video and then press ‘Select’.
- Page 31 Step 8 After choosing the ‘Download Now’, press ‘Yes’, if you intend to download the video. Press ‘No’, if not. Figure C.1.15 Step 9 When the downloading is finished, the status is changed from ‘Download Marked’ to ‘Downloaded’. (Figure C.1.16) This means that the video has now been downloaded and stored in the mobile phone.
-
Page 32: Status Of Download/S
To add the newly downloaded video to the Catalog of videos in NED, press the left soft key, and then press ‘Select’. (Figure C.1.17) Figure C.1.17 Status of the Download/s This feature shows the status of downloading, and tells you whether it was successful or not. - Page 33 Step 2 The display goes to the ‘Choose An Option’ screen. Using the up and down directional keys, choose the ‘Current Downloads’ (Figure C.1.19) option, and then press the center key. Figure C.1.19 Step 3 The next screen shows the list of the current videos that are being downloaded.
- Page 34 Using the up and down directional keys, choose the desired video in the Current Download list (Figure C.1.20). Then press the center key to view the download percentage. (Figure C.1.21) Figure C.1.21...
-
Page 35: Statistics
D. Statistics This feature is useful for monitoring usage of the videos. It also shows the number of times a video was viewed, and which videos are most often used and which are not. This is a useful tool for monitoring the use of Text2Teach videos. View Statistics Step 1 Using the up and down directional keys, choose ‘Statistics’, and then... -
Page 36: Options
Options Set the Download Time This feature allows you to choose the time when you would like to download the videos. Step 1 Using the up and down directional keys, choose ‘Options’, and then press the center key. (Figure E.1.1) Figure E.1.1 Step 2 The display goes to the ‘Choose An Option’... -
Page 37: Activating/Deactivating Download State
Step 3 Finally, enter the desired time on the pop-up window using the phone’s keypad (Figure E.1.3). Figure E.1.3 Activate / Deactivate Download State In relation to setting the download time, this feature lets you activate/deactivate the time you set for downloading. Step 1 Using the up and down directional keys, choose ‘Options’, and then press the center key. - Page 38 Step 3 Choose ‘Yes’ using the right soft key to activate the Download Scheduler, or ‘No’ using the left soft key to deactivate the Download Scheduler. (Figure E.1.5) Figure E.1.5...
-
Page 39: Exiting Ned
Exiting NED To close the NED, simply press the right soft key several times (Figure F.1.11) until you reach the default screen (Figure F.1.12). Figure F.1.11 Figure F.1.12... -
Page 40: Video Recording Feature
VI. VIDEO RECORDING FEATURE A. Recording a Video Clip This feature allows you to record a video clip in the mobile phone. USE THIS OPTION ONLY UPON THE ADVISE / INSTRUCTION OF THE TEXT2TEACH SECRETARIAT. Step 1 On active standby screen, press the menu button. (Figure A.2.1) Step 2 The display goes to main menu screen. - Page 41 Step 3 The display goes to Applications menu screen. (Figure A.2.3). Using the directional keys (up, down, left and right), go to the camera icon, and then press the center key. Figure A.2.3 Step 4 The display goes to viewfinder screen. (Figure A.2.4) If the camera is in image mode, the camera icon is shown at the upper right corner of the screen.
- Page 42 Step 5 The display goes to video viewfinder screen. (Figure A.2.5). To start recording press the capture key, located at the top right corner of the phone. The red record icon is shown and a tone sounds, indicating that recording has started (Figure A.2.6) Figure A.2.5 To pause recording at any time, press Pause (right soft key).
-
Page 43: Video Setting
B. Video Setting Step 1 On viewfinder screen, press Options (left soft key). (Figure B.2.1) Figure B.2.1 Step 2 The display goes to the Options menu. (Figure B.2.2) Using the directional keys (up and down), select Settings and then press the center key or the Select (left soft key). Figure B.2.2... - Page 44 Step 3. The display goes to the Video settings. (Figure B.2.3) Using the directional keys (up and down), choose the desired settings to change, and then press the center. To go back to the viewfinder screen, press the Back (right soft key). The following are the Video Settings options: ...
-
Page 45: After Recording
C. View a Video Clip After Recording Note: This is only available if ‘Show Captured Video’ is set to ‘On’ in the video settings. To immediately play the video clip you just recorded, select the Play icon from the active toolbar at the right side of the screen using the up and down directional keys, and then press the center key. -
Page 46: Gallery
Gallery Step 1 On active standby screen, press the Menu button. (Figure C.2.2) Step 2 The display goes to main menu screen. (Figure C.2.3) Using the directional keys (up, down, left and right), go to the Photos icon, and then press the center key to open. Figure C.2.2 Figure C.2.3... - Page 47 Step 3 The display goes to the Photos menu (Figure C.2.4). Using the up and down directional keys, select ‘All’ and then press the center key to open. Step 4 The next screen displays the listing of all the videos and images file in the mobile phone (Figure C.2.5) Using the directional keys (up, down, left and right), select the desired videos and then press the center key to open.
- Page 48 Step 5 The display goes to video play screen. (Figure C.2.6) Using the up and down directional keys, select the Play icon from the active toolbar at the right side of the screen and then press the center key to play. Play Figure C.2.6...
-
Page 49: Editing A Video Clip
D. Editing a Video Clip The video editor supports .3gp and mp4 video file formats, and .aac, .amr, .mp3, and .wav audio file formats. It does not necessarily support all features of a file format or all the variations of file formats. Step 1 On Images &... - Page 50 Step 3 The display goes to the editing options. (Figure D.2.3) Using the up and down directional keys, select the desired editing option (Merge, Change sound, Add text and Cut). Press Select (left soft key). Editing options: Merge – to add an image or a video clip to the beginning or end of the selected video clip ...
-
Page 51: Transferring Video Clips To The Computer
Transfer Video clips to Computer You can use your device with a variety of compatible PC connectivity and data communications. With data transfer, you can transfer the video clips to the PC. Note: To avoid corrupting data or possible virus infection, do not disconnect the USB data cable during data transfer. - Page 52 Step 3 At the lower left corner of the computer screen, click on Start. The Start menu will appear. Choose ‘My Computer’ by clicking on this option. (Figure E.2.3) Figure E.2.3 Step 4 The display goes to My Computer folders. (Figure E.2.4) Go to the Removable disk icon, and double-click it to open.
- Page 53 Step 5 The display goes to the Removable disk folder. (Figure E.2.5) Go to the Videos icon, and double-click it to open. Figure E.2.5 Step 6 The display goes to Videos folder. This is where the recorded videos clips are saved. (Figure E.2.6) Browse the videos folder and select the files/folders you want to transfer to the computer.
- Page 54 Step 7 To properly end the connection from the computer without damaging the phone’s memory card, use the ‘Safely Remove Hardward’ wizard in Microsoft windows located at the lower right corner of the desktop screen. Figure E.2.7 Click the removable drive icon or the ‘Safely Remove Hardware’, (Figure E.2.7) and choose the ‘Safely remove USB Mass Storage Device’.
-
Page 55: Additional Information
Step 1 Text Go <space> handset model to 2951 Example: Text Go Nokia N86 then send to 2951 Step 2 Wait for the configuration settings, which will be sent to your phone within the next 24 hours. You may also call Globe’s customer service hotline at 211 from your mobile phone to request for your MMS/GPRS settings free of charge. -
Page 56: Equipment Care
B. Equipment Care 1. Use the Text2Teach equipment for Text2Teach purposes only. Please note that a Memorandum of Agreement (MOA) signed by the Text2Teach Alliance, your LGU, and DepEd covers the proper use of the components. 2. If you are experiencing technical problems and other concerns with the Text2Teach package, please contact FIRST the text2teach helpdesk at 0917 561 3585. -
Page 57: Green Tips (Energy Saving Tips)
C. Green Tips (Energy Saving Tips) You can make a total difference in your power consumption while learning and enjoying using the Text2Teach Technology. TV Power-Saving Tips 1. Turn off the TV and other connected devices when not in use. It's easy to get into the habit of leaving the TV on as "background"... - Page 58 Turn on the power saver mode Your 29-inch Syntax TV comes with a power saver mode that's designed to cut down the power consumption. (Performance of this mode varies from model to model, with varying effects - from drastic to only a slight savings.) The only downside is that the power saver mode usually makes the TV less bright, but sometimes this has a beneficial effect on the image quality, especially with the room lights turned off, in which case it's a win-win situation.
-
Page 59: Text2Teach Secretariat
VI. TEXT2TEACH SECRETARIAT For queries or technical support, please text or send to: Mario A. Deriquito Senior Director Deriquito.ma@ayalafoundation.org Marisse Catangay Manager M: (0917) 840-6958 catangay.mc@ayalafoundation.org JR Demecais Senior Development Specialist M: (0917) 860-7764 demecais.ig@ayalafoundation.org Melissa Yamson IT Associate M: (0917) 561-3585 yamson.ml@ayalafoundation.org Kit Travina Development Associate...
Need help?
Do you have a question about the N86 8MP and is the answer not in the manual?
Questions and answers