
Related Manuals for Denver Instrument Tl-series


Summary of Contents for Denver Instrument Tl-series
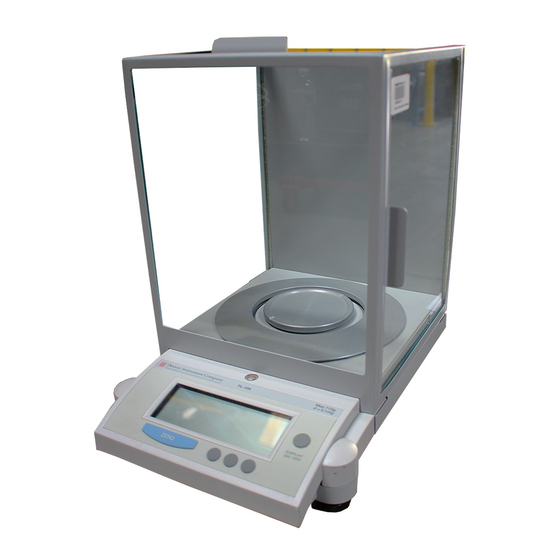
- Page 1 Denver Instrument Company TL-Series Toploading Balances Operation Manual 602174.1 Rev. G...
-
Page 2: Declaration Of Conformity
Declaration Of Conformity Denver Instrument Company declares that the following products: TL-Series Balances conform to the European Union Council Directives and other stan- dards listed below: 73/23/EEC, “Low Voltage Directive” EN 61010-1, “Safety requirements for electrical equipment for measurement, control, and laboratory use. -
Page 3: Table Of Contents
Table Of Contents Declaration of Conformity ......ii Introduction ........1 Unpacking Your Balance . - Page 4 You have purchased a quality precision weighing instru- ment that requires handling with care. Read entire contents of this Operation Manual prior to operating your new Denver Instrument balance. Disclaimer Notice “Calibrate your balance using reference weights of the appropriate tolerance (class). An instrument can be no more accurate than the standard to which it has been compared.
-
Page 5: Introduction
Introduction Thank you for selecting a precision Denver Instrument Company balance. Your balance is designed and engi- neered to provide years of reliable performance. WARNING Use of this product in a manner not specified by the manufacturer may impair any safety protection... -
Page 6: Model Specifications
Model Specifications Analytical Models Model Weighing Range 110g 210g Readability 0.1mg 0.1mg 0.1mg Linearity 0.2mg 0.2mg 0.2mg Repeatability, (s) 0.1mg 0.1mg 0.1mg Stabilization Time 4 sec 4 sec 4 sec Pan Dimensions 3.5” 3.5” 3.5” (9cm) (9cm) (9cm) Toploading Models Model Weighing Range 210g... -
Page 7: Installation
Installation Preparation This product is intended for indoor use. Select a level, rigid work area that is free from drafts and vibrations (i.e. away from doors, windows, air conditioning and heating vents). The line voltage to the balance should be reasonably con- stant (+/-10%) and free from fluctuations. -
Page 8: Setup
Setup Carefully remove the balance and all accessories from the carton. There are no tie-downs; however there may be pack- ing materials under the pan support (square-pan models only). LEVELING THE BALANCE 1. The leveling feet are located on the bottom of the balance. Do not turn the balance over. - Page 9 It is not necessary to unplug your balance from the power source when it is not in use. It is advised to leave the unit plugged in so that all components are warm and the balance is ready to weigh at any time. If you wish, the display can be turned off to save the segment life, by simply pressing the Display On/Off button.
-
Page 10: Display And Keypad
Display and Keypad Turns backlight Weigh unit Stability Graphical and display in use display Indicator on/off. Weigh Power dwtlb% ozGNB drmomgkg C1 C2 HST Select Mode Print Display Next On/Off Enter ZERO Returns the display Soft keys provide to zero. Exits a setup access to balance function. - Page 11 Functions. The functions align with the soft keys on the key- pad to provide access to the balance’s many setup features. Graphical Display. Bar graph indicates remaining capacity of balance. KEYPAD Zero key. Pressing the zero key returns the weight display to a zero reading.
-
Page 12: Software Layout
Software Layout The balance has a wide variety of modes of operation and set up parameters for different weighing applications. Parameters can easily be changed by scrolling through the options and choosing the desired selection. The different weighing modes include: basic weighing, animal weighing, statistics, counting, check weighing and specific gravity calculating. -
Page 13: Calibration
Calibration Your balance was calibrated at the factory; however, it is nec- essary to re-calibrate upon setup and on a regular basis thereafter. The factory recommendation for calibration is once per week using the maximum permissible weight stan- dard. Reasons for more frequent calibration include 1) moving the balance, 2) organizational procedures, 3) special sam- ples/applications which require documented calibration time/date stamp. - Page 14 3. Press “Enter” . external Next Enter 4. Place mass Weigh standard on the 0.00 weighing pan (see Permissible weigh Weights Chart). Select Mode Print The balance rec- ognizes the mass and automatically calibrates. NOTE! Do not remove weight until screen returns to weigh screen.
-
Page 15: Basic Weighing
2. Press “Enter”. external Next Enter 3. Press “Next”. manual Next Enter 4. Press “Enter”. cal manu 5. Enter the desired mass standard 00000.000000 value using the Enter arrow keys and press “Enter”. 6. At Add Weight prompt, place the mass standard on the weighing pan. -
Page 16: Units
TARING To subtract the weight of the sample container: 1. Place the Weigh empty container 0.00 on the weighing pan. zeroing Select Mode Print 2. Press ZERO. 3. Add sample to the container and wait for the stability icon to appear (upper left-hand corner). 4. - Page 17 Selecting Weigh Units Your balance will keep two weigh units resident for ready use at all times. To toggle between the two weigh units, press the soft key “Select” which appears on the main weighing screen. The factory default weigh unit is grams. To change the select- ed weigh units: 1.
- Page 18 To enter a Custom unit: 1. Select “Mode”. mode calibrate Next Enter 2. Press “Next”. mode units Next Enter 3. Press “Enter “. unit grams Next Enter 4. Scroll through unit the weight units, with the “Next” key until CUSTOM is custom displayed.
-
Page 19: Statistics
Statistics Your balance has an internal memory of 250 weighing which can be used to store, list, select, output or to perform statisti- cal evaluation of selected weighing. To begin storing weights to memory statistics must first be turned ON. To turn statistics ON. - Page 20 To store a weight to memory 1. With the weight on the pan, press “Print”. The SAMPLES will increase by one showing that the weight has been added to memory. 2. Continue to add more weights to memory. To list stored weights 1.
- Page 21 To edit stored weights 1. From STATS, EDIT press “Enter” to stats show the first stored weight. edit Next Enter 2. Press “Next” repeatedly to 27.34 scroll through all stored weights. Next 3. Press the * to Enter remove a weight. Removing a weight does not delete it from memory, Note but only removes it from being used in the statistics...
- Page 22 To print all calculations 1. From STATS, CALC press “Print”. To print any one calculation 1. From STATS, CALC press “Enter”. 2. Press “Next” to scroll through each statistical calculation. 3. Press “Print” on desired screen to print that calculation. To output or print all data through the serial port 1.
-
Page 23: Environmental
Environmental Your balance can be set up for optimized weighing to com- pensate for varying conditions including building vibration, drafts, surface vibration, etc. The Environmental settings con- sist of four subsettings including Filter, Stability Speed, Stability Sensitivity and Autozero. Each has multiple selections. Environmental Settings Stability Stability... - Page 24 To change Filter 1. From ENVIRO, FILTER press “Enter”. enviro filter Next Enter 2. Press “Next” to scroll through the filter 5 selections (very low, low, normal, high, very high) normal Next Enter 3. Press “Enter” to select and return to ENVIRO, ST SPEED. To change Stability Speed 1.
- Page 25 To change Stability Sensitivity 1. From ENVIRO, STABIL SENS enviro press “Enter”. stabil sens Next Enter 2. Press “Next” to scroll through the 5 selections (very coarse, coarse, st sens normal, fine, very fine) normal 3. Press “Enter” to Next Enter select and return to ENVIRO.
-
Page 26: Animal Weighing
Animal Weighing Mode Your balance is featured with an animal weighing mode to easily weigh animals which are continuously moving as a weight is taken. This mode must first be turned ON. The weigh screen will show Animal in the lower left corner when the ani- mal weighing mode is ON. - Page 27 3. Press “Enter” for TURN ON. animal 4. Press “Enter”. turn on Next Enter To change Stability Speed animal 1. From ANIMAL, STABIL SPEED press “Enter”. stabil speed Next Enter 2. Press “Next” to scroll through the 3 selections. st speed 3.
-
Page 28: Count Mode
Count Mode The balance can be set to count common pieces that are within the capacity and resolution of the balance. Please note that counting accuracy will be affected by weight vari- ation among pieces. Select parts which are appropriate to the resolution of the balance: •... - Page 29 To Perform Average Piece Weight Average piece weight allows the operator to determine the number of individual pieces in a mass if the per piece weight is known. 1. Select “Mode”. mode calibrate Next Enter 2. Press “Next” until mode MODE COUNT.
-
Page 30: Check Weighing
The Select softkey in the count mode will return to the Note count set up. To count additional pieces, simply add Memo: them to the weighing pan. To turn the Count mode off. 1. Press “Select”. 2. Press “Next” until TURN OFF and press “Enter”. Check Weighing Your balance has two check weighing modes. - Page 31 4. Press “Enter”. lo limit 5. Enter the low limit value using the arrow keys 00000.0000000 Enter 6. Press “Enter”. hi limit 7. Enter the high limit value using 00000.0000000 the arrow keys Enter Weigh 8. Press “Enter” and 40.00 return to the weigh screen in the Check Weighing...
- Page 32 3. Press “Enter”. ck weigh limits Next Enter 4. Press “Next”. ck weigh target Next Enter 5. Press “Enter”. target 6. Enter the target weight using the 00000.0000000 arrow keys. Enter 7. Press “Enter” Weigh and return to the 40.00 weigh screen in the Percent to 74.18%...
-
Page 33: Good Laboratory Practice
Good Laboratory Practice Your balance has a number of features which will allow cus- tomization for various reporting requirements pertaining to Good Laboratory Practice documentation of results. In GLP set up the parameters of date and time, user, sample type and sequence number are entered. - Page 34 5. Press “Next” until GLP,USER SAVE. 6. Press “Enter”. user save Next Enter 7. Press “Next” to select a User 1-9, then press “Enter”. user Next Enter 8. Enter the desired user name using user the arrow keys up to 12 characters. 1 1 X X X X X X X X X X X X X X X X X X 9.
- Page 35 To set date and time 1. From GLP, DATE TIME press “Enter”. date time Next Enter 2. Press “Next” until format of Month, date time Day, Year (MM DD YYYY) or Day, Month, DATE TIME, mmddyyyy Next MMDDYYYY. Enter 3. Press “Enter”. mmddyyyy 4.
- Page 36 To set sample type 1. From GLP, SAM- PLE TYPE press “Enter”. sample type Next Enter 2. Enter the desired name smpl type using the arrow keys up to 12 char- acters and 0 0 0 0 0 0 0 0 0 0 0 0 0 0 0 0 0 0 0 0 0 0 0 0 Next press “Enter”.
-
Page 37: Serial
Serial The balance has a serial port which enables communica- tions with other serial devices such a printer or computer. The Interface Applications section of this manual will assist in selecting the proper set up parameters. Serial set up para- meters include: print mode, print format including custom printout, baud rate, parity, bit, echo and handshake. - Page 38 SAMPLE OUTPUT CHART Actual output may vary decimal places depending on model. Output can be in one of the following formats: Toploading Balances Type Stable Unstable Type 1 1 +100.002 U +100.002 1 +100.003 U +100.003 Type 2 S +100.001 SD +100.001 0.002 SD +...
- Page 39 To change print mode 1) Select “Mode”. mode calibrate Next Enter 2) Press “Next” until MODE, SERIAL. mode serial Next Enter 3) Press “Enter”. serial print mode Next Enter 4) Press “Enter”. mode manual Next Enter 5) Press “Next” to scroll through interval selections and...
- Page 40 To change format Nine selections of the format are preset for simple weight doc- umentation or communications to a computer. To customize the printout in addition to the weight the following items can be individually added: Date and time* Balance ID Sample type* Sequence number* Calibration information...
- Page 41 If using custom printout, the interval print cannot be set faster than the time to print the custom printout. Note Memo: To change Baud Rate: 1. From SERIAL, BAUD press serial “Enter”. baud Next Enter 2. Press “Next” to scroll through baud selections (150- 19200) and press...
- Page 42 To change Echo: 1. From SERIAL, ECHO press serial “Enter”. echo Next Enter 2. Press “Next” to scroll through echo selections (Off and On) and press “Enter”. Next Enter To change Handshake: 1. From SERIAL, HANDSHAKE press “Enter“. serial handshake Next Enter 2.
-
Page 43: Stored Tare Weights
Stored Tare Weights The balance features the capability to store ten tare weights to memory for easy recall of weighing objects held in containers. Tare weights can be entered automatically by weighing the container or manually entering the weight of the container. To store tare weights automatically 1. - Page 44 To store tare weights manually 1. Select “Mode”. mode calibrate Next Enter 2. Press “Next” until MODE, TARE mode WEIGHTS. tare weights Next Enter 3. Press “Enter”. tare wt 4. Press “Next” until TARE WT, STORE- MANUAL. store-manual Next Print Enter 5.
- Page 45 To select a stored tare weight after storing 1. Select “Mode”. mode calibrate Next Print Enter 2. Press “Next” until MODE, TARE mode WEIGHTS. tare weights Next Print Enter 3. Press “Enter“ for tare wts select. select Next Print Enter 4.
-
Page 46: Batch Weighing
To clear stored tare weights 1. From MODE, TARE WEIGHT press mode “Enter”. tare weight Next Print Enter 2. Press “Next” until TARE WT, CLEAR. tare wt clear Next Print Enter 3. Press “Enter” for CLEAR ALL. clear 4. Press “Enter” to clear all stored clear all tare weights or... - Page 47 2. Press “Next” until BATCH MODE. mode batch mode Next Enter 3. Press “Enter”. batch 4. Press “Enter” to return to the weigh turn on Next screen in Batch Enter mode. To perform batch weighing 1. Remove weight from the pan and press the ZERO key to zero the balance.
-
Page 48: System
System The balance features options to identify the specific unit, and its software version or date and time of last calibration. This screen also gives access to secured options intended for super users including a routine to adjust linearity. For access to the secured routines call your local distributor or Denver Instrument Company. - Page 49 2. Press “Next” until SYSTEM, BALANCE system balances id Next Print Enter 3. Press “Enter” to show BAL ID, bal id XXXXXXXXX (This is the balance serial number). x x x x x x x x x Next Enter To display date and time of last calibration 1.
- Page 50 5. Press “Next” to show calibration 400.00 weight value. cal weight Next Print Enter To print calibration data 1. From SYSTEM, LAST CAL press “Print”. To enter security routines 1. From MODE, SYS- TEM press “Enter”. mode system Next Print Enter 2.
-
Page 51: Password
Password The balance can be protected from being able to make setup parameter changes including from being able to cali- brate the balance. To password protect the balance 1. From MODE, PASSWORD press mode “Enter”. password Next Enter 2. Enter the desired password password up to 12 characters using... -
Page 52: Specific Gravity
Specific Gravity The balance includes the automatic calculation of specific gravity from two weighings (weigh above and weigh below). Both may be new weights or either of the previous weights may be used. To calculate specific gravity 1. Select “Mode”. mode calibrate Next... - Page 53 6. Perform the weigh below step. 0.000 Press “Enter” to accept the weigh below value and weigh below Next Print to display specific Enter gravity calcula- tion. spc gravity Next Print Enter To turn specific gravity Off 1. From MODE, SPC GRAVITY press mode “Enter”.
-
Page 54: Factory Settings
Factory Settings The balance comes preset with factory default settings. At some time you may want to reset the balance to factory set- tings. To reset to factory default settings 1. Select “Mode”. mode calibrate Next Enter 2. Press “Next” until MODE, FACTORY. - Page 55 6. From complete press “Enter” to factory return to the Weigh screen. complete Next Enter List of Factory Defaults Units1 grams Unit2 grams Statistics Count mode Check weighing Date and time 01/01/1970 Sequence No (empty) Sample Type (empty) Tare weights none Filter Normal...
-
Page 56: Troubleshooting
Troubleshooting Display Shows Cause Remedy Power cord not Connect cord. connected. (Blank Screen) No power to outlet or Check power improper voltage. supply and voltage switch. Temporary fault Disconnect and reconnect power cord. (Wait at least five seconds before reconnecting it.) Bad connection Make sure in connecting cord. -
Page 57: Setting The Scale
Setting the Scale The scale may need to be set due to mechanic rebuild, electron- ic failure, or incorrect manual calibration. A calibrated weight to the nearest 10, 100, or 1000 of the maximum capacity of the bal- ance MUST be used. For example, a TL 204 will need a 200g, a TL 8101 will need an 8000g. - Page 58 11. Press “Enter”. “MAINT….SCALE” maint appears. 12. Press “Enter”. “SCALE….REMOVE scale Next WTS” appears. Enter 13. Press “Enter”. “STABILIZ” will appear and a countdown scale will occur, and then “ZERO CAL” will dis- play, and another remove wts Next countdown will Enter occur.
-
Page 59: Interface Details And Serial Commands
Interface Details and Serial Commands Serial Commands Command SET KEYWORD PARAMETER GET KEYWORD DO KEYWORD “•” Decimal point 0 - 9 Numeric entry Set and Get Autozero sensitivity Parameters for set are one of: NORMAL STRONG VERY STRONG Set and Get alternative units (UNITS2), Parameters for set are one of: GRAMS MOMME... - Page 60 Serial Commands Command MM Set and Get current date in MM/DD/YYYY format Parameter for Set is current date in the format MM/DD/YYYY Set and Get current operator index Parameter for Set is operator index between 1 and 10 ON Set and Get current operator name Parameter Set and Get current piece count average weight Parameter for Set is average weight...
- Page 61 Serial Commands Command Get sample data. Set and Get current serial port echo settings Parameters are Set for one of: Set and Get current Serial Port Handshake settings Parameters are Set for one of: NONE Set and Get current serial port parity setting Parameters for Set are one of: 8-none 7-OFF...
-
Page 62: Linearity Procedure
Linearity Procedure (Version 3.10 and Later) Class 1, calibrated weights MUST be used to set linearity. See attached chart for acceptable weight values for each model. 1. Remove any weight on the balance and press the “Zero” key to re-zero the balance. 2. - Page 63 11. Press “Enter”. “MAINT….SCALE” maint appears. scale Next Enter 12. Press “Select” key until “LINEARITY” maint appears. linearity Next Enter 13. Press “Enter”. “CALC LIN…..GET A calc lin POINT” appears. 14. Press “Select” get a point Next until “CLEAR DATA” Enter appears.
- Page 64 19. Press “Enter”. Unit will display “STABILIZ”, stabiliz counting down, and then “AVERAGE”, counting down, then average Next “LIN WGT”, and some Enter numbers. 20. Remove weight, and press “Enter” stabiliz twice. lin wgt Next Enter 21. Unit will now dis- play “ADD WGT 2”.
-
Page 65: Linearity Weight Settings
Linearity Weight Settings Model 603D 2102 1000 1500 2000 2101 1000 1500 2000 4102D 1000 1500 2000 3000 4000 4102 1000 1500 2000 3000 4000 4101 1000 1500 2000 3000 4000 6101 1000 2000 3000 4000 5000 6000 8102D 1000 2000 3000 4000... -
Page 66: Glossary Of Terms
Glossary of Terms Average The statistic average weight of a part used in Piece Weight part counting Auto Zero Automatically correcting the zero display due to slow drift. Baud Rate The transfer rate unit for serial data transmission in transitions per second between the computer and the printer. -
Page 67: Gram Conversion Chart
Glossary of Terms (continued) Setup The process of configuring the balance to operate in a certain way. Zero Weight Weight of a container or package that should not be taken into account in the weighing. This value is also referred to as the tare weight. Zeroing Compensating for a tare weight by setting the dis- play of the balance at zero with the container or... -
Page 68: Menu Tree
Menu Tree From the weigh screen press the “Mode” key: (Enter key to go right in chart, “Next” key to go down in chart) Screen Screen Screen Screen Screen CALIBRATE EXTERNAL ADD WEIGHT CAL OK Weigh Screen MANUAL 00000.0000000 Cal OK Weigh Screen UNITS UNIT1/grams... - Page 69 Menu Tree (continued) Screen Screen Screen Screen Screen ANIMAL TURN ON STABIL SPEED STABIL SPEED NORMAL STABIL SENS FAST “ SLOW “ STABIL SENS NORMAL Weigh Screen FINE “ VERY FINE “ VERY COARSE “ COARSE “ COUNT PIECE COUNT ADD 5 PCS Weigh Screen ADD 10 PCS...
- Page 70 Menu Tree (continued) Screen Screen Screen Screen Screen SERIAL BAUD 9600 PARITY 4800 “ 2400 “ 1200 “ “ “ “ 38400 “ 19200 “ BITS/PARITY 8-NONE ECHO 7-EVEN “ 7-ODD “ 7-NONE “ ECHO HANDSHAKE “ HANDSHAKE XON/XOFF Weigh Screen NONE “...
-
Page 71: External Transformers
Contact your local distributor or Denver Instrument Memo: Company. Accessories A variety of accessories are available from Denver Instrument to enhance your weighing experience. Contact your local distributor or Denver Instrument for part numbers and pricing. Spill Cover Lock Down device Weigh Below Draft Ring (for 4.5 and 6 inch round pan models only) -
Page 72: Cleaning Instructions
Maintenance WARNING There are no user serviceable parts within the unit. Opening the case will void the warranty. All repairs must be performed by a factory-trained technician. Contact Denver Instrument Company for your nearest autho- rized repair location. -
Page 73: Warranty Instructions
The return of the card is not a condition prece- dent to warranty coverage. 2. If you have any questions about a Denver Instrument product, please call toll-free, 1-800-321-1135 (or FAX description of problem to (303) 423-4831) for technical assistance. - Page 74 6542 Fig Street • Arvada, Colorado 80004 U.S.A. 1-800-321-1135 • (303) 431-7255 • Fax (303) 423-4831 European Office: Denver Instrument Company, Ltd. Denver House, Sovereign Way • Trafalgar Business Park Downham Market, Norfolk PE38 9SW • England Tel: (01366) 386242 • Fax: (01366) 386204...
Need help?
Do you have a question about the Tl-series and is the answer not in the manual?
Questions and answers