Table of Contents
Advertisement
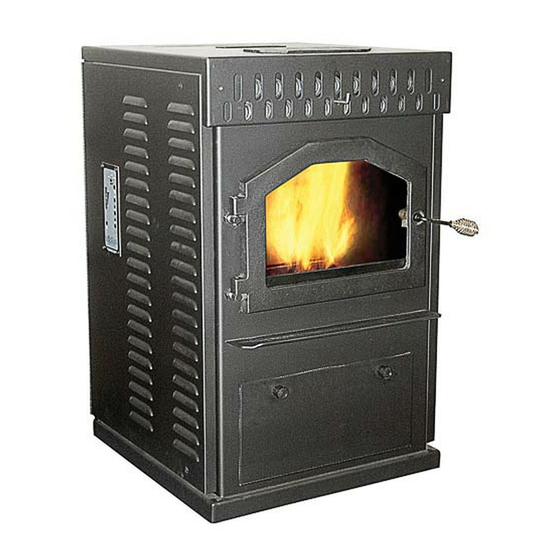
Magnum Baby Countryside
Corn/ Biomass / Wood Pellet Stove
Installation – Operation – Maintenance Instructions
NOTE: THESE INSTRUCTIONS MUST BE SAVED for future reference
PLEASE READ THIS ENTIRE MANUAL BEFORE INSTALLATION AND USE OF THIS PELLET
BURNING STOVE. FAILURE TO FOLLOW THESE INSTRUCTIONS MAY RESULT IN PROPERTY
IMPORTANT: Always contact your local dealer/installer with questions before contacting the factory.
When you call have your serial number, purchase date, who installed the unit and a list of questions.
When installing your Magnum Corn/ Biomass / Wood Pellet stove, particular attention needs to be made
in regards to fire protection. If the unit is not properly installed, a house fire may result. For your safety,
follow the installation and operation instructions provided, and if a question arises contact local building or
fire officials about restrictions and installation requirements in your area.
Read the operations and fuel section of this manual before plugging in your unit.
Always unplug the unit before attempting any service work.
Do not connect the unit to a chimney flue already serving another appliance.
When installing the chimney pipe to the unit, it is important to remember that the unit operates on a
negative pressure and the chimney on a positive pressure. All chimney connections, elbows and fittings
must be airtight. (proper venting practices must be followed. Consult with a venting professional)
Ashes must be disposed of in a metal container with a tight fitting lid.
All minimum clearances to combustibles must be followed.
The Magnum Corn/Biomass/Wood Pellet Stove is tested for operation with wood pellets with an ash
content of no more than 2% and Corn with a moisture content from 10-14 percent. It is recommended
that wood pellets with an ash content of 1% or less be used for efficient operation of this unit. Higher
ash content fuels will require additional maintenance and service. For use with wood pellets, cherry
pits, olive pits or other pelletized Biomass fuel. Corn with 11-12 percent moisture is ideal.
It is important to use fuel that is clean, dry and consistent. Make sure that your supplier is giving you
the same fuel each time that you purchase. It is recommended that you purchase your entire heating season
supply of fuel at one time so that the fuel will be the same.
A voltage surge protector or ground fault outlet is required for this unit. The warranty will be
voided if surge protection is not installed before operating this unit.
A grounded outlet must be provided with proper polarity. A constant 115 volt (12volt on DC
models), 60 cycles must be provided for proper operation or the warranty of this appliance will be
forfeited.
Special attention needs to be taken to clean out the top heat exchangers of this unit on a regular
basis. The fly ash settles on the heat exchangers and must be cleaned off to keep the unit operating
properly. Check for plugging every two-four weeks or when needed.
If unit is not operated for extended periods of time (like summer) unplug the unit and disconnect the
battery to assure long life of electrical components.
AMERICAN ENERGY SYSTEMS, INC. GRANTS NO WARRANTY, IMPLIED OR
STATED, FOR THE INSTALLATION OR MAINTENANCE OF THE STOVE AND
ASSUMES NO RESPONSIBILITY FOR ANY CONSEQUENTIAL DAMAGE(S).
AMERICAN ENERGY SYSTEMS, INC. -150 Michigan Street SE - HUTCHINSON, MINNESOTA 55350
Web Site:
www.hearthdirect.com
OWNER'S MANUAL
DAMAGE, BODILY INJURY OR EVEN DEATH.
1
Advertisement
Table of Contents

Related Manuals for Magnum Baby Countryside Corn/ Biomass / Wood Pellet Stove


Summary of Contents for Magnum Baby Countryside Corn/ Biomass / Wood Pellet Stove
- Page 1 When you call have your serial number, purchase date, who installed the unit and a list of questions. When installing your Magnum Corn/ Biomass / Wood Pellet stove, particular attention needs to be made in regards to fire protection. If the unit is not properly installed, a house fire may result. For your safety, follow the installation and operation instructions provided, and if a question arises contact local building or fire officials about restrictions and installation requirements in your area.
-
Page 2: Table Of Contents
Magnum Replace Parts List………………………………………. Warranty………………………………………………………….. Service Record……………………………………………………. TESTING/CERTIFICATION INFORMATION The Magnum Baby Countryside Stove (report # 150-S-05B-2) independently tested in accordance with ASTM E1509 Tested with OMNI TEST LABORATORIES, INC., BEAVERTON, OREGON 97005 per EPA Method 28A, APFI req. The Corn/Biomass/wood pellet fired appliance has been tested and listed for use in manufactured homes in... -
Page 3: Specifications
BTU input will vary, depending on the brand of fuel, size of fuel, quality of fuel and moisture content. Consult your authorized Magnum reseller for information on the best fuel to use to get the best results. Fuel feed rates can vary as much as 50 percent depending on fuel quality, size, brand and moisture content... -
Page 4: Introduction / Specifications
Technical Bulletin Importance of adequate fresh air Every home is a slightly different situation and depending on the design of the air movement within the home, might be easy to distribute heat or very difficult. If you have boiler heat or other non- ducted central heating this becomes even more of a challenge as adequate circulation within the home and proper make up air for combustion is lacking because of the design of your central heating system. - Page 5 make sure that there is nothing mechanical wrong with the appliance and then determine your need for proper fresh air. Your dealer can contact the factory with any questions that he might have.
-
Page 6: Safety Steps
If you are burning fuels not approved for this appliance it will void the warranty and no service/warranty will be allowed. The Magnum models will burn high ash content fuels, up to 5% but will require additional maintenance/cleaning. -
Page 7: Burning Solid Fuels
Proper draft setting will be discussed later in this manual. The point we wish to make here is that your Magnum stove, due to the nature of solid fuels, will require brief periodic attention. Please do not expect to light your stove and walk away from it until you want to shut it off in the spring. -
Page 8: Unpacking Your Magnum Wood Pellet Appliance
UNPACKING YOUR MAGNUM Baby Countryside APPLIANCE When you receive your Magnum appliance, be careful to inspect all parts and components to make sure that nothing was damaged or lost in shipment. If there was shipping damage, be sure to report it to your Magnum reseller, or the shipping company that delivered your unit. -
Page 9: Clearances
CLEARANCES CONVENTIONAL CLEARANCES A…SIDEWALL 9 In. (229 mm) B…BACK WALL 3 In. (75 mm)……(VERTICAL VENTING INSTALLATION REQUIRES A MIN. 3” CLEARANCE FROM COMBUSTIBLES TO VENT PIPE). C…CORNER WALL 3 In (75 mm)…….(VERTICAL VENTING INSTALLATION REQUIRES A MIN. 3” CLEARANCE FROM COMBUSTIBLES TO VENT PIPE). D…VENT PIPE TO WALL 3 In (75 mm)……..(MAINTAIN 3”... -
Page 10: Guidelines For Exhaust Venting Systems Design
GUIDELINES FOR EXHAUST VENTING SYSTEMS DESIGN It is recommended that only an authorized Magnum installer install your pellet/corn stove. The following installation guidelines must be followed to ensure conformity with both the safety listing of this stove and to local building codes. -
Page 11: Guidelines For Exhaust Venting Systems Design.................... 9
GUIDELINES FOR EXHAUST VENTING SYSTEMS DESIGN, CONT…… To determine whether a 3” or 4” exhaust system should be used, follow the guidelines below: 1) Determine the “equivalent pipe length” for each component used according to the comparison chart below. Add the “equivalent pipe length” of all components to get the “total equivalent pipe length”. 2) Determine the altitude at which you are installing the stove. -
Page 12: Design Guidelines For Outside Combustion Air Connection
IMPORTANT: It is the customer’s responsibility to make sure that there is adequate fresh air to the home so that the Magnum appliance does not become the fresh air source. 4) Only non-combustible pipe 3 inches in diameter is approved to use for outside air connections (straight or flexible). -
Page 13: Installation Precautions
If the home was not designed with proper heat circulation, the stove will not perform properly. Make sure that the installer looks at the entire home as a unit when installing your Magnum appliance. Make sure that there is adequate cold air returns to pull the heat to adjoining rooms. -
Page 14: Installation Configurations
INSTALLATION CONFIGURATIONS The Magnum Corn/Biomass Wood Pellet Appliances may be installed as follows: 1) A freestanding unit 2) A built-in heater mounted in an alcove with a pedestal 3) A built-in heater mounted on a non-combustible floor MOBILE HOME INSTALLATION REQUIREMENTS... -
Page 15: Vent Termination General Instructions
VENT TERMINATION GENERAL INSTRUCTIONS NOTE: The following are general instructions for installing this appliance. THE VENT PIPE MANUFACTURER’S INSTRUCTIONS SHOULD BE FOLLOWED FOR THE VENT PIPE BEING USED. USE ONLY 3 or 4 INCH LISTED TYPE PL PELLET VENT PIPE. WARNING: Shut off all electrical power to the wall or room where the appliance is going to be installed before cutting any holes. -
Page 16: Horizontal Installation
HORIZONTAL INSTALLATION EXHAUST VENT TERMINATION SHALL BE AS FOLLOWS: A MINIMUM OF 4 FEET/122Omm BELOW, BESIDE AND 1 FOOT ABOVE ANY DOOR OR WINDOW THAT OPENS, OR ANY OPENING INTO A BUILDING. A MINIMUM OF 2 FEET/610mm FROM ANY ADJACENT BUILDING OR OVERHANG. A MINIMUM OF 7 FEET/2130mm ABOVE GRADE, WHEN LOCATED ADJACENT TO PUBLIC WALKWAYS. -
Page 17: Vertical Installation
Storm Collar VERTICAL INSTALLATION GUIDELINES ON CONNECTING TO AN EXISTING FACTORY-BUILT CHIMNEY: Inspect the chimney for the presence of creosote, soot or other combustible deposits, and blockage or obstructions. Thoroughly clean the chimney and remove any obstructions. Thoroughly inspect the chimney for soundness, proper clearances and presence of all necessary parts, including a chimney cap, prior to making the connection. - Page 18 Storm Collar Note: This type of installation is not recommended in cold climates unless closed in and insulated properly. 3” min. required Warning: Unless the venting is enclosed and insulated, this installation will cause poor venting, excess ash buildup, premature failure of exhaust system, staining of the house siding and serious creosote buildup.
-
Page 19: Ac/Dc Control Panel/Thermostat Hook-Up
AC CONTROL PANEL/THERMOSTAT HOOK-UP WARNING: ALWAYS DISCONNECT POWER CORD DURING ANY ELECTRICAL OPERATION Remove control panel from protective packaging. Connect the one way molex plug to the control panel, do not pull on the wire harness inside the stove. NOTE: Use only a low voltage mercury or bi-metal thermostat switch. (No power Required on thermostat) NOTE: If you are not going to use the thermostat function then skip steps #4 -#8 and go to Step #9. - Page 20 DC CONTROL PANEL/THERMOSTAT HOOK-UP WARNING: ALWAYS DISCONNECT POWER CORD DURING ANY ELECTRICAL OPERATION Remove control panel from protective packaging. Connect the one way molex plug to the control panel, do not pull on the wire harness inside the stove. NOTE: Use only a low voltage mercury or bi-metal thermostat switch. (No power Required on thermostat) NOTE: If you are not going to use the thermostat function then skip steps #4 -#8 and go to Step #9.
-
Page 21: Optional 12 Volt Battery Back-Up
OPTIONAL 12 VOLT BATTERY BACK-UP WARNING: ALWAYS DISCONNECT POWER CORD DURING ANY ELECTRICAL OPERATION Note: Never use an unsealed battery Disconnect the 110 volt AC power before connecting the 12 volt battery. Determine the location for the 12 volt battery and obtain the proper length and type of wire (Use 18 gauge stranded wire) Drill and install 1/2”... -
Page 22: Operating Instructions Ac/Dc/All Models
OPERATING INSTRUCTIONS (DC Models) NOTE: Each time the stove is started, the firepot should be checked for debris and clear air holes. Some fuel will cause the firepot to build up more frequently making it necessary to stir and clean the firepot more often. Do not allow ash to build up underneath the firepot. - Page 23 OPERATING INSTRUCTIONS (AC models) NOTE: Each time the stove is started, the firepot should be checked for debris and clear air holes. Some fuel will cause the firepot to build up more frequently making it necessary to stir and clean the firepot more often. Do not allow ash to build up underneath the firepot.
- Page 24 OPERATION INSTRUCTIONS…continued (ALL MODELS) PROPER FUEL This stove is designed and approved to burn approved Biomass fuel only. Do not use any other type of fuel. Clean corn with moisture content less than 15% must be used. Factory approved pellets are those ¼” in diameter and not over 1”...
-
Page 25: Cleaning Instructions
CLEANING INSTRUCTIONS NOTE: BE SURE THE STOVE IS TURNED OFF, THE POWER CORD IS UNPLUGGED, AND THE UNIT IS COLD BEFORE CLEANING OR SERVICING. RECOMMENDED CLEANING PERIODS: The heat exchange tubes in the stove cleaned every 1-2 days. The fire box/ash pan cleaned every 3 to 7 days or when needed. The interior ash chambers inspected and cleaned monthly or as needed. - Page 26 CLEANING INSTRUCTIONS…continued WARNING: DISCONNECT THE POWER CORD BEFORE CLEANING OR SERVICING THIS UNIT. THE STOVE MUST BE TURNED OFF AND COOLED BEFORE USING THE RAKE HANDLE. ASH RAKE HANDLE II. HEAT EXCHANGER: This stove is designed with a built-in heat exchange tube Rake.
- Page 27 The Convection (room fan) blower will accumulate dust, cat hair, etc. on the blades during the heating season. This must be vacuumed clean as often as necessary. If you have pets, they will need to be cleaned regularly as the pet hair will clog up the fins and also the motor windings and cause premature wear, overheating and failure of the blower system.
-
Page 28: Automatic Features
To resume operation, it is necessary to locate the cause and correct it. Restart the stove following the instructions in this manual. Contact your local MagnuM dealer for help if needed. HIGH TEMP THERMODISK: If the stove overheats, it will shut itself down safely. -
Page 29: Glass Maintenance, Adjustment, Removal And Replacement
GLASS MAINTENANCE, ADJUSTMENT, REMOVAL AND REPLACEMENT Your Magnum Wood Pellet Stove comes to you with the glass door installed in place, ready for use. The glass is surrounded on the edges with a gasket and seated in a glass channel. It is held in place with two (2) clips on the top... -
Page 30: Circuit Board Functions
Then the entire system shuts down. Before starting up the Magnum Wood Pellet unit again, it is important to remember to clean out the firepot, empty the ashes, clean out the heat exchangers, vacuum out the hopper if needed and fill the... - Page 31 (on/off) of T-STAT to restart. Your Magnum Baby Countryside comes with the ability to use 3 separate programming features. This programming must be done by a qualified factory trained technician. Contact your local dealer to set up an appointment to have this done.
-
Page 32: Setting The Draft
SETTING THE DRAFT A proper draft setting is crucial to the successful burning of solid fuels. Draft refers to the amount of air flowing through the burn chamber of your stove. Too much or too little draft will cause your stove to burn improperly and may result in the fire burning out. -
Page 33: Wiring Diagram Ac/Dc
AC MODEL WIRING DIAGRAM WARNING: DISCONNECT POWER BEFORE SERVICING THIS UNIT. DC MODEL DDC- 3000 WIRING... - Page 34 DIAGRAM WARNING: DISCONNECT POWER BEFORE SERVICING THIS UNIT...
-
Page 35: Draft Slide Gate Adjustment
When rotating the slide gate, be careful not to damage the gasket. Re-tighten the bolts and check for leaks. The Draft Slide Gate is not shipped installed on the appliance. A qualified Magnum service Tech would have to determine if this plate was needed. High altitude, high wind, high voltage and fuel quality issues would be a few reasons for the need of the draft slide gate. -
Page 36: Igniter Replacement
IGNITER REPLACEMENT The igniter system on the Magnum appliances’ is an integral part of the wiring system. If the igniter is shorted out, the wiring must be by-passed for the unit to operate. It is recommended that once a season the igniter is checked for proper operation and replaced if it does not glow red. -
Page 37: Trouble Shooting Guide
Replace combustion exhaust blower if necessary. NOTE: Negative pressure in a home is a serious issue. All Magnum appliances should be installed with outside air hookups Also make sure that adequate ventilation is supplied for the rest of the home or the unit will become the air intake causing problems. - Page 38 Replace fuel with proper fuel. ♦ Combustion air too high. Adjust the damper to reduce combustion airflow. Have your Magnum reseller adjust the fuel control. ♦ Fuel feed rate is too low. ♦ Hopper is empty. Check contents of the hopper. Add ? Fuel will not feed.
-
Page 39: Trouble Shoot Guide
♦ Blower is defective Clean blades and motor, have a Magnum tech replace blower. ? Soot or fly ash in the house. ♦ Cleaning the window, particularly Clean the glass when the unit is not running when the stove is operating. - Page 40 Negative pressure present in the home for obstructions. Refer to cleaning section of this manual. Combustion motor going out. Call your Magnum reseller to inspect installation and operation. Replace any Use combustion enhancement system bad parts. The heat output is not as high as when Wet or dirty fuel.
-
Page 41: Magnum Replace Parts List
Magnum Baby Countryside,T40 AC Convection blower RP2045 F-110 N/O POF Switch (interchangeable with F-140 & F-150) RP2050 L-225 N/C Switch (manual reset) Magnum Baby C/S, T40 / Essex RP2055 Magnum Baby Countryside,T40, Essex, Hopper Pressure Switch RP2063 Magnum Baby Countryside, AC unit Wire Harness assembly... -
Page 42: Warranty
5 YEAR LIMITED WARRANTY This warranty is issued by American Energy Systems, Inc. (Manufacturer) and extends only to the original purchaser of this product. This limited warranty will not become effective unless you have returned the attached warranty card within 30 days of your purchase. -
Page 43: Service Record
SERVICE RECORD DATE SERVICE OR CLEANING PERFORMED This record must be sent in when any warranty claims are made.
Need help?
Do you have a question about the Baby Countryside Corn/ Biomass / Wood Pellet Stove and is the answer not in the manual?
Questions and answers