
Subscribe to Our Youtube Channel
Related Manuals for Topfield TF-T6000


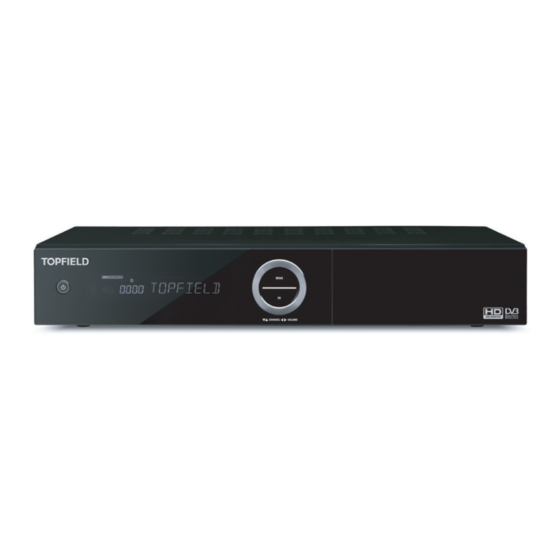
Summary of Contents for Topfield TF-T6000
- Page 1 TF-T6000 User Reference High Definition Digital Terrestrial Receiver Personal Video Recorder Default PIN: 0000...
- Page 2 The lightning flash with arrowhead symbol, in an equilateral triangle, is intended to alert the user to the presence of uninsulated “dangerous voltage” within the product’s enclosure that may be of sufficient magnitude to constitute a risk of electric shock to a person. The exclamation point, in an equilateral triangle, is intended to alert the user to the presence of important operation and maintenance instructions in the literature accompanying the product.
- Page 3 ** Google Play is a trademark of Google Inc. Compatible RCU support The TF-T6000 supports compatible RCU usage for the PVR set. Menu > Settings > Miscellaneous > Type of RCU * The RCU code is required for this feature.
-
Page 4: Table Of Contents
iv CONTENTS Contents Contents Introduction Features ........Controlling the digital receiver . - Page 5 CONTENTS v Options for playback ......Options for on-screen display ..... . Options for the front display .
- Page 6 vi CONTENTS 8.3.1 How to move a file to the photo album ... . Playing back a video file ......Playing back YouTube contents (optional) .
-
Page 7: Introduction
Chapter 1 Introduction The TF-T6000 digital receiver is fully compliant with the international Digital Video Broadcasting (DVB) standard, and thus is able to receive digital broadcasts of that standard. For its operation you need an an- tenna, which must be installed appropriately. -
Page 8: Controlling The Digital Receiver
2 Introduction • You can use various web services including YouTube. • You can use the web browser to view online contents. • You can share media files with other device across the same home network. 1.2 Controlling the digital receiver You can operate the digital receiver with the remote control or the but- tons on the front panel. -
Page 9: Remote Control
1.2 Controlling the digital receiver 3 1.2.2 Remote control • switches the remote control to operate your TV. • switches the PVR/TV to standby/active mode. • switches the remote control to operate the PVR. • mutes the sound. Press again to switch back on. •... - Page 10 4 Introduction • edit a recording. • has different functions per menu. • changes the aspect ratio. • displays the list of recorded programmes stored. • switches over between television/ radio services. • start a recording. • stop playback, to stop recording, or to jump back to live tele- vision from time-shifted television.
-
Page 11: Setup
Chapter 2 Setup 2.1 Unpacking Before going any further, check that you have received the following items with the digital receiver. • Remote control • Two batteries for the remote control (AAA 1.5 V) • One HDMI cable • A copy of this User Reference NOTE Accessories may vary according to your local area. -
Page 12: Rear Panel Connections
6 Setup • Protect the power cord from being walked on or pinched. If the cord is damaged, do not use the digital receiver and get the cord replaced. • Refer all servicing to a qualified service technician. • To maintain proper ventilation, always leave sufficient space around the digital receiver. - Page 13 2.3 Rear panel connections 7 AV-OUT VIDEO Composite video output socket for the television set (yellow) AV-OUT AUDIO R/L Stereo audio output socket for the tele- vision set or the audio-video receiver (white/red) AV-OUT Y/Pb/Pr Component video output socket for the television set (green/blue/red) S/PDIF OPTICAL...
-
Page 14: Connecting Up Your Digital Receiver
8 Setup 2.4 Connecting up your digital receiver There are several ways to set up the digital receiver. Set up the digital receiver suitably to your television and other devices. If you have any problem with your setup or need help, contact your dealer. WARNING Connect any components before plugging the power cord into the wall outlet. - Page 15 2.4 Connecting up your digital receiver 9 To use the HDMI output If you have a high definition television set, you should use an HDMI cable for best results. Plug one end of the cable into the HDMI socket on the digital receiver, and plug the other end into the matching socket on your television.
-
Page 16: Connecting To An External Device
10 Setup To make the audio connection You need to obtain an audio cable (RCA cable) to link the audio connectors. Plug one end of the cable into the AUDIO L (white) and AUDIO R (red) sockets on the digital receiver, and plug the other ends into the matching sockets on your television or audio-video receiver. -
Page 17: Switching On For The First Time
2.5 Switching ON for the first time 11 2.5 Switching ON for the first time Now that you have your digital receiver connected, you should plug it into a wall socket. Ensure that your television set is turned on and on the correct video channel so that you will be able to see the display from the digital receiver. -
Page 18: Service Search
12 Service Search Chapter 3 Service Search After connecting up the digital receiver, you will need to perform a service search. NOTE If there is no service stored, you will be not able to access all menus. A is another name for a . 3.1 Searching for broadcasting services To perform service search, select the Instal- lation >... -
Page 19: Reset To Factory Settings
3.2 Reset to factory settings 13 To start service search, move down to the Start Search item, and press £ ¢ ¡ button. The digital receiver will start to search for services. It is common for no channels to be found until quite late in the process. £... -
Page 20: Preference Settings
14 Preference Settings Chapter 4 Preference Settings 4.1 Video and audio settings You have to configure the video and audio settings appropriately for your television set and other devices. Select the Settings > A/V Output menu. You should see a screen like the left figure. 4.1.1 High definition television The digital receiver supports various video resolutions from 576 to 1080. -
Page 21: Television Aspect Ratio
4.1 Video and audio settings 15 4.1.2 Television aspect ratio If you have a wide-screen television, set the TV Aspect Ratio option to 16:9. You can enjoy both wide-screen programmes and normal-screen pro- grammes with your wide-screen television as the above figures show. To watch normal-screen programmes in full screen like the left figure, set the Display Format option to Full. -
Page 22: Audio Mode
16 Preference Settings 4.1.3 Audio mode Basically, there are two audio sources as you can find two audio sockets on the back panel of the digital receiver. You can enjoy only one source or both of them in either stereo or mono. Set the Sound Mode option as you desire. -
Page 23: Parental Control
4.3 Parental control 17 Table 4.1: Time offset table Time offset City 12:00 Eniwetok, Kwajalein 11:00 Midway Island, Samoa 10:00 Hawaii 09:00 Alaska 08:00 Pacific Time US, Canada 07:00 Mountain Time US, Canada 06:00 Central Time US, Canada, Mexico City 05:00 Eastern Time US, Canada, Bogota, Lima 04:00... -
Page 24: Options For Recording
18 Preference Settings No block restricts no prorgramme. Total block restricts every programme, even those with no programme classification. restricts to G or above. G rated programmes are suitable for all audiences. restricts to PG or above rated programmes. PG stands for Parental Guidance, the content of which is mild. -
Page 25: Options For Playback
4.5 Options for playback 19 time-shifted programme will be saved in the TimeShift folder of the hard drive. You can set the duration of the timer recording. Set the Timer Record- ing Duration option as you desire. Its available range is 10 minutes to 3 hours. -
Page 26: Options For The Front Display
20 Preference Settings 4.7 Options for the front display To set the options for the front display, select the Settings > Front Display menu. The front display shows the currently viewed service’s number and name. If any service’s name is too long to fit the width of the ser- vice name column, you can get it to scroll by setting the Main Display Scrolling option to anything other than Disable. -
Page 27: Every Day Use
Chapter 5 Every Day Use 5.1 Volume control £ £ ¢ ¡ ¢ ¡ Use the buttons to alter the volume to a comfortable VOL- VOL+ level. 5.2 Watching television To change services, press the button. In addition, you can switch to your desired service by entering its service number with the numeric buttons. -
Page 28: The Favourite Service Lists
22 Every Day Use £ ¢ ¡ button and press the button, then the selected service will be presented. Pressing the button skips over 10 entries up or down. Entering a service number with the numeric buttons puts the highlight bar on its entry. -
Page 29: Viewing Programme Information
5.2 Watching television 23 5.2.3 Viewing programme information Pressing the button displays the information box, on which you can see all of the following: • Service number and name • Transponder information • Signal level and quality • Programme name •... -
Page 30: Viewing Electronic Programme Guide
24 Every Day Use 5.3 Viewing electronic programme guide The Electronic Programme Guide (EPG) shows the current and sched- uled programmes that are or will be available on each service with a short summary for each programme. £ ¢ ¡ Pressing the button displays the elec- tronic programme guide, on which you... -
Page 31: Using Time-Shift
5.4 Using time-shift 25 5.4 Using time-shift You can pause and resume a live television programme, and even rewind and replay it. When you are watching a programme and you miss something, you can rewind and replay it. Or when your attention is needed elsewhere, you can pause a live TV and resume a short time later without losing any of the programme. -
Page 32: Organising Services
26 Organising Services Chapter 6 Organising Services 6.1 Editing the favourite lists You can make your own favourite service lists. In fact, you can define multiple favourite service lists, each being a ‘group’ of chosen services. Installation > Edit Favorite List Select menu. - Page 33 6.1 Editing the favourite lists 27 You can add up to 30 groups. To add a new group, select the NEW item in the group list, then the on-screen keyboard appears. To rename a group, put the highlight bar on the group entry you want £...
-
Page 34: Recording And Playback
28 Recording and Playback Chapter 7 Recording and Playback You can record TV programmes into an external hard drive as well as the built-in hard drive. NOTE To use an external hard drive, you must connect the external hard drive to the USB port of the digital receiver. You cannot play back the recordings with a regular MPEG player on your computer because they are formatted differently from the standard MPEG for-... -
Page 35: Recording A Programme
7.1 Recording a programme 29 7.1 Recording a programme Once a recording gets started, a symbol like the left figure will be displayed at the top right of the screen for a few seconds. When you are watching a different service from the service being recorded, you will see a number on the centre of the symbol, this indi- cates the order that the recording has started. -
Page 36: Timer Recording
30 Recording and Playback After a recording has started, pressing the button displays a menu like the left fig- ure, in which you can set the recording du- ration. To specify an arbitrary recording duration, set the Duration option as you desire with £... - Page 37 7.1 Recording a programme 31 start recording at a specified time. When the recording comes to the end, the digital receiver will switch back into standby mode again in one minute. However, if you press any button on the remote control or on the front panel even just one time, the digital receiver will not switch into standby mode.
-
Page 38: Scheduling Recordings Using The Programme Guide
32 Recording and Playback 6. Set the Duration option to a desired time, in which the recording will be finished. £ ¢ ¡ button on the File Name option displays the 7. Pressing the on-screen keyboard, with which you can specify a file name for the timer recording. -
Page 39: Recording A Time-Shifted Programme
7.2 File archive 33 7.1.4 Recording a time-shifted programme While watching a programme with time-shift, you can record it by per- forming the following steps: NOTE The whole timeshift buffer is recorded as one single file on the hard drive. 1. -
Page 40: To Lock A Recording
34 Recording and Playback 2. Set the Sorting option to Alphabetic, Time or Size as you want. £ ¢ ¡ 3. Press the EXIT button. 4. They will be sorted by the specified option. 7.2.3 To lock a recording To lock a recording so that other persons cannot play or delete it, take the following steps: 1. -
Page 41: To Navigate Using The Progress Bar
7.3 Playing back a recording 35 The instructions on how to play a recording are as follows: 1. Select the PVR > Recorded Program menu or alternatively press the button to display the list of recorded programmes. £ ¢ ¡ 2. -
Page 42: To Play In Fast Motion
36 Recording and Playback 7.3.3 To play in fast motion To watch in fast motion during a playback, press the button. If you press it repeatedly, the playback speed changes. To resume normal speed, press the button. You can play not only forward but also backward in fast motion. To play backward, press the button. -
Page 43: Transcoding A Recorded File
7.5 Transcoding a recorded file 37 7.5 Transcoding a recorded file You can encode a recordered video file to playback on other portable devices, such as a smart phone or a media player device. Go to PVR > Recorded Program and se- lect the file you want to transcode by press- ing the Set the File Transcoding Settings as you... -
Page 44: Formatting The Hard Disk
38 Recording and Playback 7.6 Formatting the hard disk If a new hard disk is installed, it must be formatted before using. Be- cause the Topfield unit does not recognize unformatted hard disk. You can delete all contents stored in the hard disk by formatting it. Select the Installation >... -
Page 45: Entertainment
Chapter 8 Entertainment This digital receiver provides several special features for entertain- ment. NOTE To fully enjoy all of the features described in this chapter, you had better configure the network settings properly. As to how to config- ure the network settings, refer to §9.2. 8.1 Copying files NOTE To copy files to the external hard drive, it must be preformatted in... -
Page 46: Playing Back Mp3 Files
40 Entertainment 5. You will be given the option to MOVE to the internal hard drive (used when you want to transfer to a folder on the internal hard drive) or COPY to the external hard drive. 6. Select COPY, you will then get a screen showing your external hard drive name, select the USB external hard drive name and £... -
Page 47: Viewing Image Files
8.3 Viewing image files 41 8.3 Viewing image files 8.3.1 How to move a file to the photo album You must move the jpg files into the Photo Album folder first. Please ensure your external hard drive is connected to your unit. £... -
Page 48: Playing Back Youtube Contents (Optional)
8.5 Playing back YouTube contents (optional) YouTube is a video sharing website where users can upload, view and share video files. With the TF-T6000, you can access YouTube and play back various contents. Select the Entertainment > Portal > YouTube. -
Page 49: Shoutcast Internet Radio (Optional)
8.7 SHOUTcast Internet radio (optional) 43 8.7 SHOUTcast Internet radio (optional) SHOUTcast™ Radio is one of the largest directories of professionally and community programmed online radio stations in the world. To- day SHOUTcast Radio features over 25,000 stations from around the globe. -
Page 50: Sharing Media Content With Other Devices
44 Entertainment 8.9 Sharing media content with other devices You can share media content with other media sharing devices across a home network. If you have, for example, a media player that has media sharing feature and is connected to the same home network through a router or other network interface, you can play back on the digital receiver the media content out of the media player, or vice versa. - Page 51 8.9 Sharing media content with other devices 45 NOTE Some digital media servers (DMS) may not work with this re- ceiver. 2. Select a device which has media content you want to play, then the list of media files on the selected device gets displayed. £...
-
Page 52: Web Browser (Optional)
46 Entertainment 8.10 Web Browser (optional) You can surf the web online using the Web Browser feature. To surf the web online, select Entertainment > Web Browser. you will see the web browser on the screen. At first, the Browser Guide will appear. £... -
Page 53: Accessing Via Network
Chapter 9 Accessing via Network NOTE The following section describes complex functions that should only be used by owners with advanced computer knowledge. This digital receiver provides a feature of FTP service, by which through the network you can transfer recording files to your com- puter. -
Page 54: Configuring The Router
48 Accessing via Network 9.1 Configuring the router In this section, the setup program of WRT54G, which is a router man- ufactured by Linksys, will be referred to as an example of how to con- figure the router for network access. NOTE For detailed description about how to set up the router, refer to the manual of your router. -
Page 55: Network Setup
9.2 Network setup 49 Whenever a new dynamic IP address is assigned to the router, it will inform the DDNS service provider of the new IP address. This makes it possible that you access the router with a domain name at any time. 9.2 Network setup 9.2.1 For a wired connection 1. -
Page 56: Accessing The Ftp Server
50 Accessing via Network 8. A successful connection will populate all the IP settings and the Level/Quality bars on the TV screen will show a high percent- age level. If the fields are not populated check the password and any security settings. NOTE After selecting activate please allow up to 5 seconds for fields to pop- ulate. - Page 57 9.3 Accessing the FTP server 51 You can log into the FTP server with the user name and password spec- ified in the Installation > Network Setting > User Info menu. NOTE The maximum number of user connections is one. This means that you cannot access the FTP server while someone else is occupying...
-
Page 58: Firmware Update
The digital receiver has a stable and convenient firmware to use. You can get the latest firmware and the firmware update tool, which runs on most versions of Windows, from http://www.i-topfield.com. 10.1 From a memory stick If you have a USB memory stick, you can update the firmware from it by taking the following steps: 1. -
Page 59: A Troubleshooting
Appendix A Troubleshooting List of Symptoms No power / No front display ....54 I have connected my Topfield unit to the TV but getting no picture 54 When the Service Scan is finished I get zero channels . - Page 60 54 Troubleshooting No power / No front display • Make sure the main switch on the back of the Topfield unit is switched to ON. • Properly insert the power plug into the power socket. • If the power outlet is controlled by a switch, make sure the wall switch is ON.
- Page 61 Can not receive or adjust sound through the Topfield unit £ £ ¢ ¡ ¢ ¡ • Adjust volume using the VOL- VOL+ on the Topfield remote. • Use the TV remote to adjust the sound to approx 50% then use the Topfield remote to adjust volume.
- Page 62 56 Troubleshooting Can not get a network connection • Make sure you are using a Router and not a Modem. • You can only establish a connection by using the Network cable directly to the Topfield unit OR by using a USB wireless dongle. •...
- Page 63 At any time during the life of a product Topfield Co., Ltd. may change or modify the hard- ware or software on any product to introduce new features or improve the functionality of the product. Copyright © 2013, Topfield Co., Ltd. All rights reserved. English version http://www.i-topfield.com 110T-U7AC6-701-1...
- Page 64 110T-U7AC6-701-1...
Need help?
Do you have a question about the TF-T6000 and is the answer not in the manual?
Questions and answers