Table of Contents
Advertisement
Refrigerator
Service Manual
MODEL :
FR - 530NT
FR - 590NT
FR - 590NW
Caution
:
In this Manual, some parts can be changed for improving, their
performance without notice in the parts list. So, if you need the
latest parts information,please refer to PPL(Parts Price List) in
Service Information Center(http://svc.dwe.co.kr).
DAEWOO ELECTRONICS CO., LTD.
http : //svc.dwe.co.kr
S/M No. : FR530NT010
Sep . 2002
Advertisement
Table of Contents

Related Manuals for Daewoo FR - 530NT


Summary of Contents for Daewoo FR - 530NT
- Page 1 S/M No. : FR530NT010 Refrigerator Service Manual MODEL : FR - 530NT FR - 590NT FR - 590NW Caution In this Manual, some parts can be changed for improving, their performance without notice in the parts list. So, if you need the latest parts information,please refer to PPL(Parts Price List) in Service Information Center(http://svc.dwe.co.kr).
-
Page 2: Table Of Contents
SAFETY AND PRECAUTIONS 1) For starters, be sure to check any chances of the leakage of electricity 2) You could handle a part in the vicinity of electricity after unplugging 3) You should put on rubber glovers to prevent an electric shock on operation test 4) Make sure the rated current, voltage, capacity before using an instrument 5) Keep your wet hands away from the metal goods in the freezer compartment not to be frostbitten 6) Be careful not to let water to permeate the electric part in the machine room... -
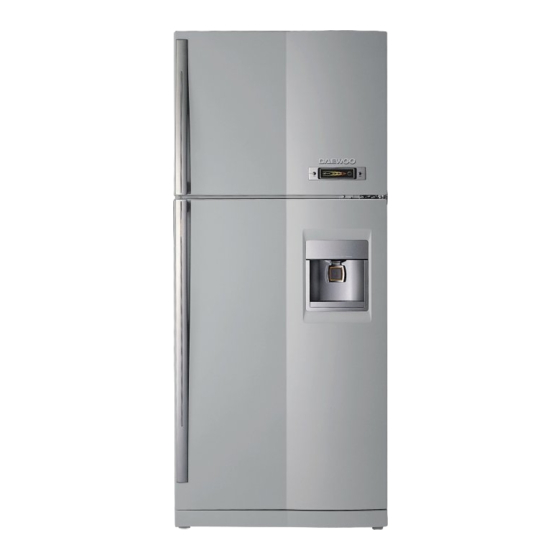
Page 3: External Views
1. EXTERNAL VIEWS 1. EXTERNAL SIZE ¡á FR-530NT ¡á FR-590NT... - Page 4 EXTERNAL VIEWS ¡á FR-590NW...
-
Page 5: Name Of Parts
EXTERNAL VIEWS 2. NAME OF PARTS ¡á FR-530NT,FR-590NT 1. Freezer Compartment Lamp 2. Shelf Freezer 3. Ice Tray 4. Temperature Controller ( Freezer Compartment ) 5. Ice Case 6. Refrigerator Compartment Lamp 7. Fresh case 8. Shelf Refrigerator 9. Cover Vegetable 10. -
Page 6: Specifications
2. SPECIFICATIONS 2-1. OUTLINE CONTENTS DIVISION MODEL NAME FR-530NT FR-590NT FR-590NW USABLE CAPACITY (L) FREEZER REFRIGERATOR TOTAL EXTERNAL DIMENSION( mm) WIDTH DEPTH HEIGHT 1749 1809 1809 REFRIGERANT R134a Fan Cooling System COOLING & CONTROL SYSTEM COOLING SYSTEM Fin Evaporator Forced DEFROST SYSTEM Automatic Start &... -
Page 7: Electric Parts
EXTERNAL VIEWS 2-2 ELECTRIC PARTS 1) COMPRESSOR REFRIGERANT VOLTAGE ( V/HZ) 100 /50,60 110 / 60 115,120/60 127/60 220 / 60 220~240 / 50 230 / 50 COMP MODEL PL23YH-4 SL28YE-5 PART CODE 3956123P40 3954128A50 STARTING TYPE RSCR RSIR REFRIGERANT R134a VOLTAGE ( V/HZ) 100 /50,60... - Page 8 EXTERNAL VIEWS 3) STARTING CAPACITOR REFRIGERANT VOLTAGE ( V/HZ) 100 /50,60 110 / 60 115,120/60 127/60 220 / 60 220 ~240 / 50 230 / 50 PART CODE RATED VOLTAGE RATED CAPACITANCE REFRIGERANT R134a VOLTAGE ( V/HZ) 100 /50,60 110 / 60 115,120/60 127/60 220 / 60 220~240 / 50...
- Page 9 EXTERNAL VIEWS 6) C- FAN MOTOR REFRIGERANT R12,R134a VOLTAGE ( V/HZ) 100 /50,60 110 / 60 115,120/60 127/60 220/60 220~240 / 50 230 / 50 TYPE NAME PART CODE 3015905031 3015905021 REVOLUTION 2400RPM 2400RPM 2400RPM 7) DEFROST HEATER REFRIGERANT R12,R134a VOLTAGE ( V/HZ) 100 /50,60 110 / 60...
- Page 10 EXTERNAL VIEWS 10) DRYER REFRIGERANT R134a SPEC (g) PART CODE 3016801000 3016801010 11) FUSE (PCB) REFRIGERANT R12,R134a VOLTAGE ( V/HZ) 100 /50,60 110 / 60 115,120/60 127/60 220/60 220~240 / 50 230 / 50 RATED CURRENT 250V/1.6A PART CODE 5F3GB1682R 12) THERMOSTAT FUSE REFRIGERANT R12,R134a...
-
Page 11: Power Cord
EXTERNAL VIEWS 3. POWER CORD NO SHAPE OF POWER CORD PART CODE DESCRIPTION REMARK 3011315000 CP-2PIN For european country 401RA17200 CP-2PIN For other country 4006D17101 KP-30 For America & El Salvador 401PD17101 KP-211 For Japan & Taiwan 3011300801 BP-3PIN 3011303010 # 267 For Chile 3011315310... -
Page 12: Door Color
EXTERNAL VIEWS 4. DOOR COLOR 1) ASSEMBLY URETHAN FREEZER DOOR Refrigerant R134a Dull High-glossy Normal High-glossy Dull High-glossy Normal High-glossy COLORTYPE laminasheet Laminasheet Bright PCM laminasheet Laminasheet Bright PCM PARTCODE 2) ASSEMBLY URETHAN REFRIGERATOR DOOR * FR-530NT ¨ç NON-KEY TYPE Refrigerant R134a Dull... -
Page 13: Operation And Fuctions
3. OPERATION AND FUNCTION 1. DISPLAY INPUT CONTROL OBJECT F-PCB Buttons ; TEMP CONTROL Button CUSTOM LED CONTENTS REMARK Custom LED Display Normal State Inital State ; Compartment Icons indicate Medium-mode ("MED" LDE BAR are lit.) TEMP CONTROL Button Temperature Regulation of Freshfood Compartment Medium-right Icons are lit by pressing the button. - Page 14 OPERATION AND FUNCTION 2. Temperature Regulation of Refrigerator (Freshfood Compartment) INPUT CONTROL OBJECT 1. TEMP Control Button 1. COMP 2. R-Sensor 2. F-FAN 3. RT-Sensor CONTENTS REMARK 1. Temperature regulation by TEMP Control Button. SUPER 2. Fan is controlled by On/Off-point of each mode. 4 Reference 3.
- Page 15 OPERATION AND FUNCTION 3. FUZZY MODE INPUT CONTROL OBJECT 1. FUZZY Control Button 1. COMP 2. R-Sensor 2. F-FAN 3. RT-Sensor CONTENTS REMARK 1. FUZZY MODE is started by pushing the FUZZY Control Button. 2. If you want to stop the FUZZY MODE function, Push the FUZZY Control Button again.
- Page 16 OPERATION AND FUNCTION 4. Defrosting Period INPUT CONTROL OBJECT 1. Total Run-time of COMP 2. Running-rate of COMP 3. Total time of Door openings 1. Defrosting Mode 4. Total times of Door open-close 5. RT-Temperature CONTENTS REMARK What to be considered in determining Defrosting Period Total Run-time of COMP : 6, 7, 8, 9, 10, 11, 12, 13 hours Running-rate of COMP (every 1hour’...
- Page 17 OPERATION AND FUNCTION 5. Defrosting Mode INPUT CONTROL OBJECT 1. COMP 1. Defrosting Period 2. F-FAN 3. HEATER CONTENTS REMARK 1. Defrosting Mode Time : 25minutes COMP and F-Fan are On, Pre-cool and HTR is off 3) Pre-cool turns off when R-Sensor [ 2.5BC Heater turns off when D-Sensor [ 10BC Limit time : 80minutes Heater continues to be On for 40 minutes of...
-
Page 18: Error Display
OPERATION AND FUNCTION 6. Error Display (displayed on C-LED of F-PCB) INPUT CONTROL OBJECT 1. TEMP Control Button 2. Refrigerator (Freshfood Compartment) Door 1. CUSTOM-LED CONTENTS REMARK 1. How to start ; open and close refrigerator door 3 times while pressing Limit-time ;... - Page 19 OPERATION AND FUNCTION REMARK CONTENTS RT -S rt Error Running- 16 / 24 6 / 34 10 / 30 16 / 24 20 / 20 Rate (ON/OFF) Dissolution : if R -Sensor is in normal state, it is finished by itself.
- Page 20 OPERATION AND FUNCTION 7. Forced Defrosting INPUT CONTROL OBJECT 1. Defrosting Key 1. Defrosting Mode CONTENTS REMARK A/S (Heater) Forced Defrosting 1. Start : The defrosting begins by pressing defrosting key 5 times (It is impossible in the state of Energy Consumption Forced Defrosting.) 2.
- Page 21 OPERATION AND FUNCTION 8. Time Delay of Electric Devices INPUT CONTROL OBJECT 1. Door Switch 1. F-FAN 2. COMP On/Off CONTENTS REMARK F-Fan Time Delay in COMP On/Off F Fan turns On/Off 1 minute after COMP On/Off. COMP F-FAN 1min 1min F-Fan Time Delay by Door Switch FLine check on : After 6 hours of initial run, the function of easy door-...
- Page 22 OPERATION AND FUNCTION 9. Initial Defrosting INPUT CONTROL OBJECT 1. D-Sensor 1. Defrosting Mode 2. Initial Power Supply CONTENTS REMARK COMP delayed for 1. Defrosting mode starts when D-Sensor [ 3.5 BC at initial power supply. 6min. at initial (It starts from Pre-cool.) defrosting 10.
- Page 23 OPERATION AND FUNCTION 13. Demonstration Function INPUT CONTROL OBJECT 1. Door Switch 1. Electric Devices 2. TEMP Control Button CONTENTS REMARK 1. Start : open and close Refrigerator[Freshfood Compartment] Door 5 times while pushing TEMP Control Button at the same time. 2.
-
Page 24: Diagram
4. DIAGRAM 1. WIRING DIAGRAM... -
Page 25: Circit Diagram
DIAGRAM 2. CIRCUIT WIRING DIAGRAM 1. The RESISTOR value which has not displayed time constant is 10K 1/4W. 2. The CERAMIC CONDENSOR which been displayed time constant is 0.01 3. The CONDENSER which has not been displayed time constant is 10 4. -
Page 26: Air Flow Diagram
DIAGRAM 3. AIR FLOW DIAGRAM... -
Page 27: Refrigent Cycle Diagram
DIAGRAM 4. REFRIGRANT CYCLE DIAGRAM... -
Page 28: Disassembly And Assembly
5. DISASSSEMBLY AND ASSEMBLY 1.FREEZER & REFRIGERATOR DOORS 1) Insert flat type(-) screw driver between Hinge cover and Cabinet surface to remove the Cover (Be careful not to break the hooks of Cover and not to damage the Cabinet surface.) 2) Remove 4 bolts with 10mm wrench. -
Page 29: Door Handles
DISASSSEMBLY AND ASSEMBLY 2.DOOR HANDLES 1) Insert rectangular bent tool whose diameter is less than 4mm into the hole of Handle to remove the Handle Decorator. 2) Pull out Handle Decorator from up to down * Be careful not to damage the surface of Handle Once it is peeled or damaged, corrosion may occur from metal parts beneath the handle. - Page 30 DISASSSEMBLY AND ASSEMBLY 3. FREEZER LOUVER 1) Push smoothly the locker of light bulb cover and Remove it 2) Remove the screw cover on the top left using screw driver ("-" type) 3) Remove the screw using driver. ("+" type) 4) Remove the screw on the light bulb base.
- Page 31 DISASSSEMBLY AND ASSEMBLY 5) Pull the housing by pressing the locker smoothly 6) Remove the louver 4. REFRIGERATAOR CONROL BOX 1) Remove the light bulb cover by pushing the locker with screw driver 2) Remove the screws on the lihgt bulb base.
- Page 32 DISASSSEMBLY AND ASSEMBLY 5.EXCHANGE OF TEMPERATURE FESE 1) Remove fuse fixing clip down left of evaporator 2) Separate temparature fuse out of fixing clip 3) Pull out temperature fuse connector of 2 wires...
- Page 33 DISASSSEMBLY AND ASSEMBLY 6. EVAPORATOR 1) Place any sheet on freezer compartment floor to protect it 2) Remove 2 screws left right of evaporator. 3) Cut black gum out. 4) Pull pipes about 50mm forward. 5) Disconnect pipes by unsoldering them...
- Page 34 DISASSSEMBLY AND ASSEMBLY 7. DEFROST HEATER 1) Remove connector of gray wire on the top left. 2) Remove connector of white wire on the top right. 3) Remove defrosting sensor on the top right of evaporator.
- Page 35 DISASSSEMBLY AND ASSEMBLY 4) Pull evaporator forward slowly until defrosting heater appears. * Be careful not to damage suction pipe and capillary pipe. 5) Pull heater fixing rubbers forward. 6) Straighten with screw driver left 2 hooks of aluminum plate, then right hooks are open of itself.
- Page 36 DISASSSEMBLY AND ASSEMBLY 8. CUBIC DUCT 1) insert screw driver into the gap to pull out * Be careful not to break the hook. 9. SIDE LOUVER 1) Pull louver forward slowly. * Be careful not to damage sealing sponge stripes 10.
- Page 37 DISASSSEMBLY AND ASSEMBLY 5) Remove 2 screws. 6) Lift up panel to remove. 7) Remove connector. 8) Remove screws on the back of panel.
- Page 38 DISASSSEMBLY AND ASSEMBLY 11. COMPRESSOR 1) Remove Machine-room Cover screws. 2) Pull the cover up to remove. 3) Remove P-Relay Band by pressing it up toward the compressor. 4) Remove Relay Assembly from Compressor. 5) Cut out Service Pipe and tiny pipe of Dryer. 6) Remove Compressor Pipes using soldering torch.
- Page 39 DISASSSEMBLY AND ASSEMBLY 2) Remove Wire-condenser pipes using soldering torch. 3) Cut out of Dryer fixing cable. 4) Turn the Drain Hose by 90degrees to remove. 5) Press the Housing Locker down to remove it. 6) Pull out Wire-condenser. * Be careful not to damage pipes when pulling out the Condenser.
-
Page 40: Fr-530Nt/Fr-590Nt Exploded View/Parts List
6. EXPLODED VIEW AND PARTS LIST 6-1. FR-530NT/FR-590NT TOTAL EXPLODED VIEW... - Page 41 EXPLODED VIEW AND PARTS LIST 1) FR-530NT/FR-590NT PART CODE PART NAME PART DESCRIPTION QUANTITY REMARK 3000015000 ASSY CAB URT FRP-441 3000015100 ASSY CAB URT FRP-481 3012905400 HINGE *T "SCP1, T2.3" 3016001240 SPECIAL BOLT *T 6 X 22 SWCH22A(YL) 3011429000 COVER *T HI 3010519200 BOX M/PCB 3014392000...
- Page 42 EXPLODED VIEW AND PARTS LIST PART CODE PART NAME PART DESCRIPTION QUANTITY REMARK 3011200500 CLAMP FAN SUS304 3016801010 DRYER AS FRB-4460NT/4760NT 3011118000 CASE VAPORI 3010314910 BASE COMPRESSOR SBHGI T1.0 3956126S50 COMPRESSOR HPL26YH-5 240V-50HZ 3010101440 ABSORBER COMP AS 3016002500 SPECIAL WAHER SK-5 T0.8 3018119920 SWITCH P-RELAY AS...
- Page 43 EXPLODED VIEW AND PARTS LIST PART CODE PART NAME PART DESCRIPTION QUANTITY REMARK 3017903300 SOCKET R LAMP AS 3013600020 LAMP AS 240V 15W 3014802300 SENSOR R AS 3011439500 COVER CUBIC/D HIPS 3011445000 COVER CONTROL HIPS 7112401611 SCREW TAPPING T1 TRS 4X16 MFZN 3010918400 CAP CONTROL BOX 3015504001...
- Page 44 HANDLE R DOOR FR-B442BB 7002501611 SCREW MACHINE TRS 5X16 MFZN 3011613600 DECORATOR R HANDLE A 3011613700 DECORATOR R HANDLE B ABS + CR EMBLEM DAEWOO 3014393000 PCB FRONT AS 3014232100 PANEL FCP 3016302900 BUTTON FCP *L 3016303000 BUTTON FCP *R 3015504600...
-
Page 45: Fr-590Nw Total Exploded View And Parts List
EXPLODED VIEW AND PARTS LIST 6-2. FR-590NW TOTAL EXPLODED VIEW... - Page 46 EXPLODED VIEW AND PARTS LIST 2) FR-590NW PART CODE PART NAME PART DESCRIPTION QUANTITY REMARK 3000015100 ASSY CAB URT FRP-481 3012905400 HINGE *T "SCP1, T2.3" 3016001240 SPECIAL BOLT *T 6 X 22 SWCH22A(YL) 3011429000 COVER *T HI 3010519200 BOX MAIN PCB 3014392000 PCB MAIN AS 3016401910...
- Page 47 EXPLODED VIEW AND PARTS LIST PART CODE PART NAME PART DESCRIPTION QUANTITY REMARK 3016801010 DRYER AS FRB-4460NT/4760NT 3011118000 CASE VAPORI 3010314910 BASE COMPRESSOR SBHGI T1.0 3956126S50 COMPRESSOR HPL26YH-5 240V-50HZ 3010101440 ABSORBER COMP AS 3016002500 SPECIAL WAHER SK-5 T0.8 3018116610 SWITCH P-RELAY AS "4TM197NHBYY-52(3P,S330)"...
- Page 48 EXPLODED VIEW AND PARTS LIST PART CODE PART NAME PART DESCRIPTION QUANTITY REMARK 3013600020 LAMP AS 240V 15W 30143802300 SENSOR R AS FRP-481 3011439500 COVER CUBIC/D HIPS 3011445000 COVER CONTROL HIPS 7112401611 SCREW TAPPING T1 TRS 4X16 MFZN 3010918400 CAP CONTROL BOX 3015504001 WINDOW R GPPS...
- Page 49 HANDLE R DOOR FR-B442BB 7002501611 SCREW MACHINE TRS 5X16 MFZN 3011613600 DECORATOR R HANDLE A 3011613700 DECORATOR R HANDLE B ABS + CR EMBLEM DAEWOO 3012014500 FIXTURE LEVER 3013701000 LEVER WATER DISPENSER ABS + CR 3011475400 COVER LEVER SILICON RUBBER 3015100700...
-
Page 50: Machine Room Exploded View And Parts List
5. DISASSSEMBLY AND ASSEMBLY 6-3 MACHINE ROOM EXPLODED VIEW AND PARTS LIST PART NAME PART NAME PART NAME BASE CAB AS 8-3 SHAFT CASTER *B 17 PIPE SUC AS SCREW MACHINE 8-4 CASTER *B 18 PIPE SUC CONN CORD POWER AS DRYER AS 19 ABSORBER PIPE SCREW TAPPING...
Need help?
Do you have a question about the FR - 530NT and is the answer not in the manual?
Questions and answers
,холодильник периодически начинает громко гудеть, потом работает тихо. На сенсорной панели горит значок Fuzzy красным цветом. Режим на панели min.
The red Fuzzy indicator on the Daewoo FR-530NT refrigerator means that the FUZZY MODE is active. This mode is started by pressing the FUZZY Control Button and can be turned off by pressing the button again. When FUZZY MODE is active, the compressor, R-Sensor, F-Fan, and RT-Sensor work together to automatically control temperature based on internal conditions. The occasional loud noise followed by quiet operation is likely due to normal cycling of these components during FUZZY MODE operation.
This answer is automatically generated