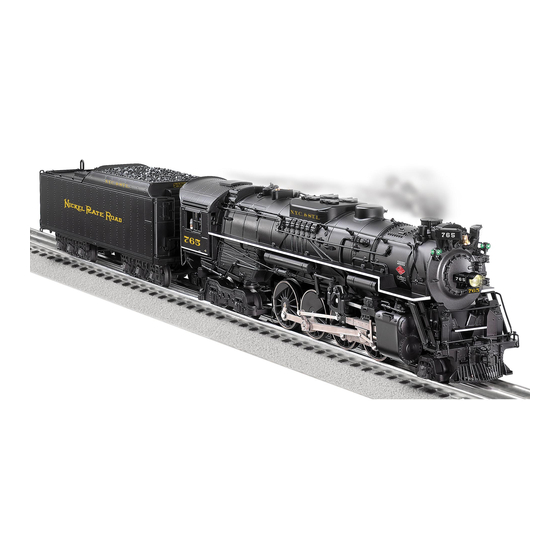
Lionel 2-8-4 Berkshire Steam Locomotive and Tender Owner's Manual
Hide thumbs
Also See for 2-8-4 Berkshire Steam Locomotive and Tender:
- Owner's manual (36 pages) ,
- Owner's manual (12 pages) ,
- Owner's manual (12 pages)

Related Manuals for Lionel 2-8-4 Berkshire Steam Locomotive and Tender


Summary of Contents for Lionel 2-8-4 Berkshire Steam Locomotive and Tender
- Page 1 73-8076-250 1/04 Lionel Lionel 2-8-4 Berkshire 2-8-4 Berkshire Steam Locomotive and Tender Steam Locomotive and Tender Owner’s Manual Owner’s Manual featuring SYSTEM...
- Page 2 • Flickering firebox in cab • Lighted cab interior • Opening tender water hatch reveals easy to access RailSounds sound system controls The following Lionel marks may be used throughout this instruction manual and are protected under law. All rights reserved. Lionel ®...
-
Page 3: Table Of Contents
Table of contents Transformer operations Running your locomotive with a Lionel transformer Locking your locomotive into a single operational state Using your tender-mounted ElectroCoupler in the non-Command environment Installing a Lionel Sound Activation Button RailSounds sound system operations Your locomotive’s RailSounds sound system—the basics Experiencing the range of your locomotive’s RailSounds sound system... -
Page 4: Transformer Operations Running Your Locomotive With A Lionel Transformer
TrainMaster Command Control system, available at your authorized Lionel dealer. Move ‘em out! Get your locomotive moving. Press the DIRECTION button on your Lionel transformer. This sequences the Command reverse unit to the next operating state. Adjust track voltage until your locomotive moves at your desired speed. To increase speed, increase track voltage. -
Page 5: Locking Your Locomotive Into A Single Operational State
Transformer operations Locking your locomotive into a single operational state o select a single operational state for your Lionel locomotive (for example, forward only), you can deactivate the Command reverse unit’s sequencing function with the Command reverse unit (PROG/RUN) switch. -
Page 6: Using Your Tender-Mounted Electrocoupler In The Non-Command Environment
Command environment, you must rely on a piece of rolling stock equipped with Lionel magnetic couplers coupled directly to your locomotive tender’s ElectroCoupler. The magnetic coupler on the rolling stock will then react to the magnetic field generated by a Lionel Remote-Control Track section (available separately, 6-65530 for O gauge; 6-65149 or 6-12746 for O-27 gauge;... -
Page 7: Installing A Lionel Sound Activation Button
Installing a Lionel Sound Activation Button o activate the bell and whistle sounds when operating your locomotive set with conventional transformers, you may need to install Lionel no. 610-5906-001 Sound Activation Buttons (available separately) if your transformer is not equipped to activate these features. -
Page 8: Railsounds Sound System Operations Your Locomotive's Railsounds Sound System-The Basics
RailSounds sound system operations Your locomotive’s RailSounds sound system—the basics he Lionel RailSounds 5.0 sound system is the most realistic model railroad sound system in the world. Your locomotive features digital samples from real-life steam locomotives for the ultimate in realism. - Page 9 RailSounds sound system operations Your locomotive’s RailSounds sound system—the basics (continued) Body REAR FRONT Screws Bottom of tender RailSounds sound system switch Volume control knob Top of tender REAR Battery clip Battery holder Speakers Inside of the tender FRONT Figure 4. RailSounds sound system controls and battery installation...
-
Page 10: Experiencing The Range Of Your Locomotive's Railsounds Sound System
RailSounds sound system operations Experiencing the range of your locomotive’s RailSounds sound system ith the RailSounds sound system, you experience the sounds of real railroading like never before. Simply put, it’s the most sophisticated, authentic model railroad sound system in the world. •... -
Page 11: Activating The Crewtalk Dialogue And Towercom Announcements In The Conventional Environment
RailSounds sound system operations Activating the CrewTalk dialogue and TowerCom announcements in the conventional environment n the conventional environment, CrewTalk dialogue and TowerCom announcements are triggered by short whistle blasts and vary with the state of the locomotive. • If the locomotive has been stopped for less than 30 seconds, a short whistle blast triggers a “please standby”... -
Page 12: Railsounds 5.0 Sound System Dialogue On A Round Trip
RailSounds sound system operations RailSounds 5.0 sound system dialogue on a round trip Refer to Figure 5 for a sample dialogue script for the locomotive’s round trip. You may also activate an arrival dialogue. To cue the arrival dialogue, press AUX1, 2 or AUX1, 7 within 30 seconds of stopping, then press 2 or 7 after the locomotive stops. -
Page 13: Notes On The Railsounds Sound System
RailSounds sound system operations Notes on the RailSounds sound system • Use the volume control knob to adjust sound output. Refer to Figure 4 on page 9 for the location of the volume control knob. Use a flat-blade screwdriver to adjust the volume level. -
Page 14: Odyssey System Operations The Odyssey System
Odyssey System operations The Odyssey System he Odyssey System is a “cruise control” for your locomotive. Once the speed is set (see below), your locomotive will maintain a constant speed, no matter what loads the locomotive pulls or what grades you have on your layout. This digitally-controlled system also allows for extremely slow movement that will amaze any “scale”... -
Page 15: Odyssey System Command Operation
Odyssey System operations Odyssey System Command operation se your CAB-1 Remote Controller to turn the Odyssey System speed control on or off. The position of the Odyssey switch (see Figure 2 on page 5) is the Odyssey System default setting when you power up the locomotive. You may override the default with the following commands. -
Page 16: Trainmaster Command Operations The Trainmaster Command Control Environment
• The digital language of TrainMaster Command Control—and not track power—controls the actions of Command-equipped Lionel engines. Track power is simply like gasoline in the tank of your car—it gives you the power to go places, but it doesn’t tell you where to go or how fast to get there. -
Page 17: Running Your Locomotive In The Trainmaster Command Control Environment
TrainMaster Command operations Running your locomotive in the TrainMaster Command Control environment our Command-equipped Example Address Locomotive #1 locomotive comes factory- Set PowerMaster to CMD or traditional programmed with an ID# of “1.” To power supplies to full throttle (no more get your locomotive in action, set than 19 volts) PowerMasters to CMD or set all power... -
Page 18: Cab-1 Remote Controller Numeric Keypad Commands For Your Locomotive
TrainMaster Command operations CAB-1 Remote Controller numeric keypad commands for your locomotive hen you press AUX1 on your CAB-1 Remote Controller, you turn the numeric keypad into ten command buttons. The keypad “stays open” and gives you access to extra command features until you press any top-row button (SW, ACC, RTE, TR, or ENG). - Page 19 TrainMaster Command operations CAB-1 Remote Controller numeric keypad commands for your locomotive (continued) Activates the steam locomotive shutdown sequence. If the locomotive is in motion, an “emergency stop” dialogue will play. If the locomotive is at rest, the engineer will sign-off. Dialogue and shutdown sequence.
-
Page 20: Tuning Your Locomotive's Performance
TrainMaster Command operations Tuning your locomotive’s performance CHUFF RATE Your locomotive is equipped with DynaChuff, the realistic steam chuffing sounds produced by the RailSounds 5.0 sound system. Your locomotive’s chuff rate is always synchronized with the motion of the drive wheels and the speed of the locomotive. The chuff intensity is also capable of varying automatically with the speed of the locomotive in automatic chuff mode, or you may choose to set a constant, or fixed, chuff intensity in manual chuff mode. -
Page 21: Tuning Your Locomotive's Performance
TrainMaster Command operations Tuning your locomotive’s performance (continued) MOMENTUM TrainMaster Command Control’s momentum feature simulates the labored performance of a locomotive pulling a heavy load. Press L, M, or H (located under the CAB-1 Remote Controller’s removable panel) for light, medium, or heavy momentum. The locomotive’s Command reverse unit remembers this setting until you change it. -
Page 22: Assigning Your Locomotive A New Id
TrainMaster Command operations Assigning your locomotive a new ID# s your fleet of Command-equipped Assign a new ID# to your Example Lionel locomotives grows, you’ll want Command-equipped locomotive to give your locomotive a more individualized number. Choose from any Set the Command reverse unit switch to PROG between 1 and 99. -
Page 23: Reprogramming The Command Reverse Unit To Restore Features
TrainMaster Command operations Reprogramming the Command reverse unit to restore features ue to the inevitable derailments and static, it is possible that your Command reverse unit could someday lose its setup program. The symptom of this condition would be unresponsiveness in Command mode. This can be easily remedied by “reprogramming” your Command reverse unit using the following steps. -
Page 24: Maintaining And Servicing Your Locomotive Maintaining Your Locomotive's Handrail Antenna
Maintaining and servicing your locomotive Maintaining your locomotive’s handrail antenna our locomotive handrails are more than just a protypically accurate detail—they’re the Command reverse unit’s antenna for receiving Command Base digital communications. Please handle the locomotive carefully to avoid handrail damage. To ensure optimum reception, both handrails are insulated from the die-cast metal shell. -
Page 25: Adding Fluid To Your Locomotive's Smoke Generator
The smoke generator requires the periodic addition of Lionel smoke fluid in order to function. A small bottle of smoke fluid was included with this locomotive. Press down and unscrew the cap of the smoke fluid bottle, then add eight to ten drops of fluid directly into the smoke stack. -
Page 26: Lubricating Your Locomotive
We recommend that you purchase a Lionel Lubrication and Maintenance Kit (6-62927), available from your Lionel dealer. Two basic rules to keep in mind: never over-lubricate (a small amount will do), and avoid getting grease or oil on the locomotive wheels, contact rollers, or your track. -
Page 27: Lubricating Your Locomotive
Maintaining and servicing your locomotive Lubricating your locomotive (continued) FRONT Body screw Body screw Lubricate with Lionel grease sparingly Lubricate with Lionel oil Lubricate with Lionel sparingly oil sparingly (both sides) (both sides) Lubricate with Lionel oil sparingly Remove the screws and... -
Page 28: Servicing Your Locomotive's Lamps
Removing the four screws as shown in Figure 6 on page 27 will allow access to the inside of the cab and the expired lamps. Due to the complexity of the required disassembly, we recommend that you take your locomotive to your authorized Lionel Service Center for any lamp replacement. -
Page 29: Replacing Your Tender's Lamp
Maintaining and servicing your locomotive Replacing your tender’s lamps our tender’s back-up light is an LED. This LED is expected to last for the life of the locomotive. The LED is not user serviceable. See your authorized Lionel Service Center if service becomes necessary. -
Page 30: Tire-Traction
Lionel has provided extra traction tires to replace the installed traction tires if they ever wear out. Simply unscrew the drive rod nut from the wheel using a 3/16” nut driver, slip off the old traction tire and remove it from under the drive rod. -
Page 31: Installing The O Gauge Front Coupler
Maintaining and servicing your locomotive Installing the O gauge front coupler n O gauge coupler (non-operating) is included with your locomotive for those who may wish to “double-head” their trains with a second 2-8-4 or another locomotive. Straighten out the wire coupler pin with a pair of needle nose pliers. The coupler pin runs through the scale coupler. -
Page 32: Limited Warranty/Lionel Service
Lionel L.L.C. or an authorized Lionel L.L.C. Service Center, together with proof of original purchase will, at the option of Lionel L.L.C., be repaired or replaced, without charge for parts or labor. In the event the defective product cannot be repaired, and a replacement is not available, a refund of the original purchase price will be granted.
Need help?
Do you have a question about the 2-8-4 Berkshire Steam Locomotive and Tender and is the answer not in the manual?
Questions and answers