Table of Contents
Advertisement
Quick Links
Advertisement
Table of Contents

Related Manuals for Deutsche Telekom Sinus 54 ISDN


Summary of Contents for Deutsche Telekom Sinus 54 ISDN
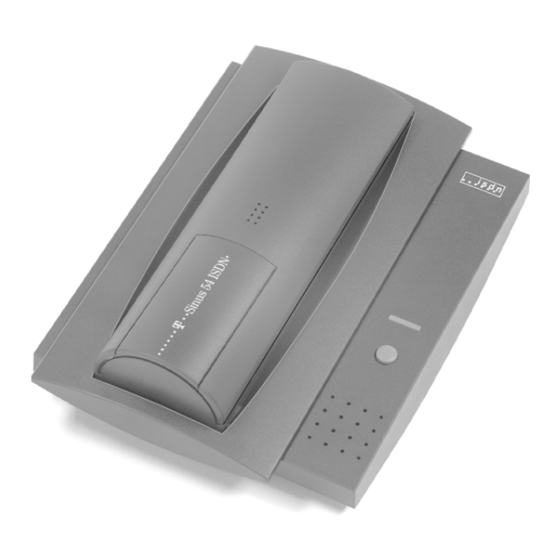
- Page 1 The Telephone. Functionel and Easy to Use. Deutsche Telekom...
- Page 2 Introduction By opting for telephone, you have selected an individually adaptable cordless telephone with a wide choice of practical user facilities. This User Guide is designed to help you make the most of your telephone. Whether you use your telephon for private or business use, it offers •...
- Page 3 Explanations Base station Label Hook for wall mounting Charge and connection indicator Paging key Loudspeaker (ringer) Charge contacts...
- Page 4 Explanations Handset Receiver Display Softkey Softkey Arrow key backwards, redial key and Delete/mute key call register Signal key Keypad 0 – 9, Connect key (seize/disconnect) Microphone Battery charge contacts...
- Page 5 Der Menübaum Im Ein-Zustand...
- Page 7 Herausgeber: Deutsche Telekom AG Änderungen vorbehalten MNr 40 152 637EA Stand Mai 1998 ABSC 20266977 3K.028...
-
Page 8: Table Of Contents
Inhaltsverzeichnis Notes Safety notes ................................ 4 Important notes on the use of battery cells ....................... 4 Key to controls Display: characters ans symbols ........................5 Keypad ................................. 6 Setting up and putting into service What's included in the delivery package ......................9 Default settings .............................. - Page 9 Changing/deleting a phone-book entry ......................40 Deleting all the entries in the phone book ....................... 41 During a call Mute switch ............................... 42 Adjusting the handset volume .......................... 43 Send DTMF function ............................44 Automatic completion of call to busy subscriber .................... 45 Activating the automatic CCBS ........................
- Page 10 Call transfer via telephone ..........................73 Inquiry via telephone ............................74 Swap .................................. 74 Three-party conference ............................ 75 call transfer ................................ 75 Setting the ringing allocation for the handsets (exchange ring) ..............76 Operation on several base stations General explanations ............................77 Application example ............................
-
Page 11: Notes
• Using other battery cell types or non-rechargeable batteries/primary cells can be dangerous and also lead to malfunctions and/or damage to the set. • Understandably, Deutsche Telekom AG cannot assume any liability in such cases. • Make sure the battery cells are fitted correctly. -
Page 12: Key To Controls
Key to controls Display: characters and symbols Symbols indicating the telephone’s 012401313 Message line current operating mode Intern Menü Digits and special characters Current meaning of the softkeys Battery indicator • When permanently lit, the telephone is ready to operate •... -
Page 13: Keypad
Key to controls Keypad With the numeric keys you can use the characters printed above the keys for letter input (phone book) as well as the functions marked on the keys themselves. Softkeys – Left and right softkey. The function of each softkey is indicated on the bottom line of the display. - Page 14 Signal key – Signal key function (Flash) in connection with a telephone system Connect key – Seizes and terminates the connection – Switches on the handset – Aborts a programming session Numeric key 1 – Number 1 Numeric key 2 – Number 2 –...
- Page 15 Numeric key 8 – Number 8 – Letter input: T U V Numeric key 9 – Number 9 – Letter input: W X Y Z Numeric key 0 – Number 0 – Character input: \ . , - Star key – Can be used for various special functions Hash key –...
-
Page 16: Setting Up And Putting Into Service
Setting up and putting into service What’s included in the delivery package Included in telephone package you will find the following: • Base station • Handset • 2 battery cells • Plug-in mains unit • Connecting cord • User Guide incl. Quick Reference User Guide •... -
Page 17: Installation Location/Range
If the equipment feet are chemically altered in this way, they may leave unsightly marks on the surface of furniture. Deutsche Telekom AG cannot accept any liability for damage of this kind. We recommend that you use a non-slip underlay for your telephone, especially on new furniture or furniture treated with lacquer-based preservatives. -
Page 18: Desktop Or Wall-Mounted, As You Wish
Setting up and putting into service Desktop or wall-mounted, as you wish Desktop version The simplest option is to use telephone as a desktop unit. Simply set up the telephone where you want it and connect. Wall-mounted version Turn the wall-mounting hook through 180° so that the handset can be suspended on the base station (see Figure below). - Page 19 Setting up and putting into service Desktop Wall...
-
Page 20: Connecting The Base Station
Setting up and putting into service Connecting the base station Just a few small tasks are required for you to use your telephone. Connecting cord The connecting cord has two plugs of different lengths. Insert the shorter one into the socket un- derneath your telephone until it is firmly connected. -
Page 21: Inserting And Charging The Battery Cells In The Handset
Setting up and putting into service Inserting and charging the battery cells in the handset Inserting the battery cells 1. Place the handset in front of you. To remove the battery compartment cover, press it lightly and slide it downwards. 2. -
Page 22: Fitting The Clip To The Handset
Setting up and putting into service Charging the battery cells IThe battery cells are not charged when supplied. To charge the batteries, you need to place the handset on to the charging bracket of the base station. If the luminous display (green LED) on the base station •... -
Page 23: Basic Settings
Basic settings Handset: ON, OFF, Lock state You can switch your handset to one of three states: 1. On state The handset automatically switches itself to the ON state when Intern Menü you insert its battery cells. It signals incoming calls, which you can answer by pressing the Connect key. -
Page 24: Handset: Switching Between States
Basic settings Handset: Switching between states Handset switched to ON: Intern Menü To switch the handset – to the OFF state Tastenschutz Press "Menu" softkey Zurück Press repeatedly until "Switch off" Ausschalten appears Zurück Press "Ok" softkey Handset is now switched off –... -
Page 25: Programming The Subscriber Number (Msn = Multiple Suscriber Number)
It is important that you enter in your telephone one of the telephone numbers you have been allocated by Deutsche Telekom. You can assign up to 5 different subscriber numbers (MSN, A, B, C, D or E). This allows you for example to separate calls according to private and business. -
Page 26: Programming The Name For Msn
Basic settings Programming the name for MSN Handset switched to ON Intern Menü Press "Menu" softkey, then press arrow Einstellen keys repeatedly until "Setup" appears Zurück Press "Ok" softkey, then press arrow keys System repeatedly until "System" appears Zurück Press "Ok" softkey, then press arrow keys Name/Nr.MSN repeatedly until "Name/Nr. -
Page 27: Programming Digit For Msn-Specific Melody
Basic settings Programming digit for MSN-specific melody Handset switched to ON Intern Menü Press "Menu" softkey, then press arrow Einstellen keys repeatedly until "Setup" appears Zurück Press "Ok" softkey, then press arrow keys System repeatedly until "System" appears Zurück Press "Ok" softkey, then press arrow keys Name/Nr.MSN repeatedly until the corresponding MSN Zurück... -
Page 28: Personal Identification Number (Pin)
Basic settings Personal Identification Number (PIN) Your personal settings on the telephone can be protected in part by using two different, four-di- git PINs. The system PIN is required if you want to protect the system settings • Call barring •... -
Page 29: Entering A New System Pin
Basic settings Entering a new system PIN Handset switched to ON Intern Menü Press "Menu" softkey, then press arrow Einstellen keys repeatedly until "Setup" appears Zurück Press "Ok" softkey, then press arrow keys System repeatedly until "System" appears Zurück Press "Ok" softkey, then press arrow keys System-PIN repeatedly until "System-PIN"... -
Page 30: Entering A New Handset Pin
Basic settings Entering a new handset PIN Handset switched to ON Intern Menü Press "Menu" softkey, then press arrow Einstellen keys repeatedly until "Setup" appears Zurück Press "Ok" softkey, then press arrow keys Geräte-PIN Zurück repeatedly until "Device-PIN" appears Neue PIN? Press "Ok"... -
Page 31: Setting The Handset Volume
Basic settings Setting the handset volume You can increase the call volume inside the handset to hear your call partner more clearly. Handset switched to ON Intern Menü Press "Menu" softkey, then press arrow Einstellen keys repeatedly until "Setup" appears Zurück Press “Ok”... -
Page 32: Activating/Deactivating Call Waiting
Basic settings Activating/deactivating call waiting You are making an (internal or outside) call and receive an outside call at the same time. The outside call is signalled to you by a call waiting tone, which you can switch on or off for each handset. -
Page 33: Setting The Language For The Menu Prompting
Basic settings Setting the language for the menu prompting You can set different languages for the display menu prompting. German is set as the default language. Handset switched to ON. Intern Menü Press "Menu" softkey, then press arrow Einstellen Zurück keys repeatedly until "Setup"... -
Page 34: Incoming Calls
Incoming calls Answering a call Even before you answer a call, your telephone provides you with a certain amount of information on the following points: Who’s calling? The display indicates the caller’s number. If the caller's number is listed in your name directory, the caller’s name will be displayed directly. -
Page 35: Answering A Call
Incoming calls Answering a call The handset and base station signal a call MUSTER HANS abweis Press the Connect key Make the call... Ending a call Press the Connect key Anrufe: 08 Intern Menü Put the handset back on the base station. Rejecting a call You do not want to answer an incoming outside call on your handset and reject it, e.g. -
Page 36: Call Register
Incoming calls Call register The last 10 calls are recorded in the call register of your telephone. Repeat calls from the same source are listed only once. Anrufe: 05 You have received 5 calls. Intern Menü Press the redial key for approx. 1 second. 065284068 The last call is displayed. -
Page 37: Offbook Answering
Incoming calls Offhook answering The offhook answering facility enables you to take incoming calls directly, simply by lifting the handset from the base station (without having to press the Connect key). Handset switched to ON. Intern Menü Press "Menu" softkey, then press arrow Einstellen keys repeatedly until "Setup"... -
Page 38: Outgoing Calls
Outgoing calls Selecting the multiple subscriber number Your Telephoneallows you to define the multiple subscriber number via which an outgoing call is to be made. This gives you the following opportunities: Charges incurred are allocated to the corresponding multiple subscriber numbers. This provides you for example with a separate list of private and business calls. -
Page 39: Selecting A Temporary Multiple
Outgoing calls Selecting a temporary multiple subscriber number IYour telephone also allows you to select a multiple subscriber number only temporarily, i.e. for the subsequent outgoing call. Handset switched to ON Intern Menü Nummer: ? Press “Intern” softkey Intern 1 Enter the corresponding number 80 for MSN A Menü... -
Page 40: Calling Line Identification Restriction
Outgoing calls Calling Line Identification Restriction Your Telephoneallows you to suppress the display of your own multiple subscriber number on the called party’s set when making an outgoing call. As a result your multiple subscriber number is not displayed to the called party. CLIR can be activated and deactivated specifically for each handset. -
Page 41: Dialling From The Numeric Keypad
Outgoing calls Dialling from the numeric keypad Handset switched to ON Intern Menü Press the Connect key. You will hear the dial tone. Intern Menü Key in the subscriber number you want 012401313 The number is dialled. Menü You will hear the ringing tone. The called party answers. -
Page 42: Last Number Radial
Outgoing calls Last number redial Your Telephonestores the five last numbers dialled. You now want to redial one of those numbers. Handset switched to ON Intern Menü Press the Redial key. 2401313 The number last dialled appears. Zurück Spchr Press the arrow keys repeatedly until the 2401314 number you want appears. -
Page 43: Enhanced-Convenience Dialling
Enhanced-convenience dialling About the phone book You can save 40 telephone numbers (max. 22 digit positions) with name (max. 12 character positions) in your phone book. The handset automatically sorts your inputs alphabetically. The numeric keys are automatically switched over to alpha characters for entering and calling up the names. -
Page 44: Storing An Entry In The Phone Book
Enhanced-convenience dialling Storing an entry in the phone book Handset switched to ON Intern Menü Suche m. ABC Press the Phone book key Zurück Tel.-Nr.:? Press “New” softkey Zurück 065242765 Key in the subscriber number Zurück Key in subscriber number of your choice 82012345678 including temporary MSN selection Zurück... -
Page 45: Storing An Entry In The Phone Book From Off-Line Call Preparation
Enhanced-convenience dialling Storing an entry in the phone book from off-line call preparation You can store a subscriber number directly from off-line call preparation. Handset switched to ON Intern Menü Key in subscriber number 065242765 (off-line call preparation) Intern Spchr Name:? Press "Save"... -
Page 46: Dialling From The Phone Book
Enhanced-convenience dialling Dialling from the phone book Handset switched to ON Intern Menü Suche m. ABC Press the Phone book key Zurück Press arrow keys repeatedly until the name VOGT ERNST you want appears in the display along with 065242765 the subscriber number. -
Page 47: Changing/Deleting A Phone-Book Entry
Enhanced-convenience dialling Changing/deleting a phone-book entry Handset switched to ON Intern Menü Suche m. ABC Press the Phone book key Zurück Press arrow keys repeatedly until the name VOEGTLI T. and subscriber number you want appear. 012401313 Press the numeric key for the first letter VOEGTLI T. -
Page 48: Deleting All The Entries In The Phone Book
Enhanced-convenience dialling Deleting all the entries in the phone book You can delete all the data stored in the phone book using a single procedure. Handset switched to ON Intern Menü Press "Menu" softkey, then press arrow Einstellen keys repeatedly until "Setup" appears. Zurück Press "Ok"... -
Page 49: During A Call
During a call Mute switch If you do not wish your call partner to hear what you are saying (for instance, when you confer with someone in the room), you can switch the microphone integrated in the handset to Mute. You are making a call... -
Page 50: Adjusting The Handset Volume
During a call Adjusting the handset volume During a call, you can increase the volume in the handset to hear the person at the other end more clearly. 012401313 You are making a call... Intern Menü Press ”Menu” softkey, then press arrow Hörer-laut keys repeatedly until ”Handset Vol.”... -
Page 51: Send Dtmf Function
During a call Send DTMF function By switching over to the DTMF dialling method, you can use the special ”star” and ”hash” keys to enter information during a call, for such functions as Voicemail, City call, etc. In such cases you can dispense with the use of a separate code transmitter. Temporary switchover: You have set up a call... -
Page 52: Automatic Completion Of Call To Busy Subscriber
During a call Automatic completion of call to busy subscriber If you want to call an outside subscriber who is busy, you can activate an automatic completion of call to busy subscriber (CCBS). As soon as the called party is free again, you will be called back by the network and the connection to the called subscriber is set up. -
Page 53: Parking
During a call Parking You can park an outside call and retrieve it again from another handset on your ISDN connec- tion. The park duration is limited to 3 minutes. Parking a call 01201313 You are making a call Rückf. Menü... -
Page 54: Answering Call-Waiting Calls
During a call Answering call-waiting calls You have the possibility of rejecting an outside call-waiting call, accepting it (in which case your current call is interrupted) or holding the current call and taking the call-waiting call. 0326184068 You are making a call Rückfr. -
Page 55: Call Diversion
Call diversion Your telephone supports three different call diversions. The multiple subscriber numbers are diverted in each case. • Call diversion always: all calls are diverted directly to the predetermined destination. • Call diversion on busy: all calls are diverted to the predetermined destination if your multiple subscriber number is busy. -
Page 56: Deactivating Call Diversion Always
Call diversion Deactivating call diversion always Handset switched to ON Intern Menü Press “Menu” softkey, then press arrow Dienste keys repeatedly until “Services” appears. Zurück Press “Ok” softkey, then press arrow keys repeatedly until “Diversion” appears. Umleiten Zurück Press “Ok” softkey. Uml. -
Page 57: Activating Call Diversion O Busy
Call diversion Activating call diversion on busy Handset switched to ON Intern Menü Press ”Menu” softkey, then press arrow Dienste keys repeatedly until ”Services” appears. Zurück Press ”Ok” softkey, then press arrow keys Umleiten repeatedly until ”Diversion” appears. Zurück Press ”Ok” softkey, then press arrow keys Uml. -
Page 58: Deactivating Call Diversion On Busy
Call diversion Deactivating call diversion on busy Handset switched to ON Intern Menü Press ”Menu” softkey, then press arrow Dienste keys repeatedly until ”Services” appears. Zurück Press ”Ok” softkey, then press arrow keys Umleiten repeatedly until ”Diversion” appears. Zurück Press ”Ok” softkey, then press arrow keys Uml. -
Page 59: Activating Call Diversion No Reply
Call diversion Activating call diversion no reply Handset switched to ON Intern Menü Press ”Menu” softkey, then press arrow Dienste keys repeatedly until ”Services” appears. Zurück Press ”Ok” softkey, then press arrow keys Umleiten repeatedly until ”Diversion” appears. Zurück Press ”Ok” softkey, then press arrow keys Uml.verzoeg. -
Page 60: Deactivating Call Diversion No Reply
Call diversion Deactivating call diversion no reply Handset switched to ON Intern Menü Press ”Menu” softkey, then press arrow Dienste keys repeatedly until ”Services” appears. Zurück Press ”Ok” softkey, then press arrow keys Umleiten repeatedly until ”Diversion” appears. Zurück Press ”Ok” softkey, then press arrow keys Uml.verzoeg. -
Page 61: Charge/Talk-Time Display
Before you can use the unit/charge metering facility, you need to apply for a ”transfer of call charges at end of call” from the Deutsche Telekom branch office responsible for your area, if you do not possess an added-feature multipoint interface. -
Page 62: Activating/Deactivating The Charge/Talk-Time Display
Charge/talk-time display Activating/deactivating the charge/talk-time display Handset switched to ON Intern Menü Press ”Menu” softkey, then press arrow Entgelt keys repeatedly until ”Amount” appears. Zurück Press ”Ok” softkey, then press arrow keys repeatedly until ”Display” appears. Anzeige Zurück Press ”Ok” softkey Keine Zurück Activating the charge display:... -
Page 63: Checking The Amounts
Charge/talk-time display Checking the amounts You can check the total amount as well as the amount for the last telephone calls at any time (charge incurred). Handset switched to ON Intern Menü Press ”Menu” softkey, then press arrow Entgelt keys repeatedly until ”Amount” appears. Zurück Abfragen Press ”Ok”... -
Page 64: Changing The Charge Factor
Charge/talk-time display Changing the charge factor Handset switched to ON Intern Menü Press ”Menu” softkey, then press arrow Entgelt keys repeatedly until ”Amount” appears. Zurück Press ”Ok” softkey, then press arrow keys Faktor repeatedly until ”Factor” appears. Zurück Keying in the line charge factor: Press ”Ok”... -
Page 65: Checking And Deleting The Amounts Of All Handsets And Msn
Charge/talk-time display Checking and deleting the amounts of all handsets and MSN Handset switched to ON Intern Menü Press ”Menu” softkey, then press arrow Entgelt keys repeatedly until ”Charging” appears Zurück Press ”Ok” softkey twice, then press arrow System keys repeatedly until ”System” appears Zurück Press ”Ok”... -
Page 66: Direct Call
Direct call Activating direct call An important subscriber number can be stored as a direct call number. When direct call is activated, this subscriber number can be dialled automatically by pressing any key (except softkeys). Incoming calls can be answered. Handset switched to ON Intern Menü... -
Page 67: Dialling A Direct Call Number
Direct call Dialling a direct call number Press the Connect key for example 065242357 The direct call number stored is Intern Menü dialled automatically. You make your call… Ending the call: Press the Connect key a second time Direktruf ”Direct call” appears again on the display. ¢Aus Note: •... -
Page 68: Call Barring
Call barring Activating call barring Call barring allows you to bar your telephone handset(s) individually for outgoing calls at the exchange connection (with the exception of the direct call facility and the emergency numbers 110, 112, 115, 19222). You have a choice of three different barring options: No Barring = No barring (all calls permitted) External... -
Page 69: Paging
Paging From base station to handset(s) You can transmit an acoustic signal (paging ringing signal) from base station to handset(s), for instance you may have mislaid your handset(s) and want to use this signal to help find it (them). Press the ringing key on the base station The paging ringing signal sounds for approx. -
Page 70: Ringing Tone
Ringing tone Setting the ringing tone on the handset You can modify the volume, tone sequence and melody of the ringing tone on the handset. Handset switched to ON Intern Menü Press ”Menu” softkey, then press arrow Einstellen keys repeatedly until ”Setup” appears Zurück Press ”Ok”... - Page 71 Ringing tone Setting the melody for digit 1 Mel.1: 1-8 3 Press arrow keys Zurück Mel.1: 1-8 2 ••• Press numeric key 1…8 for the required Zurück melody, e.g. 2 Setting the melody for digit 2 Mel.2: 1-8 3 Press arrow keys Zurück •••...
-
Page 72: Setting The Ringing Tone On The Base Station
Ringing tone Setting the ringing tone on the base station You can modify the volume, tone sequende and melody of the ringing tone on the base station. Handset switched to ON Intern Menü Press ”Menu” softkey, then press arrow Einstellen keys repeatedly until ”Setup”... -
Page 73: Operation With Several Handsets
Operation with several handsets Explanations The telephone allows you to operate up to 6 handsets on one base station. Each additional handset must be subscribed to the base station and obtain an internal subscriber number. Each internal subscriber number (1-6) can only be allocated once. Subscribing a handset to the base station Handset switched to ON Intern... - Page 74 Operation with several handsets Preparing the base station for subscription: Press down the paging key on the base station for 6 seconds. The connection indicator on the base station (red LED) starts flashing. Display reading on the handset: The following information is indicated Anmeldung on the display during subscription.
-
Page 75: Desubscribing A Handset From The Base Station
Operation with several handsets Desubscribing a handset from the base station Handset switched to ON Intern Menü Press ”Menu” softkey, then press arrow An-/Abmelden keys repeatedly until ”De/Subscribe” Zurück appears. Press ”Ok” softkey, then press arrow keys Abmelden repeatedly until ”Desubscribe” appears. Zurück Press ”Ok”... -
Page 76: Marking Internal Calls
Operation with several handsets Making internal calls You can set up an internal call to another handset (on the same base station) and make a call. Handset switched to ON Intern Menü Press ”Intern” softkey. Nummer:? The handset’s internal number is indicated Intern 1 on the bottom line of the display. -
Page 77: Checking The Internal Subscriber Number
Operation with several handsets Checking the internal subscriber number If you have forgotten a handset’s internal subscriber number, you can check it using a simple procedure. Handset switched to ON Intern Menü Press ”Intern” softkey. Nummer:? The handset’s internal number is indicated Intern 1 on the display, e.g. -
Page 78: Inquiry / Swap / Three Party Conference / Call Transfer
Operation with several handsets Inquiry / Swap / Three-party conference / Call transfer Öffentliches Netz Sinus 54 ISDN Inquiry via telephone You (subscriber A) are making a call with MUELLER HANS subscriber C Rückf. Menü Subscriber A wants to initiate an inquiry to subscriber B (internal) Rückfrage:... -
Page 79: Swap Via Telephone
Operation with several handsets Swap via telephone You (subscriber A) can now switch backwards and forwards between the two calls (B and C). You (A) are connected with subscriber B Intern m. 2 Subscriber C is on hold Zurück Menü Makeln Press ”Menu”... -
Page 80: Call Transfer Via Telephone
Operation with several handsets Call transfer via telephone You (A) are connected with subscribers B and C (swap or conference status) and can now connect them together. You (A) are connected with subscriber B Subscriber C is on hold Intern m. 2 Zurück Menü... -
Page 81: Inquiry Via Telephone
Operation with several handsets Inquiry via telephone You (subscriber A) are making a call with MUELLER HANS subscriber C Rückf. Menü Subscriber A wants to initiate an inquiry to subscriber D (external) Rückfrage: Press ”Inquiry” softkey Zurück Handy Key in the external subscriber number you 2345678 want (e.g. -
Page 82: Three-Party Conference
Operation with several handsets Three-party conference You (A) are connected with subscriber D and subscriber C is on hold. You can now link up with the two subscribers to form a three-party conference. You (A) are connected with subscriber D 2345678 Subscriber C is on hold Zurück... -
Page 83: Setting The Ringing Allocation For The Handsets (Exchange Ring)
Operation with several handsets Setting the ringing allocation for the handsets (exchange ring) An incoming external call is signalled to all the handsets. You can switch off the ring signalling (exchange ring) on individual handsets. You can then only be reached on that handset if another handset calls you internally. -
Page 84: Operation On Several Base Stations
Operation on several base stations General explanations In addition to your own base station, you can operate your Telephonehandset on up to three other base stations (a maximum of six handsets can be operated on each base station), for ex- ample on the one at home and also on the one at work. -
Page 85: Specifying The Configuration
Operation on several base stations Specifying the configuration Define one letter (A, B, C or D) in each case for the base station at home and one for the base station at the office. Write the corresponding letter in the label area on each base station. Home Office Base station... -
Page 86: Subscribing Handsets To Base Stations
Operation on several base stations Subscribing handsets to base stations First subscribe handset 1 to base station A and then to base station B. Subscribing handset 1 to base station A: Handset switched to ON Intern Menü Press ”Menu” softkey, then press arrow An-/Abmelden keys repeatedly until ”De/Subscribe”... - Page 87 Operation on several base stations Preparing base station A for subscription: Press down the paging key on base station A for 6 seconds. The connection indicator on the base station (red LED) starts flashing. Display reading on the handset: The following information is indicated on the Anmeldung display during subscription.
- Page 88 Operation on several base stations Subscribing handset 1 to base station B: Handset switched to ON Intern Menü Press ”Menu” softkey, then press arrow An-/Abmelden keys repeatedly until ”De/Subscribe” Zurück appears Anmelden Press ”Ok” softkey Zurück An Feststat. Press ”Ok” softkey Zurück System-PIN? Press ”Ok”...
- Page 89 Operation on several base stations Preparing base station B for subscription: Press down the paging key on base station B for 6 seconds. The connection indicator on the base station (red LED) starts flashing. Display reading on the handset: The following information is indicated on the Anmeldung display during subscription.
-
Page 90: Automatic Switchover Or Manual Selection Of Base Station
Operation on several base stations Automatic switchover or manual selection of base station You can set your handset to 1. Automatic switchover of the base station (default setting) In the case of separate radio cells the radio connection is set up with the base station in who- se range you are in. -
Page 91: Operation On The Telephone System
Operation on the telephone system Entering/deleting the exchange identification code (EIC) If you operate your telephone behind a telephone system, you have the possibility of entering an exchange identification code of up to 4 digits. Handset switched to ON Intern Menü... -
Page 92: Sending An Automatic Keypad
Operation on the telephone system Sending an automatic keypad is pressed as the first dialling key, there is an automatic switchover to keypad signalling (“Auto Keypad” On). On some systems (e.g. systems on which automatic line fetch is programmed) you need to set the menu item “Auto Keypad” to “Off” so that for example you can connect internally with Handset switched to ON Intern... -
Page 93: Transfer With Disconnect
Operation on the telephone system Transfer with Disconnect This setting depends on your TK system. You can test whether or not you need to carry out this setting: • During an inquiry transfer your two call partners by pressing the Connect key. •... -
Page 94: Subscribing A Telephone Handset To A Foreign System
Operation on the telephone system Subscribing a telophone handset to a foreign system You can log on and operate your telephone handset on a foreign DECT system providing that system also supports the GAP access profile. To log on the Telephonehandset, you need to have the "AC"... -
Page 95: Subscribing A Foreign Telephone Handset
Operation on the telephone system Subscribing a foreign telephone handset You can log on and operate a foreign DECT handset on your Telephonebase station providing that system also supports the GAP access profile. The Telephonebase station and the foreign handset require an "AC" access code (known as the authentication code or system code) for the subscription procedure. -
Page 96: Initialising
Initialising Restoring the handset to its default settings This procedure restores the following handset settings to the default settings: – handset ringer – choose base (automatic) – language: English – off-hook answering "OFF" – keyclick ("ON") – redial – handset volume (normal) –... -
Page 97: Restoring The Basw Station (System) To Its Default Settings
Initialising Restoring the base station (system) to its default settings This procedure restores the following system settings to the default settings: – base station ringer – charge display ("OFF") – handset call barring – MSNs – exchange ring signalling – call waiting –... -
Page 98: Restoring All Telephone Parameters To The Default Settings
Initialising Restoring all telephone parameters to the default settings This procedure restores the following telephone parameters to their default settings: – call barring – call allocation Handset switched to ON Intern Menü Press "Menu" softkey, then press arrow Einstellen Zurück keys repeatedly until "Setup"... -
Page 99: Acoustic Signals
Acoustic signals Tones in general Acoustic signal: seconds Ringers: Outside call (transparent) Internal call Paging call On-hook in inquiry call Handset tones: Internal dial tone Busy tone Call waiting tone Handset information tones: Permitted keypress Error signal Leaving radio range Battery low (preliminary warning) Battery empty... -
Page 100: Activating/Deactivating Keyclick
Acoustic signals Activating/deactivating keyclick If you do not want every keypress confirmed by a click, you can deactivate this function. Handset switched to ON. Intern Menü Press "Menu" softkey, then press arrow Einstellen keys repeatedly until "Setup" appears Zurück Press "Ok" softkey, then press arrow keys Tastenklick repeatedly until "Keyclick"... -
Page 101: Range Warning
Acoustic signals Range warning If you activate the range warning, a warning signal will sound if you leave the radio range in the course of a call. This could be due, for instance, to building-related factors acting at the limit of your base station’s transmission and reception range. -
Page 102: General Information
General information Faults and self-help troubleshooting Most malfunctions will not be due to a defect on your telephone. You can often save time and money by correcting minor faults yourself. The following tips are intended to help you do this. Symptom Cause Action... -
Page 103: Warranty Terms
General information Warranty terms Deutsche Telekom AG provides a 12 month warranty for material and manufacture of the tele- communication terminal from the moment of handover. The purchaser initially has only the right to remedy of any defects. Rather than effect such re- medies, Deutsche Telekom AG may at its discretion supply replacement equipment: any repla- ced equipment or parts become the property of Deutsche Telekom AG. -
Page 104: Recycling
How do we do it? We at Deutsche Telekom work closely with a company in which other companies in the telecom- munications industry and the Preussag Group participate. The project is known as the "Recyc- ling Initiative". -
Page 105: Ce-Labelling
Approvals The telephone is approved by the German Federal Approvals Office for Telecommunications. General type approval for terminal equipment for connecting to switched connections with ana- logue interconnection points. CE labelling This telephone complies with the requirements of the following EU Directives: 89/336/EWG "Electromagnetic Compatibility"... -
Page 106: Technical Data
Technical Data Standard: DECT Number of channels: 20 duplex channels Frequencies: 1880 MHz to 1900 MHz Duplex method: time division multiplex, 10 ms frame length Channel spacing: 1728 kHz Bit rate: 1152 kbit/s Modulation: GFSK Voice coding: 32 kbit/s ADPCM Transmit output: 250mW peak value 10 mW, mean output per channel... -
Page 107: Write-On Labels
Write-on labels... - Page 108 Notes...
-
Page 109: Bohrschablone
BOHRSCHABLONE Basisstation... - Page 110 BOHRSCHABLONE Ladestation...
- Page 111 BOHRSCHABLONE Funkrelais...
-
Page 112: Stichwortverzeichnis
Stichwortverzeichnis Abgehende Gespräche sperren ........................61 Abhören ................................10 Abweisen ................................28 Akkuzellen, einsetzen und aufladen ......................... 14 Akkuzellen, Hinweis zum Gebrauch ........................4 Akkuzellen, Leuchtanzeigen ..........................15 Akustische Signalisierungen ..........................92 Amtskennzahl (Akz) eingeben .......................... 84 Anklopfen ................................25 Entgeltanzeige ein-/ausschalten ........................ - Page 113 Stichwortverzeichnis Fehlersuche ............................... 95 Fehlerton ................................92 Feststation ................................ B1 Feststation, Anzeigen ............................B1 Frequenzbereich ............................... 99 Funkreichweite, siehe Einleitung ........................10 Funkreichweite, siehe Reichweite ........................10 GAP-Schnittstelle ............................87, 88 Garantieerklärung .............................. 96 Gebühren (Entgeltanzeige) ..........................54 Geräte-PIN ................................. 23 Gespräch abweisen ............................
- Page 114 Stichwortverzeichnis Makeln ................................ 72, 74 Melodie Tonruf ............................. 63, 64, 65 Menübaum ........................... Ausklappseite hinten Name für MSN programmieren ........................19 Netzausfall, Spannungsausfall .......................... 13 Notruf, siehe Direktruf ..........................59, 60 Optische Signalisierungen, Feststation; siehe LED ..................B1 Optische Signalisierungen, Handgerät; siehe Display ..................5 Paging ................................
- Page 115 Stichwortverzeichnis Tarife .................................. 55 Tastatur ................................6 Tastenklick ................................. 93 Technische Daten .............................. 99 Telefonbuch, Erläuterungen ..........................36 Telefonbuch-Einträge löschen .......................... 40 Telefonbuch-Einträge speichern ........................37 Tonfolge ..............................63, 65 Tonruf, Feststation ............................65 Tonruf, Handgerät ............................. 63 Tonsenderfunktion ............................. 44 Trageclip ................................
Need help?
Do you have a question about the Sinus 54 ISDN and is the answer not in the manual?
Questions and answers