Table of Contents
Advertisement
Available languages
Available languages
Having TROUBLE with operation?
Please reset your unit
Refer to page of How to reset your unit
Still having trouble??
USA ONLY
Call 1-800-252-5722
http://www.jvc.com
We can help you!
EN, SP, FR
© 2010 Victor Company of Japan, Limited
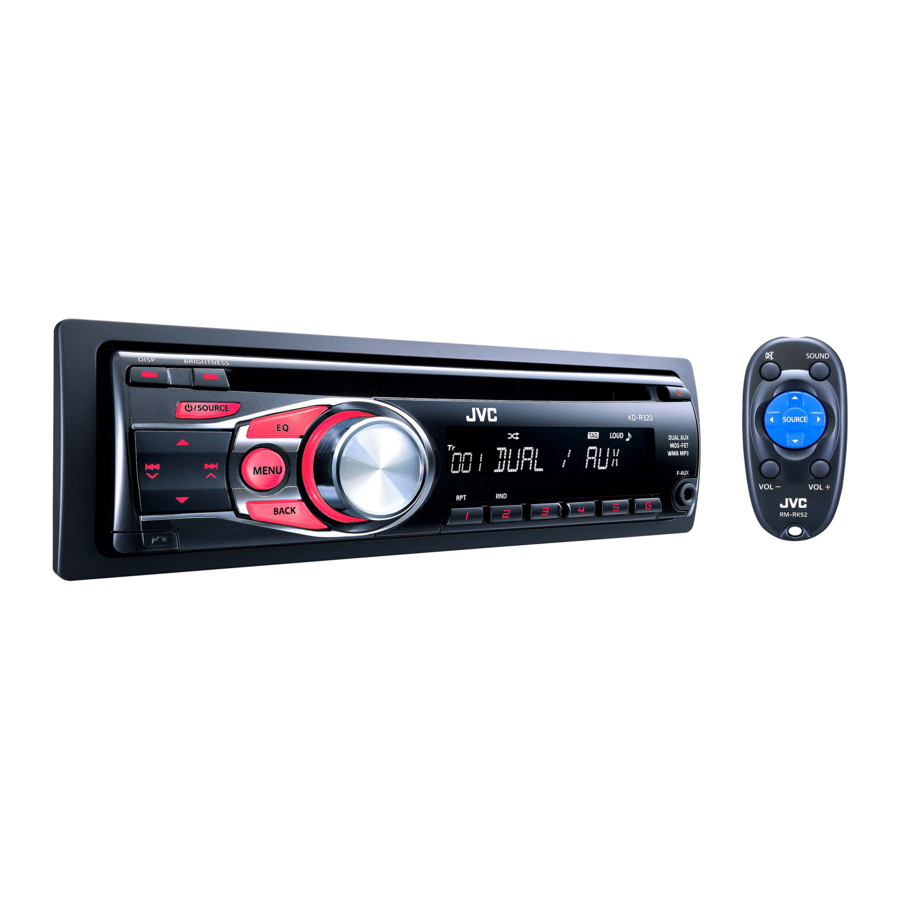
KD-R328/KD-R320
CD RECEIVER / RECEPTOR CON CD /
RÉCEPTEUR CD
For canceling the display demonstration, see page 4. / Para cancelar la demostración en pantalla,
consulte la página 4. / Pour annuler la démonstration des affichages, référez-vous à la page 4.
For installation and connections, refer to the separate manual.
Para la instalación y las conexiones, refiérase al manual separado.
Pour l'installation et les raccordements, se référer au manuel séparé.
0910DTSMDTJEIN
INSTRUCTIONS
MANUAL DE INSTRUCCIONES
MANUEL D'INSTRUCTIONS
ENGLISH
ESPAÑOL
FRANÇAIS
For customer Use:
Enter below the Model
No. and Serial No. which
are located on the top or
bottom of the cabinet.
Retain this information
for future reference.
Model No.
Serial No.
GET0669-001A
[J]
Advertisement
Chapters
Table of Contents

Subscribe to Our Youtube Channel
Related Manuals for JVC GET0669-001A


Summary of Contents for JVC GET0669-001A
- Page 1 For customer Use: Enter below the Model No. and Serial No. which are located on the top or bottom of the cabinet. Retain this information INSTRUCTIONS for future reference. MANUAL DE INSTRUCCIONES Model No. Serial No. GET0669-001A ENGLISH ESPAÑOL FRANÇAIS...
-
Page 2: Important For Laser Products
– Connect the equipment into an outlet on a circuit different from that to which the receiver is connected. – Consult the dealer or an experienced radio/TV technician for help. Caution: Changes or modifications not approved by JVC could void the user’s authority to operate the equipment. IMPORTANT FOR LASER PRODUCTS 1. CLASS 1 LASER PRODUCT 2. -
Page 3: Table Of Contents
How to attach/detach the control panel How to reset your unit Your preset adjustments will also be erased. How to forcibly eject a disc [Hold] • Be careful not to drop the disc when it ejects. • If this does not work, reset your unit. Maintenance Cleaning the unit Wipe off the dirt on the panel with a dry silicon... -
Page 4: Canceling The Display Demonstration
Canceling the display demonstration Display demonstration will be activated automatically if no operation is done for about 20 seconds. Turn on the power. [Hold] Setting the clock Turn on the power. [Hold] Select <CLOCK>. Select <CLOCK SET>. Adjust the hour. Adjust the minute. -
Page 5: Preparing The Remote Controller
Preparing the remote controller When you use the remote controller for the first time, pull out the insulation sheet. Insulation sheet For USA-California Only: This product contains a CR Coin Cell Lithium Battery which contains Perchlorate Material— special handling may apply. See www.dtsc. ca.gov/hazardouswaste/perchlorate If the effectiveness of the remote controller decreases, replace the battery. -
Page 6: Basic Operations
Basic operations Loading slot Remote sensor • DO NOT expose to bright sunlight. Detaches the panel When you press or hold the following button(s)... Remote Main unit controller — / SOURCE SOURCE VOL – / + • Adjusts the volume level. Control dial (turn) —... -
Page 7: Listening To The Radio
Listening to the radio Ÿ ] “FM” or “AM” “ST” lights up when receiving an FM stereo broadcast with sufficient signal strength. Improving the FM reception [Hold] ] <TUNER> ] <MONO> ] <MONO ON> Reception improves, but stereo effect will be lost. To restore the stereo effect, repeat the same procedure to select <MONO OFF>. -
Page 8: Selecting Playback Modes
Listening to a disc ] “CD” Stopping playback and ejecting the disc If the ejected disc is not removed within 15 seconds, it is automatically inserted into the loading slot. Selecting a track/folder Selects folder of the MP3/WMA [Press] Selects track. [Hold] Fast-forwards or reverses the track. -
Page 9: Connecting The Other External Components
Connecting the other external components You can connect an external component to the auxiliary input jack on the control panel (F-AUX) and/or on the rear side of the unit (R-AUX). Summary of using the external components through the auxiliary input jacks: Auxiliary External component input jack... -
Page 10: Selecting A Preset Sound Mode
Selecting a preset sound mode You can select a preset sound mode suitable for the music genre. FLAT = NATURAL = DYNAMIC = VOCAL BOOST = BASS BOOST = USER = (back to the beginning) While listening, you can adjust the tone level of the selected sound mode. - Page 11 Menu item DIMMER SET AUTO : Dims the display to the previous setting when you turn on the car headlights. * ON : Dims the display and button illumination (50% of the selected brightness level). / OFF : Cancels (100% of the selected brightness level). BRIGHTNESS DAY [ 31 ] / NIGHT [ 15 ] : Selects the display and button illumination brightness level [00 —...
-
Page 12: Additional Information
Menu item LOW POWER : VOLUME 00 – VOLUME 30 (Selects if the maximum power GAIN * of each speaker is less than 50 W to prevent damaging the speakers.) / HIGH POWER : VOLUME 00 – VOLUME 50 SSM * See page 7. -
Page 13: Troubleshooting
Check to be sure the terminals of the speaker leads are covered with insulating tape properly, then reset the unit. (page 3) If the message does not disappear, consult your JVC car audio dealer or a company supplying kits. Reset the unit. (page 3) Check the <SRC SELECT>... -
Page 14: Using Bluetooth ® Devices
Using Bluetooth ® devices For Bluetooth operations, it is required to connect the Bluetooth adapter, KS-BTA100 (not supplied) to the auxiliary input jack (R-AUX/BT ADAPTER) on the rear of the unit. (page 9) • For details, refer also to the instructions supplied with the Bluetooth adapter and the Bluetooth device. -
Page 15: Specifications
Specifications AUDIO AMPLIFIER SECTION Power Output : 20 W RMS × 4 Channels at 4 Ω and ≤ 1% THD+N Signal-to-Noise Ratio : 80 dBA (reference: 1 W into 4 Ω) Load Impedance : 4 Ω (4 Ω to 8 Ω allowance) Frequency Response : 40 Hz to 20 000 Hz Line-Out or Subwoofer-Out Level/ Impedance : 2.5 V/20 kΩ... - Page 16 – Enchufe el equipo a una toma de corriente situada en un circuito distinto del aparato receptor. – Consulte a su distribuidor o a un técnico experto en radio/televisión. Precaución: Los cambios o modificaciones no aprobados por JVC pueden anular la autoridad del usuario para operar el equipo. IMPORTANTE PARA PRODUCTOS LÁSER 1.
-
Page 17: Panel De Control
Cómo montar/desmontar el panel de control Cómo reposicionar su unidad También se borrarán los ajustes preestablecidos por usted. Cómo expulsar el disco por la fuerza [Sostener] • Tenga cuidado de no dejar caer el disco al ser expulsado. • Si esto no funciona, intente reposicionar su receptor. -
Page 18: Cancelación De Las Demostraciones En Pantalla
Cancelación de las demostraciones en pantalla La demostración en pantalla se activará automáticamente si no se efectúa ninguna operación durante unos 20 segundos. Encienda la unidad. [Sostener] (Configuración inicial) (Configuración inicial) Puesta en hora del reloj Encienda la unidad. [Sostener] (Configuración inicial) Seleccione <CLOCK>. -
Page 19: Preparación Del Control Remoto
Preparación del control remoto Retire la lámina aislante cuando utilice el control remoto por primera vez. Lámina aislante Sólo para EE.UU.-California: Este producto contiene una batería de litio CR de tipo botón que contiene perclorato (puede requerirse una manipulación especial). Visite www.dtsc.ca.gov/hazardouswaste/perchlorate Si disminuye la efectividad de acción del control remoto, cambie la pila. -
Page 20: Operaciones Básicas
Operaciones básicas Ranura de carga Sensor remoto • DO lo exponga a la luz solar brillante. Desmonta el panel Si pulsa o mantiene pulsado(s) el(los) siguiente(s) botón(es)... Unidad Control principal remoto — / SOURCE SOURCE VOL – / + • Ajusta el nivel de volumen. Disco de control (girar) —... -
Page 21: Preajuste Automático
Para escuchar la radio Ÿ ] “FM” o “AM” “ST” se enciende cuando se recibe una radiodifusión FM estéreo con una intensidad de señal suficiente. Mejora de la recepción FM [Sostener] ] <TUNER> ] <MONO> ] <MONO ON> Se consigue mejorar la recepción, pero se pierde el efecto estereofónico. -
Page 22: Escuchando Un Disco
Escuchando un disco ] “CD” Para detener la reproducción y expulsar el disco Si no extrae el disco expulsado en el lapso de 15 segundos, el disco será insertado automáticamente en la ranura de carga. Selección de una pista/carpeta Selecciona la carpeta de MP3/ [Pulse] Seleccionar la pista. -
Page 23: Conexión De Otros Componentes Externos
Conexión de otros componentes externos Puede conectar un componente externo al jack de entrada auxiliar en el panel de control (F-AUX) y/o en el lado trasero de la unidad (R-AUX). Ejemplos de uso de los componentes externos a través de los jacks de entrada auxiliar: Toma de Componente Elemento de... -
Page 24: Selección De Un Modo De Sonido Preajustado
Selección de un modo de sonido preajustado Podrá seleccionar un modo de sonido preajustado adecuado al género musical. FLAT = NATURAL = DYNAMIC = VOCAL BOOST = BASS BOOST = USER = (vuelta al comienzo) Durante la audición, podrá ajustar el nivel de tono del modo de sonido seleccionado. - Page 25 Opción del menú DIMMER SET AUTO : La pantalla se oscurece hasta el ajuste anterior al encender los faros del automóvil. * nivel de brillo seleccionado). / OFF : Se cancela (100% del nivel de brillo seleccionado). BRIGHTNESS DAY [ 31 ] / NIGHT [ 15 ] : Selecciona el nivel de brillo de la pantalla y la iluminación de los botones [00 —...
-
Page 26: Información Adicional
Opción del menú LOW POWER : VOLUME 00 – VOLUME 30 (Selecciónelo si la potencia máxima de GAIN * cada altavoz es inferior a 50 W, con el fin de evitar posibles daños en los altavoces.) / HIGH POWER : VOLUME 00 – VOLUME 50 SSM * Consulte la página 7. -
Page 27: Localización De Averías
(página 3) Si el mensaje no desaparece, consulte con su concesionario de equipos de audio para automóvil JVC o con una compañía que suministra tales kits. Reinicialice la unidad. (página 3) Verifique el ajuste <SRC SELECT>... -
Page 28: Uso De Dispositivos Bluetooth
Uso de dispositivos Bluetooth ® Para las operaciones Bluetooth, se deberá conectar el adaptador Bluetooth (KS-BTA100) (no suministrado) al jack de entrada auxiliar (R-AUX/BT ADAPTER) en la parte trasera de la unidad. (página 9) • Si desea más información, consulte también las instrucciones suministradas con el adaptador Bluetooth y el dispositivo Bluetooth. -
Page 29: Especificaciones
Especificaciones SECCIÓN DEL AMPLIFICADOR DE AUDIO Salida de potencia : 20 W RMS × 4 canales a 4 Ω y ≤ 1% THD+N Relación señal a ruido : 80 dBA (referencia: 1 W en 4 Ω) Impedancia de carga : 4 Ω (tolerancia de 4 Ω a 8 Ω) Respuesta de frecuencias : 40 Hz a 20 000 Hz Nivel/impedancia de salida de línea o salida... -
Page 30: Important Pour Produits Laser
Veuillez lire attentivement toutes les instructions avant d’utiliser l’appareil afin de bien comprendre son fonctionnement et d’obtenir les meilleures performances possibles. Précautions: Tout changement ou modification non approuvé par JVC peut annuler l’autorité de l’utilisateur d’utiliser l’appareil. IMPORTANT POUR PRODUITS LASER 1. -
Page 31: Panneau De Commande
Comment attacher/détacher le panneau de commande Comment réinitialiser votre appareil Vos ajustements préréglés sont aussi effacés. Comment forcer l’éjection d’un disque [Maintenez pressée] • Faites attention de ne pas faire tomber le disque quand il est éjecté. • Si cela ne fonctionne pas, essayez de réinitialiser l’autoradio. -
Page 32: Annulation Des Démonstrations Des Affichages
Annulation des démonstrations des affichages La démonstration des affichages entre en service si aucune opération n’est réalisée pendant environ 20 secondes. Mise sous tension de l’appareil. [Maintenez pressée] Réglage de l’horloge Mise sous tension de l’appareil. [Maintenez pressée] Choisissez <CLOCK>. Choisissez <CLOCK SET>. -
Page 33: Préparation De La Télécommande
Préparation de la télécommande Lorsque vous utilisez la télécommande pour la première fois, tirez sur la feuille isolante pour la retirer. Feuille isolante Pour Californie des États-Unis seulement: Cet appareil contient une pile-bouton CR au lithium qui contient du perchlorate—une manipulation spéciale peut être requise. -
Page 34: Opérations De Base
Opérations de base Fente d’insertion Capteur de télécommande • NE l’exposez PAS à la lumière directe du soleil. Retrait du panneau Quand vous appuyez ou maintenez pressées les touches suivantes... Appareil Télécommande principal / SOURCE SOURCE Molette de VOL – / + commande (tournez) Molette de... -
Page 35: Coute De La Radio
Écoute de la radio Ÿ ] “FM” ou “AM” “ST” s’allume lors de la réception d’une émission FM stéréo avec un signal suffisamment fort. Amélioration de la réception FM [Maintenez pressée] ] <TUNER> ] <MONO> ] <MONO ON> La réception est améliorée, mais l’effet stéréo est perdu. -
Page 36: Écoute D'un Disque
Écoute d’un disque ] “CD” Arrête de la lecture et éjection du disque Si le disque éjecté n’est pas retiré avant 15 secondes, il est réinséré automatiquement dans la fente d’insertion. Sélection d’une plage/dossier Choisit un dossier d’un disque MP3/WMA [Appuyez sur la touche] Sélection d’une plage. -
Page 37: Écoute D'un Autre Appareil Extérieur
Connexion d’autres appareils extérieurs Vous pouvez connecter un appareil extérieur à la prise d’entrée auxiliaire sur le panneau de commande (F-AUX) et/ou à l’arrière de l’appareil (R-AUX). Résumé de l’utilisation des appareils extérieurs par les prises d’entrée auxiliaire. Prise Appareil Élément de d’entrée extérieur... -
Page 38: Utilisation Des Menus
Sélection d’un mode sonore préréglé Vous pouvez sélectionner un mode sonore préréglé adapté à votre genre de musique. FLAT = NATURAL = DYNAMIC = VOCAL BOOST = BASS BOOST = USER = (retour au début) Pendant l’écoute, vous pouvez ajuster le niveau de tonalité... - Page 39 Article de menu DIMMER SET AUTO : Assombrit l’affichage au réglage précédent quand vous allumez les feux de la voiture. * ON : Assombrit l’affichage et l’éclairage des touches (50% du niveau de luminosité choisi). / OFF : Annule le réglage (100% du niveau de luminosité choisi). BRIGHTNESS DAY [ 31 ] / NIGHT [ 15 ] : Choisit le niveau de luminosité...
-
Page 40: Informations Complémentaires
Article de menu LOW POWER : VOLUME 00 – VOLUME 30 (Choisissez ce réglage si la puissance GAIN * maximum de chaque enceinte est inférieure à 50 W pour éviter tout dommage des enceintes.) / HIGH POWER : VOLUME 00 – VOLUME 50 SSM * Voir page 7. -
Page 41: Guide De Dépannage
(page 3) Si le message ne disparaît, consultez votre revendeur d’autoradio JVC ou la société qui fabrique les kits. Réinitialisez l’appareil. (page 3) Cochez le réglage <SRC SELECT> = <F-AUX / R-AUX>. (page 12) Assurez-vous d’utiliser une fiche mini stéréo recommandée... -
Page 42: Utilisation De Périphériques Bluetooth
Utilisation de périphériques Bluetooth ® Pour les opérations Bluetooth, il faut connecter l’adaptateur Bluetooth, KS-BTA100 (non fournis) à la prise d’entrée auxiliaire (R-AUX/BT ADAPTER) à l’arrière de cet appareil. (page 9) • Pour en savoir plus, référez-vous aussi aux instructions fournies avec l’adaptateur Bluetooth et le périphérique Bluetooth. -
Page 43: Spécifications
Spécifications SECTION DE L’AMPLIFICATEUR AUDIO Puissance de sortie : 20 W RMS × 4 canaux à 4 Ω et avec ≤ 1% THD+N Rapport signal sur bruit : 80 dBA (référence: 1 W pour 4 Ω) Impédance de charge : 4 Ω (4 Ω à 8 Ω admissible) Réponse en fréquence : 40 Hz à...
Need help?
Do you have a question about the GET0669-001A and is the answer not in the manual?
Questions and answers