Carrier Aquazone 50PEC09-18 Installation, Start-Up And Service Instructions Manual
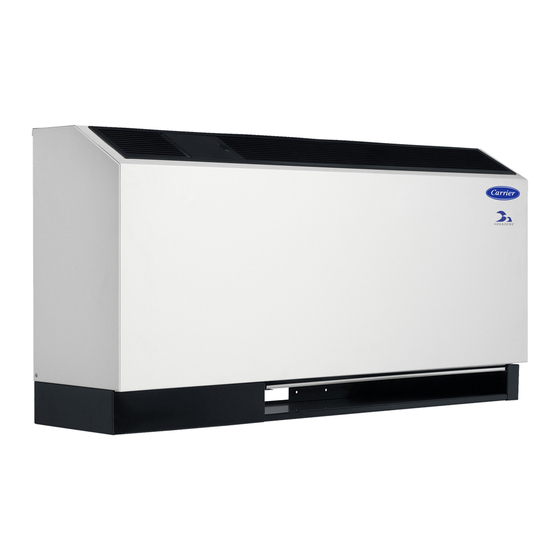
Water source heat pumps console unit with puron refrigerant (r-410a)
Hide thumbs
Also See for Aquazone 50PEC09-18:
- Installation, start-up and service instructions manual (60 pages) ,
- Product data (52 pages) ,
- Installation, start-up and service instructions manual (40 pages)
Table of Contents
Advertisement
Quick Links
Installation, Start-Up and Service Instructions
CONTENTS
SAFETY CONSIDERATIONS . . . . . . . . . . . . . . . . . . . . .1,2
GENERAL . . . . . . . . . . . . . . . . . . . . . . . . . . . . . . . . . . . . . . . . 2
INSTALLATION . . . . . . . . . . . . . . . . . . . . . . . . . . . . . . . . 2-10
Step 1 - Check Jobsite . . . . . . . . . . . . . . . . . . . . . . . . . . 2
Step 2 - Check Unit . . . . . . . . . . . . . . . . . . . . . . . . . . . . . 2
• UNIT PROTECTION
Step 3 - Mount Unit . . . . . . . . . . . . . . . . . . . . . . . . . . . . . 5
Step 4 - Wire Electrical Connections . . . . . . . . . . . . 5
Step 5 - Install Supply and Return Piping . . . . . . . 9
Step 6 - Install Condensate Piping . . . . . . . . . . . . . . 9
PRE-START-UP . . . . . . . . . . . . . . . . . . . . . . . . . . . . . . . .10,11
System Cleaning and Flushing . . . . . . . . . . . . . . . . . . 10
System Checkout . . . . . . . . . . . . . . . . . . . . . . . . . . . . . . . 10
FIELD SELECTABLE INPUTS. . . . . . . . . . . . . . . . . . . . 12
START-UP . . . . . . . . . . . . . . . . . . . . . . . . . . . . . . . . . . . . 12-14
Unit Start-Up/Cooling . . . . . . . . . . . . . . . . . . . . . . . . . . . 12
Operating Limits . . . . . . . . . . . . . . . . . . . . . . . . . . . . . . . . 12
Unit Start-Up/Heating . . . . . . . . . . . . . . . . . . . . . . . . . . . 12
Flow Regulation. . . . . . . . . . . . . . . . . . . . . . . . . . . . . . . . . 12
Antifreeze . . . . . . . . . . . . . . . . . . . . . . . . . . . . . . . . . . . . . . . 12
Cooling Tower/Boiler Systems . . . . . . . . . . . . . . . . . . 14
Heat Exchanger Well Systems . . . . . . . . . . . . . . . . 14
OPERATION . . . . . . . . . . . . . . . . . . . . . . . . . . . . . . . . . . . . . 14
Power Up Mode . . . . . . . . . . . . . . . . . . . . . . . . . . . . . . . . . 14
Programming Instructions . . . . . . . . . . . . . . . . . . . . . . 14
Units with Aquazone Complete C Control . . . . . . . 14
Units with Aquazone Deluxe D Control . . . . . . . . . . 14
SYSTEM TEST . . . . . . . . . . . . . . . . . . . . . . . . . . . . . .14,15
Retry Mode. . . . . . . . . . . . . . . . . . . . . . . . . . . . . . . . . . . . . . 14
LED Fault Indication. . . . . . . . . . . . . . . . . . . . . . . . . . . . . 15
Complete C Board Default Settings . . . . . . . . . . . . . . 15
SERVICE . . . . . . . . . . . . . . . . . . . . . . . . . . . . . . . . . . . . . 15-17
Unit Inspection . . . . . . . . . . . . . . . . . . . . . . . . . . . . . . . . . . 15
System Flushing . . . . . . . . . . . . . . . . . . . . . . . . . . . . . . . . 15
Water Coil . . . . . . . . . . . . . . . . . . . . . . . . . . . . . . . . . . . . . . . 16
Refrigerant System . . . . . . . . . . . . . . . . . . . . . . . . . . . 16
Condenser Cleaning . . . . . . . . . . . . . . . . . . . . . . . . . . . . 16
Condensate Pans . . . . . . . . . . . . . . . . . . . . . . . . . . . . . . . 16
Blower Motors . . . . . . . . . . . . . . . . . . . . . . . . . . . . . . . . . . 16
Compressor. . . . . . . . . . . . . . . . . . . . . . . . . . . . . . . . . . . . . 16
Safety Control Reset . . . . . . . . . . . . . . . . . . . . . . . . . . . . 16
Checking System Charge . . . . . . . . . . . . . . . . . . . . . . . 16
Manufacturer reserves the right to discontinue, or change at any time, specifications or designs without notice and without incurring obligations.
Catalog No. 04-53500102-01
Water Source Heat Pumps Console Unit
Page
Printed in U.S.A.
Form 50PEC-3SI
®
with Puron
Refrigerant (R-410A)
Refrigerant Charging. . . . . . . . . . . . . . . . . . . . . . . . . . . . 17
Air Coil Fan Motor Removal . . . . . . . . . . . . . . . . . . . . . 17
TROUBLESHOOTING . . . . . . . . . . . . . . . . . . . . . . . 17,18
Thermistor . . . . . . . . . . . . . . . . . . . . . . . . . . . . . . . . . . . . . . 17
START-UP CHECKLIST . . . . . . . . . . . . . . . . . . .CL-1, CL-2
IMPORTANT: Read the entire instruction manual before
starting installation.
SAFETY CONSIDERATIONS
Installation and servicing of air-conditioning equipment can
be hazardous due to system pressure and electrical components.
Only trained and qualified service personnel should install,
repair, or service air-conditioning equipment.
Untrained personnel can perform basic maintenance func-
tions of cleaning coils and filters and replacing filters. All other
operations should be performed by trained service personnel.
When working on air-conditioning equipment, observe precau-
tions in the literature, tags and labels attached to the unit, and
other safety precautions that may apply.
Improper installation, adjustment, alteration, service, mainte-
nance, or use can cause explosion, fire, electrical shock or other
conditions which may cause personal injury or property
damage. Consult a qualified installer, service agency, or your
distributor or branch for information or assistance. The qualified
installer or agency must use factory-authorized kits or accesso-
ries when modifying this product. Refer to the individual
instructions packaged with the kits or accessories when
installing.
Follow all safety codes. Wear safety glasses and work
gloves. Use quenching cloth for brazing operations. Have fire
extinguisher available. Read these instructions thoroughly and
follow all warnings or cautions attached to the unit. Consult
local building codes and applicable electrical codes for special
installation requirements.
Understand the signal words - DANGER, WARNING, and
CAUTION. DANGER identifies the most serious hazards
which will result in severe personal injury or death. WARNING
signifies hazards that could result in personal injury or death.
CAUTION is used to identify unsafe practices, which would re-
sult in minor personal injury or product and property damage.
WARNING
Electrical shock can cause personal injury or death. Before
installing or servicing system, always turn off main power
to system. There may be more than one disconnect switch.
Turn off accessory heater power if applicable.
Pg 1
8-14
Aquazone™
50PEC09-18
Page
Replaces: NEW
Advertisement
Table of Contents

Subscribe to Our Youtube Channel
Related Manuals for Carrier Aquazone 50PEC09-18


Summary of Contents for Carrier Aquazone 50PEC09-18
-
Page 1: Table Of Contents
Aquazone™ 50PEC09-18 Water Source Heat Pumps Console Unit ® with Puron Refrigerant (R-410A) Installation, Start-Up and Service Instructions Page CONTENTS Refrigerant Charging......17 Page Air Coil Fan Motor Removal . -
Page 2: General
1. Compare the electrical data on the unit nameplate with ordering and shipping information to verify that the cor- WARNING rect unit has been shipped. 2. Keep both the chassis and cabinet covered with the ship- DO NOT USE TORCH to remove any component. System ping carton until all plastering, painting, and finish work contains oil and refrigerant under pressure. - Page 3 fireproof material has not been completed, all due precautions IMPORTANT: Store units in an upright position at all must be taken to avoid physical damage to the units and con- times. Stack units a maximum of 3 units high. Use pallets tamination by foreign material.
- Page 4 LEFT HAND WATER 42.75 11.00 8.00 1.38 12.00 2.75 0.75 2.00 Water Water 1.00 19.56 Condensate 15.63 Water 13.75 13.50 5.00 1.75 3.38 1.63 RIGHT HAND WATER Disconnect Switch 0.75 42.75 11.00 4.88 8.00 2.75 0.75 Disconnect Switch 2.00 1.00 Water In Water Out 15.63...
-
Page 5: Step 3 - Mount Unit
conform to the Class II temperature limitations described in the Step 3 — Mount Unit NEC. 1. Unpack the unit from the shipping carton. Remove the Consult the unit wiring diagram located on the inside of the front cabinet by lifting up and away from the backplate. compressor access panel to ensure proper electrical hookup. -
Page 9: Step 5 - Install Supply And Return Piping
Table 2 — Electrical Data — 50PEC Units COMPRESSOR BLOWER 50PEC VOLTAGE MIN CIRCUIT MAX FUSE/ UNIT SIZE V-PH-Hz AMPS HACR 115-1-60 45.6 0.10 10.9 208/230-1-60 22.2 0.10 265-1-60 18.8 0.10 115-1-60 58.4 0.10 14.1 208/230-1-60 27.9 0.10 265-1-60 22.2 0.10 115-1-60 12.7... -
Page 10: Pre-Start-Up
Though horizontal runs of condensate piping are usually too and return connections on each unit. Refill the system and short to pose problems, horizontal runs should be pitched at bleed off all air. least 1 inch for every 10 feet of piping. Avoid low spots or un- 10. - Page 11 Table 4 — Water Quality Guidelines CLOSED CONDITION HX MATERIAL* OPEN LOOP AND RECIRCULATING WELL** RECIRCULATING† Scaling Potential — Primary Measurement Above the given limits, scaling is likely to occur. Scaling indexes should be calculated using the limits below. pH/Calcium pH <...
-
Page 12: Field Selectable Inputs
POWER SUPPLY — A voltage variation of ± 10% of name- FIELD SELECTABLE INPUTS plate utilization voltage is acceptable. Jumpers and DIP (dual in-line package) switches on the 50PEC UNIT STARTING CONDITIONS — The 50PEC control board are used to customize unit operation and can be units will start and operate at an ambient temperature of 50 F configured in the field. - Page 13 the amount of antifreeze to use. Antifreeze concentration Once antifreeze is selected, the JW3 jumper (FP1) should should be checked from a well mixed sample using a hydrome- be clipped on the control to select the low temperature ter to measure specific gravity. (antifreeze 10 F) set point to avoid nuisance faults.
-
Page 14: Cooling Tower/Boiler Systems
These systems Cooling Tower/Boiler Systems — typically use a common loop maintained at 60 to 90 F. Carrier Units with Aquazone Deluxe D Control recommends using a closed circuit evaporative cooling tower STANDBY/FAN ONLY — The compressor will be off. The... -
Page 15: Led Fault Indication
Two LED indicators are pro- LED Fault Indication — IMPORTANT: When a compressor is removed from this vided. The GREEN power LED indicates 18-30 VAC present unit, system refrigerant circuit oil will remain in the com- at the board. pressor. To avoid leakage of compressor oil, the refrigerant lines of the compressor must be sealed after it is removed. -
Page 16: Water Coil
Proper water treatment can minimize tube fouling and pitting. If such conditions are anticipated, water treatment anal- WARNING ysis is recommended. Refer to the Carrier System Design Man- ual, Part 5, for general water conditioning information. When replacing the compressor contactor or lockout relay... -
Page 17: Refrigerant Charging
4. Read liquid line temperature on thermometer, then Motor power wires need to be disconnected from motor subtract from bubble point temperature. The difference terminals before motor is removed from unit. equals subcooling temperature. 1. Shut off unit main power supply. 2. - Page 18 © Carrier Corporation 2014 8733937869 Manufacturer reserves the right to discontinue, or change at any time, specifications or designs without notice and without incurring obligations. Catalog No. 04-53500102-01 Printed in U.S.A. Form 50PEC-3SI Pg 18 8-14 Replaces: NEW...
-
Page 19: Start-Up Checklist
50PEC UNIT START-UP CHECKLIST CUSTOMER:___________________________ JOB NAME: _______________________________________ MODEL NO.:___________________________ SERIAL NO.:______________ DATE: ______________ I. PRE-START-UP DOES THE UNIT VOLTAGE CORRESPOND WITH THE SUPPLY VOLTAGE AVAILABLE? (Y/N) HAVE THE POWER AND CONTROL WIRING CONNECTIONS BEEN MADE AND TERMINALS TIGHT? (Y/N) HAVE WATER CONNECTIONS BEEN MADE AND IS FLUID AVAILABLE AT HEAT EXCHANGER? (Y/N) HAS PUMP BEEN TURNED ON AND ARE ISOLATION VALVES OPEN? (Y/N) - Page 20 (DEG F) *Use 500 for water, 485 for antifreeze. 8733937869 © Carrier Corporation 2014 Manufacturer reserves the right to discontinue, or change at any time, specifications or designs without notice and without incurring obligations. Catalog No. 04-53500102-01 Printed in U.S.A.
Need help?
Do you have a question about the Aquazone 50PEC09-18 and is the answer not in the manual?
Questions and answers