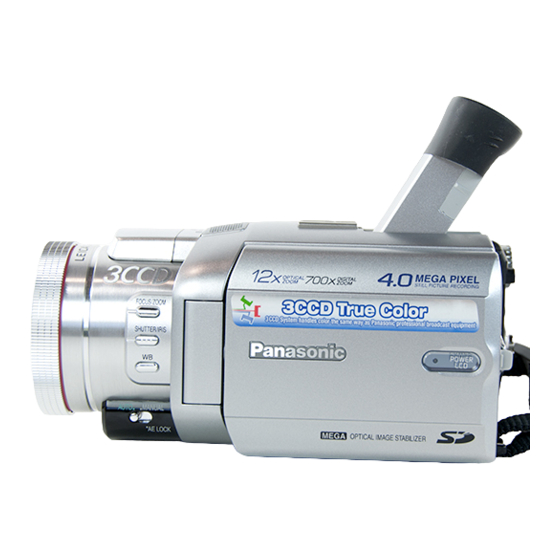
Panasonic PV-GS400 Operating Instructions Manual
Digital video camcorder
Hide thumbs
Also See for PV-GS400:
- Product snapshot (1 page) ,
- Operating instructions manual (206 pages) ,
- Operating instructions manual (102 pages)
Table of Contents
Advertisement
For USA assistance, please call: 1-800-211-PANA(7262) or, contact us via the web at: http://www.panasonic.com/contactinfo
For Canadian assistance, please call: 1-800-561-5505 or visit us at www.panasonic.ca
Operating Instructions
Before attempting to connect, operate or adjust this product,
please read these instructions thoroughly.
Spanish Quick Use Guide is included.
Guía para rápida consulta en español está incluida.
Mini
Digital Video Camcorder
PV-GS400
Model No.
LSQT0801 A
Advertisement
Table of Contents

Related Manuals for Panasonic PV-GS400


Summary of Contents for Panasonic PV-GS400
-
Page 1: Operating Instructions
Spanish Quick Use Guide is included. Guía para rápida consulta en español está incluida. Mini For USA assistance, please call: 1-800-211-PANA(7262) or, contact us via the web at: http://www.panasonic.com/contactinfo For Canadian assistance, please call: 1-800-561-5505 or visit us at www.panasonic.ca LSQT0801 A... -
Page 2: Quick Guide
Before Use ª Inserting a Card Quick Guide Slide the [OPEN] Lever 1 to open the Card Attach the Battery to the AC Adaptor and Slot Cover 2. charge it. OPEN While holding the Memory Card with its cut corner on top 3, insert it into the Card Slot. ≥Before use, fully charge the Battery. - Page 3 Before Use ª Recording a Still Picture on a Card ª Playing Back a Card (Photoshot) It plays back files recorded on a Card. Set the Mode Dial to Picture Playback Mode. Set the Mode Dial to Card Recording Mode. Press the [PHOTO SHOT] Button.
-
Page 4: Recording Mode About Recording
Recording Mode Recording Mode Recording on a Tape Set the [OFF/ON] Switch (48) to [ON]. About Recording ≥The [POWER] Lamp (46) lights up. When recording pictures on a tape, set the Mode (46) POWER Dial to Tape Recording Mode [ When recording still pictures on a card, set the Mode Dial to Card Recording Mode [ When recording with the... -
Page 5: Recording Yourself
Recording Mode ª Finding the End of Recording ª Progressive Photoshot (Blank Search Function) When the [æ] Indication is displayed, The Blank Search Function aids you in locating Progressive Photoshot Function works. the end of the recording on the Cassette quickly. You can record still pictures with higher quality by Set [TAPE RECORDING MENU] or using this function. -
Page 6: Recording A Still Picture On A Card (Photoshot)
Recording Mode (47) (52) Press the Recording Start/Stop Button Press the [PHOTO SHOT] Button halfway. (52) PHOTO SHOT (47) ≥The aperture value and gain are fixed and the ≥For other notes concerning this item, see -74- Camcorder automatically focuses on the subject. - Page 7 Recording Mode ª RapidFire Consecutive Photoshot Selecting the Size of Photoshot Images Tape Recording Mode: The still pictures can be recorded on a Card at Set [TAPE RECORDING MENU] >> [CARD] regular intervals. ≥Available only with [640k480] picture size. >> [PICTURE SIZE] >> [1280k960] or [640k480].
-
Page 8: Quick Start
Recording Mode ≥To cancel the Self-timer Recording while the Quick Start ] Indication is blinking, press the [MENU] By pressing the [QUICK START] Button (45) , the Button. Camcorder will be ready for recording in ≥You can also use the RapidFire Consecutive approximately 1.7 seconds after the Camcorder is Photoshot. -
Page 9: Digital Zoom Function
Recording Mode ª To Take Close-up Shots of Small Digital Zoom Function Subjects This function is useful when you want to record (Macro Close-up Function) close-up shots of subjects located beyond a When the zoom magnification is 1k, the normal zoom range of 1k to 12k magnification. Camcorder can focus on a subject that is as close With the Digital Zoom Function, you can select a as approximately 1.6 inches (4 cm) from the... -
Page 10: Fade In/Out Functions
Recording Mode (47) Press the Recording Start/Stop Button Fade Out (52) or [PHOTO SHOT] Button to start Fade Out causes images and sounds to recording. disappear gradually, leaving a black screen at the end of a scene. PHOTO SHOT (52) (47) To Cancel Image Stabilizer Function Set [TAPE RECORDING MENU] or... -
Page 11: Magicpix Functions
Recording Mode MagicPix Functions Soft Skin Function Advanced MagicPix Function This enables you to record skin colors in a softer This function allows you to record color images tone. In order to get the best result, avoid brightly in a dark place. background colors similar to the skin color of the Press the [ADVANCED MAGICPIX] Button subject. -
Page 12: Wide/Pro-Cinema Function
Recording Mode ≥Black bars appear at the top and bottom of Wide/Pro-Cinema Function the screen. You can record images compatible with a wide-screen format TV which has a Video CINEMA terminal. The image looks vertically stretched on the screen of the Camcorder. To Cancel the Cinema Mode ≥The aspect ratio of the playback images in the Set [TAPE RECORDING MENU] >>... -
Page 13: Recording In Natural Colors
Recording Mode To Resume Automatic Adjustment 5) [º] Surf & Snow Mode ≥For recording in glaring surroundings, such Press the [WB] Button repeatedly until none of as ski slopes, beaches, etc. the White Balance Mode Indications ([1], [z], [{]) appear. Or, set the To Cancel the Program AE Function [AUTO/MANUAL/AE LOCK] Switch to [AUTO]. -
Page 14: Manual Shutter Speed Adjustment
Recording Mode To Resume Automatic Adjustment Manual Shutter Speed Adjustment Press the [WB] Button repeatedly until none of Useful for recording fast-moving subjects. the White Balance Mode Indications ([1], [z], Set the [AUTO/MANUAL/AE LOCK] Switch [{]) appear. Or, set the (31) to [MANUAL]. -
Page 15: Manual Iris Adjustment
Recording Mode Manual Iris Adjustment Manual Focus Adjustment (F Number) Focus can be adjusted manually for recording in a You can use this function when the screen is too situation where auto focus may not function well. bright or too dark. Set the [AUTO/MANUAL/AE LOCK] Switch Set the [AUTO/MANUAL/AE LOCK] Switch (31) -
Page 16: Advanced Functions
Recording Mode ≥To prevent recording of overexposed, whitish Set the [AUTO/MANUAL/AE LOCK] Switch (31) to [AE LOCK]. pictures, manually adjust the iris/gain ( ) so -38- that the Zebra Pattern disappears. The recorded picture may become dark. ≥The Zebra Pattern is not recorded. AUTO MANUAL (31) -
Page 17: Using The Auto Pop-Up Flash
Recording Mode Using the Auto Pop-up Flash MIC LEVEL SETUP MODE AUTO The Auto Pop-up Flash enables you to record still 1MNL(AGC) MNL(NO-AGC) pictures in a dark place. (dB)-30 GAIN |||||||||----- Repeatedly press the [ß] Button (dB)-30 0 +6 LEVEL ..... -
Page 18: Digital Effect Functions
Recording Mode Adjusting Brightness of the Video Flash Digital Effect Functions Set [TAPE RECORDING MENU] or This Camcorder is equipped with Digital Effect [CARD RECORDING MENU] >> [CAMERA] >> Functions that add special effects to the scene. [FLASH LEVEL] >> a desired Flash Level. ≥Normally, set it to [NORMAL]. - Page 19 Recording Mode ª Multi-Picture Mode Digital Effects 2 [EFFECT2] Strobe Multi-Picture Mode: 11) NEGA 12) SEPIA 14) SOLARI 13) B/W You can capture and record 9 consecutive small still pictures. Manual Multi-Picture Mode: 11) Negative Mode [NEGA] ≥The colors of the recorded image are inverted as seen in a negative.
- Page 20 Recording Mode ª Picture-in-Picture Mode ª Wipe Mode and Mix Mode Wipe Mode: Like drawing a curtain, the still picture of the last recorded scene gradually changes to the moving image of a new scene. You can display a sub-screen (still picture) inside the screen.
-
Page 21: Adjusting The Sound Volume
Playback Mode ª Adjusting the Sound Volume Playback Mode To adjust the volume, push the [`VOL/JOG_] Playing Back a Tape (51) Lever to display the [VOLUME] Indication. Push the [`VOL/JOG_] Lever towards [T] to The recorded scene can be played back increase the volume or push the [`VOL/JOG_] immediately after the recording. -
Page 22: Still Playback/Still Advance Playback
Playback Mode ª Variable Speed Search Function Scenes recorded in the LP Mode are played back at approximately 1/3rd of the normal speed. The speed of Cue Playback or Review Playback can be varied. To Resume Normal Playback (19) During playback, press the [1] Button Press the [1] Button (84) ≥The [1k!] Indication appears. -
Page 23: Connecting Computer And Camcorder
With a PC ≥A message indicating a conflict between ≥Appropriate driver to recognize Camcorder is versions may be displayed during the automatically installed by Windows Plug and installation. This will not cause a problem. Play when connected for the first time. ≥After the USB Driver is installed and USB Simply click [Yes] to proceed with the installation. - Page 24 With a PC Graphic display: required. Click [Yes] and continue with High Color (16 bit) or more installation. ≥After “DirectX 9.0b” is installed, the computer Desktop resolution of 800k600 pixels or more Communication Speed: will restart. ≥Do not remove the CD-ROM. 56 kbps or faster is recommended ≥Installation may take a little while.
- Page 25 Panasonic Consumer Electronics Company, Division of Matsushita Electric Corporation of America One Panasonic Way, Secaucus, NJ 07094 Panasonic Sales Company (“PSC”) Division of Matsushita Electric of Puerto Rico, Inc. Ave. 65 de Infantería, Km. 9.5, San Gabriel Industrial Park, Carolina, Puerto Rico 00985 Panasonic Canada Inc.
Need help?
Do you have a question about the PV-GS400 and is the answer not in the manual?
Questions and answers