Table of Contents
Advertisement
Quick Links
Advertisement
Table of Contents

Subscribe to Our Youtube Channel
Related Manuals for Pearl Red Box RBM 20


Summary of Contents for Pearl Red Box RBM 20
- Page 1 R B M O W N E R S M A N U A L...
-
Page 2: Table Of Contents
INTRODUCTION ..........................CONNECTION DIAGRAM ......................... GETTING STARTED ........................RESETTING THE MODULE TO FACTORY DEFAULTS ................CHECK FOR UPDATES ........................RIDE CYMBAL SETUP ........................DEACTIVATE WRITE PROTECTION ....................THE BASICS ..........................NAVIGATING MENUS & ADJUSTING SETTINGS .................. KITS ............................VOICES: LAYERS & INSTRUMENTS ....................VOLUME ............................ -
Page 3: Introduction
INTRODUCTION Welcome to the Pearl Redbox drum module! The RBM-20 includes lots of high-fidelity drum, percussion, and accompaniment sounds giving you the sonic realism of acoustic drums but with the convenience and flexibility of electronic drums. This manual details all the RBM-20 module’s features. If you want to learn fast so you can dive right into playing, refer to the included Quickstart Guide. -
Page 4: Getting Started
GETTING STARTED Please read the following instructions to set up your RBM-20 module for its first use! RESETTING THE MODULE TO FACTORY DEFAULTS If you ever need to return the module to its original default factory settings, press and hold the EXIT and SAVE buttons simultaneously while turning it on. CHECK FOR UPDATES Since the initial release of this module, we may have released new firmware or sound ROM files. -
Page 5: Deactivate Write Protection
DEACTIVATE WRITE PROTECTION Out of the box, the RBM-20 module is write-protected, so you will be unable to save any changes you make to the Kits, Instruments, Sequences, etc. To turn write protection off: 1. Press UTILITIES. 2. Press SYS (F4). 3. -
Page 6: Kits
KITS The RBM-20 module includes 100 Preset Kits and 100 empty User Kits. A Kit is a set of sounds that you can select in the module that will be triggered by your drums when you play them. The Preset Kits come preprogrammed so you can start playing with premium sounds right away. -
Page 7: Sequences
• Adjust the levels of drum sounds with the MIXER: Slide the faders on the module’s MIXER. Use the A/B SELECT button to toggle between the two banks of sounds. Please note the module’s trigger sensitivity, threshold, velocity curve settings can also affect the dynamics of your performance. -
Page 8: Utilities
WARNING: 3. MAIN OUT – Use 1/4” TS cables to connect these outputs to an Use only the included Pearl amplifier or speaker system. The volume of these outputs is controlled by the VOLUME knob on the top panel. -
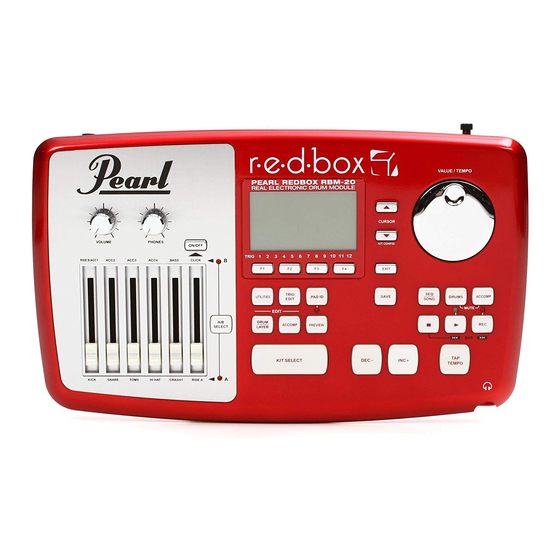
Page 9: Top Panel Features
TOP PANEL FEATURES 21 22 23 14 15 16 24 25 17 18 19 1. VOLUME – Adjusts the volume level of the MAIN OUT. 2. PHONES – Adjusts the volume level of the PHONES OUTPUT on the module’s front panel. The PHONES volume is independent of the module’s VOLUME. 3. -
Page 10: Kits, Voices, Accompaniment & Instruments
18. EDIT ACCOMP – Press this button to adjust the settings for your Accompaniment. The adjustable parameters will be shown in the LCD. 19. PREVIEW – Press this velocity-sensitive button to preview the sound of the current trigger. This can be useful when programming the RBM-20 if it is not connected to your drum kit, if it is not convenient to strike the pads, etc. -
Page 11: Editing Instruments In A Kit
EDITING INSTRUMENTS IN A KIT 1. Press KIT SELECT to go to the Main Screen. 2. Press DRUM/LAYER. The top of the screen will show the number and name of the Kit whose Instruments (drum voices) you will be editing. 3. -
Page 12: Editing Voice & Accompaniment Parameters
Instrument changes within or between the BASS and SYN BASS Categories may sometimes be desirable – the bass will have a different tone or quality while the bass line itself (the notes you hear) remains the same. However, if you edit the Instruments in the FX or HIT GROUPS Categories, it may dramatically change the way a Sequence sounds if it uses that Kit. - Page 13 • LVL (F2, 1st page): • Level: The volume level for the selected Layer (01-99 or “OFF”). • Pan: The panning for the selected Layer (“L50” to “MID” to “R50”). • Attack: The volume level of the initial attack of the note (00-99). This parameter is only available when editing Accompaniment.
-
Page 14: Editing Midi Parameters
• OTHR (F3, 2nd page): • Output: The output through which the Voice or Accompaniment will be sent. When “MAIN” is selected, the Voice or Accompaniment will be sent out of the MAIN OUT. When “AUX” is selected, the Voice or Accompaniment will be sent out of the AUX OUT. Note: If your UTILITIES Menu setting for the “Output”... -
Page 15: Editing Effects Parameters
MIDI • MIDI Chan: The MIDI channel over which the trigger will transmit MIDI messages. • MIDI Note: The MIDI note that will be transmitted. The number is the MIDI Note number; the corresponding musical note is shown next to it. (Note: The MIDI note for the hi-hat and ride cymbals is fixed and can not be reassigned.) •... - Page 16 CHORUS: A chorus effect is produced by adding a slightly delayed and slightly pitchshifted “wet” signal to the original (“dry”) signal, producing a sound with a depth similar to that of a string section or choir. The RBM-20’s chorus effects have the same editable parameters. Mono Chorus 1: Traditional chorus effect.
- Page 17 Damp (dampening): The amount of low- and high-frequency dampening of the echo. At negative values, the soundof the echo gets progressively duller, which is the most “natural” echo effect. This is also useful for simulating tape echo. At positive values, the sound of the echo gets progressively thinner.
-
Page 18: Kit Select Setup
c. COMP (compression) • Type: The kind of compression applied. To disable the dynamic processor on the Kit, select “OFF.” • Compress (compression): The compression ratio applied to the signal from the Kit. • Out Level (output level): The output level of the compressor. -
Page 19: Sequences
• RESTORE (F3 or F4): • Restore: Returns the Kit to its original factory settings. Any edits you made to its Instruments, Accompaniment, etc. will be discarded. To restore the original settings, press (F1 or F2). To cancel, press EXIT. SEQUENCES A Sequence is a recorded pattern stored in the RBM-20 module that includes drums and Accompaniment. -
Page 20: Recording Sequences
Note: If the Tempo field of the UTILITIES Menu’s main page is set to “GLOBAL,” the letter “G” will be shown. If the Clock In field of the UTILITIES Menu’s MIDI page is set to “RECEIVE,” the letter “E” will be shown. •... -
Page 21: Editing Sequences' Accompaniment
5. You can use the following controls to edit your Sequence in this screen: • CURSOR UP / DOWN scrolls up or down, allowing you to view other parts of the editing grid. • You can move through the Sequence in several ways: •... -
Page 22: Setting Up The Click Track
5. You can use the following controls to edit your Sequence in this screen: • You can move through the Sequence in several ways: • by bar: Press and hold STOP and press either PLAY or RECORD to step through the Sequence bar by bar. •... -
Page 23: Editing Quantization Settings
• #Bars: The number of bars (2-16) that will be counted by the click track before the module actually begins recording. When set to “OFF,” the Sequence will begin recording as soon as you press the module’s REC button with no count-in. When set to “NOTE ON,” the Sequence will begin recording from the first note that is sent to it (e.g., when you strike the first trigger, the Sequence will immediately start to record) with no count-in. -
Page 24: Storing & Copying Data
STORING & COPYING DATA The RBM-20 module will “remember” changes to your Kit, Sequence, or UTILITIES settings during a single session, but you will lose changes you have made once you turn the module’s power off. To save your settings so you can recall them in future sessions, you need to “store” them accordingly. NAMING When storing or copying Kits or Sequences, you can press NAME (F1) to enter a new name for the selected Kit or Sequence. -
Page 25: Copying Instruments
COPYING INSTRUMENTS This page allows you to copy an Instrument from one Kit to an Instrument in another Kit. (You can also copy it to the same Kit, which effectively stores that Instrument in that Kit.) Use the CURSOR UP / DOWN buttons to select the field you want to edit, and use the DEC- / INC+ buttons or VALUE / TEMPO DIAL to select a new entry in that field. -
Page 26: Storing Trigger Settings
STORING TRIGGER SETTINGS Any changes you make to the parameters in the Trig. Edit Menu will remain for the current session but will return to their defaults if you turn off the module. We recommend storing your settings when you change them so you can use them in future sessions. To store Trig. -
Page 27: Triggering Parameters
4. When you have finished making your edits, you can press EXIT or any button that will enter another screen -e.g., KIT SELECT, UTILITIES, etc. Your edits will remain for that session (i.e., until you turn off the module). TRIGGERING PARAMETERS The TRIG page of the Trig. -
Page 28: Velocity Curve
VELOCITY CURVE The CURV page lets you set the velocity curve for the triggers, which determines how a sound’s volume is affected by how hard you strike it – that is, how responsive the triggers’ dynamics are to changes in your playing. -
Page 29: Hi-Hat Calibration
HI-HAT CALIBRATION The Hi-hat calibration is pre-set at the factory with the TRIM settings set at OPEN = 75 and CLOSED = 12 for great playability out-of-the-box. However, if you want to customize your hi-hat Pedal (Side View) Open settings or are using a different Hi-hat controller, Closed you can calibrate the Hi-hat as follows. -
Page 30: Utilities Menu
1. Press TRIG EDIT to access the trigger settings. 2. Make sure PAD ID is activated (the LED should be lit). 3. Strike a trigger on your electronic drum kit whose settings you want to adjust. The name of the trigger will be displayed at the top of the module’s LCD. 4. - Page 31 MEASURE (F1) 1. Press UTILITIES to enter the main UTILITIES Menu. 2. Press CLIK (F1) to access the click settings. The first page to appear will be MEAS (F1). 3. Use CURSOR UP / DOWN to move through the menu items and DEC- / INC+ or the VALUE / TEMPO DIAL to adjust the settings: •...
-
Page 32: Midi (F2)
3. Press OUT (F4) to access the click output settings. 4. Use DEC- / INC+ or the VALUE / TEMPO DIAL to adjust the settings: • OutAssign: This setting lets you assign the output through which the click sound will be sent. When set to “MAIN,”... -
Page 33: Trig (F3)
• Prog Chng: Determines if the module will send out Program Change messages to external MIDI devices. When set to “NOT SENT” (the default), the module will not send any Program Change messages. When set to “SENT,” the module will send Program Change messages to a connected MIDI device. •... - Page 34 1. Press UTILITIES to enter the main UTILITIES Menu.1). 2. Use CURSOR UP / DOWN to move through the menu items: a. All Memory: All of the module’s memory that can be saved will be saved as a SysEx file. This includes your trigger settings, Kits, and Sequences.
-
Page 35: Updating The Module
UPDATING THE MODULE To update the module, follow these steps: Note: 1. If you have not done so already, download the Third party sound ROMs are also Redbox Updater Application from www.redboxsoundshop.com considered updates and can be (under the Customer Support tab.) loaded to the RBM-20 module 2. -
Page 36: Using The Rbm-20 To Trigger Sounds From A Software Drum Module
Using the RBM-20 to trigger sounds from a software drum module: Note: These are just recommended settings. You may configure the RBM-20’s MIDI settings however best suits your performance 1. Connect the module’s USB port to your computer with needs. See the MIDI section of the a standard USB cable. -
Page 37: Using An External Midi Device With The Rbm-20'S Sound Library
Using an external MIDI device with the RBM-20’s sound library: 1. Connect the RBM-20’s MIDI IN port to your external device’s MIDI OUT port using a standard MIDI cable. Note: 2. Press UTILITIES to access the module’s UTILITIES Menu. These are just recommended settings. 3. -
Page 38: Midi Implementation Chart
MIdI Implementation Chart Transmit/Export Recognize/Import Remarks 1. Basic Information Drums: 10 (default) MIDI channels 1-16 1-16 Accomp: 1 (default) Drums: 28-91 Note numbers 0-127 Accomp: 0-127 *Used for selecting Program change 0-99 0-99* active kit *0: Kits 0-99, 1: Kits Bank Select response? Yes* 100-199... -
Page 39: Rbm-20 Kits
RBM-20 Kits 1Up 2Down GreenEyed ThundaCrak Heartland SnareYaGo Doubt N It StudioCity VintageMod ShuffEnuff NowMetal EastrnTrip Pop Roxx ShoTime Music Row CariBeing ModJazz TurnTable Funk Wave Picante TranzDance Fuse On 80sMonster BoardTape Fat 70’s Wonder Gig 9Inch Nat Geo NashVegas Arena Live Funk Broz HoodHop... - Page 40 R B M - 2 0 I N S T R U M EN TS T OMS K IC KS Ambient Rock Big Butt 6plyMpl14x14 Brch Mute 14 Piano Rock Country 6plyMpl10x8 BrchPinStp14 Big Smack Quarter Head 6plyMpl12x8 Mpl Mute 16” Crunch Blastbeat Hard Rock 2...
-
Page 41: Rbm-20 Instruments
RB M - 2 0 I N S T R U M E N T S C R A SH ES R I D E S HI -H AT S Big Crash BosAntiq 20” Z K Thin 22” H Xtreme 17” SFusion 13”... - Page 42 P E R CU S S I ON 2way Cowbell LrgTriangleO TimbaleHiRim Steel Pan G3 Agogo Maracas TimbaleLoRim Xylo Agogo Hi Nagara TmbourneMte1 Car Crash Agogo Lo NativeAmrcan TmbourneMte2 CarHornLong Bead Shaker Finger Snap TmbrmFngrMte CarHornShort Block 1 Oil Can TmbrmFngrOpn Car Skid Block 2...
- Page 43 H I T S A Gtr Chk 1 Blues Gtr 10 StankyClav 5 HipHp1 Syn04 Jz GtrHrn A FusnHrn4th3 A Gtr Chk 2 Blues Gtr 11 StankyGtr 01 HipHp1 Vox01 Jz GtrHrn Bb FusnHrn4th4 A Gtr Chk 3 Blues Gtr 12 StankyGtr 02 HipHp1 Vox02 Jz GtrHrn C...
- Page 44 Copyright 2010 Pearl Corporation. All rights reserved...
Need help?
Do you have a question about the Red Box RBM 20 and is the answer not in the manual?
Questions and answers