
Related Manuals for Digital Monitoring Products XT30


Summary of Contents for Digital Monitoring Products XT30
-
Page 2: Silencing An Alarm
You can silence the trouble tone by pressing any key. This only silences the keypad and does not correct the condition that originally caused the problem. © 2009 Digital Monitoring Products, Inc. Information furnished by DMP is believed to be accurate and reliable. -
Page 3: Table Of Contents
XT Series User’s Guide ™ for XT30/XT50 Series Panels Table of Contents Section Page Section Page Silencing an Alarm ......Inside Front Cover Home/Away System Disarming ........18 Keypad Shortcut Keys ............ 19 Introduction ..............1 About Your Security System ..........1 User Menu ...............21... - Page 4 System Monitor Event Displays ........37 Wireless Jamming Event Displays ........37 Wireless Trouble Event Displays ........37 Appendix B ..............38 DMP Wireless Description ..........38 Appendix C ..............39 User’s Guide ..............39 Entering User Names ............ 41 XT30/XT50 User’s Guide...
-
Page 5: Introduction
The keypad provides a simple User Menu containing all of the functions you need to fully operate your system such as changing the time of day or a personal user code. XT30/XT50 User’s Guide... -
Page 6: Emergency Evacuation Plans
A fire alarm system installation, with smoke and carbon authorities. Never enter a building to look for someone. monoxide detectors in each room, can greatly decrease your risk of loss or injury. XT30/XT50 User’s Guide... -
Page 7: Dmp Keypads
F R I 2 51 A A M Backlit Logo and Proximity Antenna COMMAND Key Logo Back Arrow Key Icon Data Entry Digit keys Three Panic Icons Back Arrow Key COMMAND Key Thinline™/Aqualite™ Keypad Clear Touch™ Keypad Introduction XT30/XT50 User’s Guide... -
Page 8: The Select Keys
Keypads, when instructed to press the first Select key, touch Select Area 1; the second Select key touch Select Area 2; third Select key touch Select Area 3; and the fourth Select key touch Select Area 4. XT30/XT50 User’s Guide Introduction... -
Page 9: Panic Functions
Panic alarm report to the central station. Note: The 7/0 Panic Function is not available on Clear Touch™ or Thinline™ Icon keypads. Police Emergency Fire Thinline™/Aqualite™/Thinline™ Icon Keypad Panic Keys With Shaded Buttons To Indicate Police Panic Keys Introduction XT30/XT50 User’s Guide... -
Page 10: Common Keys On All Keypads
At SET VOLUME LEVEL, use the left Select key to lower the keypad volume. Use the right Select key to raise the volume. On Thinline™ Icon Series keypads, enter the desired speaker volume level from the range of off (0) to maximum (8). XT30/XT50 User’s Guide Introduction... -
Page 11: Special Keypad Tones
Your system will silence the tone as soon as the first user code digit key is pressed. If a valid user code is not entered within 5 seconds or an invalid user code is entered, the prewarn tone begins sounding again. Introduction XT30/XT50 User’s Guide... -
Page 12: Dmp Wireless
Also, your system may signal for the button press if another be pre-programmed at installation to send an Abort signal to the button is pressed too soon. Central Station. Refer to the Introduction section. XT30/XT50 User’s Guide Introduction... -
Page 13: Email/Cell Phone Messages
TEST IN PROGRESS Fire, panic, and other 24-hour devices are always turned on and do The system is currently being tested by an installation or service not need to be armed. technician. Introduction XT30/XT50 User’s Guide... -
Page 14: Central Station Monitoring
A 24-hour zone is not turned on or off by arming or disarm ing your followed by the COMMAND key when the keypad displays the Status system. Some examples of 24-hour zones are fire zones, panic zones, and temperature control zones. List. XT30/XT50 User’s Guide Introduction... - Page 15 If the open condition is not corrected, an alarm and exit error is reported to the central station. The Exit Error feature allows the central station to acknowledge the arming error without dispatching the police on a false alarm. Introduction XT30/XT50 User’s Guide...
-
Page 16: Arming And Disarming
ON or SLEEP SYSTEM ON if only selected areas are arming. Regardless of which mode is programmed, much of the operation is similar. Throughout this guide, any differences between the systems are noted for your convenience. XT30/XT50 User’s Guide Arming and Disarming... -
Page 17: Key Fob Arming
LOCAL ALARM ONLY before displaying the armed message. Arming Report: Your system may be pre-programmed at installation to send arming or zone bypass reports to a central station. Arming and Disarming XT30/XT50 User’s Guide... -
Page 18: Area System Disarming
7d. Select STOP to stop the system from arming. Correct the armed period. All burglary zones are then disarmed and any bypassed zones are automatically reset. the zone problem(s) and return to step 1. XT30/XT50 User’s Guide Arming and Disarming... -
Page 19: All/Perimeter System Arming
5. After all areas have displayed, any alarms or communication Arm Perimeter — Press 6 for 2 seconds. problems that occurred during the armed period are shown. Arm All— Press 1 for 2 seconds. 6. If areas disarmed, keypad displays ALL SYSTEM OFF. Arming and Disarming XT30/XT50 User’s Guide... -
Page 20: All/Perimeter System Disarming
8. You can select INSTNT while EXIT: ## INSTNT displays to sta tion. immediately arm all zones and make them instant. The XT30/XT50 User’s Guide Arming and Disarming... -
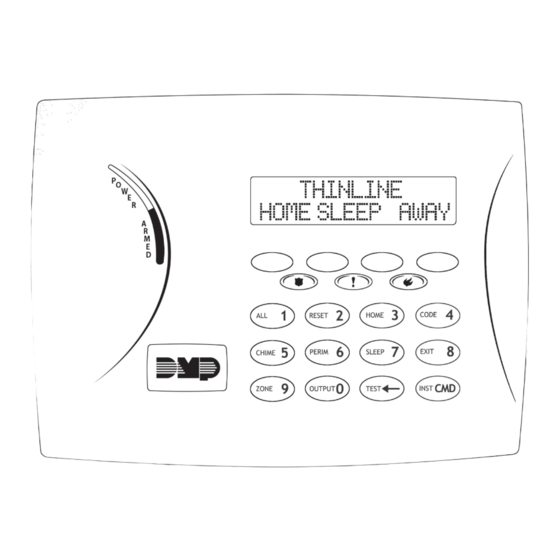
Page 21: Home/Away System Arming
Arm Away — Press 1 for 2 seconds. to the Central Station. Arming a Home/Away System 1. Enter your user code. The keypad displays HOME AWAY or HOME SLEEP AWAY (you may have three areas). Arming and Disarming XT30/XT50 User’s Guide... -
Page 22: Home/Away System Disarming
INSTANT. When you select INSTANT, any your user code. entry/exit zone that trips immediately activates an alarm 2. The keypad then displays any alarms or communication and the exit delay countdown immediately stops. XT30/XT50 User’s Guide Arming and Disarming... -
Page 23: Keypad Shortcut Keys
You can use the Arming shortcut keys, 1, 3, 6, and 7 when the system is disarmed. You may be prompted to enter your user code. If any zones are faulted, select force arm or bypass. Refer to the Arming Section for detailed arming operation. Arming and Disarming XT30/XT50 User’s Guide... - Page 24 MONITOR ON and chimes or displays MONITOR OFF and no tone is sounded. Note: The Monitor (Chime) shortcut key applies to all Exit zones in an Area system and to all zones assigned to the perimeter in a Home/Sleep/Away or All/Perimeter system. XT30/XT50 User’s Guide Arming and Disarming...
-
Page 25: User Menu
User Menu Options DISPLAY EVENTS Allows you to view the last 100 events The following list shows the User Menu options in order: on the XT30 and 200 events on the XT50 that occurred on your system. Menu Option Description... -
Page 26: User Check-In
Activity Check Disabled message to the central station. 3. When YES is selected, the keypad displays CHECK ENABLED for four seconds and then sends the Activity Check Enabled message to the central station. XT30/XT50 User’s Guide User Menu... -
Page 27: Sensor Reset
Refer back to step 5. required, to reset the system. To exit the Output menu option, press the Back Arrow key until you return to the keypad Status List. User Menu XT30/XT50 User’s Guide... -
Page 28: Bypass Zones
This initiates the Zone Monitor operation for all Exit zones in an Area system or all zones assigned to the perimeter in a Home/ Sleep/Away or All/Perimeter system. The keypad displays MONITOR ON and chimes or displays MONITOR OFF and no tone is sounded. XT30/XT50 User’s Guide User Menu... -
Page 29: Using The Zone Monitor Function
Zone Monitor mode. This allows you to open and then close each protected door and window while listening for the keypad to beep confirming its operation. See Zone Monitor. User Menu XT30/XT50 User’s Guide... -
Page 30: User Codes
(XT50 Only) (XT50 Only) (XT30/XT50) (XT30/XT50) User Number - The XT30 panel supports 30 users while the XT50 Door Access panel supports 99 users. Each user is numbered from 1 to 30 or Arm and Disarm 1 to 99. This number identifies them to the system and can be... -
Page 31: Adding User Codes
COMMAND. See Entering Names in Appendix C. Select NO to allow this user to arm and disarm the system and access all Standard level functions in the FOR XT30 Panels: User Menu. 8. The display changes to MASTER? NO YES. Select YES to Select YES to restrict this user to arming only. -
Page 32: Changing User Codes
Refer to item number 10 in the Adding User Codes section on the previous page. Note: Changing a user code does not change the user number. User number 2 may have their user code changed from 1234 to 5678 but they are still user number 2. XT30/XT50 User’s Guide User Menu... -
Page 33: Schedules
Permanent schedules are used for automatic arming and disarming and the User Menu. always occur at the same time until you change or delete them. Extend schedules allow an authorized user to extend the present day's permanent scheduled closing time. User Menu XT30/XT50 User’s Guide... -
Page 34: Extending Schedules
5. The keypad displays SUN MON TUE WED. Press the COMMAND key to display THU FRI SAT. 6. Select the day you want to program. Note: After selecting the day of the week for the schedule XT30/XT50 User’s Guide User Menu... -
Page 35: Date And Time
Display User Code Level: Master, Standard, Limited, or Scheduled. Events. Function: Allows you to view up to 100 (XT30) or 200 (XT50) past Setting the Date and Time events that occurred on your system from any keypad. Any event 1. -
Page 36: System Setup
Your system sends Ambush reports. ___________ _______________________________________ Yes No ___________ _______________________________________ ___________ _______________________________________ Use the Output number in the User Menu when using the Outputs On Off option to manually operate the relays. XT30/XT50 User’s Guide System Setup... -
Page 37: Key Fob Button Programming
User Codes Enter the user name assigned to each key fob and the button action The XT30 system provides 32 user codes you can program for programmed for each button in the table below. Refer to the individual users and the XT50 system provides 99. As you add new Introduction and Appendix B for more information. - Page 38 * Master (MST) Standard (STD) 1 2 3 4 5 6 Limited (LTD) Scheduled (SCH) 1 2 3 4 5 6 (Photocopy this page before using.) 1 2 3 4 5 6 Circle Your Selections XT30/XT50 User’s Guide System Setup...
-
Page 39: Appendix A
Display Events allows you to view up to 100 (XT30) or 200 (XT50) past events that occurred on your system from any keypad. Any event older than 45 days automatically clears from the system memory. -
Page 40: Zone Event Displays
11:41A 10/17 US:19 BY US:12 User Code Event Types - There are three event types you may see here: ADD - User added DEL - User deleted CHG - User code or authority level was changed. XT30/XT50 User’s Guide Appendix A... -
Page 41: Supervisory Event Displays
AC POWER BATTERY Keypad Display Description A DMP wireless receiver trouble 11:41A 10/17 occurred on October 17 at 11:41 WIRELESS Wireless Trouble Event Types - There are two event types: TBL - Trouble RST - Restore Appendix A XT30/XT50 User’s Guide... -
Page 42: Appendix B
Green light displays to acknowledge the button press. • When the button is programmed for Arm, Disarm, Toggle (Arm/Disarm), or Status, the system armed status is received by the key fob and the LED lights once as shown in the table below. XT30/XT50 User’s Guide Appendix B... -
Page 43: Appendix C
ENTER CODE: – DISARM either option. The keypad displays ENTER CODE: -. Present your card to the reader. Once system validates card, areas accessible by you arm or disarm automatically and the Door Strike relay activates. Appendix C XT30/XT50 User’s Guide... - Page 44 See Arming and Disarming above and on the previous page. Using the access reader for user menu access You can also use a card reader to access the User Menu when MENU? NO YES displays. XT30/XT50 User’s Guide Appendix C...
-
Page 45: Entering User Names
Pressing the 9 key provides you Pressing the 0 (zero) key provides with Y, Z, and a space to use you with a – (dash), . (period), between names. For example: * (asterisk), and a # (pound sign). BOB SMITH. Appendix C XT30/XT50 User’s Guide... -
Page 46: Email/Cell Phone Message User's Guide
Each alarm message will be detailed in the following way: * Fire = Fire Alarm * Burglary = Burglary Alarm * Panic = Panic Alarm * All other types = Alarm XT30/XT50 User’s Guide Appendix D... -
Page 47: How It Works
User’s Guide. out PhoneAccess™ until a valid user code is entered at a This exciting feature allows you to call your XT30/XT50 system keypad. from any outside touch-tone phone to arm and disarm protection 4. -
Page 48: Text Messaging Commands
If DISARM is sent without any other words, all areas will be disarmed. If the system is already disarmed, you will receive a message saying that the system is already disarmed. XT30/XT50 User’s Guide Appendix D... -
Page 49: Check Armed Status Text Command
If in alarm or trouble, the system will send ALARM ON or TROUBLE ON followed by up to 3 zone names that are in alarm or trouble. To receive the Armed Status, text: STATUS. Appendix D XT30/XT50 User’s Guide... -
Page 50: Common Keypad Displays
The panel is unable to communicate with the wireless receiver. verify the receiver is properly connected to the panel. WIRELESS TROUBLE verify the correct House Code is programmed in System Options. The wireless receiver is missing. XT30/XT50 User’s Guide Appendix D... - Page 51 Arming/Disarming Event Display 36 Instant Arming 16 Easy Exit™ Shortcut Key 20 Instant Zone 10 Emergency Evacuation Plans 2 Back Arrow (<—) Key 6 ENTER CODE display 9 Backlighting 6 Bypassing zones 12, 18, 21, 24 Index XT30/XT50 User’s Guide...
- Page 52 Status List 10 LED Operation 4, 38 Supervisory Event Display 37 System Monitor Event Display 37 Outputs On Off 23 System Ready/System Not Ready 15, 17 Output Schedules 30 System Setup Record 32 System Test 25 XT30/XT50 User’s Guide Index...
-
Page 53: Quick Reference Wallet Cards
Quick Reference Wallet Cards Quick Reference Wallet Cards Text Messaging Quick Commands PhoneAccess™ Quick Commands Panel Phone Number: ________________________ Text For this action Press For this action You will hear HELP List of text commands # then 1 Arm all 3 short beeps Note: Zones ARM, AWAY, ALL... - Page 54 1. Call the panel phone number. The panel answers and sounds one short tone. Text For this action 2. Enter your code within eight seconds. One beep means the code Status To receive a status update is good. Four short beeps means enter it again. You have three Cancel Cancel alarm while the alarm bell or siren sounds tries.
- Page 55 .This page intentionally left blank.
- Page 56 LT-0982 1.02 9184...
Need help?
Do you have a question about the XT30 and is the answer not in the manual?
Questions and answers