Variquest Cutout Maker 1800 User Manual
Hide thumbs
Also See for Cutout Maker 1800:
- User manual (44 pages) ,
- Unpacking and setup instructions (2 pages)
Table of Contents
Advertisement
Advertisement
Table of Contents
Troubleshooting

Related Manuals for Variquest Cutout Maker 1800


Summary of Contents for Variquest Cutout Maker 1800
- Page 1 Cutout Maker 1800 VariQuest™ Cutout Maker 1800...
-
Page 2: Copyright
® Park, Minnesota 55428 USA Trademarks Varitronics is a registered trademark of Brady Worldwide, Inc. VariQuest is a trademark of Brady Worldwide, Inc. All other brand or product names referenced in this manual are trademarks or registered trademarks of their respective companies or organizations. -
Page 3: Standard Warranty
® comprising the VariQuest™ Cutout Maker1800 will be free from defects in material and workmanship for one (1) year from the date of customer purchase. Original serial number must appear on product. Removal of serial numbers will void this warranty and any equipment and accessories that have been altered or modified in any way and are not as originally purchased will void this warranty. -
Page 4: Safety Information
Instructions labeled with this symbol must ALWAYS be followed. An explanatory illustration • will accompany the symbol. Instructions labeled with this symbol are warnings against actions that should NEVER be taken. An • explanatory illustration will accompany the symbol. VariQuest™ Cutout Maker 1800... - Page 5 Never disassemble or modify the Cutout Maker. • Doing so may result in fire or electrical shock. If the Cutout Maker breaks down, turn off the power switch, remove the plug from the power socket and contact your Cutout Maker dealer. VariQuest™ Cutout Maker 1800...
- Page 6 This page intentionally left blank VariQuest™ Cutout Maker 1800...
-
Page 7: Table Of Contents
Replacing the Cutting Mat ..................... 5-7 Oil Gantry Rails ......................5-10 Troubleshooting ........................ 6-1 Troubleshooting Process ....................6-2 Troubleshooting Tips....................6-2 Cutout Maker Troubleshooting..................6-3 Cutout Maker Error Codes ..................... 6-4 Having the Cutout Maker Serviced ................6-5 VariQuest™ Cutout Maker 1800 Table of Contents... - Page 8 This page intentionally left blank. viii Table of Contents VariQuest™ Cutout Maker 1800...
-
Page 9: Cutout Maker Features, Accessories And Materials
Cutout Maker Features, Accessories and Materials This chapter provides an overview of the VariQuest Cutout Maker1800 features, accessories and materials. The chapter contains these sections: • “Cutout Maker Features” on page 1-2 • “System Accessories” on page 1-3 • “Cutout Maker Materials” on page 1-4 •... -
Page 10: Cutout Maker Features
• A two-button control panel with an LCD display is provided for controlling the Cutout Maker and displaying status and error messages. • Choose from a variety of types and sizes of materials. VariQuest Design Center Software provides automatic setup selections for fonts, shapes and collections. -
Page 11: System Accessories
• Blades (5-pack) • Blade/Chad Removal Tool • Tweezers • Tool Storage Pouch Upon completion of the registration form, the customer will receive a 20-credit Shape CD. Cutout Maker Maintenance Kit VariQuest™ Cutout Maker 1800 Cutout Maker Features, Accessories and Materials... -
Page 12: Cutout Maker Materials
• Light construction paper: 40-50 lbs. • Heavy construction paper: 60-80 lbs. • Cold laminated light construction paper: 40-50 lbs. light construction paper + the VariQuest Cold Laminator 1200's dual-sided laminate. • Cold laminated heavy construction paper: 60-80 lbs. heavy construction paper + the VariQuest Cold Laminator 1200's dual-sided laminate. -
Page 13: Cutout Maker Components And Specifications
Cutout Maker Components and Specifications This chapter shows the locations of the major VariQuest Cutout Maker 1800 components and provides detailed system specifications. The chapter contains these sections: • “Cutout Maker Components” on page 2-2 • “Perspective View” on page 2-2 •... -
Page 14: Perspective View
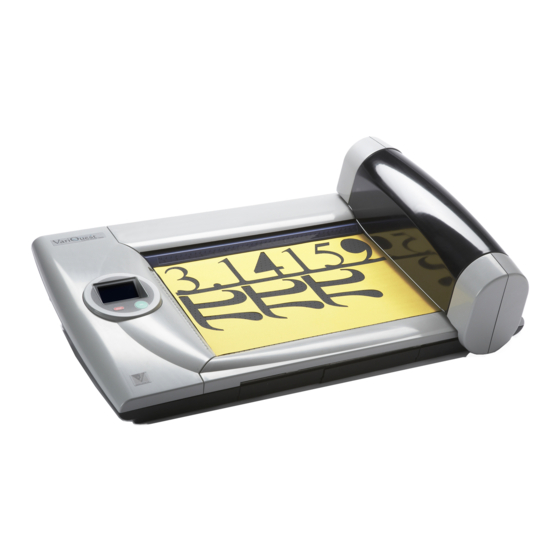
Cutout Maker Components Perspective View Gantry Cover Open Name Gantry Control Panel Cutter Bed Blade Holder Assembly Cutout Maker Components and Specifications VariQuest™ Cutout Maker 1800... -
Page 15: Side View
Side View Name USB Cable Receptacle AC Power Cord Receptacle DC Power Supply Fuse (2 Amp) OFF (0) ON (1) Power Switch VariQuest™ Cutout Maker 1800 Cutout Maker Components and Specifications... -
Page 16: Control Panel
Displays error messages and instructions. “STOP” button Pauses the cut job currently in process. Pressing “stop” while a job is paused cancels the job. “GO” button Starts the cut job selected. Cutout Maker Components and Specifications VariQuest™ Cutout Maker 1800... -
Page 17: Specifications
All brand or product names used on this sheet are trademarks or registered trademarks of their respective companies or organizations. As part of our continuous improvement, we reserve the right to change this Technical Data Sheet without notice. VariQuest™ Cutout Maker 1800 Cutout Maker Components and Specifications... - Page 18 This page intentionally left blank. Cutout Maker Components and Specifications VariQuest™ Cutout Maker 1800...
-
Page 19: Getting Started
Getting Started This chapter provides instructions for unpacking and setting up the VariQuest Cutout Maker 1800. Keep this guide near the Cutout Maker so it can be available for reference. The chapter contains these sections: • “Unpacking and Positioning the Cutout Maker” on page 3-2 •... -
Page 20: Unpacking And Positioning The Cutout Maker
Verifying Package Contents After unpacking, verify that all of the following items have been included in the Cutout Maker box: Cutout Maker 1800 Electrical Power Cord USB Cable Cutout Maker 1800 Maintenance kit User’s Guide Getting Started VariQuest™ Cutout Maker 1800... -
Page 21: Positioning The Cutout Maker
Positioning the Cutout Maker To ensure proper functioning of the Cutout Maker on a work space, allow adequate space around the system as shown below. 2 in/51 mm 2 in/51 mm 2 in/51 mm 2 in/51 mm VariQuest™ Cutout Maker 1800 Getting Started... -
Page 22: Setting Up The Cutout Maker
Cutout Maker. 3. Plug the other end of the cord into an appropriate AC outlet. Power Cord Wall Socket USB Cable Receptacle Receptacle Power Switch 1 (ON) 0 (OFF) Cutout Maker Power Cord Power Plug Getting Started VariQuest™ Cutout Maker 1800... -
Page 23: Connecting To The Variquest
Computer Important! Use the USB cable supplied with the Cutout Maker to connect to the VariQuest Design Center 1000 or a PC. The USB cable complies with FCC “Rules and Regulations,” Part 15 for Class A Equipment using fully shielded six-foot data cables. - Page 24 Connect one end of the cable provided to an available USB connector on the computer, and connect the remaining end to the USB connector on the Cutout Maker. Power up the Cutout Maker and the computer, and install the VariQuest Design Center Software.
-
Page 25: Operating The Cutout Maker
Operating the Cutout Maker This chapter provides instructions for operating the Cutout maker. The chapter contains these sections: • “Loading Material on the Cutout Maker” on page 4-2 • “Typical Operating Sequence” on page 4-3 VariQuest™ Cutout Maker 1800 Operating the Cutout Maker... -
Page 26: Loading Material On The Cutout Maker
Cutout Maker 1800, you must choose the appropriate material type in the VariQuest Design Center Software. This software is installed on the VariQuest Design Center 1000 or on your PC. When you select the material type in the software, the Cutout maker adjusts the output settings (blade depth, force and cutting speed) accordingly. -
Page 27: Typical Operating Sequence
Typical Operating Sequence Important: The VariQuest Cutout Maker 1800 can be used only with the VariQuest Design Center Software. The VariQuest Design Center Software is installed on your VariQuest Design Center 1000 PC. See the separate manual for VariQuest Design Center Software user information. - Page 28 This page intentionally left blank. Operating the Cutout Maker VariQuest™ Cutout Maker 1800...
-
Page 29: Maintenance
• Clean mat • Change blade • Change mat • Oil gantry rails • “Replacing the Cutting Blade” on page 5-3 • “Replacing the Cutting Mat” on page 5-7 • “Oil Gantry Rails” on page 5-10 VariQuest™ Cutout Maker 1800 Maintenance... -
Page 30: Maintenance Summary
Care should be taken to NOT apply too much oil. Oil should not drip or pool. If too much oil is applied, remove excess with a clean cloth. See “Oil Gantry Rails” on page 5-10. Maintenance VariQuest™ Cutout Maker 1800... -
Page 31: Replacing The Cutting Blade
Gantry Top Cover Open Blade Holder/Motor Assembly (Position in center of track) 3. Rotate the blade holder 90 towards the front of the unit to gain access to the blade. Blade Holder VariQuest™ Cutout Maker 1800 Maintenance... - Page 32 5. Press the blade removal tool (shown below) over the blade and remove the blade from the blade holder. Hold a finger over the blade release button to prevent the blade from reseating. Press the cork end of the blade removal tool over the blade Maintenance VariQuest™ Cutout Maker 1800...
- Page 33 Position blade in blade holder 7. Set the power switch to 1 (ON) to activate the electromagnet that draws the blade into its fully seated position within the blade holder. Power Switch 1 (ON) 0 (OFF) VariQuest™ Cutout Maker 1800 Maintenance...
- Page 34 8. Rotate the blade holder assembly 90 back to its operating position. Operating Position 9. Close the gantry top cover on the Cutout Maker. Close top cover Maintenance VariQuest™ Cutout Maker 1800...
-
Page 35: Replacing The Cutting Mat
4. Slide the gantry forward and grasp the rear edge of the protective mat. Slide the mat out from between the channels on each side of the Cutout Maker’s bed. Cutting Mat Gantry in (slide to rear) Forward Position Channel on each side of bed VariQuest™ Cutout Maker 1800 Maintenance... - Page 36 7. Continue sliding the mat forward until the guide slots on the leading edge of the mat are fully engaged with the guides on the front end of the bed. Guide Slots (front end of mat) Front end of Bed Maintenance VariQuest™ Cutout Maker 1800...
- Page 37 Gantry in Home Position NOTE: In some cases, you may rotate the protective mat to make use of surface area that is not worn. Either end of the mat may be inserted into the Cutout Maker. VariQuest™ Cutout Maker 1800 Maintenance...
-
Page 38: Oil Gantry Rails
Note: Take care not to apply too much oil. Oil should not drip or pool. Remove excess oil with a clean cloth. Upper Gantry Rail Lower Gantry Rail 3. Close gantry top cover. 5-10 Maintenance VariQuest™ Cutout Maker 1800... -
Page 39: Troubleshooting
• “Troubleshooting Process” on page 6-2 • “Troubleshooting Tips” on page 6-2 • “Cutout Maker Troubleshooting” on page 6-3 • “Cutout Maker Error Codes” on page 6-4 • “Having the Cutout Maker Serviced” on page 6-6 VariQuest™ Cutout Maker 1800 Troubleshooting... -
Page 40: Troubleshooting Process
Keep a record of the steps you take when troubleshooting: The information may be useful to technical support or service personnel. • Use some other electrical device to confirm that the electrical outlet is working. • Ensure all connections are securely attached. Troubleshooting VariQuest™ Cutout Maker 1800... -
Page 41: Cutout Maker Troubleshooting
Cutout Maker screen in the “Printers and Faxes” control panel on the Design Center 1000 or VariQuest software. PC, and verify that there is a printer named “VariQuest Cutout Maker 1800". Run the printer setup from the CD. Paper tears. -
Page 42: Cutout Maker Error Codes
1. Verify that there are no obstructions on the mat. Cutter stalled. Check mat for obstructions. 2. Insert new material. Press stop to clear 3. Verify that the correct material type is selected in the VariQuest software on the error. Design Center or the Personal Computer. Error #3 4. - Page 43 Error Codes (continued) Message Displayed Corrective Action Job contains invalid 1. Select a different object size in the VariQuest software on the Design Center or the data and cannot be cut. Personal Computer. Press stop to clear 2. Press STOP button to clear error.
-
Page 44: Having The Cutout Maker Serviced
The information may be useful to the service personnel. 2. Contact your VariQuest™ Dealer for further instructions. 3. If instructed to do so by your VariQuest™ Dealer, pack the Cutout Maker in the original carton. See “Unpacking the Cutout Maker” on page 3-2. - Page 45 © 2007 Brady Worldwide, Inc. All Rights Reserved. 20144-00 03/07...
Need help?
Do you have a question about the Cutout Maker 1800 and is the answer not in the manual?
Questions and answers