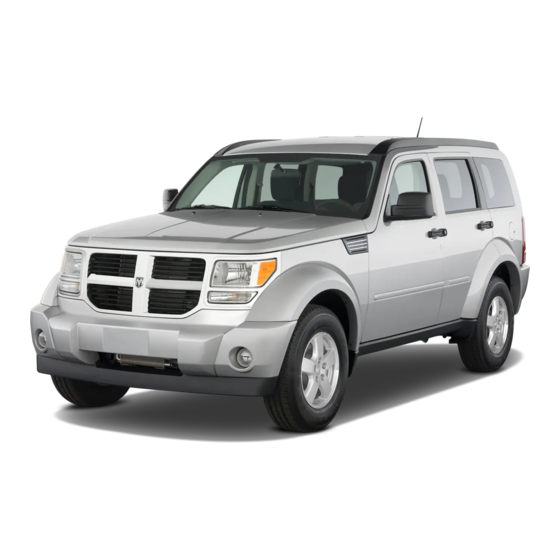
Dodge 2011 Nitro User Manual
2011 nitro
Hide thumbs
Also See for 2011 Nitro:
- Owner's manual (497 pages) ,
- Repair manual (289 pages) ,
- User manual (84 pages)
Table of Contents
Advertisement
Quick Links
Advertisement
Table of Contents

Related Manuals for Dodge 2011 Nitro


Summary of Contents for Dodge 2011 Nitro
- Page 1 201 1 user guide...
- Page 2 If you are the first registered owner of your vehicle, you may obtain a complimentary printed copy of the Owner’s Manual, Navigation/Media Center Manuals or Warranty Booklet by calling 1-800-423-6343 (U.S.) or 1-800-387-1143 (Canada) or by contacting your dealer. The driver’s primary responsibility is the safe operation of the vehicle. Driving while distracted can result in loss of vehicle control, resulting in a collision and personal injury.
-
Page 3: Table Of Contents
TABLE OF CONTENTS INTRODUCTION/WELCOME OFF-ROAD CAPABILITIES Four-Wheel Drive Operation ..45 Welcome From Chrysler Group LLC ..2 UTILITY CONTROLS AT A GLANCE Cargo Area Features ... 46 Driver Cockpit . -
Page 4: Introduction/Welcome
INTRODUCTION/WELCOME WELCOME FROM CHRYSLER GROUP LLC Congratulations on selecting your new Chrysler Group LLC vehicle. Be assured that it represents precision workmanship, distinctive styling, and high quality - all essentials that are traditional to our vehicles. Your new Chrysler Group LLC vehicle has characteristics to enhance the driver's control under some driving conditions. - Page 5 If your symptoms persist, please see an authorized dealer. CHRYSLER, DODGE, JEEP, RAM TRUCK, ATF+4, MOPAR and Uconnect are registered trademarks of Chrysler Group LLC. COPYRIGHT ©2011 CHRYSLER GROUP LLC...
-
Page 6: Controls At A Glance
CONTROLS AT A GLANCE DRIVER COCKPIT... - Page 7 CONTROLS AT A GLANCE...
-
Page 8: Instrument Cluster
CONTROLS AT A GLANCE INSTRUMENT CLUSTER Warning Lights - Low Fuel Warning Light - Charging System Light** - Oil Pressure Warning Light** - Anti-Lock Brake (ABS) Light** - Airbag Warning Light** - Electronic Throttle Control (ETC) Light - Tire Pressure Monitoring System (TPMS) Light - Engine Temperature Warning Light - Transmission Temperature Warning Light - Seat Belt Reminder Light... - Page 9 CONTROLS AT A GLANCE Indicators - Turn Signal Indicators - High Beam Indicator - Front Fog Light Indicator - Vehicle Security Indicator* - TOW/HAUL Indicator - 4WD LOW Indicator - Electronic Stability Control (ESC) Activation/Malfunction Indicator Light - Cruise Indicator Odometer Messages ECO - Fuel Saver Indicator Off LoWASH - Low Washer Fluid...
-
Page 10: Getting Started
GETTING STARTED KEY FOB Locking And Unlocking The Doors/Liftgate • Press the LOCK button once to lock all the doors and the liftgate. Press the UNLOCK button once to unlock the driver’s door only and twice within five seconds to unlock all the doors and liftgate. -
Page 11: Theft Alarm
GETTING STARTED WARNING! • Do not start or run an engine in a closed garage or confined area. Exhaust gas contains Carbon Monoxide (CO) which is odorless and colorless. Carbon Monoxide is poisonous and can cause serious injury or death when inhaled. •... -
Page 12: Supplemental Restraint System (Srs) - Airbags
GETTING STARTED WARNING! In a collision, you and your passengers can suffer much greater injuries if you are not buckled up properly. You can strike the interior of your vehicle or other passengers, or you can be thrown out of the vehicle. Always be sure you and others in your vehicle are buckled up properly. -
Page 13: Child Restraints
GETTING STARTED CHILD RESTRAINTS • Children 12 years and under should ride properly buckled up in a rear seat, if available. According to crash statistics, children are safer when properly restrained in the rear seats rather than in the front. •... - Page 14 GETTING STARTED • Tighten all three straps as you push the child restraint rearward and downward into the seat. Installing The Child Restraint Using The Vehicle Seat Belts • To install a child restraint, first, pull enough of the seat belt webbing from the retractor to route it through the belt path of the child restraint and slide the latch plate into the buckle.
-
Page 15: Front Seats
GETTING STARTED FRONT SEATS Power Seat • The power seat switch, located on the outboard side of the seat near the floor, controls forward/back, up/down, and tilt adjustment. Recliner • Lift the recliner lever located on the outboard side of the seat, lean back and release at the desired position. -
Page 16: Rear Seats
GETTING STARTED CAUTION! Do not place any article under a power seat or impede its ability to move as it may cause damage to the seat controls. Seat travel may become limited if movement is stopped by an obstruction in the seat’s path. WARNING! •... -
Page 17: Heated Seats
GETTING STARTED WARNING! Be certain that the seatback is securely locked into position. If the seatback is not securely locked into position, the seat will not provide the proper stability for child seats and/or passengers. An improperly latched seat could cause serious injury. -
Page 18: Tilt Steering Column
GETTING STARTED TILT STEERING COLUMN • The tilt lever is located on the steering column, below the turn signal lever. • Push down on the lever to unlock the steering column. • With one hand firmly on the steering wheel, move the steering column up or down as desired. -
Page 19: Operating Your Vehicle
OPERATING YOUR VEHICLE TURN SIGNAL/LIGHTS LEVER Headlights/Parking Lights • Rotate the end of the lever to the first detent for parking lights and to the second detent for headlights Instrument Panel Dimmer • Rotate the center portion of the lever to the extreme bottom position to fully dim the instrument panel lights and prevent the interior lights from illuminating when a door is opened. -
Page 20: Wiper/Washer Lever
OPERATING YOUR VEHICLE Turn Signals/Lane Change Assist • Tap the lever up or down once and the turn signal (right or left) will flash three times and automatically turn off. WIPER/WASHER LEVER Front Wipers Intermittent, Low And High Operation • Rotate the end of the lever to the first detent position for one of five intermittent settings, the second detent for low wiper operation and the third detent for high wiper operation. -
Page 21: Speed Control Lever
OPERATING YOUR VEHICLE SPEED CONTROL LEVER Cruise ON/OFF • Push the ON/OFF button to activate the Speed Control. • CRUISE will appear on the instrument cluster to indicate the Speed Control is • Push the ON/OFF button a second time to turn the system off. -
Page 22: Manual Climate Controls
OPERATING YOUR VEHICLE MANUAL CLIMATE CONTROLS Air Recirculation • Use recirculation for maximum A/C operation. • For window defogging, turn the recirculation button off. • Recirculation is not allowed in defrost, floor, defrost/floor (mix) modes. AUTOMATIC TEMPERATURE CONTROLS (ATC) Automatic Operation •... -
Page 23: Parksense Rear Park Assist
OPERATING YOUR VEHICLE Air Conditioning (A/C) • If the air conditioning button is pressed while in the AUTO mode, the indicator light may flash three times to indicate the cabin air is being controlled automatically. Air Recirculation • Use recirculation for maximum A/C operation. •... - Page 24 OPERATING YOUR VEHICLE Pinch Protection Feature • This feature will detect an obstruction in the opening of the sunroof during Express Close operation. If an obstruction in the path of the sunroof is detected, the sunroof will automatically return to the open position. NOTE: Pinch protection is disabled while the switch is pressed and held during manual opening and closing of the sunroof.
-
Page 25: Wind Buffeting
OPERATING YOUR VEHICLE WIND BUFFETING • Wind buffeting can be described as a helicopter-type percussion sound. If buffeting occurs with the rear windows open, adjust the front and rear windows together. • If buffeting occurs with the sunroof open, adjust the sunroof opening, or adjust any window. -
Page 26: Electronics
ELECTRONICS YOUR VEHICLE'S SOUND SYSTEM... - Page 27 ELECTRONICS...
-
Page 28: Non-Touch-Screen Radios
ELECTRONICS NON-TOUCH-SCREEN RADIOS Media Center 130 (Sales Code RES) Media Center 130 with Satellite Radio (Sales Code RES + RSC) - Page 29 ELECTRONICS Media Center 230 (Sales Code REQ) NOTE: Your radio may not be equipped with the Uconnect™ Voice Command and Uconnect™ Phone features. To determine if your radio has these features, press the Voice Command button on the radio. You will hear a voice prompt if you have the feature, or see a message on the radio stating “Uconnect Phone not available”...
- Page 30 ELECTRONICS • Pressing the AUX button will change the mode to auxiliary device if the Audio Jack is connected, allowing the music from your portable device to play through the vehicle's speakers. • The functions of the portable device are controlled using the device buttons. The volume may be controlled using the radio or portable device.
-
Page 31: Touch-Screen Radios
ELECTRONICS TOUCH-SCREEN RADIOS Media Center 730N CD/DVD/HDD/NAV (Sales Code RER) Media Center 730N CD/DVD/HDD/NAV (Sales Code RHR) - Page 32 ELECTRONICS Media Center 430/430N CD/DVD/HDD (Sales Code RBZ/RHB) NOTE: Your radio may not be equipped with the Uconnect™ Voice Command and Uconnect™ Phone features. To determine if your radio has these features, press the Voice Command button on the radio. You will hear a voice prompt if you have the feature, or see a message on the radio stating “Uconnect Phone not available”...
- Page 33 ELECTRONICS • The functions of the portable device are controlled using the device buttons. The volume may be controlled using the radio or portable device. Clock Setting • Turn the radio on, then touch the screen where the time is displayed. •...
- Page 34 ELECTRONICS • Touch the MY FILES soft-key, then go to the MANAGE MY FILES screen. • Touch the MY PICTURES soft-key to get an overview of the currently stored images. • Touch one of the ADD PICTURES soft-keys, then select the type of media inserted. •...
- Page 35 ELECTRONICS New Destination • Press the NAV hard-key to access the Navigation Main Menu. • Touch the NEW DESTINATION soft-key to program a destination, then select the destination soft-key of your choice. • Media Center 730N allows destinations to be input by voice while in motion. Press the Voice Command button on the radio to begin.
- Page 36 ELECTRONICS • To route to a destination that is saved in your local address book, press the MENU hard key, then touch MY FILES, next touch ADDRESS BOOK, and last touch DEFAULT FOLDER and select the contact you want to route to. Navigation –...
- Page 37 ELECTRONICS Editing Home Location • Touch the NAV soft-key in the upper-right corner of your radio screen, to access the Navigation system. • Touch the Where To? soft-key, then touch Favorites. • Touch the location you want to edit. • Next, touch Press for More. •...
-
Page 38: Steering Wheel Audio Controls
NOTE: The Uconnect™ Phone requires a mobile phone equipped with the Bluetooth Hands-Free Profile, Version 0.96 or higher. For Uconnect™ customer support, call 1–877–855–8400 or visit www.dodge.com/uconnect. Phone Pairing NOTE: Pairing is a one-time initial setup before using the phone. You will also need to ®... - Page 39 ELECTRONICS • Wait for the “ready” prompt and BEEP. • (After the BEEP), say “Uconnect setup”. • (After the BEEP), say “phone pairing”. • (After the BEEP), say “pair a phone”. • Follow the audible prompts. • You will be asked to enter a four-digit Personal Identification Number (PIN), which you will later need to enter into your mobile phone.
-
Page 40: Uconnect™ Voice Command
• It also allows you to respond by selecting from various pre-defined phrases. • Not all phones are compatible with this feature. Refer to the phone compatibility list at www.dodge.com/uconnect. Connected mobile phones must be bluetooth-compatible, and paired with your radio. -
Page 41: Electronic Vehicle Information Center (Evic)
ELECTRONICS • For vehicles equipped with Video Entertainment System (VES)™, refer to the Uconnect™ Voice Command section of the Uconnect™ User's Manual on the DVD for further details. • For vehicles not equipped with VES™, refer to your vehicle Owner's Manual on the DVD for Uconnect™... -
Page 42: Programmable Features
ELECTRONICS • Press the FUNCTION SELECT button to RESET Trip Functions and change Personal Settings. Compass Calibration • This compass is self-calibrating, which eliminates the need to set the compass manually. When the vehicle is new, the compass may appear erratic and the EVIC will display “CAL”... - Page 43 ELECTRONICS Unlock On First Press • To unlock either the driver's side, or all doors, on the first press of the UNLOCK button: • Press and hold the LOCK button for at least 4 seconds, but no longer than 10 seconds. Then, press and hold the UNLOCK button while still holding the LOCK button.
-
Page 44: Universal Garage Door Opener (Homelink )
ELECTRONICS UNIVERSAL GARAGE DOOR OPENER ® (HomeLink ® Programming HomeLink Begin Programming ® • The HomeLink buttons are located in the sun visor. • Erase all channels before you begin programming by holding the two outside buttons for up to 20 seconds until the red indicator flashes. - Page 45 ELECTRONICS Programming A Rolling Code System • At the garage door opener motor (in the garage), locate the “learn” or “programming” button. This can usually be found where the hanging antenna wire is attached to the garage door opener motor (it is NOT the button normally used to open and close the door).
-
Page 46: Power Outlet
ELECTRONICS POWER OUTLET • The power outlet is located on the instrument panel below the climate control and is powered when the ignition switch is in the ON/RUN position. • The outlet can operate a conventional cigar lighter unit or power accessories designed for use with a standard power outlet adapter. -
Page 47: Off-Road Capabilities
OFF-ROAD CAPABILITIES 2WD To 4WD LOCK FOUR-WHEEL DRIVE • Shifts between 2WD and 4WD LOCK OPERATION can be done with the vehicle stopped or in motion. With the vehicle in motion, the transfer case will engage/disengage faster if you momentarily release the accelerator pedal after turning the control knob. -
Page 48: Utility
UTILITY CARGO AREA FEATURES Cargo Tie-Down Hooks • The tie-downs located on the cargo area floor should be used to safely secure loads when the vehicle is moving. Cargo Load Floor • The panel in the load floor is reversible for added utility. One side features a plastic lined tray which can hold a variety of items. -
Page 49: Trailer Towing Weights (Maximum Trailer Weight Ratings)
UTILITY... -
Page 50: Recreational Towing (Behind Motorhome, Etc.)
UTILITY Towing — Four-Wheel Drive Or All-Wheel RECREATIONAL Drive Models TOWING (BEHIND Recreational Towing (All Four Wheels On MOTORHOME, ETC.) The Ground) Recreational Towing — Two-Wheel Drive • Recreational towing is NOT allowed. Models These models do not have a NEUTRAL position in the transfer •... -
Page 51: What To Do In Emergencies
WHAT TO DO IN EMERGENCIES 24-HOUR TOWING ASSISTANCE • Dial toll-free 1-800-521-2779 or 1-800-363-4869 for Canadian residents. • Provide your name, vehicle identification number and license plate number. • Provide your location, including telephone number, from which you are calling. •... - Page 52 WHAT TO DO IN EMERGENCIES • Your vehicle has also been equipped with a TPMS malfunction indicator to indicate when the system is not operating properly. The TPMS malfunction indicator is combined with the low tire pressure telltale. When the system detects a malfunction, the telltale will flash for approximately one minute and then remain continuously illuminated.
- Page 53 WHAT TO DO IN EMERGENCIES WARNING! Driving a vehicle with the red brake light on is dangerous. Part of the brake system may have failed. It will take longer to stop the vehicle. You could have a collision. Have the vehicle checked immediately. - Malfunction Indicator Light (MIL) •...
-
Page 54: If Your Engine Overheats
WHAT TO DO IN EMERGENCIES • If a problem is detected, the light will come on while the engine is running. Cycle the ignition when the vehicle has completely stopped and the shift lever is placed in the PARK position; the light should turn off. •... -
Page 55: Jacking And Tire Changing
WHAT TO DO IN EMERGENCIES NOTE: There are steps that you can take to slow down an impending overheat condition: • If your air conditioner (A/C) is on, turn it off. The A/C system adds heat to the engine cooling system and turning the A/C off can help remove this heat. •... - Page 56 WHAT TO DO IN EMERGENCIES • Lower the spare tire by turning the winch drive nut, located in the rear cargo area inside the vehicle, counterclockwise with the jack-handle assembly until the spare tire is on the ground with enough cable slack to allow you to pull the spare tire out from underneath the vehicle.
- Page 57 WHAT TO DO IN EMERGENCIES • Locate the jack: • For the front tires, place it (rearward) of the notch on the body weld seam behind the wheel to be changed. • For the rear tires, place it under the axle by the wheel to be changed. •...
-
Page 58: Jump-Starting
WHAT TO DO IN EMERGENCIES WARNING! (Continued) • A loose tire or jack, thrown forward in a collision or hard stop, could endanger the occupants of the vehicle. Always stow the jack parts and the spare tire in the places provided. JUMP-STARTING •... - Page 59 WHAT TO DO IN EMERGENCIES • If using another vehicle to jump-start the battery, park the vehicle within the jumper cables reach, set the parking brake and make sure the ignition is OFF. Jump-Starting Procedure • Connect the positive (+) end of the jumper cable to the positive (+) post of the discharged vehicle.
-
Page 60: Shift Lever Override
WHAT TO DO IN EMERGENCIES WARNING! • When temperatures are below the freezing point, electrolyte in a discharged battery may freeze. Do not attempt jump-starting because the battery could rupture or explode and cause personal injury. Battery temperature must be brought above the freezing point before attempting a jump-start. -
Page 61: Towing A Disabled Vehicle
WHAT TO DO IN EMERGENCIES... -
Page 62: Freeing A Stuck Vehicle
WHAT TO DO IN EMERGENCIES FREEING A STUCK VEHICLE • If your vehicle becomes stuck in mud, sand or snow, it can often be moved by a rocking motion. Turn your steering wheel right and left to clear the area around the front wheels. -
Page 63: Event Data Recorder (Edr)
WHAT TO DO IN EMERGENCIES EVENT DATA RECORDER (EDR) • This vehicle is equipped with an event data recorder (EDR). The main purpose of an EDR is to record, in certain crash or near crash-like situations, such as an air bag deployment or hitting a road obstacle, data that will assist in understanding how a vehicle’s systems performed. -
Page 64: Maintaining Your Vehicle
MAINTAINING YOUR VEHICLE OPENING THE HOOD • Pull the release lever located below the instrument panel and in front of the driver’s door. • Raise the hood and locate the safety latch, in the middle of the hood opening. • Move the safety latch while lifting the hood at the same time. -
Page 65: Engine Compartment
MAINTAINING YOUR VEHICLE... - Page 66 MAINTAINING YOUR VEHICLE...
-
Page 67: Fluids And Capacities
MAINTAINING YOUR VEHICLE FLUIDS AND CAPACITIES Component Fluid, Lubricant, or Genuine Part Capacities ® Engine Coolant 3.7L, MOPAR Antifreeze/Coolant Five 14 Quarts 4.0L Year/100,000 Mile Formula HOAT (13.3 Liters) Includes (Hybrid Organic Additive heater and coolant Technology) or equivalent. recovery bottle filled to MAX level. -
Page 68: Maintenance Chart
MAINTAINING YOUR VEHICLE... - Page 69 MAINTAINING YOUR VEHICLE...
- Page 70 MAINTAINING YOUR VEHICLE Maintenance Record Odometer Date Signature, Authorized Service Center 8,000 Miles (13,000 km) or 6 Months 16,000 Miles (26,000 km) or 12 Months 24,000 Miles (39,000 km) or 18 Months 32,000 Miles (52,000 km) or 24 Months 40,000 Miles (65,000 km) or 30 Months 48,000 Miles...
-
Page 71: Fuses
MAINTAINING YOUR VEHICLE FUSES... -
Page 72: Integrated Power Module (Fuses)
MAINTAINING YOUR VEHICLE Integrated Power Module (fuses) • The Integrated Power Module is located in the engine compartment near the battery. This center contains cartridge fuses, mini-fuses and relays. Cavity Cartridge Fuse Mini-Fuse Description – – 30 Amp Pink Transfer Case/Pwr Liftgate Module –... - Page 73 MAINTAINING YOUR VEHICLE Cavity Cartridge Fuse Mini-Fuse Description 15 Amp Blue Ignition Off Draw — Vehicle Entertainment System (IOD-VES), Satellite Digital Audio Receiver (SDARS), DVD, Hands-Free Module (HFM), RADIO, Antenna (ANT), Universal Garage Door Opener (UGDO), Vanity Lamp (VANITY LP) 10 Amp Red (Ignition Off Draw) IOD-HVAC/ATC, MW SENSR, Underhood Lamp (UH...
- Page 74 MAINTAINING YOUR VEHICLE Cavity Cartridge Fuse Mini-Fuse Description 20 Amp Yellow Fuel Pump (FUEL PUMP), Diesel Lift Pump (DSL LIFT PUMP) — Export Only 10 Amp Red Power Mirror Switch (PWR MIRR SW), Driver Window Switch (DRVR WIND SW) 10 Amp Red Ignition Switch (IGN SW), Window Module (WIN MOD) 10 Amp Red...
-
Page 75: Tire Pressures
MAINTAINING YOUR VEHICLE CAUTION! (Continued) • When replacing a blown fuse, it is important to use only a fuse having the correct amperage rating. The use of a fuse with a rating other than indicated may result in a dangerous electrical system overload. If a properly rated fuse continues to blow, it indicates a problem in the circuit that must be corrected. -
Page 76: Exterior Bulbs
MAINTAINING YOUR VEHICLE EXTERIOR BULBS LIGHT BULBS – Exterior Bulb Number Backup, Tail, Stop, Turn Lamp 3057K Center High-Mounted Stop Lamp LED (*) (CHMSL) Fog Lamp – If Equipped H10 9145 Front Park/Turn Signal 3157AK Front Side Marker Headlamp – Low Beam 9008 H13 License Lamp * CHMSL is not serviceable. -
Page 77: Consumer Assistance
• The Owner's Manual and User Guide users, dial 711 and for Voice callers, electronic files are also available on the dial 1–800–855–0511 to connect Chrysler, Jeep, Ram Truck and Dodge with a Bell Relay Service operator. websites. • Click on the "For Owners" tab, select "Owner/Service Manuals", then select... -
Page 78: Reporting Safety Defects In The 50 United States And Washington, D.c
CONSUMER ASSISTANCE In Canada REPORTING SAFETY • If you believe that your vehicle has a DEFECTS IN THE 50 safety defect, you should contact the UNITED STATES AND Customer Service Department immediately. Canadian customers WASHINGTON, D.C. who wish to report a safety defect to •... -
Page 79: Mopar Accessories
• For the full line of Authentic Dodge Accessories by Mopar, visit your local Dodge dealership or online at mopar.com. CHROME: •... -
Page 80: Index
INDEX Air Conditioning ..20,21 ECO ....40 Airbag ....10 Electronic Speed Control Airbag Light . - Page 81 INDEX Instrument Cluster Warning Seats ....13 Lights ....6,49 Steering .
- Page 82 INDEX Changing ....54 Turn Signals ....18 Flat Changing ... . 54 Jacking .
- Page 83 Driving and Alcohol: Drunken driving is one of the most frequent causes of collisions. Your driving ability can be seriously impaired with blood alcohol levels far below the legal minimum. If you are drinking, don’t drive. Ride with a designated non-drinking driver, call a cab, a friend, or use public transportation.
- Page 84 This guide has been prepared to help you get quickly acquainted with your new Dodge and to provide a convenient reference source for common questions. However, it is not a substitute for your Owner’s Manual. For complete operational instructions, maintenance procedures and important safety messages, please consult your Owner’s Manual,...
Need help?
Do you have a question about the 2011 Nitro and is the answer not in the manual?
Questions and answers