Table of Contents
Advertisement
Advertisement
Table of Contents

Related Manuals for Glem EMF61MVI


Summary of Contents for Glem EMF61MVI
- Page 3 Dear Customer, Thank you for purchasing our product. This manual has been written to assist you and instruct you in the operation of your oven. It will help you get the best performance and make full use of the features of your oven. The safety precaution and warnings are listed for your safety and the safety of others when operating your oven.
- Page 4 SAFETY HINTS AND USAGE TIPS 1) OVEN DOOR Keep children away from the glass oven door while cooking is in progress: if touched, the glass could cause burns. Don’t let children sit on or play with the oven door. Do not use the drop down door as a stool to reach above cabinets.
-
Page 5: General Warnings
GENERAL WARNINGS • This oven must not be used by persons (including children) whose physical, sensory or mental capacities are reduced or by persons without experience or instruction, unless under supervision of a responsible person or with appropriate instruction on the use of the oven. -
Page 6: Before Using For The First Time
BEFORE USING FOR THE FIRST TIME Remove all packing material and literature from the oven before connecting the gas and electricity supplies. Make sure all plastic has been removed before use. Some models have trays with a protective coating; make sure the plastic coating has been removed. -
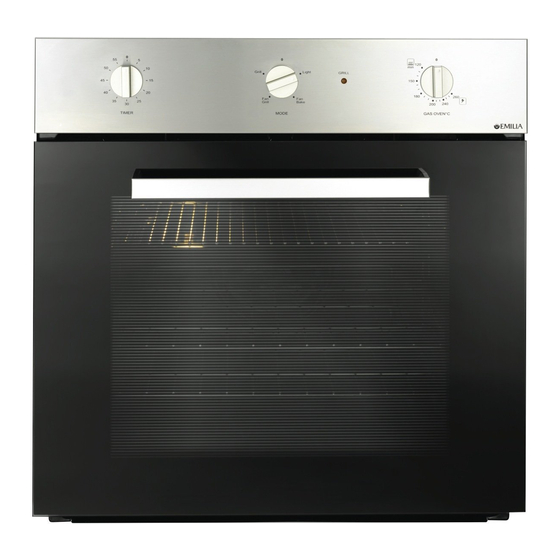
Page 7: Description Of Controls
GAS OVEN DESCRIPTION OF CONTROLS Use the controls and knobs on the oven instrument panel to select the various functions. Minute counter – rotate the knob to the desired time up to 60 ‘TIMER’: minutes and a bell will ring at the end of the time period. For very short time periods turn the knob past the point you want and then back to it to load the timer mechanism. -
Page 8: Oven Operation
GAS OVEN OVEN OPERATION Lighting the Gas Oven The oven burner must be ignited with the DOOR OPEN. There is a safety device which prevents the oven lighting unless the door is in the open position 1. Open the oven door and remove the grill tray and leave it out. 2. -
Page 9: Electric Oven
ELECTRIC OVEN DESCRIPTION OF CONTROLS Electric ovens have the advantage of being able to offer different types of heat to suit many cooking applications. Models vary according to the functions available. Minute counter – rotate the knob to the desired time up to 60 TIMER: minutes and a bell will ring at the end of the time period. - Page 10 OVEN FUNCTIONS – Electric Oven (functions vary according to model) FAN FORCED: The heat is generated by a circular element and distributed by a fan. Fast and efficient and allows for baking on more than one shelf. Some foods may need to be rotated using this function. CLASSIC BAKE: Heat applied from the top and bottom elements provides traditional baking conditions.
-
Page 11: Cooking Table
COOKING TABLE Dish Shelf Position 1=top Temp Degrees C Cooking Time Cakes Static Fan Oven Static Fan Oven Minutes Chocolate cake 180-190 35-40 Creme Caramel 130-150 30-35 Cup Cakes 190-200 180-190 18-20 (35 cakes) Fruit Cake 175-190 165-180 35-35 Jam Tarts 185-200 185-200 40-50... - Page 12 Cooking Notes: • The information provided is purely a guideline. Modify to suit experience, eating habits and personal taste. • The times indicated in the table do not include preheating of the oven, which is always recommended. • The time and temperature indicated refer to average quantities of food: meats1/1.5kg, dough for confectionery, pizza, bread 0.5/0.8kg.
- Page 13 BAKING TROUBLE SHOOTING All ovens are different and it can take some time to learn the cooking characteristics of your new oven. Listed below are some common problems, causes and suggested solutions that may assist. Problem Cause Solution Cooking unevenly Wrong location in oven Use shelf to place food in centre of oven Wrong size tray...
- Page 14 NOTE: If the oven thermostat knob is turned accidently during the operation of the electric grill, a safety device will stop the functioning of the grill.
-
Page 15: Grilling Tips
GRILLING TIPS: • Before introducing food inside the oven it is advisable to pre-heat the oven for at least 5 minutes. • Place the food to be grilled on the appropriate rack or tray, positioning it at the highest level depending on the volume of food and the amount of direct heat you want to apply. - Page 16 To set the timer just push the (+) or (-) button until you have set the required time in minutes and seconds. When the timer is operating the timer on indicator will be lit. Once the pre-set time has elapsed, the timer will beep Push the SET button to switch off.
- Page 17 Setting the Minute Countdown Timer The minute countdown timer works independently of the oven and is handy for checking the time periods for all cooking tasks. 1. Press the MENU button until the screen changes and then let go. 2. Set the countdown time you want by pressing the ‘+’ or ‘-‘. The time is in minutes, not seconds.
-
Page 18: Handy Hints
Programming the Oven to Switch Off at a Certain Time of Day Sometimes it is handy to set the time of day you want to finish cooking. This feature allows you to set the length of time you want the oven to run and the time of day when you would like the oven to turn off. -
Page 19: Cleaning And Maintenance
CLEANING AND MAINTENANCE WARNING: the oven must be kept clean, as a build up of fat constitutes a fire risk. 1. Cleaning of Stainless Steel: In order that your oven retains its new appearance, care should be taken to protect the stainless steel finish. Never use gritty or abrasive sponges. -
Page 20: Care Of Catalytic Liners
CARE OF CATALYTIC LINERS Some models may have catalytic liners installed within the oven cavity. They are the matte finished light coloured panels on the sides and the matte finished panel at the rear of the oven. They work by collecting the grease and oil residues that occur during cooking. -
Page 21: Removing The Door
REMOVING THE DOOR Open the door fully and flip over the locking tabs. Close the door gently until it stops on the hinge mechanism. Hold the two sides of the door placing your hands near the hinges. Lift the door upwards, forming an angle of about 45% and carefully lift it away from the oven. - Page 22 Where the appliance is built into a cabinet, the cabinet must be capable of withstanding 70°C. Installation into low temperature tolerant cabinetry (e.g. Vinyl coated) may result in deterioration of the low temperature coating by discolouring or bubbling. If the appliance is to be installed adjacent to vinyl wrapped surfaces, use an installation kit available from the vinyl-wrap supplier.
-
Page 23: Location Of Installation
LOCATION OF INSTALLATION The oven must be installed and operated in a suitable place and in conformity with the laws in force. Air flow requirement The installer must refer to the laws in force with regard to ventilation and discharge of combustion products. The place where the gas oven is installed must have a natural air flow necessary for gas combustion. -
Page 24: Installation - Electrical Connection
INSTALLATION - ELECTRICAL CONNECTION This installation must be undertaken by a licensed and authorised technician. • The electrical supply for the oven must be a 240 Volt 50 Hz. • The fuse and electrical wiring of the dwelling must support the load of the oven. - Page 25 GAS OVEN INSTALLATION - Gas Connection WARNING! THIS OVEN MUST BE INSTALLED BY AN AUTHORISED PERSON – PROOF IS REQUIRED FOR WARRANTY SERVICE CLAIMS. The oven has been manufactured with a Natural Gas injector fitted. For use with LPG the oven must be converted by an authorised technician. The warranty will be voided if the LPG conversion is not undertaken by a qualified gas fitter.
-
Page 26: Final Check
• When satisfied that the oven is operating correctly, instruct the customer in its safe operation. • Ensure the customer understands fully by having them operate the oven in all its functions. GAS CHECKS AND ADJUSTMENTS - LOW FLAME SETTING Check the low flame setting for the oven burner with the control engaged in the minimum position. -
Page 27: Important Notes
Gas checks and adjustments - pressure adjustment First shut off the gas to the oven. Remove the sealing screw from the regulator test point at the rear of the oven and attach the hose from the mamometer to the point. Turn the gas back on and light the burner on the maximum temperature setting. - Page 28 CONVERSION TO ULPG The gas oven has been configured to operate on natural gas only. To operate on ULPG the oven must be converted. The conversion kit is provided with your oven. This is a relatively simple task but must be undertaken by a licensed gas fitter.
- Page 29 ADJUSTMENT OF THE THERMOSTAT MINIMUM SETTING The operation is performed with the oven installed in the fixture and after qualified personnel has completed the electrical and gas connections. This measure is necessary whenever the type of gas is changed natural gas to ULPG so as to guarantee a minimum temperature close to 150°C.
-
Page 30: Product Warranty
PRODUCT WARRANTY Thank you for choosing a Glem Gas Appliance, the purchase of this appliance is an important investment in your home and so to protect your investment we urge you to complete the registration card attached, please return it immediately. IT IS A WARRANTY REQUIREMENT THAT PROOF OF PURCHASE BE PROVIDED PRIOR TO REQUESTING A SERVICE CALL. -
Page 31: Warranty Form
THIS WARRANTY SHALL NOT APPLY: If the rating plate has been removed or the serial number or other details on it have been removed or rendered illegible. If the appliance is connected to any gas type or voltage other than shown on rating plate. If the appliance has been subjected to misuse, abuse accident or want of care. -
Page 32: Installers Check List
INSTALLERS CHECK LIST You must test the oven after installation before you hand it over to the customer. On gas ovens you must have a manometer and a connecting tube to check that the gas pressure is correct. The following checks must be made to commission the oven and to activate the warranty. If this form is not completed fully and correctly it will void the warranty.
Need help?
Do you have a question about the EMF61MVI and is the answer not in the manual?
Questions and answers