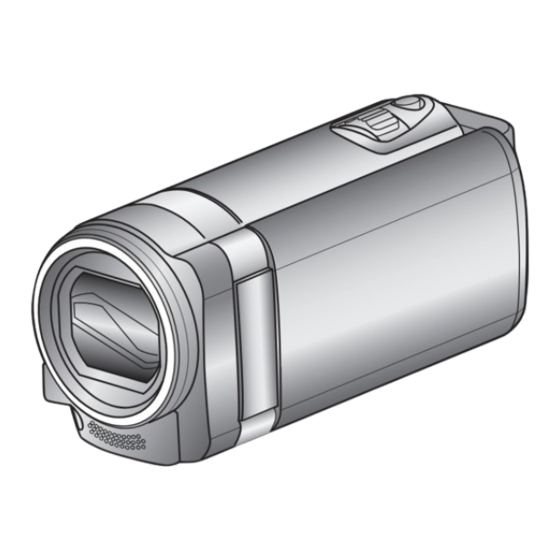
JVC GZ-EX210 Everio User Manual

JVC GZ-EX210 Everio User Manual

Hd memory camera
Hide thumbs Also See for GZ-EX210 Everio:

Advertisement

Quick Links

Basic User Guide
HD MEMORY CAMERA
GZ-EX250 A
GZ-EX215 A
GZ-EX210 A
.
Detailed User Guide
For more details on operating this
product, please refer to the "Detailed
User Guide" at the following website.
http://manual3.jvckenwood.com/
o
index.html/

Verifying the Accessories

Basic User Guide(this manual)
AC Adapter
AC-V11U
CD-ROM
Stylus pen
Dear Customers
Thank you for purchasing this JVC product.
Before use, please read the Safety Precautions
and Cautions on p. 2 and p. 18 to ensure
safe use of this product.
When you are outside, refer to the
"Mobile User Guide". Mobile User
Guide can be viewed with standard
browser for Android tablet and iPhone.
o
Battery Pack
BN-VG114U
Core Filter
(for AV Cable)
For Future Reference:
Enter the Model No. (located on the bottom of
the camera) and Serial No.
(located on the battery pack mount of the
camera) below.
Model No.
Serial No.
LYT2393-002A-M
Mobile User Guide
.
http://manual3.jvckenwood.com/
mobile/us/
USB Cable
(Type A - Mini Type B)
.
Core Filter
(for USB Cable)
EN
AV Cable
Basic User Guide
(this manual)

Advertisement

Table of Contents
loading

Summary of Contents for JVC GZ-EX210 Everio

  • Page 1: Verifying The Accessories

    (for USB Cable) (this manual) Dear Customers For Future Reference: Thank you for purchasing this JVC product. Enter the Model No. (located on the bottom of Before use, please read the Safety Precautions the camera) and Serial No. and Cautions on p. 2 and p. 18 to ensure (located on the battery pack mount of the safe use of this product.
  • Page 2: Safety Precautions

    Make a backup of important recorded data (2) This device must accept any interference received, including interference that may Cause JVC will not be responsible for any lost data. undesired operation. It is recommended to copy your important recorded data to a disc or other recording media for storage...
  • Page 3 European Union. Standard C73 series type use an AC plug adapter, called a “Siemens Plug”, as shown. For this AC plug adapter, consult your nearest JVC dealer. Stylus Pen Plug Adapter • Be sure to use the supplied stylus pen.
  • Page 4: Table Of Contents

    BN-VG121U pack. Battery Charger Enables the battery pack to be charged without using this unit. AA-VG1U * To order any of these accessories please visit www.store.jvc.com or call 1-800-252-5722...
  • Page 5: Charging The Battery Pack

    CAUTION Be sure to use JVC battery packs. If you use any other battery packs besides JVC battery packs, safety and performance cannot be guaranteed. The charging time is when the unit is used at 25°C (77°F). If the battery pack is charged outside the room temperature range of 10°C to 35°C (50°F to 95°F), charging...
  • Page 6: Inserting An Sd Card

    Inserting an SD Card Insert a commercially available SD card before recording. Close the LCD monitor. Open the cover. (Base) Insert an SD card. Label Turn off the power of this unit before inserting or removing a card. To remove the card Push the card inward once, then pull it out straight.
  • Page 7: Changing Menu Settings

    Changing Menu Settings Select an item from the menu list on the menu screen. Tap the desired menu. Tap “MENU”. VIDEO SCENE SELECT To adjust settings in the “COMMON” PLAY MENU menu, tap “Q”. The shortcut menu appears. Tap “∧” or “∨” to scroll the screen. Tap the desired item in the shortcut menu.
  • Page 8: Video Recording

    Video Recording You can record without worrying about the setting details by using the Intelligent Auto mode. Settings such as exposure and focus will be adjusted automatically to suit the shooting conditions. In case of specific shooting scenes such as person etc., its icon is displayed on the screen. Before recording an important scene, it is recommended to conduct a trial recording.
  • Page 9: Still Image Recording

    Still Image Recording Check if the Set the focus on the subject. recording mode Press halfway is B still image. If the mode is A video, tap A on the Lights up in green when touch screen, then focused tap B to switch. Take a still image.
  • Page 10: Playing Back On Tv

    Playing Back on TV Preparation: Turn off both camera and TV. To connect using the HDMI mini connector When connecting to a 1080p compatible TV, set “HDMI OUTPUT” to “AUTO”. HDMI Cable (Optional) To HDMI Mini HDMI Connector Connector Input NOTE Use a High Speed HDMI mini cable.
  • Page 11: Keep It High Definition (Windows)

    These discs can be played back in virtually any recent Blu-ray player that has the AVCHD logo. Upload to YouTube YouTube is a great way to share your videos, in either HD or SD quality. JVC makes it easy. Copying Files You can create discs or copy the files on this unit by connecting it to various devices.
  • Page 12: Install Everio Mediabrowser (Windows)

    Install Everio MediaBrowser (Windows) Everio MediaBrowser is included with your Everio MediaBrowser uses a camera. It lets you archive and organize calendar based interface that makes your videos. It also lets you create discs and it easy to find any video you have upload video to YouTube, and other recorded by selecting the popular web sites.
  • Page 13: Usb Menu Operations

    USB Menu Operations By connecting a USB cable between this The “CONNECT TO PC” menu appears. unit and your computer, you can perform Tap an option that best suits your needs. operations such as file backups to PC/disc or file uploads to file-sharing site using your CONNECT TO PC computer.
  • Page 14: File Backup (Windows)

    File Backup (Windows) Preparation: Tap “BACK UP” on the camera’s Install the Everio MediaBrowser software touch screen. onto the PC. Make sure that enough space is left in the CONNECT TO PC PC’s HDD. Disconnect the power supply to turn off the camera.
  • Page 15: Avchd Disc Creation (Windows)

    AVCHD Disc Creation (Windows) Everio MediaBrowser makes it possible Preparation: to create AVCHD discs to archive your Install the software on your PC. recordings in their original high definition Click on the “Create Disc” button. quality. You can use any standard DVD-R, DVD- RW, DVD+R or DVD+RW disc.
  • Page 16: How To Upload A File (Video Clip) To Youtube (Windows)

    Phone # USA and Canada English +1-800-458-4029 (toll-free) Europe (UK, Germany, France, English/German/French/Spanish +800-1532-4865 (toll-free) and Spain) Other Countries in Europe English/German/French/Spanish +44-1489-564-764 Asia (Philippines) English +63-2-438-0090 10800-163-0014 (toll-free) Homepage: http://www.pixela.co.jp/oem/jvc/mediabrowser/e/ Please check our website for latest information and downloading.
  • Page 17: Working With Imovie And Iphoto

    Working with iMovie and iPhoto iMovie and iPhoto You may use the software supplied with the Mac Computer to view and edit files You can import files from this unit to a from the Camera. computer using Apple’s iMovie ’08, ’09 Connect the Camera to the Mac or ’11 (video) or iPhoto (still image).
  • Page 18: Troubleshooting/Cautions

    • If the above do not solve the problem, consult Do not turn off the camcorder power or your nearest JVC dealer or JVC service center. remove the battery or AC adapter during shooting, playback, or when otherwise accessing the recording medium.
  • Page 19 fields (speakers, broadcasting Changes or modifications not approved by antennas, etc.). JVC could void the user’s authority to operate ... in places subject to extremely high (over 40°C the equipment. This equipment has been or 104°F) or extremely low (under 0°C or 32°F) tested and found to comply with the limits for temperatures.
  • Page 20: Recordable Time/Specifications

    Mass Approx. 71 g (0.15 lbs) The specifications and appearance of this product are subject to changes for further improvement without prior notice. For more information, please refer to the Detailed User Guide. http://manual3.jvckenwood.com/index.html/ *LYT2393-002A-M* ©2011 JVC KENWOOD Corporation 1211ZAR-SW-VM...
  • Page 24 2. The User shall not carry out reverse engineering, The software embedded in the Product (hereinafter disassembling, decompiling or any other code analysis the "Licensed Software") provided by JVC KENWOOD works in connection with the Licensed Software. Corporation (hereinafter the "Licensor") is copyrighted...
  • Page 25 JKC, the original in each of such individual components (hereinafter English version will be displayed by the Product. the "Licensed Software"),, a copyright of either JVC KENWOOD Corporation (hereinafter “JKC”) or a Turn on the power. (Video mode) third party subsists.

This manual is also suitable for:

Gz-ex215 everioGz-ex250 everio

Table of Contents