Table of Contents
Advertisement
Advertisement
Table of Contents

Related Manuals for REL Acoustics Habitat1


Summary of Contents for REL Acoustics Habitat1
- Page 2 REL Acoustics Limited North Road, Bridgend industrial Estate . Bridgend, CF31 3TP . United Kingdom Telephone: +44 (0)1 656 768 777 . Fax: +44 (0) 1 656 766 093 Web: www.rel.net...
- Page 3 Operating Instructions for the Habitat1 Sub-Bass Systems...
- Page 5 Important Safeguards 1 Read all of these instructions. 2 Save these instructions for future use. 3 Heed all warnings. 4 Follow all instructions. 5 Unplug from the wall socket before cleaning. Clean only with polish and micro fiber cloth. 6 Keep away from water or other liquids. Do not rest drinks, vases or other liquid-filled items on the unit. 7 Do not place on a stand or table.
- Page 6 Warning This item is heavy. To avoid risk of injury, take care when handling. Design Safety This apparatus is supplied with a detachable mains cord. For 220V operation a 1.6A fuse is fitted in the socket, for 120V operation a 3.16A fuse is fitted. Should the fuse need to be replaced use a similar rated fuse approved to ASTA or BSI 362 standards.
-
Page 7: Table Of Contents
Technical ..............................38 Specifications ............................39 Welcome to the REL Family Congratulations on your purchase of a Habitat1, the latest concept in ultra high-quality low bass for your environment. Your Habitat. Understanding the Customer’s Habitat: REL’s designers began with the understanding that more and more people are enjoying music, but in less traditional consumption formats. - Page 8 Habitat1 is simply impossible), deep bass with style and sophistication via a proprietary wireless link we call Longbow™. Habitat1 works for you, the customer. REL’s customer. It offers looks that support virtually every design idiom, from modern to traditional and everything in between; and it does so...
-
Page 9: Intro To Habitat1
Habitat1 is equipped to allow you to take full advantage of Dolby Digital AC3, DTS, MPEG 2 and any other digital sound format that includes a dedicated Low Frequency Effects (LFE) channel. -
Page 10: Habitat1 Connection Legend
4 .1/LFE INPUT: Used to connect to the .1/LFE output from a 5.1 amplifier of processor. Should be used in conjunction with REL HIGH-LEVEL connection for the ultimate theater experience. 5 Pair Switch: Used to pair REL Longbow™ transmitter with Habitat1 cabinet. REL Habitat1 Control Panel 6 Volume Control for HI/LOW INPUT: Use to adjust output when using either HIGH-LEVEL or LOW-LEVEL input. - Page 11 9 Pair Switch: Used to pair Habitat1 cabinet with REL Longbow™ transmitter. 10 Phase Switch: Used to set phase 0-180 degrees. REL Habitat1 Back Panel 11 .1/LFE INPUT: Used to connect to the .1/LFE output from a 5.1 amplifier of processor. Should be used in conjunction with REL HIGH-LEVEL connection for the ultimate theater experience.
-
Page 12: Connectivity And Functionality
There is an AC cable supplied for the subwoofer cabinet and a power adapter cable supplied for the transmitter. The design intent here is to find the perfect place for the Habitat1 on a wall with the Longbow™... - Page 13 Connecting to the Power Amplifier Using the Speakon HIGH-LEVEL INPUT To engage the Neutrik Speakon plug, insert fully into socket and rotate clockwise until locked. To remove the Neutrik Speakon plug, grip body of plug, place thumb on chrome lever, move lever backwards, rotate plug anticlockwise quarter turn and withdraw.
- Page 14 If the user prefers to connect the high level directly to the Habitat1 subwoofer, please contact your dealer for a REL 34’ 10” (10 meter) cable with a right angle Neutrik Speakon connector (PN NL4FRX) to fit between the cabinet and the wall.
- Page 15 Longbow™ wireless transmitter’s HIGH-LEVEL input. Use the Longbow™ for wireless connection. Use the HIGH-LEVEL input on the rear of the Habitat1 for direct wired connection. You must choose either wireless or direct wired as these two inputs cannot be used simultaneously.
- Page 16 • If connecting two RELs in a stereo configuration, connect the black wire of each REL to the negative speaker terminal of the corresponding amplifier channel; twist together the red and yellow wires of each REL separately and connect each pair to the positive speaker terminal of the corresponding amplifier channel. •...
- Page 17 • If connecting a REL as a dedicated rear channel sub, connect the black wire of the REL to either the left rear or right rear negative speaker terminal; connect the yellow wire to the left rear positive speaker terminal; connect the red wire to the right rear positive speaker terminal. LOW-LEVEL connection (via phono connector) is always an option if HIGH-LEVEL connection is not possible.
-
Page 18: Pairing
Habitat1 subs to the system, there are a few easy steps to follow. REL Habitat1 wireless sub bass systems come paired to a single transmitter out of the box. In the event that the sub and transmitter becomes un-paired, the owner must follow the procedure below to repair. -
Page 19: Rel Set Up Made Simple
Now that you have the Long Bow transmitter box connected to your amplifier and wirelessly paired to Habitat1, it is time to choose a location and dial in Habitat1 for your specific room. Note, this section will help guide you in selecting the best location and choosing the basic settings for Habitat1, but will not discuss installation. - Page 20 6 and 7 in the below Setting Up section for more details. You may have a wider selection of locations for installation. 6 Next we will discuss selecting the best location and proper settings for Habitat1. Remember, Habitat1 MUST be mounted to studs so you will have to find a balance between the best placement and the nearest wall stud.
- Page 21 Habitat1 on, move to step 5. As you experiment with different wall choices try to hold Habitat1 so that the bottom of the unit is 10 to 12 inches (25 to 30 cm) off the ground and use the installed bracket (see step 1 under Setting Up) to judge proper distance from the wall.
- Page 22 Listen for the best bass pressurization, extension, and integration at each location. Remember, if you are using the side wall we suggest that you locate the Habitat1 behind the main speakers if possible (in the range between the front corner and the speaker location).
- Page 23 7 Selecting Location When Using Masonry Walls (Brick or Cement-based Building Blocks): All of the same notes and suggestions apply to locating Habitat1 in a room built using masonry. However, you are no longer limited by stud locations resulting in far more choices in placement. Use the same voicing technique described above, and note that front wall placement still generally results in the best overall performance.
- Page 24 ANY single sub can produce. For REL Theater Reference 3D Bass™ each Habitat1 will require an independent Longbow™ transmitter box.
- Page 25 3 Connect to the center channel a third REL using ONLY the HIGH-LEVEL connection. This may be easily accomplished by connecting directly to the connection terminals on the rear of the center channel speaker. To do so, first twist the red and yellow leads together and connect to the positive terminal, then connect the remaining black lead to the negative (black) terminal on the rear of the speaker.
-
Page 26: Mounting
The Habitat1 must be securely anchored to the wall. There are two sets of mounting brackets for the Habitat1 cabinet. Each set is made up of a wall side bracket and a cabinet side bracket that are designed to fit together to create a solid mounting for the Habitat1. - Page 27 REL Setup Made Simple section. 3 Determine placement of the Habitat1. See the REL Setup Made Simple section of this manual. 4 Locate nearest studs to optimum placement. Habitat1 must be installed onto wall studs.
- Page 28 6 Next hold bracket A to the wall below the mark from the top bracket. 7 Level the bracket against the wall and mark the screw hole locations. Make sure that the screws will hit the studs. 8 Drill a pilot hole for each screw hole using the drill/ driver and 3/32 drill bit. 9 Place long gasket on the back side bracket A.
- Page 29 10 Screw top bracket to wall using drywall screws. Make sure screws are tight and bracket is mounted securely to wall. 11 With top wall bracket (bracket A) in place, use the supplied wall mount template to locate the holes for bracket C.
- Page 30 16 Screw bottom bracket to wall with drywall screws. Make sure screws are tight and bracket is mounted solid to wall. 17 Connect AC cable provided to back panel of Habitat1. Lift cabinet to wall and lower onto brackets.
- Page 31 Tighten the three provided screws 1/2 turn at a time starting with one side and rotating through each one. Using this method will take several passes to get the screws tight. You will notice that with each pass the Habitat1 is evenly pulled into the bracket. 20 Secure bottom bracket with the two 50mm long cap head hardware provided from the bottom side of the bracket.
- Page 32 21 Install Grille. Now that the Habitat1 sub woofer is mounted to the wall, it is time to revisit the settings to really dial in the system. Crossover and Level Settings: To determine the crossover point, take the volume of the REL (using the HI/ LOW Level control) all the way down, and put the crossover to 25 Hz.
- Page 33 Wall anchors will be required to screw the top and bottom brackets to the wall. The supplied set of brackets should work with all types of solid walls. Both brackets are required for the Habitat1 to function properly. Two people are recommended for proper installation.
- Page 34 REL Setup Made Simple section. 3 Determine placement of the Habitat1. See the REL Setup Made Simple section of this manual. 4 Holding the cabinet in place on the wall, mark the wall along the top edge of the top bracket and at the...
- Page 35 5 Next hold bracket A to the wall below the mark from the top bracket. 6 Level the bracket against the wall and mark the screw hole locations. 7 Drill a pilot hole for each screw hole using the drill/ driver and 3/16 drill bit. 8 Drill hole for anchors using the drill / driver and 5/16 drill bit.
- Page 36 9 Put glue on masonry anchors before installing. 10 Push masonry anchor into wall and drive flush with hammer. 11 Place long gasket on the back side bracket A. Gasket must go between wall and bracket. Do not omit the use of this gasket. 12 Screw top bracket to wall using screws.
- Page 37 13 With top wall bracket (bracket A) in place, use the supplied wall mount template to locate the holes for bracket C. This template should work for all solid walls. Place template directly under bracket A and mark the holes indicated for your wall construction. The top of bracket C should be 323mm (12.7 inches) is below the top of bracket A.
- Page 38 Tighten the three provided screws 1/2 turn at a time starting with one side and rotating through each one. Using this method will take several passes to get the screws tight. You will notice that with each pass the Habitat1 is evenly pulled into the bracket.
- Page 39 22 Secure bottom bracket with the two 50mm long cap head hardware provided from the bottom side of the bracket. Bottom of Habitat1 23 Install Grille...
- Page 40 Now that the Habitat1 sub woofer is mounted to the wall, it is time to revisit the settings to really dial in the system. Crossover and Level Settings: To determine the crossover point, take the volume of the REL (using the HI/ LOW Level control) all the way down, and put the crossover to 25 Hz.
-
Page 41: Technical
Technical The Longbow™ transmitter provides true REL Theater Reference™ connectivity, permitting both HIGH LEVEL and LFE channels to be wirelessly fed to Habitat1. This occurs with virtually zero delay and a complete absence of compression. Habitat1 uses a very fast, gentle and transparent filter intended to allow excellent impulse response and a natural sound. -
Page 42: Specifications
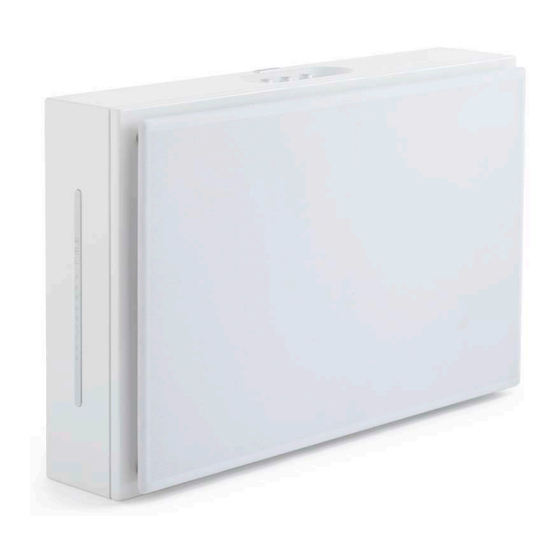
Specifications Habitat1 Type: Sealed, two front-firing active woofers, one back-firing passive woofer Drive Unit: Two 6.5in., 165mm long-throw, steel chassis Passive Unit: 10in, steel chassis Lower Frequency Response: 38 Hz at -6 dB in room Input Connectors: High-Level Neutrik Speakon... - Page 43 6 x 2 x 6.5 in., (152.4 x 50.8 x 165 mm) Finish: Gloss Piano Black or Gloss White Lacquer Supplied Accessories Power adapter: In the interest of product improvement, REL Acoustics Limited reserves the right to alter these specifications without notice.
Need help?
Do you have a question about the Habitat1 and is the answer not in the manual?
Questions and answers