
Related Manuals for Samsung AQA24C5ME


Summary of Contents for Samsung AQA24C5ME
-
Page 1: Table Of Contents
ROOM AIR CONDITIONER INDOOR OUTDOOR AQA24C5(6)ME UQA24C5(6)ME SH24AC5(6) SH24AC5(6)X AQA18C9(0)ME UQA18C9(0)ME SH18AC9(0) SH18AC9(0)X Manual SERVICE AIR CONDITIONER CONTENTS 1. Precautions 2. Product Specifications 3. Operating lnstructions and Installation 4. Disassembly and Reassembly 5. Troubleshooting 6. Exploded Views and Parts List 7. -
Page 2: Precautions
Relocate the unit if necessary. 9. Keep children away from the unit while it is being repaired. Fig. 1-3 No Kids Nearby! 10. Be sure to clean the unit and its surround- ing area. Fig. 1-4 Clean the Unit Samsung Electronics... - Page 3 MEMO Samsung Electronics...
-
Page 4: Product Specifications
Width 1153 1023 1153 Depth Weight 61.5 53.5 Shipping 65.5 57.0 Remarks : Rating Conditions are : Indoor air temperature ISO(50Hz) : 27˚C DB/19.0˚C WB, ISO(60Hz) : 27.0˚C DB/19.5˚C WB Outdoor air temperature ISO : 35.0˚C DB/24.0˚C WB Samsung Electronics... -
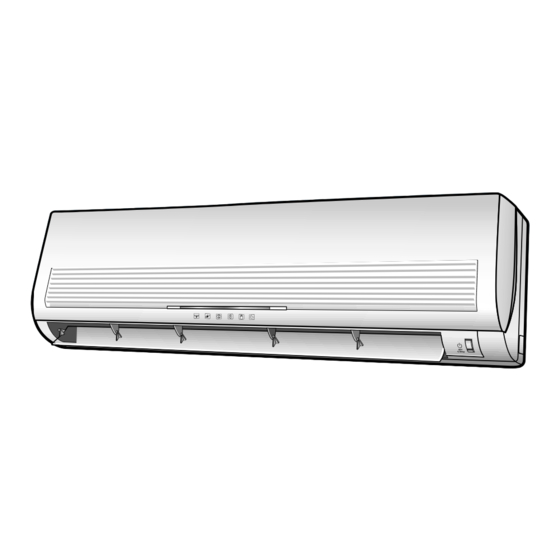
Page 5: Major Component Specifications
˚C Run capacitor µF x VAC 4µF x 450VAC 2.5µF x 450VAC Coil AL-FIN / Copper tube AL-FIN / Copper tube Rows x Steps Heat 2 x 28 2 x 28 Exch. Fin pitch Face area 0.538 0.500 Samsung Electronics... - Page 6 2-3 Dimensions 2-3-1 Indoor Unit (Front view) (Remote control) 1080 (Rear view) Installation plate The feature is subject to be varied as a model. Samsung Electronics...
-
Page 7: Product Specifications
Product Specifications 2-3-2 Outdoor Unit 24K BTU (Front view) (Rear view) 18K BTU (Front view) (Rear view) Samsung Electronics... -
Page 8: Pressure Graph
2-4 Pressure Graph 24K BTU 30.6/22.5 27/19 21.5/14.6 Outdoor drybulb temp [deg C] 18 BTU 30.6/22.5 27/19 21.5/14.6 Outdoor drybulb temp [deg C] Samsung Electronics... - Page 9 MEMO Samsung Electronics...
-
Page 10: Operating Instructions
To select the 5 way function with the remote control, press the 5 way button one or more times until the desired mode is selected. Each time you press the 5 way button Each 5 way indicator on the indoor unit comes on in order. Samsung Electronics... - Page 11 De-ice end by sensing of the processing 7. FAN SPEED : Manual (3 step), Auto (4 step) time by de-ice Condition. Fan speed automatically varies depending on both the difference between setting and the room temperature. Samsung Electronics...
- Page 12 "beep". 10. 24-Hour ON/OFF Real Setting Timer. : The air conditioner is turned ON at a specified time using Samsung Electronics...
- Page 13 It is harmful to the air conditioner if it is used in the following environments: greasy areas (including areas near machines), salty areas such as coast areas, areas where sulfuric gas is present such as hot spring areas. Contact your dealer for advice. Samsung Electronics...
-
Page 14: Installation Diagram Of Indoor Unit And Outdoor Unit
“H”metere s maximum Remote control Remote control holder Model ** 18 ** ** 24 ** Piping (Liquid) 1/4" Putty Clamper tube 18K BTU Piping(Gas) 1/2” 24K BTU Piping(Gas) 5/8” Installation plate Installation tube Screw Vinyl tape Drain hose Samsung Electronics... - Page 15 Result : All inert gas escapes from the indoor unit. • To prevent dirt or foreign objects from getting into the pipes during installation, do NOT remove the caps completely until you are ready to connect the piping. Samsung Electronics...
- Page 16 4. Pass the drain hose through the hole in the wall, making sure that it is sloping downwards, as shown in the illustrations above. The hose will be fixed permanently into position once Shield the whole installation has been tested for gas leaks; Drain hose Extension drain hose Samsung Electronics...
- Page 17 6. To prevent the entry of water, form a trap of the ass'y cable as illustrated in the installation dia- gram of indoor and outdoor unit. Ass’y cover valve (RO Hand cabi, RH) N1 L1 1 Indoor unit Outdoor unit N1 L1 1 Circuit Breaker (Main Power) Samsung Electronics...
- Page 18 And mount the service port cap to 3-way valve. 7. Check for gas leakage. - At this time, especially check for gas leakage from the Stem cap Valve stem 3-way valve’s stem nuts, and from the service port cap. Samsung Electronics...
- Page 19 R410A 7. Stop operation of the air conditioner. 8. Close the 3-way valve, disconnect the pressure gauge, and open the 3-way valve again. 9. Close the cap of each valve. 3-10 Samsung Electronics...
- Page 20 1m. MODEL “A” SH18AC9(0)(X) SH24AC5(6)(X) 3-2-2(i) Flare nut fixing torque Torque (kg-cm) Outter diameter Fixing Torque Final Torque ø 6.35 (9000Btu, 12000Btu) (Liquid Side) ø 9.52 (9000Btu) (Gas Side) ø 12.7 (12000Btu) (Gas Side) Samsung Electronics 3-11...
- Page 21 At this time, cover the pipe of the indoor 8. Remove the mounting plate for the indoor unit and the other pipe using a cap or vinyl unit and move it to a new location. plug to avoid foreign material entering. 3-12 Samsung Electronics...
-
Page 22: Disassembly And Reassembly
7) Pull the upper left, right and Center of discharge softly for the outside cover to be pulled out. 8) Pull softly the lower part of discharge and push it up. Caution; Assemble the front panel and fix the hooks of left, right and Center. Samsung Electronics... - Page 23 4) Separate the bush body at the upper side and holder at the rearside. 5) Loosen the two fixing screws of left side. 6) Lifting the heat exchanger up a little to push the up side for separation from the indoor unit. Samsung Electronics Samsung Electronics...
- Page 24 2) Loosen the fixing three screws and separate the motor holder. 3) Loosen the fixing screw of fan motor. (By use of M3 wrench) 4) Separate the fan motor from the fan. 5) Separate the fan from the left holder bearing. Samsung Electronics...
-
Page 25: Outdoor Unit
Fan Motor 1) Do Procedure 1 above. & 2) Remove the nut flange. Propeller Fan (Turn to the right to remove as it is a left turned screw) 3) Disassemble the propeller fan. Samsung Electronics... -
Page 26: Troubleshooting
Indoor unit heat exchanger temperature sensor Error (open or short) 4 NATURE LED blinking (1Hz) Indoor fan malfunctioning (for speed is Below 450rpm) EEPROM Error 5 STD, NATURE and TIMER LED blinking(1HZ) 6 AII LED blinking (1Hz) Option Error (Option wasn’t setup or option data error) Samsung Electronics... -
Page 27: Fault Diagnosis By Symptom
Check PCB pattern. Refer to Replace ICO2 10ms Replace nidule PCB. Is voltage output terminal of D101~D105(IN4007) normal? Are voltage at #18 and #19 of the micom normal? Replace resonator (X501) 100ms Replace IN4007 Is operation normal? Replace micom Samsung Electronics... - Page 28 Test rod location Normal voltage PCB CN73 Condition Fan operate = AC 180V Pin 3, Pin 5 MF-C is out of order Replace MFC Fan motor Fan motor should be replaced. is out of order. Samsung Electronics...
- Page 29 Is the rating voltage ±10% range applied relay between out of order replaced. CN78 ! and # . Outdoor unit is out of order. Is the room sensor normal register? (25°C 10KΩ) 10°C 20°C 30°C 17.96k Ω 12.09kΩ 8.3kΩ Samsung Electronics...
- Page 30 Is the voltage between CN71 #5 and CN78 #1 the rating voltage ±10% range? Abnormal RY73 Abnormal 4way valve of Outdoor Unit. or connecting Cable Refer to replace PCB module 4 way valve should be replaced or connecting Cable Check. Samsung Electronics...
-
Page 31: Samsung Electronics
Voltage at PIN #30 of Remocon Micom change? Voltage at collecter of Q601 or Q602 change? Q601(C4375Y) or Q602(C1623Y) is faulty. IR LED(CL-1L5EU) is faulty. Voltage at pin #26 of micom (IC04) change (INDOOR UNIT)? Receiver module is faulty. Micom (IC04) is faulty. Samsung Electronics... -
Page 32: Replace Pcb Module
5-3 Replace PCB module 5-3-1 Replace PCB module Remove power cord Replace the PCB module Check the connection and plug in Replace another PCB module Does all display lamp blink or STD lamp blink? Refer to set up the Model option(5-3-2) Samsung Electronics... - Page 33 $ When pressing the button appear on the display, select one of them. % When pressing the button appear on the display, select one of them. ^ When pressing the button appear on the display, select one of them. Samsung Electronics...
- Page 34 If all lamps of indoor unit are flickering, Plug out and plug in again and pressing ON/OFF key to retry. If the unit is not working properly or all lamps are continuously flickering after setting the option code, see if the correct option code is set up for it’s model. Samsung Electronics...
- Page 35 Troubleshooting OPTION ITEMS REMOCON SEG1 SEG2 SEG3 SEG4 SEG5 SEG6 SEG7 SEG8 SEG9 SEG10 SEG11 SEG12 MODEL AQA24C5ME SH24AC5 AQA24C6ME SH24AC6 AQA18C9ME SH18AC9 AQA18C0ME SH18AC0 5-10 Samsung Electronics...
- Page 36 5-4-2 Procedure The parts should be replaced in the following procedure. Check for any faulty part. Detach the faulty part. Replace it with a new part. Check the operation of the new part. The repair is completed. Samsung Electronics 5-11...
- Page 37 Set the power on. : relay off 12[v] 2. Voltage at terminal block • RY71 is faulty ((N1)-1) rating voltage • RY72 or RY74 is faulty ((N1)-2 or 4) rating voltage • RY73 is faulty ((N1)-3) rating voltage 5-12 Samsung Electronics...
-
Page 38: Exploded Views And Parts List
6. Exploded Views and Parts List 6-1 Indoor Unit 17R or 16R You can search for the updated part code number through the ITSELF. URL : http://itself.sec.samsung.co.kr Samsung Electronics... - Page 39 ASSY TERMINAL BLOCK 6P,25A DB31-10151C MOTER FAN IN IC-9430SKC7A DB94-00040J ASSY CROSS FAN ASSY PD-SH30ZC-00 ASSY MAIN PCB ASSY DB32-00027B ASSY THERMISTER ASSY DB61-10163A CASE-CONTROL ABS(V0) DB94-00107A ASSY BACK BODY ASSY DB90-00434A HOLDER PIPE DB70-10663A PLATE HANGER SGCC-M Samsung Electronics...
- Page 40 6-2 Outdoor Unit 6-2-1 18K BTU 12-4 12-5 12-3 12-2 12-1 15-2 15-1 15-3 15-6 15-5 15-4 13-1 17-1 17-3 17-4 17-2 17-7 17-6 17-5 Samsung Electronics...
- Page 41 DB72-50537A CLOTH SOUND 17-1 DB39-00121A CONNECT POWER 3G,2.5mm 17-2 DB39-00171A CONNECT WIRE 7G, 1.00mm 17-3 DB67-20011A DRAIN PLUG OUT 17-4 DB63-10355C CAP DRAIN 17-5 DB60-30010A NUT FLANGE 1/4” C3771BD 17-6 DB60-30010C NUT FLANGE 1/2” C3771BD 17-7 DB73-20134A RUBBER-LEG Samsung Electronics...
- Page 42 Exploded Views and Parts List 6-2-2 24K BTU 12-3 15-6 12-4 15-1 13-1 15-5 15-4 15-2 12-2 15-3 15-2 12-1 17-1 17-3 17-2 17-6 17-5 17-4 Samsung Electronics...
- Page 43 MOTOR CAPACITOR 4µF/450VAC DB72-00690A SPONGE-COMP SIDE PVC+FELT 17-1 DB39-00121A CONNECTOR POWER 3G,2.5mm 17-2 DB39-00171A CONNECT WIRE 7G, 1.0mm 17-3 DB67-20011A DRAIN PLUG OUT 17-4 DB63-30010A NUT FLANGE 1/4” C3771BD 17-5 DB60-30010D NUT FLANGE 5/8” C3771BD 17-6 DB73-20134A RUBBER-LEG Samsung Electronics...
- Page 44 6-3 Remote Control & PCB Box 6-3-1 Remote Control (DB93-00251L) Parts List Description Specification Q’TY Remark ASS’Y PCB REMOCON ARH-403 BATTERY COVER Samsung Electronics...
- Page 45 Exploded Views and Parts List 6-3-2 PCB Box Parts List CODE NO Description Specification Remark Q’TY PD-SH30ZC-00 ASS'Y MAIN PCB PD-SH30ZC-00 DB32-00027B ASS'Y THERMISTOR 103AT 240/240 DB93-00926A ASS’Y PCB S/W & MODULE ASS’Y DB39-00172A CONNECTOR WIRE DISPLAY AWG#26 Samsung Electronics...
-
Page 46: Block Diagrams
7-1 Refrigerating Cycle Block Diagram INDOOR UNIT OUTDOOR UNIT Capillary tube Check valve 2-way valve Liquid side Capillary tube Heat Heat exchanger exchanger (Evaporator) (Condenser) Gas side 3-way valve 4-way valve Accumulator Cooling Heating Compressor Gas leak check point Samsung Electronics... -
Page 47: Pcb Diagrams
8. PCB Diagrams 8-1 Main PCB 8-1-1 Indoor Unit (PD-SH30ZC-00/PD-SH30ZC-02) Samsung Electronics... - Page 48 1WALL,3P/5P,1R,3.96mm,S CN71 CONNECTOR-HEADER 1WALL,3P/5P,1R,3.96mm,S CN73 CONNECTOR-HEADER 1WALL,3P/5P,1R,3.96mm,S CN91 CONNECTOR-HEADER BOX,10P,1R,2.5mm,STRAIG CN43 CONNECTOR-HEADER BOX,3P,1R,2.5mm,STRAIGH CN41 CONNECTOR-HEADER BOX,4P,1R,2.5mm,STRAIGH CN61 CONNECTOR-HEADER BOX,6P,1R,2.5mm,STRAIGH IC07 IC-MASK ROM 93LC56B,8BIT,-,DIP,8P,-,-,- IC03 IC-RESET KA7533,DIP,-,-,-,-,- IC06 IC-DRIVE KID65003AP,DIP,16P,STICK,TR-AR L101 COIL CHOKE 5.0mH,-,8.0*11.0,-,-,PE-M10 WIRE-SO COPPER PI0.6,SN,T,52MM,TAPING_WI PCB-MAIN PD-SH30ZC-00,FR-1,-,-,T1.6,W197 Samsung Electronics...
- Page 49 PCB-DISPLAY FR-1 T1.6 MODULE REMCOON FRP-4021H6 TACT SWITCH KPT-1105A C-CERAMIC CA 0A 50V 102Z C-CERAMIC CA 0A 50V 104Z DIODE SWITCHING 1N4148 R-CARBON 1/4W 470KΩ-J JUMP-WIRE 10mm CONNECTOR WAFER SMAW200-5P(WHT) CONNECTOR WAFER SMAW200-10P(WHT) ASS’Y CENTER DISPLAY : DB93-00860A Samsung Electronics...
-
Page 50: Wiring Diagrams
9. Wiring Diagrams 9-1 Indoor Unit Samsung Electronics... - Page 51 9-2 Outdoor Unit SH24AC5(6)X, SH18AC9(0)X MARK NAME MARK NAME POWER-RELAY T1 1, 2 TERMINAL BLOCK SOLENOID COIL CAPACITOR FAN MOTOR FUSE(2A, 250V~) SPARK KILLER Samsung Electronics...
- Page 52 MEMO Samsung Electronics...
-
Page 53: Schematic Diagrams
10. Schematic Diagrams 10-1 Indoor Unit 10-1 Samsung Electronics Samsung Electronics 10-2... - Page 54 MEMO 10-3 Samsung Electronics...
- Page 55 Itself Solution Integrated technology supporting electronic library http://itself.sec.samsung.co.kr Copyright © 2002 By Samsung Electronics Co., Ltd. All rights reserved. This manual may not, in whole or in part, be copied, photocopied, reproduced, translated, or converted to any electronic or machine readable from without prior written permission of Samsung Electronics Co., Ltd.
- Page 56 ELECTRONICS © Samsung Electronics Co., Ltd. Apr. 2002. Printed in Korea. Code No. DB98-05230A(1)
Need help?
Do you have a question about the AQA24C5ME and is the answer not in the manual?
Questions and answers