Table of Contents
Advertisement
Advertisement
Table of Contents

Related Manuals for GE NX-10


Summary of Contents for GE NX-10
- Page 1 Security NX-10 Alarm system user manual GE imagination at work...
- Page 2 PSTN network termination point. ww.gesecurity.com Copyright(c) 2009 GE Security B.V.. All rights reserved. GE Security B.V. grants the right to reprint this manual for internal use only. GE Security B.V. reserves the right to change information without notice.
-
Page 3: Table Of Contents
Keypad keys ....................7 Changing phone numbers ..............25 LCD icons ......................8 Setting up light control ................26 Using the NX-10 menus .................9 Activating your light control system ..........27 Preparing your system ................10 Up/downloading data ................28 Arming and disarming using a single-partition keypad ..11 Arming and disarming using a master keypad ......12... -
Page 4: Menu Map
Output 3... Arm Only After Closing Arm Only Arm/Disarm Partitions Master Code Language Bypass Zones Name Reports Open/Close Add One Card NX-1701 Proximity Readers* Add Multiple Cards Activate Card Deactivate Card Delete One Card *available only if installed NX-10 User Manual... - Page 5 Bypass Zones Zone 9-16 (2) Zone 2 Zone 17-24 (3) Zone 3... Zone 25-32 Group Bypass Zone 33-40 Alarm Memory Zone 41-48 Service Check Light Control Detector Reset Chime Answer U/D Call Download Begin U/D Call Change Batteries NX-10 User Manual...
-
Page 6: Lcd Keypad
: Navigation and editing keys. NO: A rejection and navigation key. : A key that toggles Chime mode on and off. #: A key that activates the function of the : An acceptance and navigation key. next key that is pressed. NX-10 User Manual... -
Page 7: Keypad Keys
Press # F5 (or ) to move to the last character or number. These keys can be programmed by the installer to perform certain • Press # to delete from the current position to the end. functions. NX-10 User Manual... -
Page 8: Lcd Icons
If it is NOT OK to the left one if ANY zone is bypassed, arm, the V-sign disappears. In case the right one if NO zone is bypassed. the force armable zone is open, it will flash on and off. NX-10 User Manual... -
Page 9: Using The Nx-10 Menus
Using the NX-10 menus Quick User menu Navigating the menus You can access a limited number of menu options, without entering a Press to move through different menu options. user code, through the Quick User menu. Press OK, and then press The quick user menu and the user menu contain lists of entries such keys to enter and navigate the command menu. -
Page 10: Preparing Your System
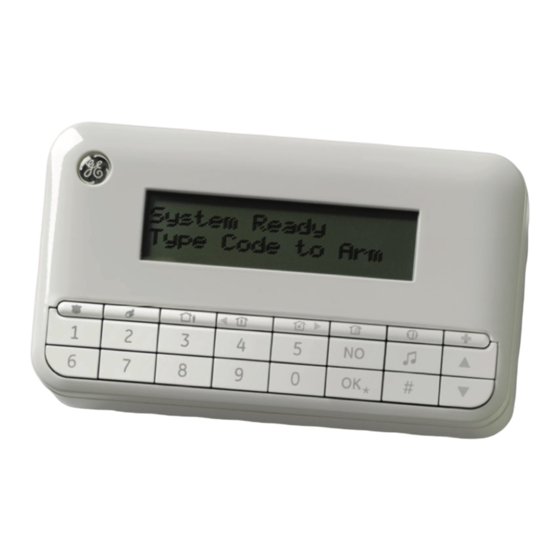
..zones, see page 17. Any bypassed zones are shown. Ensure that these zones need to be nnn Bypass ..bypassed. <description> 6. Your system is ready to be armed..System Ready Type Code to Arm NX-10 User Manual... -
Page 11: Arming And Disarming Using A Single-Partition Keypad
Disarm 2. Enter your user code..Your system is disarmed and the keypad sounder stops. System Ready ..Note: Press NO key to clear any incorrectly entered user code or other Type Code to Arm information. NX-10 User Manual... -
Page 12: Arming And Disarming Using A Master Keypad
Note: When you open the door to enter the secured partition, the entry delay ..starts, Type Code to Disarm message displays, and the keypad sounds continuously. It stops when you disarm the selected partitions. NX-10 User Manual... -
Page 13: Disarming Your System After An Alarm
Note: You can view the alarm memory at any time from the quick user menu or user menu. Enter the quick user menu by pressing OK and then pressing key, select Alarm Memory and press OK. Note: Press NO key to clear any incorrectly entered user code or other information. NX-10 User Manual... -
Page 14: Resetting Fire Detectors
Detector Reset and press OK..Quick User Menu Detector Reset 6. The fire detectors are reset, the fire alarm icon disappears and your ..System Ready system is ready to be armed. Type Code to Arm NX-10 User Manual... -
Page 15: Using Life Safety Functions
Note: If the installer has programmed the personal attack alarm to be silent, a report is sent to the central station but the siren and keypad make no sound. NX-10 User Manual... -
Page 16: Viewing The Status Of A Zone
Note: When previewing problem zones, you can immediately bypass any zone displayed as off normal with the Bypass Zones function key the keypad. *1 Open The problem zone is bypassed, and the keypad displays a star next to the Zone 1 zone number. NX-10 User Manual... -
Page 17: Bypassing One Or More Zones
To remove a zone from the bypassed Enter Zone No. zone set, enter its number again. Note: The installer can set the keypad to require the user code when selecting zones to bypass. NX-10 User Manual... -
Page 18: Changing Your User Code And Name
..displayed. 7. Press to overwrite or insert text. Press to delete text..Name ..8. Press the character keys to enter a new name of up to 15 characters in John length and press OK. NX-10 User Manual... -
Page 19: Changing Another User's Code And Name
7. Scroll to Name and press OK. The user’s name is displayed..Name Ann Lee 8. Press to overwrite or insert text. Press to delete text. Enter a ..new name of up to 15 characters in length and press OK. NX-10 User Manual... -
Page 20: Changing User Rights
Partitions and press OK. The partitions the user can access are listed..• Press a partition number to assign it to the selected user. Press the Partitions number again to unassign the partition. Press OK. 1 _ 3 4 NX-10 User Manual... -
Page 21: Setting The System Time And Date
..You can also enter digits from the keypad. 4. Press OK to accept the change and move on. Press NO to cancel the ..change. NX-10 User Manual... -
Page 22: Adjusting The Keypad Settings
3. The current volume is shown as a horizontal bar chart. Keypad keeps ..Keypad Volume beeping to help setting required volume. ------- --------- ..4. Press F4 ( ) to decrease the volume, or F5 ( ) to increase it, and press OK. NX-10 User Manual... -
Page 23: Adjusting The Lcd Display
..press OK. 6. Scroll to Backlight Always On and press OK..User Menu Backlight Alwa> 7. Navigate with the keys to Enabled or Disabled and press OK to ..turned the backlight on or off. NX-10 User Manual... -
Page 24: Reading The Event Log
4. In this case, the alarm occured in zone 168 (with the assigned zone Warehouse ..name Office). This is the 28 event in the log. 48 Office 028 5. Press the keys to scroll through the events in the log..NX-10 User Manual... -
Page 25: Changing Phone Numbers
..4. Press # to move to the start of the phone number and then press # to delete the whole number. 5. Enter a new number and press OK..NX-10 User Manual... -
Page 26: Setting Up Light Control
Module Number 6. Scroll to House Code and select your house code with the keys..Device 1 House code is always a single letter. Ensure that you turn on the House Code switches in the correct house! NX-10 User Manual... -
Page 27: Activating Your Light Control System
2. Press the relevant number to add the device to the set of selected ..Devices devices. In this case, device 2 and 5 are selected. -2--5----- 3. Press to switch all selected devices on or off. The devices are ..turned on or off depending on their current state. NX-10 User Manual... -
Page 28: Up/Downloading Data
Downloading ..is answered. In Progress To answer a call 1. Navigate with the keys to Answer U/D call and press OK..2. The control panel answers the computer and uploading begins..Downloading In Progress NX-10 User Manual... -
Page 29: Testing Your System
5. If there are any problems, a service message is displayed on the LCD....Service Message See page 31 for more information. Note: Use the keys to scroll through the walktest and service check results on the LCD display. NX-10 User Manual... -
Page 30: Adding And Deleting Cards
7. The user card information for the re-entered user number is cleared ..and LED 1 stops flashing. Note: 40 seconds after you have finished scanning cards, all the readers in the system are updated with the new card information. NX-10 User Manual... -
Page 31: Service Messages
Panel control panel is not working connected properly. Line Fault properly. The control panel tried to send a Ensure that the phone line is Panel message to the central station but connected properly. Fail to Communicate failed. NX-10 User Manual... - Page 32 Fail to Communicate failed. connected and working properly. The mains power supply is not Reconnect the mains power supply Remote connected to an expansion module and ensure it is working properly. Mains Fault power supply. NX-10 User Manual...
- Page 33 The connection to an expansion Contact the installer. Remote module’s siren is broken. Siren Fault There is a problem with a zone. Press Contact the installer. Zone Problem. OK to identify the zone(s) and the Press OK problem condition. NX-10 User Manual...
-
Page 34: Glossary
A module that can be added to the control without triggering an alarm. panel to increase its functionality. For ex- Buzzer A local low volume vibrating audio output, ample, a keypad, audio panel or a card typically located in the keypad. reader. NX-10 User Manual... - Page 35 Zone An partition guarded by a group of one or Reports Open/Close A menu option that sets the code of the more detection devices. selected user to report arms (close) and disarms (open). NX-10 User Manual...
-
Page 36: Battery Replacement
CAUTION: Batteries can explode or cause burns when recharged, incorrectly (dis)assembled, or exposed to fire or high temperatures. Dispose of used battery according to battery directive instructions and/or as required by local laws. Keep away from children. NX-10 User Manual... -
Page 37: Notes
Notes NX-10 User Manual... - Page 38 1060792...
Need help?
Do you have a question about the NX-10 and is the answer not in the manual?
Questions and answers