
Related Manuals for SMA CLUSTER CONTROLLER

Summary of Contents for SMA CLUSTER CONTROLLER
- Page 1 Device for Monitoring and Controlling SMA Inverters in Decentralised Large-Scale PV Plants SMA CLUSTER CONTROLLER Installation Manual ClusterController-IA-en-10 | Version 1.0...
-
Page 3: Table Of Contents
4.1 Cluster Controller........ - Page 4 7.2 Faults in the Cluster Controller or the Connected Devices ..70 7.3 Resetting the Cluster Controller ......75 8 Decommissioning .
- Page 5 SMA Solar Technology AG Table of Contents 9 Technical Data ........77 10 Accessories .
-
Page 6: Information On This Document
1 Information on this Document SMA Solar Technology AG 1 Information on this Document Validity This document is applicable for the device type "CLCON-10.GR1" from hardware version A1 and from firmware version 1.0. Target Group This document is intended for skilled persons. Only qualified personnel are allowed to perform the tasks described in this manual (see Section 2.2 "Qualifications of Skilled Persons", page 10). - Page 7 SMA Solar Technology AG 1 Information on this Document Nomenclature Complete designation Designation in this document Large-scale PV plant Plant PV inverter Inverter SMA Cluster Controller Cluster Controller Abbreviations Abbreviation Designation Explanation Change Over Relay change-over contact DHCP Dynamic Host Configuration Protocol Protocol for the dynamic assignment of IP...
-
Page 8: Safety
• Sending the plant data to an FTP server and/or the Sunny Portal Internet portal • Performing updates for the Cluster Controller and the inverters The Cluster Controller is an ITE Class A device according to EN 55022 and is designed for industrial use. - Page 9 SMA Solar Technology AG 2 Safety Supported Products SMA products The Cluster Controller can establish a connection to and display data on the following SMA products that are equipped with Speedwire communication: Inverters: • All inverters with integrated or retrofitted Speedwire/Webconnect interface...
-
Page 10: Qualifications Of Skilled Persons
2.3 Safety Precautions Electric Shock If the enclosure of the Cluster Controller is not earthed, there is a danger of electric shock. • Earth the enclosure of the Cluster Controller (for information on connecting the protective conductor, see Section 6.13). -
Page 11: Scope Of Delivery
SMA Solar Technology AG 3 Scope of Delivery 3 Scope of Delivery Check the scope of delivery for completeness and any externally visible damage. Contact your specialist dealer if the delivery is incomplete or damaged. Figure 1: Components included in scope of delivery... -
Page 12: Product Description
SMA Solar Technology AG 4 Product Description 4.1 Cluster Controller The Cluster Controller is a device for monitoring and controlling up to 75 SMA inverters in decentralised large-scale PV plants. For this purpose, the Cluster Controller performs the following essential tasks: •... - Page 13 Cluster Controller, either in the form of digital or analogue signals (e.g. to a ripple control receiver that is connected to the Cluster Controller) or via the Modbus client. In agreement with your network operator, you can use the user interface of the Cluster Controller to configure which setpoints of the Cluster Controller are to be transmitted to the connected inverters depending on the respective signal.
- Page 14 Performing Updates for the Cluster Controller and the Inverters You have the option of performing updates for the Cluster Controller and the inverters in the plant (see the Cluster Controller user manual). You can perform the updates automatically or manually. The update source can be the SMA update portal or a USB data carrier with update files downloaded from the Internet.
- Page 15 SMA Solar Technology AG 4 Product Description Figure 3: Decentralised large-scale PV plant with Cluster Controller (example) Item Designation PV modules Module temperature sensor Inverters Outside temperature sensor Irradiation sensor Cluster Controller Sunny Portal Router Ripple control receiver or remote terminal unit...
-
Page 16: Type Label
4 Product Description SMA Solar Technology AG 4.2 Type Label The type label provides unique identification of the Cluster Controller. The type label can be found on the back of the enclosure. Figure 4: Layout of the type label Item Explanation... -
Page 17: Leds
(for a description of the LED statuses, see Section 7.1.1) Status LED Displays the status of the Cluster Controller and the connected devices as well as the communication status of the plant and the status of the grid management (for a description of the LED statuses, see Section 7.1.1) -
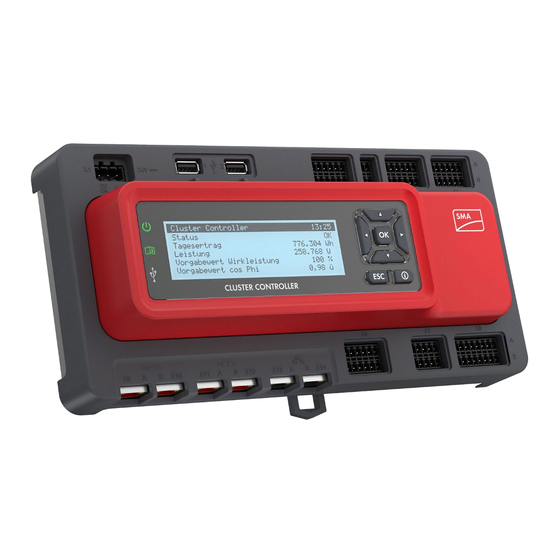
Page 18: Display
LED statuses, see Section 7.1.2) 4.4 Display The display shows information on the Cluster Controller and the connected devices as well as the plant status and the plant configuration. The display contrast can be configured (see the Cluster Controller user manual). - Page 19 Displays the yield data of the plant Plant status Displays the current plant status The number of inverters detected by the Cluster Controller and the status of the inverters is displayed here Cluster Controller Displays the status and device information of the...
-
Page 20: Button Field
4 Product Description SMA Solar Technology AG 4.5 Button Field Designation Explanation Any button Activates the display illumination Arrow buttons (◂, ▸, ▴, ▾) Change the display views and select specific display lines [OK] Confirms the selected action [ESC] Cancels the selected action ⓘ... -
Page 21: Assembly
Requirements for the mounting location: Radio interference in living areas possible due to the Cluster Controller The Cluster Controller is a device of ITE class A (EN 55022) and can cause radio interference in living areas. • Take suitable measures for shielding radio waves when used in the vicinity of living areas. - Page 22 • Maintain the minimum clearance to walls and other devices or objects. Observe permitted mounting position: • Mount the Cluster Controller in such way, that the ventilation slots face the top and the bottom. This ensures adequate ventilation and avoids overheating of the Cluster Controller.
-
Page 23: Mounting The Cluster Controller
☐ The top-hat rail must be 35 mm wide. ☐ To mount the Cluster Controller, the top-hat rail must be at least 26 cm long. ☐ To mount the top-hat rail power supply unit, the top-hat rail must be correspondingly longer. -
Page 24: Connection
6 Connection SMA Solar Technology AG 6 Connection 6.1 Overview of the Connection Area Figure 9: Overview of the connection area Item Quantity Designation Explanation Terminal for the voltage supply ‒ Terminal for the earthing USB terminal for exporting plant data... -
Page 25: Functions Of The Terminals And Terminal Blocks
6.2 Functions of the Terminals and Terminal Blocks The digital and analogue terminals of the Cluster Controller are divided into terminal blocks. A terminal block is a group of pins. Each respective pin group forms one of the digital or analogue inputs or outputs. - Page 26 6 Connection SMA Solar Technology AG Connection Terminal block Function Digital input 5 (DI5) A1 … A3 Signal 1 of 4 for the reactive power setpoint under grid management Digital input 6 (DI6) A4 … A6 Signal 2 of 4 for the reactive power...
-
Page 27: Cable Requirements
SMA Solar Technology AG 6 Connection 6.3 Cable Requirements UV resistance of the connection cable Connection cables to be laid outdoors must be UV-resistant or routed in a UV-resistant cable channel. Connection Cable requirements Earthing ☐ Conductor cross-section: 2.5 mm ☐... - Page 28 6 Connection SMA Solar Technology AG Connection Cable requirements Inverter (Speedwire) ☐ Cable category: from Cat5 ☐ Cable structure and shielding: S/UTP, SF/UTP (S-FTP* ), S/FTP (S-STP*) or SF/FTP ☐ Maximum cable length between two nodes when using patch cables: 50 m ☐...
-
Page 29: Performing Pin Coding
Remove the coding tab from the coding element by snapping it off. 3. Remove the key at the rear of the cable entry in the multipole plug into which the code pin is to be inserted during connection to the Cluster Controller. Installation Manual ClusterController-IA-en-10... -
Page 30: Preparing Connection Cables For Connection To A Multipole Plug
6 Connection SMA Solar Technology AG 6.5 Preparing Connection Cables for Connection to a Multipole Plug Always proceed as follows to prepare connection cables for connection to multipole plugs. 1. Strip 4 cm of cable sheath off the connection cable to which the multipole plug is to be attached. - Page 31 SMA Solar Technology AG 6 Connection • Insert the insulated wire at one end of the single core into the ring terminal lug of the shield connection terminal and crimp with a crimping tool. 3. Trim unused insulated wires flush with the cable sheath.
-
Page 32: Connecting The Cluster Controller To A Speedwire Network
6.6 Connecting the Cluster Controller to a Speedwire Network Do not connect the Speedwire network and the local network (LAN) The Speedwire network is a separate network managed by the Cluster Controller. In case the Speedwire network and the local network (LAN) are connected, a disturbance of both networks is likely to occur. - Page 33 Webconnect function, connect the patch cable to the network socket in the inverter (see installation manual of the inverter). 3. Connect the Cluster Controller to the Speedwire network. For this purpose, observe the desired network topology: • When using a pre-configured patch cable, connect the patch cable to terminal X9 or X10.
-
Page 34: Connecting The Cluster Controller To A Local Area Network (Lan)
(LAN) Selecting a Suitable Internet Tariff According to use, the data volume of the Cluster Controller transferred via the Internet can be more then 1 GB per month. The data volume depends, among other things, on the number of inverters, the frequency of device updates, the frequency of data transfer to the Sunny Portal and the use of FTP push. -
Page 35: Setting Up A Modbus Data Connection
☐ Up to two Modbus clients Requirements: ☐ The Cluster Controller and the Modbus client must be located on the same local area network (LAN) (for information on connecting the Cluster Controller to the local area network (LAN), see Section 6.7). - Page 36 USB data carrier is assigned must be noted down on the supplementary sheet for noting the connected devices. 4. If the USB data carrier is to be removed from the Cluster Controller again, wait until the data carrier status LED ( ) is not flashing anymore..
-
Page 37: Connecting Sensors To The Cluster Controller
Cluster Controller and transmitted to Sunny Portal. In Sunny Portal, the measured values are taken into account in the calculation of the performance ratio. - Page 38 6. Adjust the characteristic curve of the irradiation sensor or pyranometer via the user interface of the Cluster Controller (see the Cluster Controller user manual). The measured irradiation values can therefore be shown on the display and the user interface of the Cluster Controller. ClusterController-IA-en-10...
-
Page 39: Connecting The Temperature Sensor
You can connect 1 outside temperature sensor and 1 module temperature sensor to the Cluster Controller. The measured values of the temperature sensors are shown on the display and the user interface of the Cluster Controller and transmitted to Sunny Portal. In Sunny Portal, the measured values of the module temperature sensor flow into the calculation of the performance ratio. - Page 40 6 Connection SMA Solar Technology AG 2. Connect the connection cable to the five-pole plug as follows: • Release conductor entry 1 using a screwdriver and insert the insulated wire of the single core into the conductor entry. • For two-conductor connection, release conductor entries 3 and 4 using a screwdriver and insert the insulated wires of the connection cable into the conductor entries.
-
Page 41: Connecting Additional Sensors
2.2 V will nevertheless be shown on the display and the user interface of the Cluster Controller. • In order for a measured value of 0 V to be displayed for the terminal block Analogue voltage input 4 (AI4) when it is not connected, place a jumper wire at terminal X8 between pin B5 and pin B7. - Page 42 6 Connection SMA Solar Technology AG Requirements: ☐ The sensor must be able to output a current signal in the range from 0 mA to 20 mA. ☐ The connection cable must have been prepared for connection to the multipole plug (see Section 6.5)
- Page 43 SMA Solar Technology AG 6 Connection 2. For connecting to the terminal block Analogue current input 1 (AI1), perform the following steps: • Release conductor entry 4 using a screwdriver and insert the insulated wire of the single core into the conductor entry.
- Page 44 6 Connection SMA Solar Technology AG Figure 16: Pin assignment at the terminal block Analogue voltage input 4 (AI4) Signal Explanation Voltage input Reserved for future applications assigned V − Voltage feedback Shield ground 1. Connect the connection cable to the sensor (see the manufacturer manual). For this purpose, trim the insulated wires that are not required up to the cable shield and note the wire colours.
-
Page 45: Connections For Grid Management
6.11.1 Options for Implementing the Network Operator Setpoints The Cluster Controller can receive the network operator setpoints for grid management via three types of signal. For this purpose, the type of signal can be combined, meaning for example that setpoints for active power limitation can be received as digital signals and the setpoints for the reactive power setpoint can be received as analogue signals. -
Page 46: Digital Signal Setpoint
The digital signals for the active power limitation can be sent to up to four terminal blocks at terminal X4 of the Cluster Controller. A ripple control receiver or a remote terminal unit can be used as a digital signal source, for example. -
Page 47: Connecting The Signal Source To The Digital Input For The Reactive Power Setpoint
The digital signals for the reactive power setpoint can be sent to up to four terminal blocks at terminal X5 of the Cluster Controller. A ripple control receiver or a remote terminal unit can be used as a digital signal source, for example. - Page 48 6 Connection SMA Solar Technology AG Figure 18: Terminal blocks and pin assignment at terminal X5 Terminal block Pin assignment Explanation Digital input 5 (DI5) 24 V Voltage supply output Signal 1 of 4 for the Input reactive power setpoint Reference potential...
-
Page 49: Analogue Signal Setpoint
The analogue signals for the active power limitation are sent to the terminal block Analogue current input 2 (AI2) at terminal X8 of the Cluster Controller. A remote terminal unit can be used as an analogue signal source, for example. - Page 50 6 Connection SMA Solar Technology AG 1. Connect the connection cable to the analogue signal source (see the manufacturer manual). For this purpose, trim the unused insulated wires up to the cable shield and note the wire colours. 2. Connect the connection cable to the eight-pole plug as follows: •...
-
Page 51: Connecting The Signal Source To The Analogue Input For The Reactive Power Setpoint
The analogue signals for the reactive power setpoint are sent to the terminal block Analogue current input 3 (AI3) at terminal X8 of the Cluster Controller. A remote terminal unit can be used as an analogue signal source, for example. -
Page 52: Setpoint Via Modbus Client
6.11.4 Setpoint via Modbus Client Requirements: ☐ The Cluster Controller and the Modbus client must be located on the same local area network (LAN) (see Section 6.8). ☐ The commissioning of the Cluster Controller must be completed. - Page 53 Via the two analogue current outputs Analogue current output 1 (AO1) and Analogue current output 2 (AO2), you can provide feedback on the value (if any) for the active power limitation or the reactive power setpoint of the Cluster Controller that is currently being sent to the inverters in the plant.
- Page 54 6 Connection SMA Solar Technology AG Figure 22: Pin assignment at the terminal blocks Analogue current output 1 (AO1) and Analogue current output 2 (AO2) Terminal block Signal Explanation Analogue current output 1 (AO1) Current output Feedback of the current active power I −...
- Page 55 Depending on the size of the reactive power setpoint that was selected via the user interface (see the Cluster Controller user manual), the strength of the feedback signal corresponds either to the percentage value for the reactive power setpoint or to the latest displacement power factor cos φ sent to the inverters in the plant.
- Page 56 6 Connection SMA Solar Technology AG 1. Connect the connection cable to the remote terminal (see the manufacturer manual). For this purpose, trim the unused insulated wires up to the cable shield and note the wire colours. 2. When using the terminal block Analogue current output 1 (AO1), perform the following steps to connect the connection cable to the six-pole plug: •...
-
Page 57: Using Fault Indication Relays
You can connect up to three remote terminals (e.g. optical or acoustic signal generators) to the three potential-free relay contacts of the Cluster Controller. The relay contacts are implemented as two fault indication relays and one response contact. Via the fault indication relay Digital output 1 (DO1), you can signal the plant status Fault. -
Page 58: Connecting The Cluster Controller To The Voltage Supply
6.13 Connecting the Cluster Controller to the Voltage Supply Danger to life due to electric shock if earthing is omitted If the enclosure of the Cluster Controller is not earthed, there is a danger of electric shock. • Earth the enclosure of the Cluster Controller. - Page 59 SMA Solar Technology AG 6 Connection Connecting the Protective Conductor to the Cluster Controller Additional required material (not included in scope of delivery): ☐ 1 protective conductor (for cable requirements, see Section 6.3) 1. Remove 1 cm of the cable sheath from the protective conductor.
- Page 60 Cluster Controller (for cable requirements, see Section 6.3) If you are not using the top-hot rail power supply unit supplied as an accessory for the Cluster Controller, the top-hat rail power supply unit you are using must meet the requirements detailed below.
-
Page 61: Checking The Connections Via The Display
• If the problem persists, contact the SMA Service Line (see Section 11). 6.14 Checking the Connections via the Display You can use the display of the Cluster Controller to check whether the connections have been made correctly and whether all inverters, sensors and remote terminals have been detected by the Cluster Controller. - Page 62 • Read out the IP address from the IP Address line and write it down. Tip: if you wish to integrate the Cluster Controller in a static local area network (LAN), you also require the IP address for the network configuration (see Section 6.15).
- Page 63 Changing default plant passwords Change the default plant passwords of all user groups promptly to prevent unauthorised access to the user interface of the Cluster Controller and the inverters in your plant (see the Cluster Controller user manual). ☑ The user interface opens. The display language and the user interface language are changed.
-
Page 64: Performing Configuration For A Static Local Network (Lan)
6.15 Performing Configuration for a Static Local Network (LAN) You have the option of configuring the Cluster Controller and the inverters in the plant for a static local area network (LAN) (see the Cluster Controller user manual). The Cluster Controller and the inverters are configured for automatic address allocation via DHCP by default. -
Page 65: Troubleshooting
• If the status LED is not glowing green after commissioning, refer also to the event log of the Cluster Controller to determine the precise cause of the fault. The details of the respective fault are logged in the event log (see the Cluster Controller user manual). - Page 66 • Observe the event log of the Cluster Controller (see the Cluster Controller user manual). • Observe the device documentation. The SD card in the Cluster Controller may be defective. Corrective measures: • Check the event report of the Cluster Controller (see the Cluster Controller user manual).
- Page 67 Status Cause and corrective measures Data carrier status ( ) Off The Cluster Controller is starting and no information is yet available for data export or for USB data carriers. Corrective measures: • Wait until the Cluster Controller has completed the start process and is ready for operation.
- Page 68 Corrective measures: • Wait until the Cluster Controller has completed the write or read access and the data carrier status LED glows yellow. • Replace the USB data carrier with a USB data carrier that has sufficient free memory capacity.
-
Page 69: Leds Of The Network Connections
7.1.2 LEDs of the Network Connections Status Cause and corrective measures Link/Activity (green) No network connection has been established. The Cluster Controller is not connected to the voltage supply. Corrective measures: • Connect the Cluster Controller to the voltage supply (see Section 6.13). -
Page 70: Faults In The Cluster Controller Or The Connected Devices
7 Troubleshooting SMA Solar Technology AG 7.2 Faults in the Cluster Controller or the Connected Devices Problem Cause and corrective measures The Cluster Controller does not The Cluster Controller is not connected to the voltage supply. start. The LEDs and the display are Corrective measures: off. - Page 71 • Adjust the firewall settings in order to allow the required connection. If the Cluster Controller is connected to the local area network (LAN) via DCHP and the voltage supply of the Cluster Controller was interrupted, it is possible that the DHCP server in the local area network (LAN) has assigned a new IP address to the Cluster Controller.
- Page 72 Login to the user interface has The plant password has been entered incorrectly four times. failed. Access to the Cluster Controller is suspended for 15 minutes. Corrective measures: • Wait for 15 minutes, then log in with the correct plant password.
- Page 73 The correct number of all connected The communication with at least one inverter is interrupted. inverters is not shown on the Either the Cluster Controller has not yet registered with one or display. more inverters or the connection to one or more inverters has been interrupted.
- Page 74 Corrective measures: • Ensure that the characteristic curve of the irradiation sensor is configured (see the Cluster Controller user manual). • Ensure that the irradiation sensor is correctly connected (see Section 6.10.1).
-
Page 75: Resetting The Cluster Controller
☑ The Confirm the Resetting display view appears. • Select OK and confirm with [OK]. ☑ The selected settings are reset. ☑ If the network settings were reset or the Cluster Controller was reset to default settings, the Cluster Controller restarts. Installation Manual... -
Page 76: Decommissioning
3. Remove the patch cable of the local area network (LAN) (e.g. of the router) from the Cluster Controller. 4. Remove the multipole plugs of the connected devices and sensors from the Cluster Controller. 5. Remove the Cluster Controller from the top-hat rail: •... -
Page 77: Technical Data
SMA Solar Technology AG 9 Technical Data 9 Technical Data General Data Status display LEDs, display Operation Button field, integrated Web server Type of mounting Top-hat rail mounting Mounting location Indoors Mechanical Data Width x height x depth 275 mm x 133 mm x 71 mm Weight 1.2 kg... - Page 78 9 Technical Data SMA Solar Technology AG Ambient Conditions Ambient temperature in operation* − 25°C … +60°C Ambient temperature during storage and − 40°C … +70°C transport Relative humidity in operation** 4% … 95% Relative humidity during storage and 10% … 95%...
-
Page 79: Network Connections
SMA Solar Technology AG 9 Technical Data Network Connections Number (Speedwire) Number (local area network (LAN)) Auto-MDIX (auto-crossing) Data transfer standard 10BASE-T or 100BASE-TX Data transfer rate* 10 Mbit/s or 100 Mbit/s * negotiated via autonegotiation Digital Inputs Quantity Input voltage... -
Page 80: Analogue Outputs
9 Technical Data SMA Solar Technology AG Analogue Outputs Number of analogue outputs for current signals Measurement range for current signals 4 mA … 20 mA Maximum tolerance ± 0.5% Maximum cable length 3,000 m Temperature Inputs Quantity Measuring shunt... - Page 81 SMA Solar Technology AG 10 Accessories 10 Accessories You will find the corresponding accessories and spare parts for your product in the following overview. If required, you can order them from SMA Solar Technology AG or from your specialist dealer. Designation Brief description...
- Page 82 • When using a retrofitted Speedwire/Webconnect interface: serial number and firmware version of the Speedwire/Webconnect interface You can read out the necessary information via the user interface of the Cluster Controller (see the Cluster Controller user manual). Alternatively, you can also read out the serial number and the device type on the type label of the respective product (see the respective product manual).
- Page 83 Legal Provisions The information contained in this document is the property of SMA Solar Technology AG. Publishing its content, either partially or in full, requires the written permission of SMA Solar Technology AG. Any internal company copying of the document for the purposes of evaluating the product or its correct implementation is allowed and does not require permission.
- Page 84 SMA Central & Eastern Europe s.r.o. SMA Middle East LLC www.SMA-Czech.com www.SMA-Me.com SMA France S.A.S. SMA Portugal - Niestetal Services Unipessoal Lda www.SMA-France.com www.SMA-Portugal.com SMA Hellas AE SMA Solar (Thailand) Co., Ltd. www.SMA-Hellas.com www.SMA-Thailand.com SMA Ibérica Tecnología Solar, S.L.U.
Need help?
Do you have a question about the CLUSTER CONTROLLER and is the answer not in the manual?
Questions and answers