Table of Contents
Advertisement
Quick Links
Advertisement
Table of Contents

Subscribe to Our Youtube Channel
Related Manuals for Thecus i8500


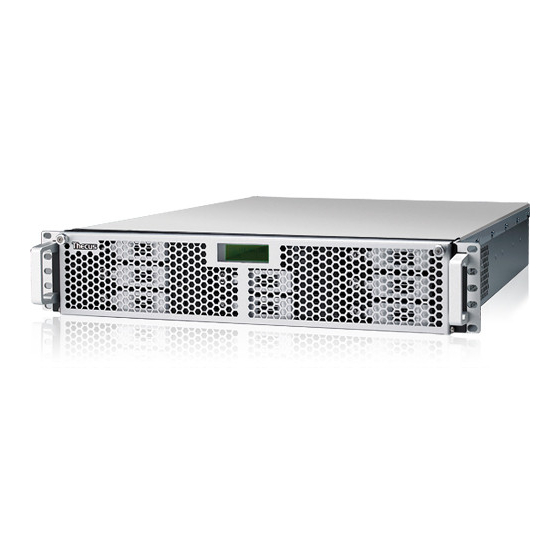
Summary of Contents for Thecus i8500
- Page 1 Thecus i8500 iSCSI RAID SYSTEM User Manual - 1 -...
-
Page 2: About This Manual
Preface About this manual This manual is the introduction of i8500 and it aims to help users know the operations of the disk array system easily. Information contained in this manual has been reviewed for accuracy, but not for product warranty because of the various environments/OS/settings, Information and specification will be changed without further notice. -
Page 3: Table Of Contents
Table of Contents Features................5 Terminology ..............6 RAID levels ..............8 Volume relationship diagram ........... 9 Chapter 2 Getting started ..........10 Before starting..............10 iSCSI introduction ............10 Management methods ........... 12 2.3.1 Web GUI hierarchy ................12 2.3.2 Remote control –... - Page 4 3.8.1 System information................54 3.8.2 Upgrade....................54 3.8.3 Reset to factory default................. 55 3.8.4 Import and export ................. 56 3.8.5 Event log ....................56 3.8.6 Reboot and shutdown................57 Logout ................57 Chapter 4 Advanced operation ........58 Rebuild................58 RG migration..............60 VD Extension ..............
-
Page 5: Features
“sales@thecus.com ”. i8500 connects to the host system in iSCSI interface. It can be configured to any RAID level. i8500 provides reliable data protection for servers and RAID 6. The RAID 6 allows two HDD failures without producing any impact on the existing data. -
Page 6: Terminology
Caution Snapshot / rollback features need 512MB RAM or more. Please refer to RAM certification list in Appendix A for more detail. 1.2 Terminology The document uses the following terms: RAID is the abbreviation of “Redundant Array of Independent RAID Disks”. - Page 7 RAID width=1; RAID copy=4; RAID row=3. Write-Through cache-write policy. A caching technique in which the completion of a write request is not signaled until data is safely stored in non-volatile media. Each data is synchronized in both data cache and accessed physical disks. Write-Back cache-write policy.
-
Page 8: Raid Levels
World Wide Name. Host Bus Adapter. SAF-TE SCSI Accessed Fault-Tolerant Enclosures. SCSI Enclosure Services. Network Interface Card. LACP Link Aggregation Control Protocol. MPIO Multi-Path Input/Output. Multiple Connections per Session MC/S Maximum Transmission Unit. Challenge Handshake Authentication Protocol. An optional CHAP security mechanism to control access to an iSCSI storage system over the iSCSI data ports. -
Page 9: Volume Relationship Diagram
PD 3 Figure 1.4.1 This is the volume structure of i8500 designed. It describes the relationship of RAID components. One RG (RAID group) consists of a set of VDs (Virtual disk) and owns one RAID level attribute. Each RG can be divided into several VDs. -
Page 10: Chapter 2 Getting Started
Gigabit LAN switches. (recommended) Or Gigabit LAN switches with VLAN/LCAP. (optional) CHAP security information, including CHAP username and secret. (optional) Setup the hardware connection before power on servers and i8500. Connect console cable, management port cable, and iSCSI data port cables in advance. 2.2 iSCSI introduction... - Page 11 Storage protocol, such as iSCSI, has “two ends” in the connection. These ends are initiator and target. In iSCSI, we call them iSCSI initiator and iSCSI target. The iSCSI initiator requests or initiates any iSCSI communication. It requests all SCSI operations like read or write. An initiator is usually located on the host/server side (either an iSCSI HBA or iSCSI SW initiator).
-
Page 12: Management Methods
2.3.1 Web GUI hierarchy i8500 support graphic user interface to manage the system. Be sure to connect LAN cable. The default setting of management port IP is Static IP and Static IP address displays on LCM; user can inspect LCM for IP first, then open the... -
Page 13: Remote Control - Secure Shell
Host name: 192.168.1.100 (Please check your DHCP address for this field.) Login name: admin Default password: 1234 Tips i8500 controllers only support SSH for remote control. For using SSH, the IP address and password are required for login. 2.4 Enclosure 2.4.1... - Page 14 When there is WARNING or ERROR occurred (LCM default filter), the LCM shows the event log to give users more detail from front panel. The following table is function description. Display system information. System Info. Mute alarm when error occurs. Alarm Mute Reset or shutdown controller.
- Page 15 RAID 0 RAID 1 RAID 3 [Quick Install] RAID 5 [Apply The [ Yes RAID 6 Config] No ] RAID 0+1 xxx GB [Local] RAID 0 [Apply RAID 1 [Volume [Use default RAID 3 Size] Config] algorithm] RAID 5 xxx GB [ Yes RAID 6 No ]...
-
Page 16: System Buzzer
2.4.2 System buzzer The system buzzer features are listed below: The system buzzer alarms 1 second when system boots up successfully. The system buzzer alarms continuously when there is error occurred. The alarm will be stopped after error resolved or be muted. The alarm will be muted automatically when the error is resolved. -
Page 17: Chapter 3 Web Gui Guideline
Chapter 3 Web GUI guideline 3.1 Web GUI hierarchy The below table is the hierarchy of web GUI. Step 1 / Step 2 / Confirm Quick installation System configuration System name / Date and time System setting MAC address / Address / DNS / port IP address Login configuration / Admin password / User Login setting... -
Page 18: Login
Sure to logout? Logout 3.2 Login i8500 supports graphic user interface (GUI) to operate the system. Be sure to connect the LAN cable. The default IP address is 192.168.1.100; open the browser and enter: http://192.168.1.100 (Please check the IP address first on LCM.) Click any function at the first time;... -
Page 19: Volume Creation Wizard
Figure 3.2.2 RAID light: Green means RAID works well. Red represents RAID failure. Temperature light: Green means normal temperature. Red represents abnormal temperature. Voltage light: Green means normal voltage. Red represents abnormal voltage. UPS light: Green means UPS works well. Red represents UPS failure. -
Page 20: System Configuration
Step 2: Confirm page. Click “ ” if all setups are correct. Then a VD will be created. Done. You can start to use the system now. Figure 3.3.2 (Figure 3.3.2: A RAID 0 Virtual disk with the VD name “QUICK53360”, named by system itself, with the total available volume size 1191GB.) 3.4 System configuration “System configuration”... -
Page 21: Ip Address
Figure 3.4.1.1 Check “Change date and time” to set up the current date, time, and time zone before using or synchronize time from NTP (Network Time Protocol) server. 3.4.2 IP address “IP address” can change IP address for remote administration usage. There are 2 options, DHCP (Get IP address from DHCP server) or static IP. -
Page 22: Login Setting
3.4.3 Login setting “Login setting” can set single admin, auto logout time and Admin/User password. The single admin can prevent multiple users access the same controller at the same time. Auto logout: The options are (1) Disable; (2) 5 minutes; (3) 30 minutes; (4) 1 hour. -
Page 23: Notification Setting
Figure 3.4.4.1 3.4.5 Notification setting “Notification setting” can set up SNMP trap for alerting via SNMP, pop-up message via Windows messenger (not MSN), alert via system log server protocol, and event log filter. - 23 -... - Page 24 Figure 3.4.5.1 “SNMP” allows up to 3 SNMP trap addresses. Default community setting is “public”. User can choose the event log levels and default setting only enables INFO event log in SNMP. There are many SNMP tools. The following web sites are for your reference: SNMPc: http://www.snmpc.com/...
-
Page 25: Iscsi Configuration
Using “System log server”, user can choose the facility and the event log level. The default port of syslog is 514. The default setting enables event level: INFO, WARNING and ERROR event logs. There are some syslog server tools. The following web sites are for your reference: WinSyslog: http://www.winsyslog.com/... -
Page 26: Nic
3.5.2 “NIC” can change IP addresses of iSCSI data ports. Figure 3.5.2.1 (Figure 3.5.2.1: there are 2 iSCSI data ports.) IP settings: User can change IP address by moving mouse to the gray button of LAN port, click “IP settings for iSCSI ports”. There are 2 selections, DHCP (Get IP address from DHCP server) or static IP. -
Page 27: Node
The MTU size of switching hub and HBA on host must be enabled. Otherwise, the LAN connection can not work properly. 3.5.3 Node “Node” can view the target name for iSCSI initiator. The node name of i8500 exists by default and can not be changed. Figure 3.5.3.1 CHAP: CHAP is the abbreviation of Challenge Handshake Authorization Protocol. -
Page 28: Session
Go to “/ iSCSI configuration / CHAP account” page to create CHAP account. Please refer to next section for more detail. In “Authenticate” page, select “None” to disable CHAP. Tips After setting CHAP, the initiator in host/server should be set the same CHAP account. -
Page 29: Volume Configuration
Enter “User”, “Secret”, and “Confirm” secret again. Figure 3.5.5.3 Click “ ”. Figure 3.5.5.1 (Figure 3.5.5.4: create a CHAP account named “chap1”.) Click “Delete” to delete CHAP account. 3.6 Volume configuration “Volume configuration” is designed for setting up the volume configuration which includes “Volume create wizard”, “Physical disk”, “RAID group”, “Virtual disk”, “Snapshot”, and “Logical unit”. - Page 30 RAID level and different sizes. After user chooses RAID level, user may find that some HDDs are available (free status). The result is using smarter policy designed by Thecus. It gives user: Biggest capacity of RAID level for user to choose and, The fewest disk number for RAID level / volume size.
- Page 31 Figure 3.6.1.2 Step 3: Decide VD size. User can enter a number less or equal to the default number. Then click “ ”. Figure 3.6.1.3 Step 4: Confirm page. Click “ ” if all setups are correct. Then a VD will be created. Done.
-
Page 32: Physical Disk
3.6.2 Physical disk “Physical disk” can view the status of hard drives in the system. The followings are operational tips: Mouse moves to the gray button next to the number of slot, it will show the functions which can be executed. Active function can be selected, but inactive function will show in gray color. - Page 33 Figure 3.6.2.3 (Figure 3.6.2.3: Physical disks of slot 1,2,3 are created for a RG named “RG-R5”. Slot 4 is set as dedicated spare disk of RG named “RG-R5”. The others are free disks.) • PD column description: The position of hard drives. The button next to the Slot number of slot shows the functions which can be executed.
- Page 34 the hard drive is good. “Good” the hard drive is failed. “Failed” S.M.A.R.T. error alert. “Error Alert” the hard drive has unrecoverable “Read Errors” read errors. RAID Disk. This hard drive has been set to Usage “RD” RAID. FRee disk. This hard drive is free for use. “FR”...
-
Page 35: Raid Group
Set hard drive to dedicated spare of selected RGs. Dedicated spares Change the status of write cache and standby. Set property Write cache options: Enable disk write cache. “Enabled” Disable disk write cache. “Disabled” Standby options: Disable spindown. “Disabled” Enable hard drive “30 sec / 1 min / 5 min / 30 min”... - Page 36 Step 2: Confirm page. Click “ ” if all setups are correct. Figure 3.6.3.2 (Figure 3.6.3.2: There is a RAID 0 with 4 physical disks, named “RG-R0”, total size is 135GB. Another is a RAID 5 with 3 physical disks, named “RG-R5”.) Done.
- Page 37 the RAID group is being migrated. “Migrate” the RAID group is being scrubbed. “Scrub” The health of RAID group. Health the RAID group is good. “Good” the hard drive is failed. “Failed” the RAID group is not completed. The “Degraded” reason could be lack of one disk or disk failure.
-
Page 38: Virtual Disk
information 3.6.4 Virtual disk “Virtual disk” can view the status of each Virtual disk. The following is an example to create a VD. Step 1: Click “ ”, enter “Name”, choose “RG name”, “Stripe height (KB)”, “Block size (B)”, “Read/Write” mode, “Priority”, “Bg rate”... - Page 39 Figure 3.6.4.2 (Figure 3.6.4.2: Create a VD named “VD-01”, related to “RG-R0”, size is 30GB. The other VD is named “VD-02”, initializing to 12%.) Done. View “Virtual disk” page. • VD column description: Number of this Virtual disk. The button next to the VD No.
- Page 40 Background task priority. Bg rate Default value is 4. The higher “4 / 3 / 2 / 1 / 0” number the background priority of a VD has, the more background I/O will be scheduled to execute. The status of Virtual disk. Status the Virtual disk is online.
- Page 41 Number of snapshot(s) that Virtual disk is taken. #Snapshot The Virtual disk is related to the RG name RG name This feature makes data be loaded to disk's buffer in Readahead advance for further use. Default is "Enabled". • VD operations description: Extend a Virtual disk capacity.
-
Page 42: Snapshot
Clean all snapshot VD related to the Virtual disk and Cleanup release snapshot space. snapshot Take a snapshot on the Virtual disk. Take snapshot Set auto snapshot on the Virtual disk. Auto snapshot List all snapshot VD related to the Virtual disk. List snapshot Show Virtual disk detail information. - Page 43 Step 3: Take a snapshot. In “/ Volume configuration / Snapshot”, click “ ”. It will link to next page. Enter a snapshot name. Figure 3.6.5.3 Step 4: Export the snapshot VD. Mouse moves to the gray button next to the Snapshot VD number;...
-
Page 44: Logical Unit
• Snapshot column description: Number of this snapshot VD. The button next to the snapshot VD No. shows the functions which can be executed. Snapshot VD name. Name The amount of snapshot space that has been used. Used (MB) Snapshot VD is exported or not. Exported Read / Write. -
Page 45: Example
User can attach LUN by clicking the “ ”. “Host” must enter an iSCSI node name for access control, or fill-in wildcard “*”, which means every host can access the volume. Choose LUN number and permission, then click “ ”. Figure 3.6.6.1 •... - Page 46 Step 1: Create RG (RAID group). To create the RAID group, please follow the procedures: Figure 3.6.7.1 Select “/ Volume configuration / RAID group”. Click “ “. Input a RG Name, choose a RAID level from the list, click “ “...
- Page 47 Figure 3.6.7.3 Select “/ Volume configuration / Virtual disk”. Click “ ”. Input a VD name, choose a RG Name and enter a size of VD; decide the stripe high, block size, read/write mode and set priority, finally click “ “.
- Page 48 Input “Host” name, which is a FC node name for access control, or fill- in wildcard “*”, which means every host can access to this volume. Choose LUN and permission, then click “ ”. Done. Tips The matching rules of access control are from top to bottom in sequence.
- Page 49 In “/ Volume configuration / Logical unit”, Mouse moves to the gray button next to the LUN; click “Detach”. There will pop up a confirmation page. Choose “OK”. Done. Step 7: Delete VD (Virtual disk). To delete the Virtual disk, please follow the procedures: Select “/ Volume configuration / Virtual disk”.
-
Page 50: Enclosure Management
Select “/ Volume configuration / Physical disk”. Mouse moves to the gray button next to the PD slot; click “Set Free disk”. Step 10: Done, all volumes have been deleted. 3.7 Enclosure management “Enclosure management” allows managing enclosure information including “SES configuration”, “Hardware monitor”, “S.M.A.R.T.”... -
Page 51: Hardware Monitor
3.7.2 Hardware monitor “Hardware monitor” can view the information of current voltage and temperature. Figure 3.7.2.1 If “Auto shutdown” has been checked, the system will shutdown automatically when voltage or temperature is out of the normal range. For better data protection, please check “Auto Shutdown”. -
Page 52: Hard Drive S.m.a.r.t. Support
If the high temperature situation doesn’t last for 3 minutes, controller will not do auto shutdown. 3.7.3 Hard drive S.M.A.R.T. support S.M.A.R.T. (Self-Monitoring Analysis and Reporting Technology) is a diagnostic tool for hard drives to deliver warning of drive failures in advance. S.M.A.R.T. provides users chances to take actions before possible drive failure. -
Page 53: Ups
3.7.4 “UPS” can set up UPS (Uninterruptible Power Supply). Figure 3.7.4.1 Currently, the system only supports and communicates with smart-UPS of APC (American Power Conversion Corp.) UPS. Please review the details from the website: http://www.apc.com/. First, connect the system and APC UPS via RS-232 for communication. Then set up the shutdown values when power is failed. -
Page 54: System Maintenance
“UPS shutdown in progress” “Batteries failed. Please change them NOW!” Current percentage of battery level. Battery Level 3.8 System maintenance “Maintenance” allows the operation of system functions which include “System information” to show the system version, “Upgrade” to the latest firmware, “Reset to factory default”... -
Page 55: Reset To Factory Default
When upgrading, there is a progress bar running. After finished upgrading, the system must reboot manually to make the new firmware took effect. Tips Please contact with www.thecus.com for latest firmware. 3.8.3 Reset to factory default “Reset to factory default” allows user to reset controller to factory default setting. -
Page 56: Import And Export
3.8.4 Import and export “Import and export” allows user to save system configuration values: export, and apply all configuration: import. For the volume configuration setting, the values are available in export and not available in import which can avoid confliction/date-deleting between two controllers. That says if one controller already exists valuable data in the disks and user may forget to overwrite it. -
Page 57: Reboot And Shutdown
Figure 3.8.5.1 The event log is displayed in reverse order which means the latest event log is on the first page. The event logs are actually saved in the first four hard drives; each hard drive has one copy of event log. For one controller, there are four copies of event logs to make sure users can check event log any time when there is/are failed disk(s). -
Page 58: Chapter 4 Advanced Operation
But rebuilding in the same failed disk may impact customer data if the status of disk is unstable. Thecus suggests all customers not to rebuild in the failed disk for better data protection. - Page 59 Tips “Set dedicated spare” is not available if there is no RG or only RG of RAID 0, JBOD, because user can not set dedicated spare disk to RAID 0 & JBOD. Sometimes, rebuild is called recover; they are the same meaning. The following table is the relationship between RAID levels and rebuild.
-
Page 60: Rg Migration
arrays. The abbreviation of “Just a Bunch Of Disks”. No data JBOD protection. RG fails if any hard drive failures or unplugs. 4.2 RG migration To migrate the RAID level, please follow below procedures. Select “/ Volume configuration / RAID group”. Mouse moves to the gray button next to the RG number;... - Page 61 Figure 4.2.2 (Figure 4.2.2: A RAID 0 with 4 physical disks migrates to RAID 5 with 5 physical disks.) Figure 4.2.3 (Figure 4.2.3: A RAID 0 migrates to RAID 5, the complete percentage is 14%.) To do migration, the total size of RG must be larger or equal to the original RG. It does not allow expanding the same RAID level with the same hard disks of original RG.
-
Page 62: Vd Extension
4.3 VD Extension To extend VD size, please follow the procedures. Select “/ Volume configuration / Virtual disk”. Mouse moves to the gray button next to the VD number; click “Extend”. Change the size. The size must be larger than the original, and then click “... -
Page 63: Create Snapshot Volume
capture. The certain location, named as “Snap VD”, is essentially a new VD.which can be attached to a LUN provisioned to a host as a disk like other ordinary VDs in the system. Rollback restores the data back to the state of any time which was previously captured in case for any unfortunate reason it might be (e.g. - Page 64 Figure 4.4.1.1 (Figure 4.4.1.1: This is Snap VD, but it is not exported.) Mouse moves to the gray button next to the Snapshot VD number; click “Export”. Enter a capacity for snapshot VD. If size is zero, the exported snapshot VD will be read only. Otherwise, the exported snapshot VD can be read/written, and the size will be the maximum capacity to read/write.
-
Page 65: Auto Snapshot
256 VD/snapshot volume. It depends when the logical volumes (VD number + snapshot config + snapshot number) reaches the max number of the controller. In i8500, it is 256. We leave the flexibility to users, so users can have their own RG/VD/Snapshot plan. -
Page 66: Rollback
Done. It will take snapshots automatically. Figure 4.4.2.1 (Figure 4.4.2.1: It will take snapshots every month, and keep the last 32 snapshot copies.) Tips Daily snapshot will be taken at every 00:00. Weekly snapshot will be taken every Sunday 00:00. Monthly snapshot will be taken every first day of month 00:00. -
Page 67: Disk Roaming
When making rollback, the original VD cannot be accessed for a while. At the same time, the system connects to original VD and snaps VD, and then starts rollback. During rollback, data from snap VD to original VD, the original VD can be accessed and the data in VD just like it has finished rollback. - Page 68 use multiple physical paths to create logical "paths" between the server and the storage device. In the case which one or more of these components fails, causing the path to fail, multi-path logic uses an alternate path for I/O. So applications can still access their data.
-
Page 69: Appendix
A. Certification list • Spec: 184pins, DDR333(PC2700), Reg.(register) i8500 UB(Unbufferred), ECC or Non-ECC, from 64MB to 1GB, 32-bit or 64-bit data bus width, x8 or x16 devices, 9 to 11 bits column address. Vendor Model AG64L72T8SQC4S, 512MB DDR-400 (ECC) with Samsung... - Page 70 PowerConnect 5324 Dell PowerConnect 2724 Dell PowerConnect 2708 ProCurve 1800-24G • Hard drive i8500 support SATA I, II disks. Vendor Model Hitachi Deskstar 7K250, HDS722580VLSA80, 80GB, 7200RPM, SATA, 8M Hitachi Deskstar E7K500, HDS725050KLA360, 500GB, 7200RPM, SATA II, - 70 -...
-
Page 71: Event Notifications
Hitachi Deskstar 7K80, HDS728040PLA320, 40GB, 7200RPM, SATA II, 2M Hitachi Deskstar T7K500, HDT725032VLA360, 320GB, 7200RPM, SATA II, Hitachi Deskstar P7K500, HDP725050GLA360, 500GB, 7200RPM, SATA II, Maxtor DiamondMax Plus 9, 6Y080M0, 80GB, 7200RPM, SATA, 8M Maxtor DiamondMax 11, 6H500F0, 500GB, 7200RPM, SATA 3.0Gb/s, 16M Samsung SpinPoint P80, HDSASP0812C, 80GB,7200RPM, SATA, 8M Seagate... - Page 72 SCSI info Received SCSI Bus Reset event at the SCSI INFO Bus <number>. • EMS events Level Type Description Power installed Power <number> is installed. INFO Power absent Power <number> is absent. ERROR Power work Power <number> is restored to work. INFO Power warning Power <number>...
- Page 73 RG created RG <name> has been created. INFO RG creation failed Failed to create RG <name>. INFO RG deleted RG <name> has been deleted. INFO VD created VD <name> has been created. INFO VD creation failed Failed to create VD <name>. INFO VD deleted VD <name>...
- Page 74 write error occurred <address>-<address> of VD <name>. Dedicated spare PD <slot> has been configured to RG <name> INFO configured as a dedicated spare disk. Global spare PD <slot> has been configured as a global INFO configured spare disk. PD read error Read error occurred at LBA <address>- WARNING occurred...
- Page 75 backuped data finishes. BBM detected Battery backup module is detected. INFO BBM is good Battery backup module is good. INFO BBM is charging Battery backup module is charging. INFO BBM is failed Battery backup module is failed. WARNING Battery backup feature is <item>. INFO •...
-
Page 76: Known Issues
C. Known issues Microsoft MPIO driver is not supported on Windows XP and Windows 2000 Professional. Workaround solution: Using Windows Server 2008/2003, Windows 2000 server to run MPIO. Workaround solution: It’s a JBOD limitation. - 76 -... -
Page 77: Microsoft Iscsi Initiator
D. Microsoft iSCSI Initiator Here is the step by step to setup Microsoft iSCSI Initiator. Please visit Microsoft website for latest iSCSI initiator. The following setup may not use the latest Microsoft iSCSI initiator. Run Microsoft iSCSI Initiator. Click “Discovery”. Click “Add”. - Page 78 Figure D.4 Click “Advance…” if CHAP information is needed. Click “OK”. The status would be “Connected”. Done, it can connect to an iSCSI disk. The following procedure is to log off iSCSI device. Click “Details” in “Targets”. Check the Identifier, which will be deleted. Click “Log off”.
-
Page 79: Installation Steps For Large Volume (Tb)
E. Installation steps for large volume (TB) Introduction: i8500 capable of supporting large volumes (>2TB). When connecting controllers to 64bit OS installed host/server, the host/server is inherently capable for large volumes from the 64bit address. On the other side, if the host/server is installed... - Page 80 Follow the installation guild provided by HBA vendor, install HBA driver properly. For iSCSI models, please install the latest Microsoft iSCSI initiator from the link below. http://www.microsoft.com/downloads/details.aspx?FamilyID=12cb3c1a- 15d6-4585-b385-befd1319f825&DisplayLang=en Step 3: Initialize/Format/Mount the disk Go to Start Control Panel Computer Management Disk Management, it displays a new disk.
- Page 81 http://www.microsoft.com/whdc/device/storage/GPT_FAQ.mspx Figure E.4 Format the disk. Figure E.5 Done. Figure E.6 The new disk is ready to use, the available size = 2.72TB. - 81 -...
-
Page 82: Mpio And Mc/S Setup Instructions
Figure E.7 Caution If user setups 512B block size for VD and the host/server OS is 32bit, in the last step of formatting disk, user will find OS cannot format the disk sector after 2048GB (2TB). Wrong setting result: OS can not format disk sector after 2048GB(2TB). Figure E.8 F. - Page 83 Figure F.1 The MPIO setup instructions are in the following: Create RG/VD, and then attach LUN. Add the first “Target Portal” on Microsoft iSCSI initiator. Add the second “Target Portal” on Microsoft iSCSI initiator. Logon. Enable “Enable multi-path” checkbox. Then click “Advanced…”. Select the first “Source IP”...
-
Page 84: Bbm (Battery Backup Module) Inspect Steps
Write-back cache policy means i8500 reply to the host that write access is complete when data is written into memory. Then i8500 writes the cached data to the disk device when system activity is low or when the cache is getting full. -
Page 85: Bbm(Battery Backup Module) Inspect Steps -(Optional)
INFO: Abnormal shutdown detected, flushing battery-backed data finished BBM inspect steps 1. Connect BBM cable into i8500 controller. 2. Initial controller, then BBM will start to charge automatically. 3. Wait and watch the value of “Battery Backup Module”, please reference the attached screen shot from console, Once the value is over 70%, the BBM can backup 1GB DDR-II cach over 72hr. -
Page 86: M/B Diagram
M/B Diagram ■ ■ - 86 -...
Need help?
Do you have a question about the i8500 and is the answer not in the manual?
Questions and answers