Advertisement
Quick Links
Thank you for purchasing the SXV200V1 SiriusXM Connect Vehicle Tuner Kit.
Install the Magnetic Mount Antenna
This kit comes with everything you need to add Satellite Radio to your
Proper placement of the Magnetic Mount Antenna is very important. Consult
SiriusXM-Ready headunit. Consult your headunit User Guide for features and
a professional installer if you are uncomfortable with installing the antenna
detailed operational instructions.
yourself. More detailed installation instructions and illustrations can be found at
For questions or support, please visit www.siriusxm.com or call 1-866-635-2349.
www.siriusxm.com/installation and clicking on the XM Vehicle Installation link.
What's In the Box?
• Locate the Magnetic Mount Antenna on the
outside of your vehicle on a horizontal surface
The SXV200V1 kit includes the following:
that always faces the sky.
• Avoid placing the antenna near obstacles that
could block a clear view of the sky (such as
roof racks, other antennas like AM/FM, cellular,
Antenna Cable
and GPS), preventing the satellite signal from
Routing Adapter
reaching the antenna.
Select the Best Location for the Magnetic Mount Antenna
Alcohol
For most vehicles the best location is on the roof,
Prep Pad
centered above the rear window or front windshield.
Consult a professional installer to find an alternate
antenna mounting location if your vehicle roof is made
from a non-magnetic material such as aluminum,
Alcohol Prep
Pad
fiberglass, or carbon fibre.
• Sedan or Coupe: Recommended mounting location
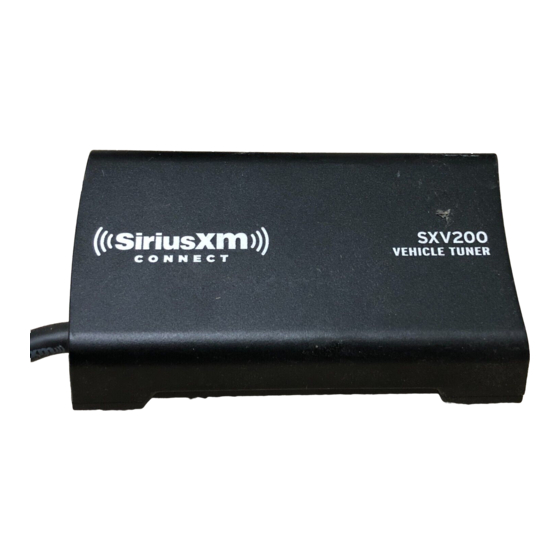
SXV200 Vehicle Tuner
Magnetic Mount Antenna
is above the rear window or front windshield.
Check Your Headunit For Compatibility
• Pickup or SUV: Recommended mounting location is
above the front windshield.
If your headunit has the official SiriusXM-
• Convertible: Recommended mounting location is
Ready logo it is compatible with the
Products with this logo are compatible
above the front windshield, or alternately on the
SXV200 Vehicle Tuner. All SiriusXM-
trunk lid, on the front hood, or on top of the front
Ready headunits include a dedicated
fender.
connector, allowing for quick and easy
connection of the SXV200 tuner.
Products with these logos are not compatible
1
2
Route the Antenna Cable
Make the Connections
If you are installing the antenna at the edge of the roof or hood, install the
You'll need to access the back of the SiriusXM-Ready headunit so you can
Antenna Cable Routing Adapter to direct the
plug the SXV200 Vehicle Tuner into it. This may require you to remove
cable downward. Place the antenna cable
the headunit from the dashboard. If you are uncomfortable with this step,
into the groove of the adapter and slide the
consult a professional installer.
adapter down the cable until the adapter is
flush with the bottom of the antenna.
Be sure to turn OFF the SiriusXM-Ready headunit before connecting the
SXV200 Vehicle Tuner. Locate the SiriusXM connector on the headunit and
Use care when routing the antenna cable into and through the vehicle
connect the SXV200. The headunit may have a panel mount type connector,
interior, avoiding sharp objects that can damage the cable. Keep the antenna
or it may have a pigtail type connector.
cable away from moving parts such as gas and brake pedals, trunk and door
hinges, and sliding seat brackets.
Hide the antenna wire inside the vehicle cabin by routing the cable under the
carpet and behind plastic trim, toward the headunit location. Coil and secure
PANEL MOUNT
any excess cable in a hidden location, such as under the carpet, using wire
TYPE CONNECTOR
ties (not included).
CAUTION! Do not kink or sharply fold the antenna cable.
2. Route cable out of window
1. Feed cable under
To disconnect,
rubber moulding
slide lock back
moulding and into weather-
around window.
stripping around trunk opening.
5. Bring cable out from trim and
route under carpet and behind
the dash to the headunit. Coil
Plug the Magnetic Mount Antenna
3. Route cable along trunk
and secure excess cable under
wall and into cabin.
carpet or behind dash.
into the SXV200 Vehicle Tuner.
4. Route cable from trunk under interior trim,
into cabin and towards front of vehicle.
3
4
Secure the Tuner
Secure the SXV200 Vehicle Tuner behind the vehicle headunit location or
under the dash using wire ties (not included).
Thread the wire ties through the molded brackets on the underside of the
Tuner as shown. Then secure it to a bracket or wiring harness using the wire
ties. Avoid brackets with sharp edges and any moving parts such as gas and
brake pedals.
Connector
orientation
may vary
PIGTAIL TYPE
CONNECTOR
Reinstall the vehicle headunit if it had been removed from the dashboard.
5
Subscribe
Once the SXV200 Vehicle Tuner begins receiving the satellite signal, a
courtesy period is initiated that allows you to tune to channels and listen to
SiriusXM Radio programming for up to 5 days.
You can subscribe to the SiriusXM service anytime by following these steps:
1
Make sure your vehicle headunit is turned on and that Satellite Radio is
selected. Verify that you are receiving the SiriusXM signal so that you
can hear the SiriusXM audio.
2
Make a note of your Radio ID. You can find it on channel 0, on a label on
the bottom of the packaging, and on the label on the bottom of your
SXV200 Vehicle Tuner.
NOTE! The Radio ID does not use the letters I, O, S, or F.
3
Activate your service:
• First see our Customer Agreement for complete terms at
www.siriusxm.com and then:
• Online: Go to www.siriusxm.com/activatenow
OR
• By phone: Call 1-866-635-2349
4 Activation usually takes 10 to 15 minutes, but may take up to an hour.
We recommend that your vehicle headunit remain on until subscribed.
When your service is activated, you will see the SUBSCRIPTION
UPDATED, PRESS ENTER TO CONTINUE or similar message displayed
on the headunit. Once subscribed, you can tune to channels in your
subscription plan.
5
Activation signals can be sent again at any time by visiting
www.siriusxm.com/refresh.
6
Advertisement

Related Manuals for Sirius Satellite Radio SXV200


Summary of Contents for Sirius Satellite Radio SXV200
- Page 1 SiriusXM-Ready headunit. Consult your headunit User Guide for features and a professional installer if you are uncomfortable with installing the antenna plug the SXV200 Vehicle Tuner into it. This may require you to remove under the dash using wire ties (not included).
- Page 2 • Connect the SiriusXM equipment into an outlet on a circuit different from that to and programming subject to change. Our satellite service is available only to those Antenna, CHK Antena, and securely plugged into the SXV200 Vehicle Tuner. 1221 Avenue of the Americas which the affected receiver is connected. at least 18 and older in the 48 contiguous USA and DC. Our Sirius satellite service is Chek Ant) • Make sure the antenna cable is not bent or broken.
Need help?
Do you have a question about the SXV200 and is the answer not in the manual?
Questions and answers