Advertisement
Quick Links
Advertisement

Related Manuals for Sirius Satellite Radio SIR-CL1


Summary of Contents for Sirius Satellite Radio SIR-CL1
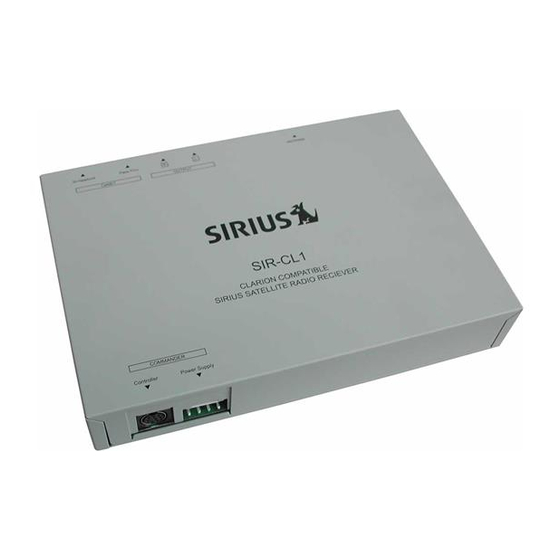
- Page 1 SIRIUS" SIRIUS Satellite Radio User Manual...
-
Page 2: Table Of Contents
Thank you for purchasing this product. Please read this user's manual in its entirety before operating this equipment. After reading this manual, be sure to keep it in a handy place (e.g., compartment). glove Check the contents of the enclosed warranty card and keep it carefully with this manual. Contents 1. -
Page 3: Precautions
2. PRECAUTIONS Upon initial startup or when starting This equipment has been tested to comply after turning off the backup power with the limits for a Class B digital device, supply, the receiver will take longer to pursuant to Part 15 of the FCC Rules. play audio and may take up to 30 These limits are designed to provide seconds after reception of the SIRIUS... - Page 4 R&B information, visit www.sirius.com. oldies to classical masterpreces. From authentic country and real bluegrass to To receive SIRIUS Satellite Radio on cool jazz, hot latin, reggae, rock, and this receiver many more. Best of all, it's all This receiver contains a SIRIUS 10 for commercial free, a Sirius exclusive.
-
Page 5: Installation And Wiring Connections
3. INSTALLATION AND WIRING CONNECTIONS Before Installation 1. Before starting, be sure to disconnect the battery's negative "-" terminal to prevent accidents due to short-circuits. 2. Location - Consider safety and operability when selecting a place for installation. Avoid the following. •... - Page 6 SIRIUSiJ COMMANDER Controller terminal Connection for DSC920S (sold separately) SIR·CL1 COMMANDER, Power Supply terminal Used only when operating the SIR-CL1 with the "If DSC920S (sold separately) CeNET/STANDALONE switch This switch is used to select the operating type: CeNET (headunit) or STAND ALONE...
-
Page 8: System Examples
4. SYSTEM EXAMPLES • Example 1 ® SIRlusii SIR-CL1 CD Main unit compatible with CeNET SIR-CL1 to the main unit. connection ® CeNET cable (provided with the CD CD changer compatible with CeNET changer) connection SIRIUS antenna (sold separately) CeNET cable (provided with the ®... - Page 9 • Example2 SIRlusii SIR-CL1 ClJlRIOlICQlAPJllTlBU! SRlUSSATI!WTI!IlADIOREeeNeR ® RCA pin (audio) cable (sold CD SIRIUS controller (DSC920S, sold separately) separately) SIRIUS antenna (sold separately) Connection cable (provided with the Front speakers DSC920S) ® Audio systems with auxiliary or line-in connections...
-
Page 10: Controls
5. CONTROLS Source unit buttons, example 1 [ROTARY] [FNC] Source unit buttons, example 2 [ROTARY] [DIRECT] [<~J, --:---:-~~~~ [~>] [SCN] Notes: • The illustrations show examples of two headunits with button functions. • Since this manual covers several models, the names of some buttons vary by model. - Page 11 Display Items Source unit display, example 1 Operation status indication ~ : SIRIUS indication Manual indication llimm: Source unit display, example 2 Operation status indication £6-:' .:r.-:. ~-:. ~-:. ~ -:. ~-:. .ft-:. III" ''11811:11I11I•• :--: nlSC"".~~~SAJ;,ryfANU t::lJ:D '::: Z:set channel indication MANU: Manual indication : Category indication...
-
Page 12: Sirius Operation
• Information displayed during reception The following information is displayed when SIRIUS Satellite Radio cannot be received normally. • UPDATING: when the receiver is turned on the first time or after a reset. Do not turn power off during this time as the receiver is downloading the channel guide. - Page 13 • The [ADJ] button is described in the source unit instruction manual either as the [T] (TITLE) button or [A-M] button. This refers to the function of the button labeled "ADJ" on the source unit panel. etc. -ADJ Channel selection Channels are selected with the following buttons.
- Page 14 Notes: • When the name of a channel stored in memory is changed by SIRIUS, the display will show the new channel name immediately. It will not be removed from the preset channel location. • A channel stored in memory may be discontinued at the option of SIRIUS. If you attempt to access this channel from the preset location, the receiver will give you the "INVALID CH"...
- Page 15 Scan function There are two scan modes: a category scan mode and a preset scan mode. During scanning, channels are displayed in abbreviated form and the display mode cannot be switched. • Category scanning In a category scan, broadcast channels in the same category as the current channel are selected about every 10 seconds.
-
Page 16: Specifications
7. SPECIFICATIONS Receivinq Frequencies Satellite 2322.293/2330.207 MHZ Terrestrial 2326.250 MHZ Power Power supply (Stand-alone 4-pin input jack for power and ground mode only) Power consumption Less than 1A Physical Interface Commander 8-pin connector Antenna K-code FAKRA 5MB connector CeNET connector Two 13-pin jacks for CeNET compatible Clarion head units or CD Changers Audio output... - Page 17 SIRIUS® SATELLITE RADIO SIRIUS~ SIRIUS Magnetic Mount Satellite Radio Antenna...
- Page 18 SIRIUS satellites and terrestrial (ground) transmitters when mounted on the roof (or trunk) of a vehicle. This antenna has been approved by SIRIUS Satellite Radio, Inc. to receive signals under a variety of conditions within the SIRIUS North American coverage area.
- Page 19 SIRIUS~ SATELLITE RADIO & Caution and Warnings CAUTION: Because adhesive is used in the installation of the rubber antenna cable cover/tail, it is recommended that the antenna be installed at or above room temperature (68 degrees). Lower temperatures may cause the adhesive on the rubber antenna cable cover/tail to not adhere properly to the vehicle roof.
- Page 20 procedure which follows). This rubber antenna cable cover/tail provides two benefits: first, it locates the antenna the recommended distance from the rear window, rear door/hatch, or trunk edge to give the antenna the best view of the sky. Secondly, it conceals and protects the exposed antenna cable.
- Page 21 SIRIUS~ SATELLITE RADIO Antenna Installation Once you have selected the correct mounting location (see previous section, Mounting Information), you are ready to install the antenna. 1. Clean the area where the antenna and rubber antenna cable cover/tail will be mounted with the supplied alcohol swab. 2.
- Page 22 Sedan/Coupe: Route the cable along the rear window underneath the rubber molding. Use a plastic knife or other blunt object to lift the window rubber molding and tuck the antenna cable underneath the window molding. Route the antenna cable around and down the window to the lowest point, and into the vehicle trunk area using any existing vehicle cable/wire channel or wiring conduit, if possible.
- Page 23 SIRIUS~ SATELLITE RADIO cover/tail are correct, and continue to press firmly down on rubber antenna cable cover/tail for another 30 seconds. Note: At room temperature (68 degrees), maximum adhesion usually occurs within 72 hours. During this period, avoid car washes and other contact with the antenna and rubber antenna cable cover/tail.
- Page 24 SIRIUS~ SATELLITE RADIO SIRIUS Satellite Radio 1221 Avenue of the Americas New York, NY 10020 (888) 539-7474 www.sirius.com Magnetic-Antenna-Install-Manual (v11 0904) © 2004 SIRIUS Satellite Radio Inc.
Need help?
Do you have a question about the SIR-CL1 and is the answer not in the manual?
Questions and answers