Jet JBG-6A Operating Instructions And Parts Manual
Jbg series bench grinders
Hide thumbs
Also See for JBG-6A:
- Operating instructions and parts manual (20 pages) ,
- Operating instructions and parts manual (20 pages)
Table of Contents
Advertisement
Advertisement
Table of Contents

Related Manuals for Jet JBG-6A


Summary of Contents for Jet JBG-6A
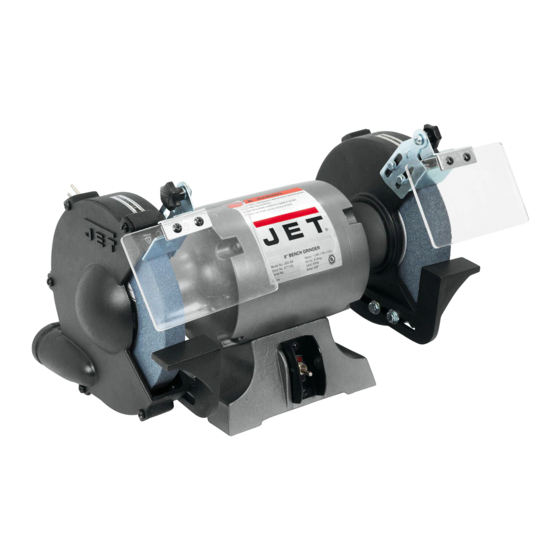
- Page 1 This Manual is Bookmarked Operating Instructions and Parts Manual JBG Series Bench Grinders Models: JBG-6A, JBG-8A, JBG-10A Model JBG-8A shown WMH TOOL GROUP 2420 Vantage Drive Elgin, Illinois 60123 Part No. M-577101 Ph.: 800-274-6848 Revision G 04/06 www.wmhtoolgroup.com Copyright © WMH Tool Group...
-
Page 2: Warranty And Service
WARRANTY AND SERVICE WMH Tool Group, Inc., warrants every product it sells. If one of our tools needs service or repair, one of our Authorized Service Centers located throughout the United States can give you quick service. In most cases, any of these WMH Tool Group Authorized Service Centers can authorize warranty repair, assist you in obtaining parts, or perform routine maintenance and major repair on your JET®... -
Page 3: Table Of Contents
Assembling the Spark Guard and Eye Shield Mounting Brackets ... 8 Installing the Spark Guard and Eye Shield Mounting Brackets... 9 Tool Rests ... 9 Eye Shields... 9 Mounting the Grinder... 9 Electrical... 10 Electrical Requirements... 10 Electrical Connections ... 10 Extension Cords ... -
Page 4: Warnings
5. This bench grinder is designed and intended for use by properly trained and experienced personnel only. If you are not familiar with the proper and safe operation of a bench grinder, do not use until proper training and knowledge have been obtained. - Page 5 Do not overreach or use excessive force to perform any machine operation. 27. Use grinding wheel suitable for speed of grinder. Do not force a tool or attachment to do a job for which it was not designed. The right tool will do the job better and safer.
-
Page 6: Introduction
WMH Tool Group. WMH Tool Group can also be reached at our web site: www.wmhtoolgroup.com. Specifications Model... JBG-6A ... JBG-8A ... JBG-10A Stock Number: ...577101 ... 577102 ... 577103 Overall Dimension (L x H x D/in):...18 x 10-1/2 x 8-1/2 ... 19 x 12-1/2 x 10 ... 24-1/2 x 12-1/4 x 13 Wheel Size (D x W x Bore /in): ... -
Page 7: Unpacking
Separate all parts from the packing material. Check each part against the Contents of the Shipping Container and make certain that all items are accounted for before discarding any packing material. Contents of the Shipping Container Bench Grinder (not shown) Hardware (contents listed below) Hardware... -
Page 8: Assembly
Your bench grinder requires only the assembly of the eye shields and tool rests. For your safety, do not plug the grinder into a power source until all adjustments are complete. An adjustable wrench and a Phillips screwdriver are the only tools you will need to make all normal adjustments and wheel changes on this grinder. -
Page 9: Installing The Spark Guard And Eye Shield Mounting Brackets
To prevent the grinder from moving during operation, it should be securely mounted to a work surface or grinder stand. 1. Align the mounting holes on the grinder with predrilled holes in a bench or grinder stand. 2. Insert bolts through the holes and tighten, using... -
Page 10: Electrical
Electrical Electrical Requirements When connecting the bench grinder to the power source outlet, the outlet must be properly grounded to protect the operator from electrical shock. In the event of a malfunction or breakdown, grounding provides a path of least resistance for electrical current to reduce the risk of electrical shock. -
Page 11: Operation
Failure to comply may cause serious injury! Switch The switch is located on the front of the grinder near the bottom. To turn the tool on, depress the rocker switch at the top near the word ON. To turn the tool off, depress the bottom part of the rocker switch near the word OFF. -
Page 12: Maintenance
If you must replace a wheel be sure to obtain one with a safe rated speed at least as high as the NO LOAD RPM marked on the grinder's nameplate. Refer to Table 2 to determine correct dimensions for the replacement wheel. -
Page 13: Grinding Wheels
Use fine wire brushes for polishing and finish work. When the brush tips become dull, reverse the brush on the grinder. Cleaning Metal shavings may still be hot from recent grinding operations. Make sure shavings and debris are cold before cleaning the grinder. -
Page 14: Troubleshooting
Troubleshooting Problem Probable Cause Not plugged into receptacle Switch not in the ON position Motor cord cut or abraded Motor will not start Plug on cord is faulty Fuse or circuit breaker open Motor faulty Too many electrical machines running on the same outlet Incorrect fuse Motor will not start and Wheels cannot rotate because of... -
Page 15: Parts And Assembly
9 ...TS-0561011 ...Hex Nut ... 1/4 ... 4 10 ...JBG6A-10 ...Fan ..1 ...JBG8A-10 ...Fan ..1 ...JBG10A-10 ...Fan ..1 11 ...BB-6202ZZ...Ball Bearing (JBG-6A)..2 ...BB-6204ZZ...Ball Bearing (JBG-8A)..2 ...BB-6206ZZ...Ball Bearing (JBG-10A)..1 12 ...JBG6A-12 ...Cover..2 ...JBG8A-12 ...Cover... - Page 16 Parts List Index No Part No 27 ...JBG6A-27 ...Tool Rest - left..1 ...JBG8A-27 ...Tool Rest - left..1 ...JBG10A-27 ...Tool Rest - left..1 28 ...JBG6A-28 ...Tool Rest - right ..1 ...JBG8A-28 ...Tool Rest - right ..1 ...JBG10A-28 ...Tool Rest - right ...
- Page 17 ...JBG8A-56 ...Eye Shield Plate - right..1 ...JBG10A-56 ...Eye Shield Plate - right..1 57 ...JBG6A-57 ...Lock Hub (JBG-6A/8A) ... 1/4 ... 2 58 ...JBG6A-58 ...Cross Screw... 3/16x3/8 ... 4 59 ...JBG6A-59 ...Eye Shield ..2 ...JBG6A-59A ...Eye Shield Assembly ...
-
Page 19: Wiring Diagram
Wiring Diagram... -
Page 20: Replacement Parts
Replacement Parts Replacement parts are listed on the following pages. To order parts or reach our service department, call 800-274-6848 between 7:30 a.m. and 5:30 p.m. (CST), Monday through Friday. Having the Model Number and Serial Number of your machine available when you call will allow us to serve you quickly and accurately.
Need help?
Do you have a question about the JBG-6A and is the answer not in the manual?
Questions and answers