Viking 24” Use & Installation Instructions Manual
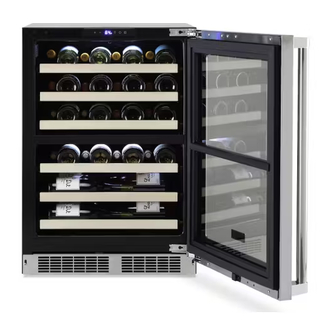
24” w. undercounter/freestanding wine cellar
Hide thumbs
Also See for 24”:
- Installation manual (26 pages) ,
- Use & installation instructions manual (16 pages) ,
- Service manual (30 pages)
Table of Contents
Advertisement
USE/INSTALLATION
INSTRUCTIONS
24" W. UNDERCOUNTER/FREESTANDING WINE CELLAR
Retain for Future Reference
IMPORTANT - PLEASE READ AND FOLLOW
• • Before beginning, please read these instructions completely and carefully.
• Do not remove permanently affixed labels, warnings, or plates from the product. This may void the warranty.
• Please observe all local and national codes and ordinances.
• Please ensure that this product is properly grounded.
• The installer should leave these instructions with the consumer who should retain for local inspector's use and for
future reference.
T T o o r r e e d d u u c c e e t t h h e e r r i i s s k k o o f f f f i i r r e e , , e e l l e e c c t t r r i i c c a a l l s s h h o o c c k k , , o o r r i i n n j j u u r r y y w w h h e e n n u u s s i i n n g g y y o o u u r r w w i i n n e e c c e e l l l l a a r r , , f f o o l l l l o o w w b b a a s s i i c c p p r r e e c c a a u u t t i i o o n n s s i i n n c c l l u u d d i i n n g g t t h h e e
f f o o l l l l o o w w i i n n g g : :
DO NOT STORE OR USE GASOLINE OR OTHER FLAMMABLE VAPORS AND LIQUIDS IN THE VICINITY OF THIS OR
ANY OTHER APPLIANCE. THE FUMES CAN CREATE A FIRE HAZARD OR EXPLOSION.
I I t t i i s s y y o o u u r r r r e e s s p p o o n n s s i i b b i i l l i i t t y y t t o o b b e e s s u u r r e e y y o o u u r r w w i i n n e e c c e e l l l l a a r r i i s s : :
•located so the front is not blocked to restrict incoming or discharge air flow.
•properly leveled.
•located in a well ventilated area.
•connected to the proper kind of outlet, with the correct electric supply and grounding. A 115 volt, 60 Hz, 15 amp
fused electrical supply is required. N N O O T T E E : : Time delay fuse or circuit breaker is recommended.
•not used by anyone unable to operate it properly.
•used only for its intended purpose.
•properly maintained.
PROPER DISPOSAL OF YOUR OLD REFRIGERATION UNIT
DANGER
SUFFOCATION HAZARD
Remove doors from your old
refrigeration unit.
Failure to do so can result in
child entrapment, which can
cause death or brain damage.
IMPORTANT: Child entrapment and suffocation are not problems of the
past. Junked or abandoned refrigeration products are still dangerous,
even if they will sit for "just a few days." If you are getting rid of your
refrigeration product, please follow the instructions below to help prevent
accidents.
BEFORE YOU THROW AWAY YOUR OLD REFRIGERATION UNIT:
•Take off the doors.
•Leave the shelves in place so that children may not easily climb inside.
WARNING: :
•FOR YOUR SAFETY•
•SAVE THESE INSTRUCTIONS•
VIKING RANGE CORPORATION
111 FRONT STREET
GREENWOOD, MISSISSIPPI 38930 USA
(662) 455-1200
41009332
Rev. B
Advertisement
Table of Contents

Related Manuals for Viking 24”


Summary of Contents for Viking 24”
- Page 1 VIKING RANGE CORPORATION USE/INSTALLATION 111 FRONT STREET GREENWOOD, MISSISSIPPI 38930 USA INSTRUCTIONS (662) 455-1200 24” W. UNDERCOUNTER/FREESTANDING WINE CELLAR Retain for Future Reference IMPORTANT - PLEASE READ AND FOLLOW • • Before beginning, please read these instructions completely and carefully.
-
Page 2: General Information
GENERAL INFORMATION U U n n p p a a c c k k 1. Remove banding from bottom of carton. Lift carton up and off of the wine cellar 2. Remove all tape and packaging material from the outside and inside of the cabinet. 3. - Page 3 SPECIFICATIONS/DIMENSIONS PROFESSIONAL SERIES B B a a s s i i c c E E l l e e c c t t r r i i c c D D a a t t a a •115 VAC/60 Hz •Maximum amps - 3.3 •Approximate Shipping Weight - 140 lbs.
-
Page 4: Front View
SPECIFICATIONS/DIMENSIONS Front View DESIGNER SERIES B B a a s s i i c c E E l l e e c c t t r r i i c c D D a a t t a a •115 VAC/60 Hz •Maximum amps - 3.3 •Approximate shipping weight - 140 lbs (63.2 kg) Mín. - Page 5 CUSTOM WOOD FRAME INSTALLATION INSTRUCTIONS ( ( D D F F U U W W M M o o d d e e l l ) ) Note: Weight of wood panel must not exceed 20 lbs. W W o o o o d d S S c c r r e e w w s s 1.
- Page 6 Selecting and Preparing the Wood Frame - DFUW Model F F O O R R A A 3 3 - - 1 1 / / 2 2 ” ” T T O O E E K K I I C C K K ( ( C C O O V V E E R R S S T T H H E E E E N N T T I I R R E E D D O O O O R R E E X X T T R R U U S S I I O O N N ) ) ( ( L L E E F F T T H H I I N N G G E E ) ) 7 13/16”...
- Page 7 O O P P T T I I O O N N A A L L F F O O R R 4 4 ” ” T T O O E E K K I I C C K K T T O O M M A A T T C C H H E E X X I I S S T T I I N N G G C C A A B B I I N N E E T T R R Y Y T T O O E E K K I I C C K K H H E E I I G G H H T T ( ( L L E E F F T T H H I I N N G G E E ) ) 7 13/16”...
- Page 8 F F O O R R A A 3 3 - - 1 1 / / 2 2 ” ” T T O O E E K K I I C C K K ( ( C C O O V V E E R R S S T T H H E E E E N N T T I I R R E E D D O O O O R R E E X X T T R R U U S S I I O O N N ) ) ( ( R R I I G G H H T T H H I I N N G G E E ) ) 7 13/16”...
- Page 9 O O P P T T I I O O N N A A L L F F O O R R 4 4 ” ” T T O O E E K K I I C C K K T T O O M M A A T T C C H H E E X X I I S S T T I I N N G G C C A A B B I I N N E E T T R R Y Y T T O O E E K K I I C C K K H H E E I I G G H H T T ( ( R R I I G G H H T T H H I I N N G G E E ) ) 7 13/16”...
- Page 10 Attaching the Wood Frame to the Door - DFUW Model 1. If the door is attached to the unit, remove by unscrewing the top allen head set screw at the top hinge. Remove the door by angling the door off of the bottom hinge pin. 2.
-
Page 11: Leg Leveler Installation
Lock Installation Details L L o o c c k k B B o o d d y y L L o o c c k k C C a a m m P P h h i i l l l l i i p p s s S S c c r r e e w w K K E E Y Y L L o o c c k k E E x x t t e e n n s s i i o o n n D D o o o o r r G G a a s s k k e e t t... -
Page 12: Electrical Connection
ELECTRICAL SHOCK HAZARD WARNING Failure to follow these instructions could result in fire or electrical shock. ELECTRICAL CONNECTION Grounding type wall Power Supply E E l l e e c c t t r r i i c c a a l l R R e e q q u u i i r r e e m m e e n n t t s s receptacle with 3-prong A 115 volt, 60 Hz, AC only 15 amp fused electrical supply is required. -
Page 13: Interior Light
LIGHT TUBE REPLACEMENT N N o o t t e e : : Please contact your Viking Range Corporation parts distributor or dealer to order new light tubes. Use only approved replacement light tubes from your dealer or manufacturer. -
Page 14: Cleaning And Maintenance
LOADING RECOMMENDATIONS Each of the top six roll-out racks holds 8 bottles with necks alternating front to back. The bottom wood cradle holds six bottles for a total of 54 bottles. To aid in the loading and unloading, the racks extend up to 14 inches (35.6 cm) to allow easier access to rear bottles. -
Page 15: Energy Saving Tips
If you are unable to obtain the name of an authorized service agency, or if you continue to have service problems, contact Viking Range Corporation at (888) 845-4641 or write to: V V I I K K I I N N G G P P R R E E F F E E R R R R E E D D S S E E R R V V I I C C E E... - Page 16 For the name of your nearest authorized Viking Range Corporation service agency, call the dealer from whom the product was purchased or Viking Range Corporation. I I M M P P O O R R T T A A N N T T : : Retain proof of original purchase to establish warranty period.
Need help?
Do you have a question about the 24” and is the answer not in the manual?
Questions and answers