
Related Manuals for Motorola CP125


Summary of Contents for Motorola CP125
- Page 1 CP125 ™ Portable Two-Way Radio User Guide Guide de l'utilisateur de radio bidirectionnelle...
-
Page 2: Computer Software Copyrights
Motorola. Furthermore, the purchase of Motorola products shall not be deemed to grant either directly or by implication, estoppel, or otherwise, any license under the copyrights, patents or patent... -
Page 3: Table Of Contents
Select a Channel ..... 15 CONTENTS Receive a Call ..... . . 15 Monitor . - Page 4 Notes: English...
-
Page 5: Safety
RF Exposure booklet enclosed with your radio (Motorola Publication part number 68P81095C98) to ensure compliance with RF energy exposure limits. For a list of Motorola-approved antennas, batteries, and other accessories, visit the following web site which lists approved accessories: http://www.motorola.com/cgiss/ index.shtml. - Page 6 Notes: English...
-
Page 7: Radio Overview
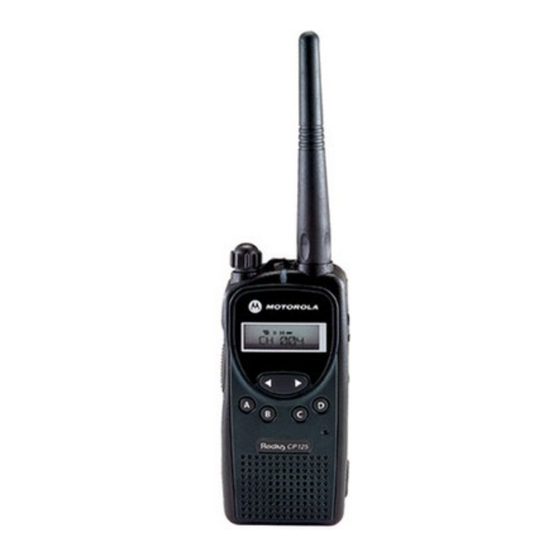
RADIO OVERVIEW Antenna Belt Clip On/Off/Volume Programming Knob LED Indicator Port Accessory Connector Monitor Button Push-to-Talk (PTT) Button LCD Screen !" Buttons " Programmable Buttons (A, B, C, D) Speaker Microphone English... -
Page 8: Accessory Information
ACCESSORY INFORMATION Attach the Battery Remove the Battery Grooves Battery Clasp Battery Slots Fit the battery slots with the grooves on the Turn off the radio if it is turned on. radio. Slide the battery clasp away from the radio. Slide the battery upwards until a click is heard. -
Page 9: Attach The Antenna
Attach the Antenna Remove the Antenna Antenna Connector Threaded End of Antenna Fasten the antenna to the radio by placing the Turn the antenna in a counter-clockwise threaded end of the antenna into the Antenna direction until it disengages from the radio. Connector. -
Page 10: Attach The Belt Clip
Attach the Belt Clip Remove the Belt Clip Release Tab Mounting Grooves Align mounting rails of the radio with the Insert the end of a key between the release grooves of the belt clip. tab and the back surface of the radio. Slide the belt clip downwards until it clicks Lift the release tab. -
Page 11: Battery Information
14 to 16 hours before initial and performance. The battery was designed use. specifically to be used with a Motorola charger. Charging in non-Motorola equipment may lead to battery damage and void the battery warranty. -
Page 12: Wall Charger
The radio should be charged at least 16 hours initially before decreasing charging time to 13 hours. Turn on your radio, when charging is complete; you should see all 3 bars of the Battery Level Indicator illuminated. * Other charging solutions available through Motorola Accessories (1-800-422-4210). English... -
Page 13: Led Indicators
LED INDICATORS Symbol Indication The selected channel is being State Indication Color monitored Monitor Illuminated Radio is transmitting. Radio is in Programming Blinking Battery voltage is low. Mode. Programming Green Illuminated Radio is receiving. Mode Blinks, without the dot, when LCD SCREEN scan is activated. -
Page 14: Programmable Buttons (A, B, C, D)
PROGRAMMABLE BUTTONS (A, B, C, D) Used to select various functions. These functions can be assigned as a short press (press and release) or a long press (press and hold for 1 second). Button Function Channel Alias Toggles display between Channel Number and Channel Alias. Backlight Toggles backlight display between On and Off. - Page 15 The default functions programmed to your radio are described in the table below. Press Type Button A Button B Button C Button D Short Press Prime Channel Scan On/Off Power Select Backlight On/Off Long Press Channel Alias Nuisance Channel Squelch Level Kepad Lock Delete Although your radio is programmed with default functions, you have the ability to re-program the...
-
Page 16: Buttons
!" BUTTONS Used to: • select a channel in Normal Mode • select a parameter in Programming Mode • change the scanning direction. MONITOR BUTTON Used to monitor the channel for any activity; squelch is disabled. English... -
Page 17: Getting Started
SELECT A CHANNEL GETTING STARTED Your radio offers 4 conventional channels. " TURN THE RADIO ON OR OFF To select a channel, press the buttons until you reach the desired channel. RECEIVE A CALL Turn your radio on. Adjust the radio’s volume. "... -
Page 18: Monitor
MONITOR Hold the radio vertically 1 to 2 inches (2.5 to 5cm) from your mouth. Press the PTT button It is important to monitor for traffic before to talk. transmitting to ensure that you do not “talk over” someone who is already transmitting. •... -
Page 19: Scan
• Priority Scan – allocates 50% of the scan- SCAN ning time to the Priority Channel (the first channel in the designated scan list). Your radio is equipped with the Scan feature, allows you to monitor multiple channels and Start receive calls that are transmitted on them. -
Page 20: Start And Stop Scan
START AND STOP SCAN G To Remove a Nuisance Channel While the radio is on the nuisance channel, Press the preprogrammed Scan button to press the preprogrammed Nuisance start scan. Channel Delete button until you hear a tone. The G indicator blinks to indicate Note: that the radio is scanning. -
Page 21: Programming Mode
PROGRAMMING MODE This mode allows you to change feature parameters to enhance the use of your radio. ENTERING PROGRAMMING MODE If your radio is turned on, turn it off. Press and hold the preprogrammed Monitor button, and turn on your radio. Note: A ringing tone is heard, indicating that your radio is in Programming Mode. -
Page 22: Accessing Programming Mode Parameters
ACCESSING PROGRAMMING MODE PARAMETERS Press the PTT button or the preprogramed Monitor button to scroll through the features available in ! " Programming Mode. Press the buttons to scroll through the parameters for each feature. Feature Range Remarks Squelch Level SQL-00, …, SQL-15 Select low level when you need to receive very (SQL-XX) - Page 23 Feature Range Remarks Alert Tone Volume BEEP-OFF, BEEP-1, Selects the alert tone volume needed. Select (BEEP-X) BEEP-2, BEEP-OFF, if you require quiet operation, or BEEP-3 BEEP-3, if working in a noisy environment. Prime Channel PRM-OFF, PRM-001, …., The Prime Channel is the channel that you wish Select PRM-XXX, to spend most of your time monitoring.
- Page 24 English...
-
Page 25: Warranty
One (1) Year the Product with any ancillary equipment, and all such equipment is expressly excluded from this MOTOROLA, at its option, will at no charge either warranty. Because each system which may use repair the Product (with new or reconditioned... - Page 26 Product (e.g., dealer or communication service PRODUCT, TO THE FULL EXTENT SUCH MAY provider), it can facilitate your obtaining warranty BE DISCLAIMED BY LAW. service. You can also call MOTOROLA at 1-800- 927-2744 US/Canada. III. STATE LAW RIGHTS: SOME STATES DO NOT ALLOW THE...
- Page 27 VI.PATENT AND SOFTWARE PROVISIONS: supplied equipment) which adversely affect performance of the Product or interfere with MOTOROLA will defend, at its own expense, any MOTOROLA's normal warranty inspection suit brought against the end user purchaser to and testing of the Product to verify any the extent that it is based on a claim that the warranty claim.
- Page 28 Product such claim; or any parts thereof. B) that MOTOROLA will have sole control of the Laws in the United States and other countries defense of such suit and all negotiations for preserve for MOTOROLA certain exclusive rights its settlement or compromise;...
-
Page 29: Accessories
BATTERIES ACCESSORIES Motorola offers a number of accessories to PMNN4063 NiMH, 1500 mAH enhance the productivity of your two-way radio. Many of the available accessories are CARRY ACCESSORIES listed below. ANTENNAS 4285820Z01 Shoulder Strap HLN9844 2-inch Belt Clip PMAD4012 136-155 MHz, Helical Antenna, 9cm... -
Page 30: Audio Accessories
RLN4940 Slow Desktop Charger Kit, 120 V WPLN4203 Slow Desktop Charger Base EPNN7997 Slow Desktop Transformer, 120 V PMTN4073 Wall Charger, 120 V US NA AUDIO ACCESSORIES PMLN4294 Ear Set Mic w/PTT PMLN4425 Ear Set Boom Mic w/Remote Ring HMN9030 Remote Speaker Mic HMN9013 Lightweight Handset w/Boom Mic... - Page 32 MOTOROLA and the Stylized M Logo are registered in the U.S. Patent and Trademark Office. All other product or service names are the property of their respective owners. © Motorola, Inc. 2005. MOTOROLA et le logo stylisé M sont homologués au Patent and Trademark Office des Etats-Unis.
Need help?
Do you have a question about the CP125 and is the answer not in the manual?
Questions and answers
what is required to program the CP125 portable, Is a rib box required or not Just do I simply plug in the one end to the portable and the other to a com port of the computer??? Please help me?
To program the Motorola CP125 portable, a USB programming cable is required. A separate RIB (Radio Interface Box) is not necessary.
This answer is automatically generated