Table of Contents
Advertisement
Quick Links
Advertisement
Table of Contents

Related Manuals for BenQ E1220


Summary of Contents for BenQ E1220
- Page 1 E1220 Digital Camera User Manual Welcome...
- Page 2 Copyright Copyright 2009 by BenQ Corporation. All rights reserved. No part of this publication may be reproduced, transmitted, transcribed, stored in a retrieval system or translated into any language or computer language, in any form or by any means, electronic, mechanical, magnetic, optical, chemical, manual or otherwise, without the prior written permission of this company.
-
Page 3: Fcc Statement
FCC Statement This equipment has been tested and found to comply with the limits for a Class B digital device, pursuant to Part 15 of the FCC Rules. These limits are designed to provide reasonable protection against harmful interference in a residential installation. This equipment generates, uses and can radiate radio frequency energy and, if not installed and used in accordance with the instructions, may cause harmful interference to radio communications. - Page 4 Safety warning and notice Before operating the camera, please make sure that you read and fully understand the content in this section. If you ignore and violate all safety warning notices indicated in this section, the camera warranty may be void. Meanwhile, not only the camera but also you and all other people and things around you may be severely damaged, injured, or even placed in danger of death.
-
Page 5: Operating Environment
• If a foreign substance or water gets in your camera, please turn the power off immediately and disconnect the battery. Next, remove the foreign substance or water and send it to the maintenance center. • Whenever there is data in the internal memory or the external memory card, you should make a backup copy to a computer or disc. - Page 6 Do not hold the camera by excessive To avoid accidental falling, please attach force. Plus, be sure to protect the the hand strap to the camera and always camera from strong impacts. hold the camera by keeping the hand strap around your wrist. If the battery suddenly depleted and When the camera is not in use, always caused the lens fail to retract, please...
-
Page 7: Table Of Contents
Table of Contents Table of Contents Touring the camera ................. 1 Checking the package contents ................ 1 Camera ......................1 Front view and bottom view ................... 1 Rear view ........................2 Preparing the camera for use ............3 Charging the battery ..................3 Using multifunctional buttons ................. - Page 8 Table of Contents Date Stamp ......................18 Instant Review ....................18 Auto Z-Lighting ....................19 Smart Scene .....................19 Blink Detector ....................19 Self Portrait / Love Portrait ................19 Pre-composition ....................20 Smile Catch ......................20 Movie Record mode settings ................20 Other settings ................. 21 Playback mode ................23 Options for playback and editing ..............24 Enlarging an image ....................24 Viewing multiple files at a time ................24...
-
Page 9: Touring The Camera
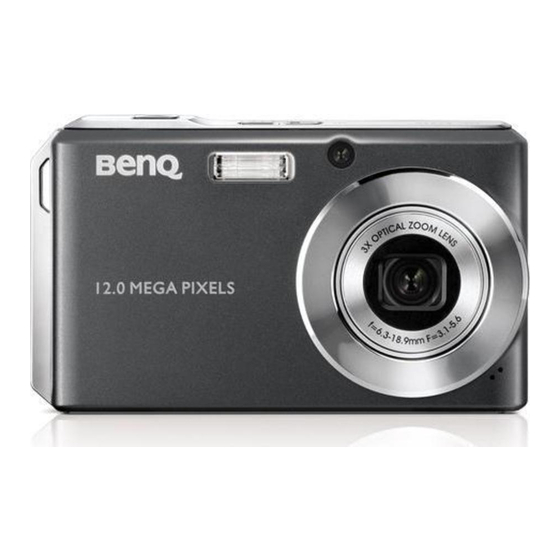
Touring the camera 1 Touring the camera Checking the package contents Carefully unpack your kit box and ensure that you have the following items. 1. User Manual / Quick Guide 2. Digital camera 3. USB cable 4. Battery 5. Hand strap 6. -
Page 10: Rear View
2 Touring the camera Rear view 1. LCD display 2. T (Tele) - Zoom-in or turn on the Shooting mode description 3. Strap eyelet 4. W (Wide) - Zoom-out, turn off the Shooting mode description, or enter the thumbnail view (Playback mode) 5. -
Page 11: Preparing The Camera For Use
Preparing the camera for use 3 Preparing the camera for use Use only the specified battery for the camera, and always turn off the camera before removing the battery. To install the battery: 1. Open the battery cover (A). 2. Insert the battery in the correct direction by matching the + - label on the battery cover (B). -
Page 12: Using Multifunctional Buttons
4 Preparing the camera for use • Damage caused by the use of an incorrect battery charger set is not covered under the warranty. • The battery may be warm after being charged or used. This is normal and not a malfunction. -
Page 13: Initial Setting
Initial setting 5 Initial setting You will be prompted to set up the language and the date and time when the camera is turned on for the first time. Setting language Selects the language version shown on the screen. To select a language: 1. -
Page 14: Operating The Camera
6 Operating the camera Operating the camera The procedure below is a general guideline for basic operation. It is particularly useful if you are new to the camera. 1. Press to turn the power on. 2. Press > , or to locate desired options (under two different tabs: ), and then press to make selections. -
Page 15: Capture Mode
Capture mode 7 Capture mode 9999 9999 -1.0 Item Description Page reference Shooting mode Flash mode Focus mode Drive mode S.S.F. Number of shots available Image size Image quality Face tracking White balance AE metering Exposure value (EV) AF area Histogram Battery status Camera shake warning... -
Page 16: More Capture Options In Func Menu
8 Capture mode • In the Capture mode, press to toggle among 4 display modes (standard, complete, none, and rule of thirds). Use the rule of thirds display mode to improve your composition by placing subjects on at least one of the intersections of these 4 imaginary lines. -
Page 17: Image Size
Capture mode 9 Image size Icon Description Icon Description 12 megapixels (4000 x 3000) 3 megapixels (2048 x 1536) 3:2 (12 megapixels; 4000 x 2672) HD 16:9 (1920 x 1080 in full HD format) 8 megapixels (3264 x 2448) VGA (640 x 480) 5 megapixels (2592 x 1944) To select an image size: 1. -
Page 18: Focus Mode
10 Capture mode To select a flash mode: 1. Go to the Capture mode. 2. Keep pressing to toggle among different flash modes and select a desired option. Focus mode Icon Mode Description Auto focus Adjusts focus automatically. Macro Used when capturing images at a close distance. Pan Focus Used when you want to capture the subjects in a certain focus range. -
Page 19: Battery Status
Capture mode 11 Battery status Icon Description Battery power is full. Battery power remains adequate. Battery power is low. Battery power is very low. You should replace the battery ASAP. Setting EV EV (Exposure Value) lightens or darkens the entire image. Adjust EV when the brightness between the subject and the background is not balanced, or when the subject occupies only a small part of the picture. -
Page 20: Iso
12 Capture mode To select white balance: 1. Press > White balance. 2. Press to select an select a white balance option. (When selecting the manual mode, you must first point the adjustment frame shown on the screen at a blank sheet of white paper or something similar, and press the Shutter for the camera to detect proper colors.) 3. -
Page 21: Effect
Capture mode 13 Effect Adds color filter effects to the image or video you want to capture. Icon Mode Description Normal No effects are added. Vivid Adds an effect with very clear and bright color tones. Sepia Adds an effect with dark reddish brown color tones, so the image or video looks as if it is old. - Page 22 14 Capture mode Movie Record Captures videos with sound. When viewing the captured video file later, you can see a unique icon that appears on the screen and indicates that this is a video file. Smile Catch Automatically takes a shot when a smile is detected. Blink Detector Warns of eye blinks if detected &...
- Page 23 Capture mode 15 Food Captures food by enhancing color brightness and giving more vivid colors. Museum Used when taking a picture of subjects in a place where flash is usually prohibited. Flash is always off. Candle Light Makes a picture look warm, and thus captures the mood under candle light source.
-
Page 24: Aperture Priority
16 Capture mode Aperture Priority Aperture priority is often used when shooting static subjects or emphasizing the depth of field. In general, use a smaller aperture if a greater depth of field is needed. To adjust aperture value: 1. Go to the Capture mode with Aperture Priority mode selected. 2. -
Page 25: Auto Exposure Bracketing (Aeb)
Capture mode 17 Auto Exposure Bracketing (AEB) The AEB function automatically takes 3 pictures with slightly different settings in the shutter speed or the aperture value. To turn on/off AEB: 1. Go to the Capture mode. 2. Press > > AEB. 3. -
Page 26: Setting Sharpness, Saturation And Contrast
18 Capture mode Setting sharpness, saturation and contrast Adjusts how colors appear in the pictures by setting sharpness, saturation, and contrast. To set sharpness, saturation, or contrast: 1. Press > , and then select Sharpness, Saturation or Contrast. 2. Press , and then select High, Normal, or Low. -
Page 27: Auto Z-Lighting
Capture mode 19 Auto Z-Lighting Automatically enhances the brightness and contrast in the darker areas of a picture to improve overall exposure quality. To set Auto Z-Lighting: 1. Press > > Auto Z-Lighting. 2. Press , and then select 3. Press >... -
Page 28: Pre-Composition
20 Capture mode Pre-composition Captures the background first for positioning the final image. Ideal for asking others to take your photo. 1. Press > > Shooting Mode and select 2. Press the shutter to capture the background. The bottom section of the screen displays the captured background image. -
Page 29: Other Settings
Other settings 21 To select a Movie Record option: 1. Press > > Shooting Mode > Movie Record mode, and make sure you can see the icon on the screen. 2. Press , and then select an option. 3. Press to select a setting. - Page 30 22 Other settings LCD Brightness [High] The LCD brightness is increased. [Normal] The LCD brightness remains at the default value. LCD Saving The LCD screen remains bright when the camera [Off] is idle. For power conservation, the LCD screen is [On] automatically dimmed after the camera has been idle for 5 seconds.
-
Page 31: Playback Mode
Playback mode 23 Playback mode Press to enter the Playback mode. 01.15.2009 01.15.2009 01.15.2009 10/115 10/115 08:05 08:05 08:05 IMG 0064.JPG IMG 0064.JPG 1.25MB 1.25MB 1/200 1/200 F2.8 F2.8 • When the camera is off, press and hold for at least one second to enter the Playback mode. -
Page 32: Options For Playback And Editing
24 Playback mode Options for playback and editing When the camera is in the Playback mode, press , or to move to different files. You can also select any of the following options. Enlarging an image Magnifies an image, so more details can be seen. To enlarge an image: 1. -
Page 33: Adjusting The Playback Volume
Playback mode 25 Adjusting the playback volume Increase or decrease the volume of video clips, audio clips, or voice memos. To adjust the playback volume: 1. Turn the power on, and set the camera to the playback mode. 2. Press to select a video clip, audio clip, or voice memo that you want to playback. -
Page 34: Protecting Files
26 Playback mode Protecting files Prevents selected files from accidental removal. To protect files: 1. Press > > > Protect > 2. Select whether to protect this selected file, other selected, or all files, and then press You will then see the icon indicating the file is protected. -
Page 35: Z-Lighting
Playback mode 27 Negative Colors become the opposite of what they were in the original image. Mosaic Applies a mosaic tile effect to the image. Vivid Red The image becomes reddish. Vivid Green The image becomes greenish. Vivid Blue The image becomes bluish. To add a special effect to an image: 1. -
Page 36: Resizing
28 Playback mode 3. Press to select the target image size (8M, 5M, 3M, VGA) to which you want to reduce. 4. Press , or to locate the area to trim. 5. Press to confirm the change and save the image file. You cannot trim images in the size of 3:2, 16:9, or VGA. -
Page 37: Working With Computer And Av System
Working with computer and AV system 29 Working with computer and AV system Bundled software The camera offers the following programs on a CD. ArcSoft Combines photo editing with creative enhancement and sharing tools PhotoImpression 5 that maximize your digital media experience. ArcSoft Creates multimedia presentations by combining photos and video VideoImpression 2... -
Page 38: Printing Images
30 Working with computer and AV system Printing images In addition to printing images by connecting the camera to a printer via a computer or bringing the memory card (if available) to a photo-processing center, you can choose to print using PictBridge. Printing with PictBridge You can directly print images by connecting your camera to a PictBridge-compatible printer without using a computer. -
Page 39: Troubleshooting And Service Information
Troubleshooting and service information 31 Troubleshooting and service information If your camera cannot operate normally, see the frequently encountered problems and solutions listed below. If the problem persists, contact your nearest service center or technical support. Problem Cause Solution The camera There is no battery or the battery is Insert the battery correctly. -
Page 40: Technical Support
Turn on the camera, select images with printer when the camera is PictBridge, and then connect to the PictBridge- powered off. printer. compliant printers. Technical support For technical assistance, free driver updates, product information, and news releases, visit the following web site: http://www.BenQ.com... -
Page 41: Specifications
Specifications 33 Specifications Sensor Sony 12.0 Mega Pixels, 1/2.3 inch CCD Zoom Optical: 3X Digital: Up to 5X(Preview) / Up to 12X(Playback) Lens f = 6.3 (W) ~ 18.9 (T) mm F: 3.1 (W) ~ 5.6 (T) (f = 35.5mm ~ 106.5mm, 35mm equivalent) Focus Range Normal: 40cm ~ Infinity Macro: W=10 ~ 60cm;T= 40cm ~ 60cm...
Need help?
Do you have a question about the E1220 and is the answer not in the manual?
Questions and answers