Table of Contents
Advertisement
Quick Links
Advertisement
Table of Contents

Related Manuals for BenQ E1050


Summary of Contents for BenQ E1050
- Page 1 E1050 Digital Camera User Manual Welcome...
-
Page 2: European Union
Copyright Copyright 2008 by BenQ Corporation. All rights reserved. No part of this publication may be reproduced, transmitted, transcribed, stored in a retrieval system or translated into any language or computer language, in any form or by any means, electronic, mechanical, magnetic, optical, chemical, manual or otherwise, without the prior written permission of this company. - Page 3 CE Regulatory Notice Hereby, BenQ Corp. declares under our responsibility that the product is in conformity with the requirements set out in the Council Directive on the Approximation of the Laws of the Member States relating, Electromagnetic Compatibility Directives (2004/108/EC) and Low Voltage Directive (2006/95/ EC).
-
Page 4: Table Of Contents
Table of Contents Table of Contents Touring the camera ....1 Digital Zoom ........ 17 Date Stamp ........18 Checking the package contents ..1 Instant Review ......18 Camera ........... 1 Movie Record mode settings ..18 Front view and bottom view ... 1 Other settings ......19 Rear view .......... -
Page 5: Touring The Camera
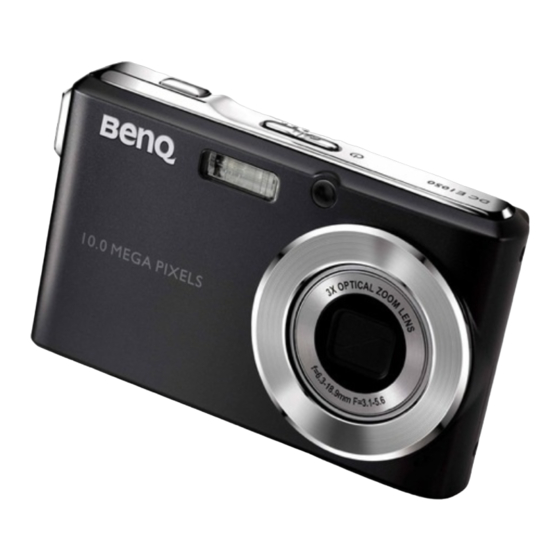
Touring the camera 1 Touring the camera Checking the package contents Carefully unpack your kit box and ensure that you have the following items. 1. User Manual / Quick Guide 2. Digital camera 3. USB cable 4. Battery 5. Hand strap 6. -
Page 6: Rear View
2 Preparing the camera for use Rear view 1. LCD display 2. T (Tele) - Zoom-in or Scene mode description 3. Strap eyelet 4. W (Wide) - Zoom-out or thumbnail view (Playback mode) 5. Playback mode button - Toggle between Capture and Playback modes) 6. -
Page 7: Charging The Battery
Preparing the camera for use 3 To remove the battery: 1. Open the battery cover. 2. Press and hold the battery. 3. Release the battery lock lever. 4. When the battery has come out a little, gently pull it out the rest of the way. 5. -
Page 8: Using Multifunctional Buttons
4 Preparing the camera for use Using multifunctional buttons You can choose camera settings by pressing the 4-way control or the button. 1. Left/Macro/Auto Focus: • Scrolls left in menus. • Activates Macro mode or Auto Focus mode. 2. Up: •... -
Page 9: Initial Setting
Initial setting 5 Initial setting You will be prompted to set up the language and the date and time when the camera is turned on for the first time. Setting language Selects the language version shown on the screen. To select a language: 1. - Page 10 6 Operating the camera 7. In the Movie Record mode, press the shutter to stop video recording. 8. Press to view captured images or recorded videos, and then press , or to move to different images/videos. You can also press to zoom-in/out a captured image, or press to view 9 images on the screen.
-
Page 11: Capture Mode
Capture mode 7 Capture mode 8 8 8 Item Description Page reference Scene mode Flash mode Focus mode Drive mode Zoom bar Image size Number of shots available Image quality AF area Battery status Histogram Exposure value (EV) AE metering White balance •... -
Page 12: More Capture Options In Func Menu
8 Capture mode More capture options in FUNC menu Press the FUNC button to access more capture options. Depending on your settings, the displayed option icons in the FUNC menu may vary. My Mode (the most recent 6 record modes Resolution used in order) Quality... -
Page 13: Flash Mode
Capture mode 9 Flash mode The flash offers an additional light source (usually used in a low-light environment). You can capture an image using one of the following flash modes. Icon Mode Description Auto flash The flash fires automatically based on the photographic conditions. -
Page 14: Image Quality
10 Capture mode Image quality Icon Mode Description Fine Best image quality with the lowest compression rate. File size is the largest. Normal Better image quality with medium compression rate. File size is medium. Economy Good image quality with the highest compression rate. File size is the smallest. -
Page 15: White Balance
Capture mode 11 White balance Compensates for color temperatures in different lighting conditions, so white and other colors can display properly when you capture images. Icon Mode Description Auto Adjusts white balance automatically. Daylight Used in bright daylight conditions. Cloudy Used in twilight or shady conditions. -
Page 16: Ae Metering
12 Capture mode To select an ISO value: 1. Press > ISO. 2. Press to select an ISO Value. 3. Press to confirm setting. AE metering Icon Mode Description Automatic Exposure metering: Detects the exposure based on multiple points in Matrix the subject area. -
Page 17: Scene Mode
Capture mode 13 To select an color mode: 1. Press > Color Mode. 2. Press to select an Effect option. 3. Press to confirm setting. Scene mode Select one of the following scene modes to fit your shooting condition. Icon Mode Description Auto... - Page 18 14 Capture mode Self-Portrait Helps take a picture of yourself (and other subjects if available). Building Line contrasts of a building are highlighted. Soft Flowing Water Captures the moments of motion blur on water. L. Portrait Makes the subject (usually a person) stand out while the background is blurred slightly.
-
Page 19: Aperture Priority
Capture mode 15 To select a scene mode: 1. Press > > Scene Mode. 2. The currently selected scene mode shows. Press , or to locate another desired option. When you are selecting from different scene modes, press for detailed explanation of each scene mode. -
Page 20: Drive Mode
16 Capture mode Drive mode Icon Mode Description Standard Takes one picture at a time. Self-timer Automatically takes a picture after 2 or 10 second delay. This mode is useful when you want to be part of the picture. Double Performs delay and capture twice: 1. -
Page 21: Af Assist Lamp
Capture mode 17 2. Press , and then select a focusing area. 3. Press > While using the Face Tracking function, point the camera to where the people (your subjects) are located. Focus frames of Face Tracking will automatically detect faces (maximum 9) and show on the LCD screen. -
Page 22: Date Stamp
18 Capture mode To select a digital zoom: 1. Press > > Digital Zoom. 2. Press , and then select a digital zoom type or 3. Press > Date Stamp Imprints the date when a picture was taken on the picture itself. To set the date stamp: 1. -
Page 23: Other Settings
Other settings 19 To select a Movie Record option: 1. Press > > Scene Mode > Movie Record mode, and make sure you can see the icon on the screen. 2. Press , and then select an option. 3. Press to select a setting. -
Page 24: Playback Mode
20 Playback mode Playback mode Press to enter the Playback mode. 06.25.2008 06.25.2008 06.25.2008 10/115 10/115 10/115 08.05 08.05 08.05 IMG 0064.JPG IMG 0064.JPG IMG 0064.JPG 1.25MB 1.25MB 1.25MB 1/200 1/200 1/200 F2.8 F2.8 F2.8 • When the camera is off, press and hold for at least one second to enter the Playback mode. -
Page 25: Options For Playback And Editing
Playback mode 21 Options for playback and editing When the camera is in the Playback mode, press , or to move to different files. You can also select any of the following options. Enlarging an image Magnifies an image, so more details can be seen. To enlarge an image: 1. -
Page 26: Deleting Files
22 Playback mode Deleting files Removes selected or all files. To delete files: 1. Press > > > Delete > 2. Select whether to delete this selected file, other selected, or all files, and then press Protecting files Prevents selected files from accidental removal. To protect files: 1. -
Page 27: Effect
Playback mode 23 Effect You can add special effects to your images. Option Description Normal No effect is added to the image. Sepia Recorded image will be stored in a sepia tone. B&W Convert image to black & white. Negative Opposite what they were in the original image. -
Page 28: Resizing
24 Playback mode Resizing Changes an image file to a smaller size, and overwrites the image file or saves it as another new file. To resize an image: 1. Press > to move to the image you want to resize. 2. -
Page 29: Working With Computer And Av System
Working with computer and AV system 25 Working with computer and AV system Bundled software The camera offers the following programs on a CD. ArcSoft Combines photo editing with creative enhancement and sharing tools PhotoImpression 5 that maximize your digital media experience. ArcSoft Creates multimedia presentations by combining photos and video VideoImpression 2... - Page 30 26 Working with computer and AV system To print images from a PictBridge-compatible printer: 1. Connect the end of the smaller plug of the USB cable to the camera. 2. Turn on the printer. Wait for a while until it finishes starting up and is ready to print. 3.
-
Page 31: Troubleshooting And Service Information
Troubleshooting and service information 27 Troubleshooting and service information If your camera cannot operate normally, see the frequently encountered problems and solutions listed below. If the problem persists, contact your nearest service center or technical support. Problem Cause Solution The camera There is no battery or the battery is Insert the battery correctly. -
Page 32: Technical Support
Turn on the camera, select images with printer when the camera is PictBridge, and then connect to the PictBridge- powered off. printer. compliant printers. Technical support For technical assistance, free driver updates, product information, and news releases, visit the following web site: http://www.BenQ.com... -
Page 33: Specifications
Specifications 29 Specifications Image sensor 10 Mega Pixels CCD LCD display 3-inch LTPS LCD; 230K dots Digital Zoom Still image: 1.0X ~ 5.0X (capture) / 1.0X ~ 12.0X (playback) Lens • Focal Length: f = 6.3 (W) ~ 18.9 (T) mm •... - Page 34 30 Specifications Interface • Digital output: USB • Audio/Video output (NTSC/PAL) • PictBridge-compatible Power source Rechargeable Lithium-ion battery; CIPA 200 PCS Working temperature 0 - 40 degrees Celsius Dimensions 95 x 57 x 17.6 mm (W x H x D) Weight 120 g (without battery &...
Need help?
Do you have a question about the E1050 and is the answer not in the manual?
Questions and answers