
Subscribe to Our Youtube Channel
Related Manuals for Pakedge Device & Software WAP-W3N


Summary of Contents for Pakedge Device & Software WAP-W3N
- Page 1 pakedgedevice&software inc. WAP‐W3N Enterprise‐class, Ultra High‐Throughput Rackmount & Wall Mount Wireless‐N Access Point User Guide – Version 1.2...
- Page 2 WAP-W3N User Manual FCC Declaration of Conformity Pakedge Device & Software, 1163 Triton Drive, Foster City, CA 94404, declares under sole responsibility that the WAP‐W3N complies with 47 CFR Parts 2 and 15 of the FCC Rules as a Class B digital device. This device complies with Part 15 of FCC Rules. Operation of the device is subject to the following two conditions: (1) This device may not cause harmful interference, and (2) this device must accept any interference that may cause undesired operation. FCC Compliance Class B Digital Device This equipment has been tested and found to comply with the limits for a Class B digital device, pursuant to Part 15 of the FCC Rules. These limits are designed to provide reasonable protection against harmful interference in a residential environment. This equipment generates, uses, and can radiate radio frequency energy and, if not installed and used in accordance with the instructions, may cause harmful interference to radio communications. However, there is no guarantee that interference will not occur in a particular installation. If this equipment does cause harmful interference to radio or television reception, which can be determined by turning the equipment off and on, the user is encouraged to try to correct the interference by one of the following measures: • Reorient or relocate the receiving antenna. • Increase the separation between the equipment and receiver. • Connect the equipment into an outlet on a circuit different from that to which the receiver is connected. • Consult the dealer or an experienced radio/TV technician for help. Wireless LAN and your Health The WAP‐W3N, like other radio devices, emits radio frequency electromagnetic energy, but operates within the guidelines found in radio frequency safety standards and recommendations. FCC Certification The WAP‐W3N contains a radio transmitter. Accordingly, it has been certified as compliant with 47 CFR Part 15 of the FCC Rules for intentional radiators. Products that contain a radio transmitter are labeled with FCC ID and the FCC logo. Restrictions on Use of Wireless Devices In some situations or environments, the use of wireless devices may be restricted by the proprietor of the building or responsible representatives of the organization. For example, these situations may include: • Using wireless equipment on board an airplane. • Using wireless equipment in any environment where the risk of interference to other devices or services is perceived or identified as harmful. ...
- Page 3 WAP-W3N User Manual WARNING: TO PREVENT FIRE OR SHOCK HAZARD, DO NOT EXPOSE THIS PRODUCT TO RAIN OR MOISTURE. THE UNIT MUST NOT BE EXPOSED TO DRIPPING OR SPLASHING WATER. CAUTION: DO NOT OPEN THE UNIT. DO NOT PERFORM ANY SERVICING OTHER THAN THAT CONTAINED IN THE INSTALLATION AND TROUBLESHOOTING INSTRUCTIONS. REFER ALL SERVICING TO QUALIFIED SERVICE PERSONNEL. CAUTION: THIS DEVICE MUST BE INSTALLED AND USED IN STRICT ACCORDANCE WITH THE MANUFACTURER’S INSTRUCTIONS AS DESCRIBED IN THE USER DOCUMENTATION THAT COMES WITH THE PRODUCT. WARNING: POSTPONE INSTALLATION UNTIL THERE IS NO RISK OF THUNDERSTORM OR LIGHTNING ACTIVITY IN THE AREA. SAFETY PRECAUTIONS: When using this device, always follow basic safety precautions, to reduce the risk of fire, electric shock, and injury to persons, including the following: • Read all of the instructions (listed here and/or in the user manual) before you operate this equipment. • Comply with all warning and caution statements in the instructions. • Retain the instructions for future reference. • Observe all warning and caution symbols that are affixed to this equipment. • Comply with all instructions that accompany this equipment. • Upon completion of any service or repairs to this product, ask the service technician to perform safety checks to determine that the product is in safe operating condition. • Installation of this product must be in accordance with national wiring codes and conform to local regulations. • Avoid using this product during an electrical storm. There may be a risk of electric shock from lightning. For added protection for this product during a lightning storm, or when it is left unattended and unused for long periods of time, unplug the power supply, and disconnect the CAT5e to the WAP‐W3N at the PoE. This will prevent damage to the product due to lightning and power surges. • Give particular attention to all safety precautions. ...
-
Page 4: Table Of Contents
WAP-W3N User Manual 1. Introduction ............................ 6 1.1. Package Contents .......................... 8 1.2. System Requirements ........................ 8 1.3. Network Configuration ......................... 9 1.3.1. Ad‐hoc (peer‐to‐peer) Mode .................... 9 1.3.2. Infrastructure Mode ...................... 10 2. Understanding the Hardware ...................... 10 2.1. Hardware Installation & IP Address Configuration .............. 10 2.2. LOGGING IN .......................... 13 3. Initial Setup ............................. 14 3.1. System ............................ 14 3.1.1. Status .......................... 14 ... - Page 5 WAP-W3N User Manual 4.5.3. System Log .......................... 51 4.5.4. Reset ........................... 51 5. Appendix A‐ Specifications ...................... 52 6. Appendix B‐ Support ........................ 55 7. Appendix C‐ Warranty Information .................... 56 5 ...
-
Page 6: Introduction
WAP-W3N User Manual 1. Introduction Thank you for purchasing the Pakedge WAP‐W3N Wireless Access Point ‐ the best Wireless Access Point for your wireless network. The Wireless Access Point is the central component of your wireless network. It can connect multiple computers together to form a network, allowing you to share a high speed Internet connection, files, audio, video, printers, and other resources. Computers, PDA, and compatible devices with wireless adapters can easily connect to the WAP‐W3N to form a secure high‐speed link. The WAP‐W3N can operate in any one of four modes; • Access Point Mode: The typical configuration for most Wi‐Fi networks. In this mode, the WAP‐W3N broadcasts a Wi‐Fi signal that clients can associate with, as shown in the figure ... - Page 7 WAP-W3N User Manual • Client Bridge Mode: In this mode, you can connect one WAP‐W3N to a client by its Ethernet port, as shown below. In Client Bridge Mode, the WAP‐W3N can receive a wireless signal from an Access Point and send the signal through its Ethernet port to a client. • WDS Bridge Mode: In this mode, the WAP‐W3N associates to the MAC address of another WAP‐ W3N operating in Access Point mode. The WAP‐WG receives and “repeats” the signal of the ...
-
Page 8: Package Contents
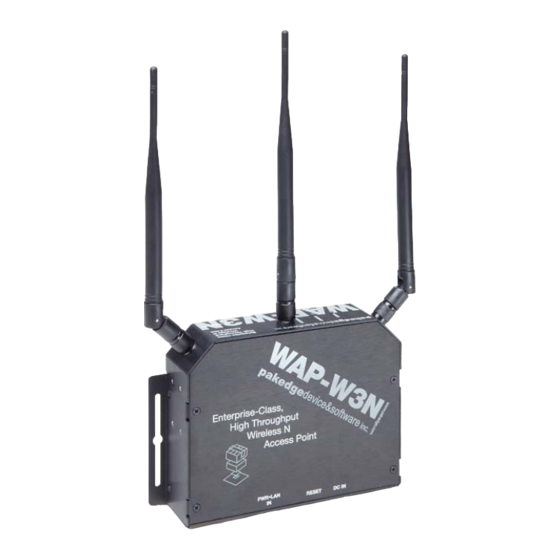
WAP-W3N User Manual • Repeater (Universal) Mode: This is similar to WDS Mode; however, the WAP‐W3N can associate with any Wireless Access Point, as shown in the figure below. Because the functionality of the WAP‐W3N changes depending on its operating mode, this manual offers both general and mode‐specific content. Chapters 1‐3 give setup information applicable to all operating modes, and Chapter 4 gives specific information about each operating mode. 1.1. Package Contents Open the package carefully, and make sure that none of the items listed below are missing. Do not discard the packing materials. In case of return, the unit must be shipped in its original package. • One WAP‐W3N • One CAT5 UTP Cable • Three Dipole Antenna • One Quick Start Guide • Rack Mount Brackets • Wall Mounting Hardware 1.2. System Requirements The following are the minimum system requirements in order to configure the WAP‐W3N: • PC compatible computer with an Ethernet interface • Operating system that supports HTTP web‐browser 8 ... -
Page 9: Network Configuration
WAP-W3N User Manual 1.3. Network Configuration To better understand how the WAP‐W3N works with other LAN products to create a wireless network, it might be helpful to depict a few of the possible wireless LAN PC card network configurations. The wireless LAN products can be configured as: • Ad‐hoc (or peer‐to‐peer) for departmental or SOHO LANs • Infrastructure for enterprise LANs 1.3.1. Ad-hoc (peer-to-peer) Mode This is the simplest network configuration with several computers equipped with PC Cards that form a wireless network whenever they are within range of one another. In ad‐hoc mode, each client is peer‐to‐peer and only has access to the resources of the ... -
Page 10: Infrastructure Mode
WAP-W3N User Manual 1.3.2. Infrastructure Mode The infrastructure mode requires the use of an Access Point (AP) such as the WAP‐W3N. In this mode, all wireless communication between two computers has to be via the AP. It doesn’t matter if the AP is stand‐alone or wired to an Ethernet network. If used in stand‐alone, the AP can extend the range of independent wireless LANs by acting as a repeater, which effectively doubles the distance between wireless stations. The image below depicts a network in infrastructure mode. 2. Understanding the Hardware 2.1. Hardware Installation & IP Address Configuration 1. Place the unit in an appropriate place using the mounting kit. 2. Run the Ethernet cable indoors and plug one end into the PWR + LAN IN port of the ... - Page 11 WAP-W3N User Manual The WAP‐W3N comes with a DC power supply. However, we recommend using a PoE injector as shown in the above diagram. DO NOT use both simultaneously as permanent damage could occur. The WAP‐W3N can be configured as a WDS Bridge or as an Access Point. The WAP‐W3N is set to Access Point mode when shipped from the factory. The default IP address of the WAP‐W3N is 192.168.1.250. In order to log into the WAP‐W3N, you must first configure the TCP/IP settings of your PC/Notebook. 1. In the control panel, double click Network Connections and then double click on the connection of your Network Interface Card (NIC). You will then see the following screen. 11 ...
- Page 12 WAP-W3N User Manual 2. Select Internet Protocol (TCP/IP) and then click on the Properties button. This will allow you to configure the TCP/IP settings of your PC/Notebook. 3. Select Use the following IP Address radio button and then enter the IP address and subnet mask. Ensure that the IP address and subnet mask are on the same subnet as the WAP‐W3N. For Example: WAP‐W3N IP address: 192.168.1.250 PC IP address: 192.168.1.10 PC subnet mask: 255.255.255.0 4. Click on the OK button to close this window, and once again to close LAN properties window. ...
-
Page 13: Logging In
WAP-W3N User Manual 2.2. LOGGING IN To configure the WAP‐W3N through the web‐browser, enter the Access Point mode IP address of the WAP‐W3N (default: 192.168.1.250) into the address bar of the web‐browser and press Enter. Make sure that the Access Point and your computers are configured on the same subnet. Refer to Section 2 in order to configure the IP address of your computer. After connecting to the IP address, the web‐browser will display the login page. In the User Name box, type pakedge, and in the Password box type pakedgea, and click OK. After logging in you will see the Graphical User Interface (GUI) of the Access Point. The navigation drop‐down menu is divided into four main sections: 13 ... -
Page 14: Initial Setup
WAP-W3N User Manual System: This menu includes administrator settings, switch to Bridge mode, firmware upgrade, reset to factory defaults, and system date/time configuration. Network: This menu contains options such as IP Address and SNMP configuration. Wireless: This menu includes the settings such as network visibility, channel, data rate, and security. -
Page 15: Properties
WAP-W3N User Manual Name, Firmware version, operating Country, Date and Time, Network and Wireless MAC Address are all displayed in the ‘System’ section. Device IP address, subnet mask, default gateway, DHCP status, and Spanning Tree status are displayed in the ‘Network’ section. • In the ‘Wireless section, the device operating mode, 802.11 mode, wireless Channel, VLAN Management ID, and VLAN Tagging are displayed. • Since this device supports multiple‐SSIDs, the details of each SSID, such as ESSID and its security settings are displayed. 3.1.2. Properties Click on the Properties link under the System tab. This page allows you to switch the operating mode of the device. 15 ... -
Page 16: Administration
WAP-W3N User Manual • Operating Mode: Select which operating mode you wish to utilize from the drop‐down menu. • Click on the Apply button once you have modified the settings. 3.1.3. Administration Click on the Administrator Settings link under the System menu. This page allows you to configure the password to access the WAP‐W3N from the web‐browser. • Specify a user name and password and then re‐type it once again for verification. • Click on the Apply button once you have modified the settings. 3.1.4. Maintenance Click on the Maintenance link under the System menu. This option is used to save the current settings of the device in a file on your local disk or load settings on to the device from a local disk. This feature is very handy for administrators who have several devices that need to be configured with the same settings. • Restore To Factory Default: Click on the Factory Default Settings button to reset the device to the default settings. Please wait while the device restart and then access the device using the default IP address: 192.168.1.250 • Click on the Backup button to save the current configuration. • Backup Settings: Click on the Backup button to save the current configuration. ... -
Page 17: Firmware
WAP-W3N User Manual 3.1.5. Firmware Click on the Firmware link under the System menu. This page is used to upgrade the firmware on the device. Make sure to download the appropriate firmware from your vendor. • Click on the Browse button to select the firmware and then click on the Upload button. • Note: The upgrade process may take about 1 minute to complete. Do not power off the device during this process as it may cause the device to crash and become unusable. The device will restart automatically once the upgrade is complete. • Click on the Apply button once you have modified the settings. 3.1.6. TIME Click on the Time link under the System menu. This page allows you to configure the time on the device. You may do this manually or by connecting to a NTP server. • Time Zone: Select your time zone from the drop‐down menu, this will be used by the W3N to establish the correct system time. • NTP Time Server: Enter the NTP server that the W3N will use to maintain accurate system time. 17 ... -
Page 18: Network
WAP-W3N User Manual • Daylight Savings: Click the box to enable Daylight savings and then enter the appropriate dates for Daylight Savings in your geographical region. • Click on the Apply button once you have modified the settings. 3.2. Network Under the Network tab there are three links; LAN Settings, DHCP Server, and SNMP. These are used to manage some of the network functions of the W3N such as the device IP address and Spanning Tree Protocol. 3.2.1. LAN Settings In order to configure the IP address of the device click on the LAN Settings link under the Network tab. This page allows you to configure the device with a static IP address or as a DHCP client • IP Address: Enter an IP address for this device • IP Subnet Mask: Enter the subnet mask for this IP address. • Default Gateway: Enter the IP address of the default gateway. • 802.1d Spanning Tree: If you wish to enable Spanning Tree Protocol to improve ... -
Page 19: Snmp
WAP-W3N User Manual • Start IP: This is the first IP address in the DHCP’s available list of address to assign clients. • End IP: This is the last IP address in the DHCP’s available list of address to assign clients. • Domain Name: Specify the name of the current Domain. • First DNS Address: Specify the primary DNS Address. • Second DNS Address: Specify the secondary DNS Address. • Click on the Apply button once you have modified the settings. 3.2.2. SNMP Click on the SNMP link under the Wireless menu. The page allows you to create the community name and password if you would like to remotely manage the device using a SNMP client. • SNMP Active: Select Enable if you would like to use the SNMP feature. • SNMP Version: Select the SNMP version utilized by your network from the drop‐down menu. The options are; Version 1, Version 2c, or All. If you are not sure what SNMP version is used by your network it is recommended that you choose All. • Read Community: Specify the password for access to the SNMP community for read only access. • Set Community: Specify the password for access to the SNMP community with read/write access. •... -
Page 20: Mode Specific Setup
WAP-W3N User Manual • System Contact: For reference purposes, specify the contact details of the device. • Trap Active: Enable or disable the SNMP trapping feature. • Trap Manager IP: Specify the IP address for the SNMP trap manager. • Trap Community: Specify the password for the SNMP trap community. • Click on the Apply button once you have modified the settings. Mode Specific Setup This chapter describes the settings for your WAP‐W3G in the four available modes: • Access Point Mode (Section 4.1) • Client Bridge Mode (Section 4.2) • WDS Bridge Mode (Section 4.3) • Repeater (Universal) Mode (Section 4.4) 4.1. Access Point Mode This section describes the Wireless configuration and functions of the W3N in Access Point mode. ... - Page 21 WAP-W3N User Manual • Radio: Click to enable the Wireless Radio broadcasting • Mode: Select whether the W3N will operate in standard AP mode or if it will associate with another AP using the WDS link function. • Band: Select a broadcast Band from the drop down menu. This will depend on the type of wireless clients that are connected to the network. The options are; B, G, N, B+G, or all three. If you are unsure of which to use, it is recommended that you select B/G/N for the best performance. • Enabled SSID#: Select how many SSID profiles you wish to enable from the drop down menu • ESSID #: Enter the name for the selected SSID. This is the name that will be broadcast with the wireless network. • Channel: By default, ‘Auto’ will be selected and the AP will automatically associate to the channel which will offer ideal performance for the wireless network. If you wish to manually select a channel, uncheck the box next to ‘Auto’. Then select a channel from the drop‐down list. The channels available are based on the selected country’s regulations. • Click on the Apply button once you have modified the settings. 4.1.1.2. Security Click on the Security link under the Wireless header to configure the Wireless security settings for the W3N. 21 ...
- Page 22 WAP-W3N User Manual • ESSID Selection: Select which SSID Profile to manage • Broadcast ESSID: Select whether the SSID is broadcast or not • WMM: Enable Wireless Media Mode. This is a Quality of Service (QoS) function which will improve network functions by automatically adjusting transmission and reception rates across the W3N. • Encryption: To enable the SSID security functions, select an encryption type from the drop down menu. The available options are; WEP, WPA Pre‐Shared, and WPA RADIUS o WEP Select WEP from the drop‐down list if your wireless network uses WEP encryption. WEP is an acronym for Wired Equivalent Privacy, and is a security protocol that provides the same level of security for wireless networks as for a wired network. 22 ...
- Page 23 WAP-W3N User Manual Authentication Type: Select Open System, Shared Key, or auto. Authentication method from the drop‐down list. An open system allows any client to authenticate as long as it conforms to any MAC address filter policies that may have been set. All authentication packets are transmitted without encryption. Shared Key sends an unencrypted challenge text string to any device attempting to communicate with the AP. The device requesting authentication encrypts the challenge text and sends it back to the access point. If the challenge text is encrypted correctly, the access point allows the requesting device to authenticate. It is recommended to select Auto if you are not sure which authentication type is used. Key Length: Specify whether the key is 64 or 128 bits in length Key Type: Select a key type from the drop‐down list. 128‐bit encryption requires a longer key than 64‐bit encryption. Keys are defined by entering in a string in HEX (hexadecimal ‐ using characters 0‐9, A‐F) or ASCII (American Standard Code for Information Interchange ‐ alphanumeric characters) format. ASCII format is provided so you can enter a string that is easier to remember. 23 ...
- Page 24 WAP-W3N User Manual Default Key #: Select which of the four possible keys you wish to use as default. Encryption Key 1‐4: Enter up to four different WEP keys. Enable 802.1x Authentication: Place a check in this box if you would like to use RADIUS authentication. This option works with a RADIUS Server to authenticate wireless clients. Wireless clients should have established the necessary credentials before attempting to authenticate to the Server through this Gateway. Furthermore, it may be necessary to configure the RADIUS Server to allow this Gateway to authenticate users. You will then be required to specify the RADIUS Server’s IP address, port, and password. o WPA Pre‐Shared Select the WPA‐Pre‐Shared radio button if your wireless network uses WPA encryption. WPA (WiFi Protected Access) was designed to improve upon the security features of WEP (Wired Equivalent Privacy). The technology is designed to work with existing Wi‐Fi ...
- Page 25 WAP-W3N User Manual Pre‐Shared Key Type: The Key Type can be passphrase or Hex format. Pre‐Shared Key: The key is entered as a pass‐phrase of up to 63 alphanumeric characters in ASCII (American Standard Code for Information Interchange) format at both ends of the wireless connection. It cannot be shorter than eight characters, although for proper security it needs to be of ample length and should not be a commonly known phrase. This phrase is used to generate session keys that are unique for each wireless client. o WPA Radius This option works with a RADIUS Server to authenticate wireless clients. Wireless clients should have established the necessary credentials before attempting to authenticate to the Server through this Gateway. Furthermore, it may be necessary to configure the ...
-
Page 26: Vlan Management
WAP-W3N User Manual 4.1.1.3. VLAN Management Virtual LAN: Click to enable the VLAN function. VLAN or Virtual Lan, allows for the creation of separate, client groups without the need to physically isolate clients on the network. • SSID # Tag: Enter the VLAN Tag for the corresponding SSID group. • Click on the Apply button once you have modified the settings. 4.1.1.4. MAC Filter Click on the MAC Filter link under the Wireless menu. On this page you can filter the MAC address of possible clients by allowing or blocking access to the network. 26 ... - Page 27 WAP-W3N User Manual • Click the box to Enable MAC Address Filtering • Enter a description (optional) and the MAC Address of the client you wish to add • Click Add • All of the MAC filtering clients are listed at the bottom • Click on the Apply button once you have modified the settings. 4.1.1.5. Advanced Click on the Advanced link. On this page you can configure the advanced settings to adjust the performance of your wireless network. • Fragment Threshold: Packets over the specified size will be fragmented in order to improve performance on noisy networks. Specify a value between 256 and 2346. The default value is 2346. • RTS Threshold: Packets over the specified size will use the RTS/CTS mechanism to maintain performance in noisy networks and prevent hidden clients from degrading the performance. Specify a value between 1 and 2347. The default value is 2347 • N Data Rate: Specify a data rate for the N wireless band. Auto is selected by default and is recommended for best performance. • Channel Bandwidth: Specify the size of the wireless frequency spectrum to be used by the wireless radio. 27 ...
-
Page 28: Client Bridge Mode
WAP-W3N User Manual • Preamble Type: Specify whether the network utilizes a long or short preamble. For the best performance it is recommended to also configure the client device with the same preamble type. • CTS Protection: CTS (Clear to Send) can be always enabled, auto, or disabled. By enabled CTS, the Access Point and clients will wait for a ‘clear’ signal before transmitting. It is recommended to select auto. • TX Power: You may control the output power of the WAP‐W3N by selecting a value from the drop‐down list. This feature can be helpful in restricting the coverage area of the wireless network. • Isolation: By enabling this feature Clients connected to this Access Point will not be able to directly communicate with each other. • Click on the Apply button once you have modified the settings. 4.2. Client Bridge Mode NOTE: The options in the main menu of the WAP‐W3N change depending on the current operating mode of the WAP‐W3N. The main menu options discussed in this chapter are those available in Client Bridge mode. In this mode, you can connect one WAP‐W3N to a client by its Ethernet port, as shown below. In Client Bridge Mode, the WAP‐W3N can receive a wireless signal from an Access Point and send the signal through its Ethernet port to a client. 28 ... -
Page 29: Wireless
WAP-W3N User Manual Summary of configuration for Client Bridge Mode 1. First setup the Wireless Access Point that that will be broadcasting to the Client Bridge. This Wireless Access Point is the one broadcasting the Wireless Network you wish to connect the client device to. Setup as usual‐ ie. SSID, IP Address, Channel, Security, etc. 2. Connect the W3N to the client and login via your Web Browser. 3. Configure the W3N by selecting Client Bridge Mode from the Properties page under the System header. 4. Now configure the SSID (or BSSID), Channel, and Security settings to match those of the Wireless Access Point 5. Finish the configuration of the W3N in Client Bridge Mode by assigning it a unique IP address if it is not connected to a DHCP server. 6. You should be able to verify performance from the client device by sending a ping request to the IP address of the Wireless Access Point or by accessing the GUI through your Web Browser at the same address. Following the remaining sections for a more detailed description on the remaining features and functions. 4.2.1. Wireless With the WAP‐W3G operating in Client Bridge mode, the main menu shows three options under the Wireless section: ... - Page 30 WAP-W3N User Manual • Radio: Click to enable the Wireless Radio broadcasting • 802.11 Mode: Select a broadcast Band from the drop down menu. This will depend on the type of wireless clients that are connected to the network. The options are; B, G, N, B+G, or all three. If you are unsure of which to use, it is recommended that you select B/G/N for the best performance. • Site Survey • Click on the Apply button once you have modified the settings. 4.2.1.2. AP Profile Click on the AP Profile links under the Wireless header. This page allows you the connect the W3N with an available AP as well as maintain connection profiles. 30 ...
- Page 31 WAP-W3N User Manual • Add • Edit • Move Up/Move Down • Delete • Connect • SSID : Select which SSID Profile to manage • Encryption: To enable the SSID security functions, select an encryption type from the drop down menu. The available options are; WEP, WPA Pre‐Shared, and WPA RADIUS o WEP Select WEP from the drop‐down list if your wireless network uses WEP encryption. WEP is an acronym for Wired Equivalent Privacy, and is a security protocol that provides the same level of security for wireless networks as for a wired network. 31 ...
- Page 32 WAP-W3N User Manual Authentication Type: Select Open System, Shared Key, or auto. Authentication method from the drop‐down list. An open system allows any client to authenticate as long as it conforms to any MAC address filter policies that may have been set. All authentication packets are transmitted without encryption. Shared Key sends an unencrypted challenge text string to any device attempting to communicate with the AP. The device requesting authentication encrypts the challenge text and sends it back to the access point. If the challenge text is encrypted correctly, the access point allows the requesting device to authenticate. It is recommended to select Auto if you are not sure which authentication type is used. Key Length: Specify whether the key is 64 or 128 bits in length Key Type: Select a key type from the drop‐down list. 128‐bit encryption requires a longer key than 64‐bit encryption. Keys are defined by entering in a string in HEX (hexadecimal ‐ using characters 0‐9, A‐F) or ASCII (American Standard Code for Information Interchange ‐ alphanumeric characters) format. ASCII format is provided so you can enter a string that is easier to remember. Default Key #: Select which of the four possible keys you wish to use as default. Encryption Key 1‐4: Enter up to four different WEP keys. Enable 802.1x Authentication: Place a check in this box if you would like to use RADIUS authentication. This option works with a RADIUS Server to authenticate wireless clients. Wireless clients should have 32 ...
- Page 33 WAP-W3N User Manual established the necessary credentials before attempting to authenticate to the Server through this Gateway. Furthermore, it may be necessary to configure the RADIUS Server to allow this Gateway to authenticate users. You will then be required to specify the RADIUS Server’s IP address, port, and password. o WPA Pre‐Shared Select the WPA‐Pre‐Shared radio button if your wireless network uses WPA encryption. WPA (WiFi Protected Access) was designed to improve upon the security features of WEP (Wired Equivalent Privacy). The technology is designed to work with existing Wi‐Fi ...
- Page 34 WAP-W3N User Manual This option works with a RADIUS Server to authenticate wireless clients. Wireless clients should have established the necessary credentials before attempting to authenticate to the Server through this Gateway. Furthermore, it may be necessary to configure the RADIUS Server to allow this Gateway to authenticate users. WPA Type: Select TKIP, AES, or WPA2 Mixed. The encryption algorithm ...
-
Page 35: Wds Bridge Mode
WAP-W3N User Manual 4.3. WDS Bridge Mode NOTE: The options in the main menu of the WAP‐W3N change depending on the current operating mode of the WAP‐W3N. The main menu options discussed in this chapter are those available in Wireless Bridge mode. In this mode, the WAP‐W3N associates to the MAC address of another WAP‐W3N operating in Access Point mode. The WAP‐WG receives and “repeats” the signal of the broadcasting unit. (Please note, only WEP security can be used in this mode.) Summary of configuration for WDS Bridge Mode 1. First setup the WDS enabled Access Point that that will be broadcasting the Wireless Network you wish to associate the W3N with. Setup as usual‐ ie. SSID, IP Address, Channel, Security, etc. Enable the WDS function on the AP and add the W3N’s MAC address to the WDS client table. 2. Connect the W3N to the LAN and login via your Web Browser. 3. Configure the W3N by selecting WDS Bridge Mode from the Properties page under the System header. 4. Now configure the Channel, and Security settings to match those of the Wireless Access Point. 35 ... -
Page 36: Wireless
WAP-W3N User Manual 5. Add the MAC address of the Wireless Access Point to the W3N’s WDS Link list on the WDS page under the Wireless header. 6. Finish the configuration of the W3N in WDS Bridge Mode by assigning it a unique IP address if it is not connected to a DHCP server. 7. You should be able to verify performance from the client device by sending a ping request to the IP address of the W3N or accessing the GUI through your Web Browser at the same address. Following the remaining sections for a more detailed description on the remaining features and functions. 4.3.1. Wireless When you set the WAP‐W3G in Wireless Bridge Mode, in the WAP‐W3G main menu the Wireless section has the ... - Page 37 WAP-W3N User Manual • Radio: Click to enable the Wireless Radio broadcasting • Band: Select a broadcast Band from the drop down menu, this will depend on the type of wireless clients that are connected to the network. The options are; B, G, N, B+G, or all three. If you are unsure of which to use, it is recommended that you select B/G/N for the best performance. • Channel: Manually select a channel from the drop down menu • Mac Address 1 – 4: Specify the MAC addresses of up to four different WDS clients • WDS Data Rate: Specify a fixed rate for data transfer over the WDS Link. • Set Security: Click on the Set Security button to configure the Wireless security settings for the W3N. The configuration process is explained the following section. 4.3.1.1.1. Security To configure the Wireless security settings for the W3N, go the Network Settings page, in the Wireless section. Click on the Set Security button on the Network Settings page to bring up the configuration page. o WEP 37 ...
- Page 38 WAP-W3N User Manual Select WEP from the drop‐down list if your wireless network uses WEP encryption. WEP is an acronym for Wired Equivalent Privacy, and is a security protocol that provides the same level of security for wireless networks as for a wired network. Authentication Type: Select Open System, Shared Key, or auto. Authentication method from the drop‐down list. An open system allows any client to authenticate as long as it conforms to any MAC address filter policies that may have been set. All authentication packets are transmitted without encryption. Shared Key sends an unencrypted challenge text string to any device attempting to communicate with the AP. The device requesting authentication encrypts the challenge text and sends it back to the access point. If the challenge text is encrypted correctly, the access point allows the requesting device to authenticate. It is recommended to select Auto if you are not sure which authentication type is used. Key Length: Specify whether the key is 64 or 128 bits in length Key Type: Select a key type from the drop‐down list. 128‐bit encryption requires a longer key than 64‐bit encryption. Keys are defined by entering in a string in HEX (hexadecimal ‐ using characters 0‐9, A‐F) or ASCII (American Standard Code for Information Interchange ‐ alphanumeric characters) format. ASCII format is provided so you can enter a string that is easier to remember. Default Key #: Select which of the four possible keys you wish to use as default. Encryption Key 1‐4: Enter up to four different WEP keys. o WPA Pre‐Shared key Select the WPA‐Pre‐Shared radio button if your wireless network ...
- Page 39 WAP-W3N User Manual improve upon the security features of WEP (Wired Equivalent Privacy). The technology is designed to work with existing Wi‐Fi products that have been enabled with WEP. WPA provides improved data encryption through the Temporal Key Integrity ...
-
Page 40: Universal Repeater Mode
WAP-W3N User Manual • Fragment Threshold: Packets over the specified size will be fragmented in order to improve performance on noisy networks. Specify a value between 256 and 2346. The default value is 2346. • RTS Threshold: Packets over the specified size will use the RTS/CTS mechanism to maintain performance in noisy networks and prevent hidden clients from degrading the performance. Specify a value between 1 and 2347. The default value is 2347 • N Data Rate: Specify a data rate for the N wireless band. Auto is selected by default and is recommended for best performance. • Channel Bandwidth: Specify the size of the wireless frequency spectrum to be used by the wireless radio. • Preamble Type: Specify whether the network utilizes a long or short preamble. For the best performance it is recommended to also configure the client device with the same preamble type. • CTS Protection: CTS (Clear to Send) can be always enabled, auto, or disabled. By enabled CTS, the Access Point and clients will wait for a ‘clear’ signal before transmitting. It is recommended to select auto. • TX Power: You may control the output power of the WAP‐W3N by selecting a value from the drop‐down list. This feature can be helpful in restricting the coverage area of the wireless network. • Click on the Apply button once you have modified the settings. 4.4. Universal Repeater Mode NOTE: The options in the main menu of the WAP‐W3N change depending on the current operating ... - Page 41 WAP-W3N User Manual This is similar to WDS Mode; however, the WAP‐W3N can associate with any Wireless Access Point, as shown in the figure below. Summary of configuration for Repeater Mode 1. First setup the Wireless Access Point that that will be broadcasting the Wireless Network you wish to associate the W3N with. Setup as usual‐ ie. SSID, IP Address, Channel, Security, etc. 2. Connect the W3N to the LAN and login via your Web Browser. 3. Configure the W3N by selecting Repeater Mode from the Properties page under the System header. 4. Now configure the SSID, Channel, and Security settings to match those of the Wireless Access Point. 5. Finish the configuration of the W3N in Repeater Mode by assigning it a unique IP address if it is not connected to a DHCP server. 41 ...
-
Page 42: Wireless
WAP-W3N User Manual 6. You should be able to verify performance from the client device by sending a ping request to the IP address of the W3N or accessing the GUI through your Web Browser at the same address. Following the remaining sections for a more detailed description on the remaining features and functions. 4.4.1. Wireless In Repeater mode, the WAP‐W3G main menu has the following four options, to be described in detail the sections that follow • Network Settings • SSID Security • MAC Filter • Advanced 4.4.1.1. Network Settings Click on the Network Settings page under the Wireless header. This page allows you to configure the wireless mode, which SSID is in use, the SSID, and perform a Site Survey. 42 ... - Page 43 WAP-W3N User Manual • Radio: Click to enable the Wireless Radio broadcasting • Mode: Select whether the W3N will operate in standard AP mode or if it will associate with another AP using the WDS link function. • Band: Select a broadcast Band from the drop down menu. This will depend on the type of wireless clients that are connected to the network. The options are; B, G, N, B+G, or all three. If you are unsure of which to use, it is recommended that you select B/G/N for the best performance. • Enabled SSID#: Select how many SSID profiles you wish to enable from the drop down menu • ESSID 1: Enter the name for the selected SSID. This is the name that will be broadcast with the wireless network. • Channel: By default, ‘Auto’ will be selected and the AP will automatically associate to the channel which will offer ideal performance for the wireless network. If you wish to manually select a channel, uncheck the box next to ‘Auto’. Then select a channel from the drop‐down list. The channels available are based on the selected country’s regulations. • Site Survey 43 ...
- Page 44 WAP-W3N User Manual • Click on the Apply button once you have modified the settings. 4.4.1.2. Security Click on the Security link under the Wireless header to configure the Wireless security settings for the W3N. • ESSID Selection: Select which SSID Profile to manage • Broadcast ESSID: Select whether the SSID is broadcast or not • WMM: Enable Wireless Media Mode. This is a Quality of Service (QoS) function which will improve network functions by automatically adjusting transmission and reception rates across the W3N. • Encryption: To enable the SSID security functions, select an encryption type from the drop down menu. The available options are; WEP, WPA Pre‐Shared, and WPA RADIUS o WEP Select WEP from the drop‐down list if your wireless network uses WEP encryption. WEP is an acronym for Wired Equivalent Privacy, and is a security protocol that provides the same level of security for wireless networks as for a wired network. 44 ...
- Page 45 WAP-W3N User Manual Authentication Type: Select Open System, Shared Key, or auto. Authentication method from the drop‐down list. An open system allows any client to authenticate as long as it conforms to any MAC address filter policies that may have been set. All authentication packets are transmitted without encryption. Shared Key sends an unencrypted challenge text string to any device attempting to communicate with the AP. The device requesting authentication encrypts the challenge text and sends it back to the access point. If the challenge text is encrypted correctly, the access point allows the requesting device to authenticate. It is recommended to select Auto if you are not sure which authentication type is used. Key Length: Specify whether the key is 64 or 128 bits in length Key Type: Select a key type from the drop‐down list. 128‐bit encryption requires a longer key than 64‐bit encryption. Keys are defined by entering in a string in HEX (hexadecimal ‐ using characters 0‐9, A‐F) or ASCII (American Standard Code for Information Interchange ‐ alphanumeric characters) format. ASCII format is provided so you can enter a string that is easier to remember. Default Key #: Select which of the four possible keys you wish to use as default. Encryption Key 1‐4: Enter up to four different WEP keys. 45 ...
- Page 46 WAP-W3N User Manual Enable 802.1x Authentication: Place a check in this box if you would like to use RADIUS authentication. This option works with a RADIUS Server to authenticate wireless clients. Wireless clients should have established the necessary credentials before attempting to authenticate to the Server through this Gateway. Furthermore, it may be necessary to configure the RADIUS Server to allow this Gateway to authenticate users. You will then be required to specify the RADIUS Server’s IP address, port, and password. o WPA Pre‐Shared Select the WPA‐Pre‐Shared radio button if your wireless network uses WPA encryption. WPA (WiFi Protected Access) was designed to improve upon the security features of WEP (Wired Equivalent Privacy). The technology is designed to work with existing Wi‐Fi ...
- Page 47 WAP-W3N User Manual Information Interchange) format at both ends of the wireless connection. It cannot be shorter than eight characters, although for proper security it needs to be of ample length and should not be a commonly known phrase. This phrase is used to generate session keys that are unique for each wireless client. • Click on the Apply button once you have modified the settings. 4.4.1.3. MAC Filter Click on the MAC Filter link under the Wireless menu. On this page you can filter the MAC address of possible clients by allowing or blocking access to the network. • Click the box to Enable MAC Address Filtering • Enter a description (optional) and the MAC Address of the client you wish to add • Click Add • All of the MAC filtering clients are listed at the bottom • Click on the Apply button once you have modified the settings. 4.4.1.4. Advanced Click on the Advanced link. On this page you can configure the advanced settings to adjust the performance of your wireless network. 47 ...
- Page 48 WAP-W3N User Manual • Fragment Threshold: Packets over the specified size will be fragmented in order to improve performance on noisy networks. Specify a value between 256 and 2346. The default value is 2346. • RTS Threshold: Packets over the specified size will use the RTS/CTS mechanism to maintain performance in noisy networks and prevent hidden clients from degrading the performance. Specify a value between 1 and 2347. The default value is 2347 • N Data Rate: Specify a data rate for the N wireless band. Auto is selected by default and is recommended for best performance. • Channel Bandwidth: Specify the size of the wireless frequency spectrum to be used by the wireless radio. • Preamble Type: Specify whether the network utilizes a long or short preamble. For the best performance it is recommended to also configure the client device with the same preamble type. • CTS Protection: CTS (Clear to Send) can be always enabled, auto, or disabled. By enabled CTS, the Access Point and clients will wait for a ‘clear’ signal before transmitting. It is recommended to select auto. • TX Power: You may control the output power of the WAP‐W3N by selecting a value from the drop‐down list. This feature can be helpful in restricting the coverage area of the wireless network. • Click on the Apply button once you have modified the settings. 48 ...
-
Page 49: Log & Management
WAP-W3N User Manual 4.5. Log & Management 4.5.1. Wireless Clients WLAN Client Table: This table displays the MAC address of the clients currently associated with the W3N and details of the connection. o Interface: Displays the SSID that the client is Associated to. o MAC Address: The physical MAC address of the client o Rx: Data received rate o Tx: Data transmitted rate o Signal (%): Signal strength (in percentage) o Connected Time: Amount of time the client has been connected o Idle Time: Time since last data request from client 49 ... -
Page 50: Diagnostics
WAP-W3N User Manual 4.5.2. Diagnostics Click on the Diagnostics link under the Log & Management tab. This page can be used to aid in determining the cause of network errors or unresponsive devices by attempting to illicit a response from the device. • Address to Ping: Enter the IP address that you wish to ping • Ping Frequency: In the drop down menu, select the number of pings you wish to be sent to the specified IP address 50 ... -
Page 51: System Log
WAP-W3N User Manual 4.5.3. System Log Click on the Log link on the navigation drop‐down menu. Log displays a list of events that are triggered on the Ethernet and Wireless interface. This log can be referenced when an unknown error occurs on the system or when a report needs to be sent to the technical support department for debugging purposes. 4.5.4. Reset If you need to perform a device reset, click on the Reset link under the Log & Management tab. Click apply, to reset the W3N. Allow the device to fully reboot before powering off or modifying. 51 ... -
Page 52: Specifications
WAP-W3N User Manual Appendix A - Specifications Standards • IEEE802.11n, IEEE802.11b/g, IEEE802.3, IEEE802.3u, IEEE802.3af, IEEE802.1f, IEEE802.1x Data Rates and Frequency Band • IEEE 802.11b: DSSS 11, 5.5, 2, 1 Mbps (auto fallback) • IEEE 802.11g: 1, 2, 5.5, 6, 9, 11, 12, 18, 24, 36, 48, 54 Mbps (auto fallback), Modulation- DBPSK @ 1Mbps, DQPSK @2Mbps, CCK @ 5.5 &... - Page 53 WAP-W3N User Manual Receive Sensitivity (Typical): • 2.412~2.472G (IEEE802.11n): Up to -91dBm • 2.412~2.472G (IEEE802.11g): Up to -92dBm • 2.412~2.472G (IEEE802.11b): Up to -93dBm Available Transmit Power (Typical): • 2.412~2.472G (IEEE802.11g/n): Up to 20dBm • 2.412~2.472G (IEEE802.11b): Up to 19dBm Ethernet Connection •...
- Page 54 WAP-W3N User Manual • Humidity: 5%~95% Non-condensing 54 ...
-
Page 55: Appendix B- Support
WAP-W3N User Manual Appendix B - Support Please visit our website for up-to-date support information: Website: www.pakedge.com Email: support@pakedge.com CONTACT INFORMATION: Pakedge Device & Software Inc. 1163 Triton Drive Foster City, CA 94404 55 ... -
Page 56: Appendix C- Warranty Information
WAP-W3N User Manual Appendix C - Warranty Information Congratulations on your purchase of a Pakedge Device & Software wireless product! Pakedge designs and manufactures the finest home networking products. With proper installation, setup, and care, you should enjoy many years of unparalleled performance. Please read this consumer protection plan carefully and retain it with your other important documents. - Page 57 WAP-W3N User Manual Important- Warranty Registration Please register your product at www.pakedge.com. It is imperative that Pakedge knows how to reach you promptly if we should discover a safety problem or product update for which you must be notified. In addition, you may be eligible for discounts on future upgrades as new networking standards come about.
- Page 58 WAP-W3N User Manual pakedgedevice&software inc. 1163 Triton Drive Foster City, CA 94404‐1213 Visit Us At: www.pakedge.com © Pakedge Device & Software Inc. 2010 – All Rights Reserved 58 ...
Need help?
Do you have a question about the WAP-W3N and is the answer not in the manual?
Questions and answers