
Related Manuals for Midea MKB-300


Summary of Contents for Midea MKB-300
- Page 1 Operation Maintenance Manual Fan Coil Unit Cassette and Ceiling Concealed Series MKA/MKB/MKC/MKT/MKT2 200CFM~1500CFM (50Hz/60Hz)
- Page 2 Content MCAC-KTSM-2007-2 Introduction…………………………………………………………………………………………..1 Part 1 General Information………………………………………………………………………...2 Part 2 Indoor Unit……………………………………………………………………......7 Part 3 Installation………………………………….……………………………......127 Content...
-
Page 3: Introduction
AC fan coil is designed and manufactured on the base of advanced technology, and ® Midea utilize qualified galvanized iron as material. Due to its supper-thin design, it has such advantages: beautiful outlook, space saving, easy installation, etc. And the most obvious advantage is that it can decrease the outlet air Temp-difference as low as possible to make room more comfortable, as well as don’t decrease... - Page 4 General information MCAC-KTSM-2007-2 Part 1 General Information 1. Model Names of Fan Coil…………........3 2. External Appearance……………………………………..4 3. Nomenclature…………………………………………………..5 4. Features…………………………………………….….………..6 General Information...
-
Page 5: Model Names Of Fan Coil
MCAC-KTSM-2007-2 Model Names of Fan Coil 1. Model Names of Fan Coil MKB-300 MKB-400 Compact cassette type fan coil MKB-450 MKB-500 MKA-600 MKA-750 MKA-850 Cassette type fan coil MKA-950 MKA-1200 MKA-1500 MKT2(H)-200 MKT2(H)-300 MKT2(H)-400 MKT2(H)-500 MKT2(H)-600 2 Rows MKT2(H)-800 MKT2(H)-1000... -
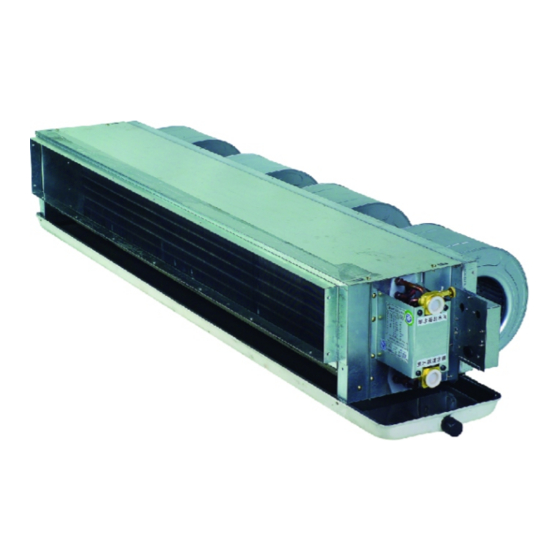
Page 6: External Appearance
External Appearance MCAC-KTSM-2007-2 2. External Appearance Compact four way cassette type Duct type Four way cassette type One way cassette type General Information... -
Page 7: Nomenclature
C One Way Cassette T Duct T1 127v 60 Hz Duct Type T2 2nd Generation Duct Type F1 Exposed Floor-stand Type (side air intake) F2 Exposed Flood-stand Type (below air intake) F3 Concealed Flood-stand Type Chilled Water Fan coil unit Midea General Information... -
Page 8: Features
Features MCAC-KTSM-2007-2 4. Features Chilled water/Hot water (2 pipes) Low height for easy installation Low noise fan direct driven by single phase, 3 speed permanent split capacitor motor. Copper tube/aluminum fin coils Hydrophilic aluminum fin coils coated (optional) ... -
Page 9: Part
MCAC-KTSM-2007-2 Indoor Units Part 2 Indoor Units Four Way Cassette Type ……..........6 Compact Four Way Cassette Type........25 Duct Type................38 One Way Cassette Type ……..........106 Indoor Units... -
Page 10: Table Of Contents
Four Way Cassette Type MCAC-KTSM-2007-2 Four Way Cassette Type 1. Features……………………………………..………………………....9 2. Specification…………………………………………………………….... 10 3. Dimensions………………………………………………………………...12 4. Service Space……………………………………………………………...13 5. Wiring Diagrams…………………………………………………………..14 6. Capacity Tables……………………………………………………………..15 7. Sound Levels……………………………………………………………...22 8. Explored View……………………………………………………………..23 Indoor Units... -
Page 11: Features
MCAC-KTSM-2007-2 Features 1. Features (1) Low operation noise ---Streamline plate ensures quietness ---Creates natural and comfortable environment (2) Efficient cooling ---Equal, fast and wide—range cooling (3) The adoption of the most advanced 3- Dimensional Screw fan ---Reduces the air resistance passing through ---Smoothes the air flow ---Makes air speed distribution to the heat exchange uniform (4) Fresh air makes life healthier and more comfortable. -
Page 12: Specification
Specification MCAC-KTSM-2007-2 2. Specification TYPE MKA-950 MKA-850 MKA-750 MKA-600 Airflow 1600 1400 1250 1000 8110 7260 6385 5109 Cooling Capacity Btu/h 27635 24910 21835 17400 11311 10240 8850 7160 Heating Capacity Btu/h 38690 34870 30570 24360 Noise dB(A) Water flow 1541 1382 1204... - Page 13 MCAC-KTSM-2007-2 Specifications TYPE MKA-1500 MKA-1200 1500 1200 Airflow 2500 2000 11556 9849 Cooling Capacity Btu/h 39240 33440 14920 13745 Heating Capacity Btu/h 51000 46810 Noise dB(A) Water flow 2388 1928 Water resistance Number of rows Tube pitch(a)x row pitch(b) 25.4×22 Fin spacing Indoor Fin type...
-
Page 14: Dimensions
Dimensions MCAC-KTSM-2007-2 3. Dimensions MKA-600 MKA-750 、 4-install hanger Gas side Liquid side E-parts box Pump inspect hole Drain hole 、 MKA-850、MKA-950、MKA-1200 MKA-1500 4-install hanger Gas side liquid side E-parts box Pump inspect hole Drain hole Four Way Cassette Type... -
Page 15: Service Space
MCAC-KTSM-2007-2 Service Space 4. Service Spaces MKA-600 MKA-750、MKA-850、MKA-950、MKA-1200 MKA-1500 、 、 Four Way Cassette Type... -
Page 16: Wiring Diagram
Wring Diagram MCAC-KTSM-2007-2 5. Wiring Diagram MKA-600 MKA-750、MKA-850、MKA-950、MKA-1200 MKA-1500 、 、 DISPLAY TO WIRE CONTROLER (CHOICE) INDOOR DRAWING CN11 CN10 CN15 POWER:220V-240V~ 50Hz MAINBOARD PART CODE CAP1 INDOOR FAN CAPACITOR CN12 FAN1 INDOOR FAN CN14 CN16 PUMP WATER PUMP LEVLE SWITCH WATER TRANSFORMER... -
Page 17: Capacity Tables
MCAC-KTSM-2007-2 Capacity Tables 6. Capacity Tables Cooling Capacity Table Unit: W Air inlet condition Water Water Water inlet DB24℃ DB25℃ DB26℃ DB27℃ DB28℃ Model temp. WB17℃ WB18℃ WB19℃ WB19.5℃ WB21℃ (LPM) (kPa) (℃) 13.5 3439 4047 3537 4449 3636 4860 3823 5074 3823... - Page 18 Capacity Tables MCAC-KTSM-2007-2 Cooling Capacity Table Unit: W Air inlet condition Water Water Water inlet DB24℃ DB25℃ DB26℃ DB27℃ DB28℃ Model temp. WB17℃ WB18℃ WB19℃ WB19.5℃ WB21℃ (LPM) (kPa) (℃) 11.9 4001 4838 4121 5316 4241 5811 4455 6058 4472 6839 21.2 4217...
- Page 19 Capacity Tables MCAC-KTSM-2007-2 Cooling Capacity Table unit:W Air inlet condition Water Water Water inlet DB24℃ DB25℃ DB26℃ DB27℃ DB28℃ Model temp. WB17℃ WB18℃ WB19℃ WB19.5℃ WB21℃ (LPM) (kPa) (℃) 11.9 4637 5607 4775 6161 4914 6734 5163 7020 5182 7925 21.2 4886 6225...
- Page 20 Capacity Tables MCAC-KTSM-2007-2 Cooling Capacity Table Unit: W Air inlet condition Water Water Water DB24℃ DB25℃ DB26℃ DB27℃ DB28℃ inlet Model temp. WB17℃ WB18℃ WB19℃ WB19.5℃ WB21℃ (LPM) (kPa) (℃) 11.9 5180 6263 5334 6882 5490 7522 5768 7842 5789 8853 21.2 5459...
- Page 21 MCAC-KTSM-2007-2 Capacity Tables Cooling Capacity Table Unit: W Air inlet condition Water Water Water inlet DB24℃ DB25℃ DB26℃ DB27℃ DB28℃ Model temp. WB17℃ WB18℃ WB19℃ WB19.5℃ WB21℃ (LPM) (kPa) (℃) 18.2 6858 8651 7094 9517 7322 10418 7680 10873 7750 12282 29.8 7059...
- Page 22 Capacity Tables MCAC-KTSM-2007-2 Cooling Capacity Table Unit: W Air inlet condition Water Water Water DB24℃ DB25℃ DB26℃ DB27℃ DB28℃ inlet Model temp. WB17℃ WB18℃ WB19℃ WB19.5℃ WB21℃ (LPM) (kPa) (℃) 18.2 8047 10151 8324 11167 8591 12224 9012 12758 9094 14410 29.8 8283...
- Page 23 MCAC-KTSM-2007-2 Capacity Tables Heating Capacity Table: Hydraulic Air inlet condition DB18℃ Water Flow Model Pressure Water inlet temp. volume(LPM) Drop (kPa) 13.5 3791 4650 5509 6375 7234 8959 10684 30.4 4087 5013 5946 6871 7804 9663 11521 MKA-600 4257 5227 6190 7160 8130...
-
Page 24: Sound Levels
Sound Levels MCAC-KTSM-2007-2 7. Sound Levels TYPE MKA-600 MKA-750 MKA-850 MKA-950 MKA-1200 MKA-1500 Noise dB(A) FOUR-WAY CASSETTE TYPE 1.0m Microphone Four Way Cassette Type... -
Page 25: Explored View
MCAC-KTSM-2007-2 Explored View 8. Exploded View MKA-600、MKA-750、MKA-850、MKA-950、MKA-1200、MKA-1500 Quantity Quantity Part Name Part Name Water Receiver, Assembly Rubber washer, pump Pipe Temperature Sensor Assembly holder, pump E-Parts Box Cover1 Water trying board Capacity Panel Assembly E-Parts Box Assembly Cover, installing E-Parts Box Cover2 Swing motor Transformer Fan guide... - Page 26 Explored View MCAC-KTSM-2007-2 Fixing board, Evaporator Switch cover, air inlet grille Clamp, fan Air inlet grille Fan assembly Hanger for panel, assembly Fan Motor Control box Gasket, motor LED holder Gasket, motor Control board Evaporator Base assembly Cover, control box Base Pan assembly Panel Wire clamp board...
- Page 27 MCAC-KTSM-2007-2 Compact Four Way Cassette Type Compact Four Way Cassette Type 1. Features..……………………………………………………………....26 2. Specification……………………………………………………………....27 3. Dimensions………………………………………………………………...28 4. Service Space……………………………………………………………....29 5. Wiring Diagrams…………………………………………………………..30 6. Capacity Tables……………………………………………………………..31 7. Sound Levels……………………………………………………………..35 8. Explored View……………………………………………………………..36 Compact Four Way Cassette Type...
- Page 28 Features MCAC-KTSM-2007-2 1. Features (1) Low operation noise ---Streamline plate ensures quietness ---Creates natural and comfortable environment (2) Efficient cooling ---Equal, fast and wide—range cooling (3) The adoption of the most advanced 3- Dimensional Screw fan ---Reduces the air resistance passing through ---Smoothes the air flow ---Makes air speed distribution to the heat exchange uniform (4) Fresh air makes life healthier and more comfortable.
- Page 29 MCAC-KTSM-2007-2 Specification 2. Specification TYPE MKB-300 MKB-400 MKB-450 MKB-500 Airflow 2635 3190 3750 3935 Cooling Capacity Btu/h 8870 10920 12625 13310 3630 4425 5240 5510 Heating Capacity Btu/h 12420 15285 17675 18630 Noise dB(A) Water flow Water resistance 10.1 14.5 18.3...
- Page 30 Dimensions MCAC-KTSM-2007-2 3. Dimensions MKB-300、MKB-400、MKB-450、MKB-500 Hook Body Ceiling Panel Chart 4 401(Hook-location) 5 8 0 ( B o d y ) 600(Ceiling hole) 650(Panel) Compact Four Way Cassette Type...
- Page 31 MCAC-KTSM-2007-2 Service Space 4. Service Space Compact Four Way Cassette Type...
- Page 32 Wring Diagram MCAC-KTSM-2007-2 5. Wiring Diagram T O C ON TR OL ER C N 17 C N 11 C N 10 C N 7 C N 12 C N 2 C N 5 C N 19 C N 1 C N 4 C N 8 C N 9...
- Page 33 1850 1606 2072 1662 2295 1753 2635 1781 2775 18.2 1592 1968 1655 2336 1724 2608 1815 2816 1843 2955 MKB-300 1349 1377 1398 1551 1446 1731 1530 1822 1530 2107 1419 1558 1474 1753 1530 1961 1609 2061 1634 2392 12.7...
- Page 34 Capacity Tables MCAC-KTSM-2007-2 Cooling Capacity Table Unit: W Air inlet condition Water Water Water inlet DB24℃ DB25℃ DB26℃ DB27℃ DB28℃ Model temp. WB17℃ WB18℃ WB19℃ WB19.5℃ WB21℃ (LPM) (kPa) (℃) 1852 2188 1911 2407 1961 2626 2062 2744 2062 3089 1970 2466 2037...
- Page 35 MCAC-KTSM-2007-2 Capacity Tables Cooling Capacity Table Unit: W Air inlet condition Water Water Water inlet DB24℃ DB25℃ DB26℃ DB27℃ DB28℃ Model temp. WB17℃ WB18℃ WB19℃ WB19.5℃ WB21℃ (LPM) (kPa) (℃) 2305 2693 2366 2955 2435 3227 2559 3366 2552 3793 2505 3180 2591...
- Page 36 Capacity Tables MCAC-KTSM-2007-2 Cooling Capacity Table Unit: W Air inlet condition Water Water Water inlet DB24℃ DB25℃ DB26℃ DB27℃ DB28℃ Model temp. WB17℃ WB18℃ WB19℃ WB19.5℃ WB21℃ (LPM) (kPa) (℃) 13.5 2759 3646 2857 4020 2962 4403 3101 4598 3150 5209 30.4 2857...
- Page 37 MCAC-KTSM-2007-2 Sound Levels 7. Sound Levels TYPE MKB-300 MKB-400 MKB-450 MKB-600 Noise dB(A) FOUR-WAY CASSETTE TYPE 1.0m Microphone Compact Four Way Cassette Type...
- Page 38 Explored View MCAC-KTSM-2007-2 8. Explored View MKB-300、MKB-400、MKB-450、MKB-500 26.1 26.2 26.3 26.4 26.7 26.5 26.8 26.6 26.9 26.10 26.11 26.14 26.13 26.15 26.12 29.2 29.7 29.1 29.8 29.3 29.4 29.6 Quantity Quantity Part Name Part Name Collect Water Pan ,Assembly 26.1...
- Page 39 MCAC-KTSM-2007-2 Explored View Extend water pipe 26.10 Swing motor Drain Pump Holder 26.11 Panel Evaporator Assembly 26.12 Install cover, swing motor Fixing clamp, evaporator 26.13 Install cover I Desperation board, left 26.14 Install cover II Inlet pipe, evaporator 26.15 Install cover I Outlet pipe, evaporator Remoter Wire crossing board...
- Page 40 The Installation of MKA MCAC-KTSM-2007-2 The Installation of MKA 1. Before Installation …………………………………………………....143 2. Install the Main Body...…………………………………………………...144 3. Install the Panel...…………………………………………………....146 4. Install the Drain Pipe...…………………………………………………...148 5. Wiring...…………………………………………………........150 The Installation of MKA...
-
Page 41: Before Installation
MCAC-KTSM-2007-2 Before Installation 1. Before Installation Please check whether the accessories are of full scope. If there are some fittings free from use, please restore them carefully. The Installation of MKA... -
Page 42: Install The Main Body
Install The Main Body MCAC-KTSM-2007-2 2. Install the Main Body A. The existing ceiling (to be horizontal) a. Please cut a quadrangular hole of 880 880mm in the ceiling according to the shape of the installation paper board. (Refer to Chart3, 4) The center of the hole should be at the same position of that of the air conditioner body. - Page 43 MCAC-KTSM-2007-2 Install The Main Body B. New built houses and ceilings a. In the case of new built house, the hook can be embedded in advance (refer to the A.b mentioned above). But it should be strong enough to bear the indoor unit and will not become loose because of concrete shrinking.
- Page 44 Install The Panel MCAC-KTSM-2007-2 3. Install the Panel (1) Remove the inlet grid. Cat ion Never put the panel face down on floor or against the wall, or on bulgy objects. Never crash or strike it. a. Slide two grid switches toward the middle at the same time, and then pull them up. (Refer to chart 9) b.
- Page 45 MCAC-KTSM-2007-2 Install The Panel The Installation of MKA...
-
Page 46: Connect The Drain Pipe
Connect Drain Pipe MCAC-KTSM-2007-2 4. Connect the Drain Pipe Install the drainpipe of the indoor unit You can use a polyethylene tube as the drainpipe (out-dia. 37~39mm, in-dia. 32mm). It could be bought at local market or from your dealer. Set the mouth of the drainpipe onto the root of the body's pump-pipe, and clip the drainpipe and the out-let pipe sheath (fittings) together firmly with the out-let pipe clasp (fitting). - Page 47 MCAC-KTSM-2007-2 Connect Drain Pipe Turn on the power, and operate the air conditioner under the "COOLING" mode. Listen to the sound of the drain pump. Check whether the water is discharged well (a lag of 1min is allowed before discharging, according to the length of the drain pipe), and check whether water leaks from the joints. Cautions: 1.
- Page 48 Wring MCAC-KTSM-2007-2 5. Wiring Caution: 1. The air conditioner should use separate power supply with rated voltage; the voltage of power supply must be within90%~110% of rated value. 2. The wiring work should be done by qualified persons according to circuit drawing. 3.
- Page 49 MCAC-KTSM-2007-2 The Installation of MKB The Installation of MKB 1. Before Installation …………………………………………………....152 2. Install the Main Body...…………………………………………………...153 3. Install the Panel...…………………………………………………....155 4. Install the Drain Pipe...…………………………………………………...158 5. Wiring...…………………………………………………........160 The Installation of MKB...
- Page 50 Before Installation MCAC-KTSM-2007-2 1. Before Installation Please check whether the accessories are of full scope. If there are some fittings free from use, please restore them carefully. Select the locati on Install the indoor unit Install the outdoor unit Connect the drain pipe Wiring Install the connecting pipe Test operation...
- Page 51 MCAC-KTSM-2007-2 Install The Main Body 2. Install the Main Body A. The existing ceiling (to be horizontal) a. Please cut a quadrangular hole of 600×600mm in the ceiling according to the shape of the installation paper board. (Refer to Chart3, 4) The center of the hole should be at the same position of that of the air conditioner body.
- Page 52 Install The Main Body MCAC-KTSM-2007-2 c. Please adjust the hexangular nuts on the four installation hooks evenly, to ensure the balance of the body. Use the transparent hose filled with water to check the lever of the main body from the four sides or diagonal line direction, the lever indicator also can check the lever from four sides of the main body (Refer to chart 6) If the drainpipe is awry, leakage will be caused by the malfunction of the water-level switch.
- Page 53 MCAC-KTSM-2007-2 Install The Panel 3. Install the Panel Caution: Never put the panel face down on floor or against the wall, or on bulgy objects. Never crash or strike it. a. Slide two grid switches toward the middle at the same time, and then pull them up. (Refer to chart 9) b.
- Page 54 Install The Panel MCAC-KTSM-2007-2 3. Install the drainage pipe Check whether the height drop between the indoor unit and outdoor unit, the length of refrigerant pipe, and the number of the bends meet the following requirements: The max height drop ....................20m (If the height drop is more than 10m, you had better put the outdoor unit over above the indoor unit.) The length of refrigerant pipe ..............
- Page 55 MCAC-KTSM-2007-2 Install The Panel Notices for bendable notices The bending angle should not exceed 90°. Bending position is preferably in the bendable pipe. The larger the better it is. Do not bend the pipe more than three times. Bend the connecting pipe of small wall thickness Cut out a desired concave at the bending part of the insulating pipe.
- Page 56 Install The Drain Pipe MCAC-KTSM-2007-2 4. Install The Drain Pipe Install the drainpipe of the indoor unit You can use a polyethylene tube as the drainpipe (out-dia. 31~32mm, in-dia. 25mm). It could be bought at local market or from your dealer. Set the mouth of the drainpipe onto the root of the body's pump-pipe, and clip the drainpipe and the out-let pipe sheath (fittings) together firmly with the out-let pipe clasp (fitting).
- Page 57 MCAC-KTSM-2007-2 Install The Drain Pipe B ody D rain pipe St o w Stow tub e Drain plug Mater pan W ater re c e iver Chart 26 Turn on the power, and operate the air conditioner under the "COOLING" mode. Listen to the sound of the drain pump.
- Page 58 Wring MCAC-KTSM-2007-2 5. Wring 1. The air conditioner should use separate power supply with rated voltage; the voltage of power supply must be within90%~110% of rated value. 2. The wiring work should be done by qualified persons according to circuit drawing. 3.
- Page 59 GD Midea Refrigeration Equipment Co., Ltd. GD Midea Refrigeration Equipment Co., Ltd. Have received ISO 9001 certification for quality Have received environmental management system assurance. Standard ISO 14001 certification Certificate Numer. CC 454 Certificate Numer. CC 1417 Dealer GD Midea Air-conditioning Equipment...
Need help?
Do you have a question about the MKB-300 and is the answer not in the manual?
Questions and answers