Table of Contents
Advertisement
Quick Links
Download this manual
See also:
User Manual
User's Guide
For Sales Information Please Contact
RoadTrucker Inc (www.RoadTrucker.com
8312 Sidbury Rd. Wilmington, NC 28411
(800) 507-0482 / (910) 686-4281
For Sales Information Please Contact RoadTrucker Inc (www.RoadTrucker.com)
8312 Sidbury Rd.; Wilmington, NC 28411 - (800) 507-0482 / (910) 686-4281
Advertisement
Table of Contents

Related Manuals for Rand McNally IntelliRoute TND 500


Summary of Contents for Rand McNally IntelliRoute TND 500
- Page 1 User’s Guide For Sales Information Please Contact RoadTrucker Inc (www.RoadTrucker.com 8312 Sidbury Rd. Wilmington, NC 28411 (800) 507-0482 / (910) 686-4281 For Sales Information Please Contact RoadTrucker Inc (www.RoadTrucker.com) 8312 Sidbury Rd.; Wilmington, NC 28411 - (800) 507-0482 / (910) 686-4281...
- Page 2 Trademarks Rand McNally and IntelliRoute are registered trademarks and TND is a trademark of Rand McNally. NAVTEQ ON BOARD is a trademark of NAVTEQ. The Trucker’s Friend and National Truck Stop Directory are registered trademarks of TR Information Publishers. Other products and companies mentioned herein may be trade-marks of their respective owners.
-
Page 3: Table Of Contents
Table of Contents Welcome Basic Operations Your IntelliRoute® TND™ 500 ........1 Start the IntelliRoute® TND™ 500 ....... 17 About GPS ..............2 The Main Menu ............18 Features ................. 3 Using Keyboards ............19 Customer Support ............5 Basic Settings ............... - Page 4 Multi-Stop Routes Point of Interest Searches ..........34 Points of Interest Selection Window ......34 Points of Interest Category Window ......35 Create a Multiple Stop Route ........53 Types of Points of Interest (POIs) ........36 Add Locations to a Multi-Stop Route ......54 Select a Truck-Related Point of Interest ......
- Page 5 Truck Tools TND Dock Truck Tools Window ............. 71 Install TND Dock Software ..........87 Timers and Logs ............72 Set Up to Use TND Dock ..........88 View Timers and Odometer Readings ......72 Open the TND Dock Main Window ......88 View Driver Logs ............
-
Page 6: Welcome
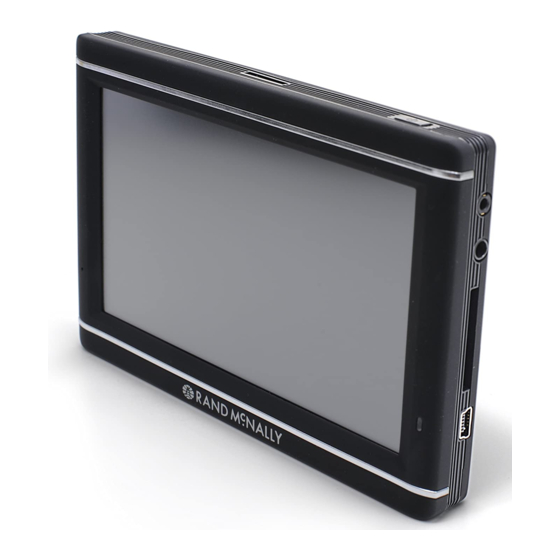
Welcome Your IntelliRoute ® ™ Power Key Front Turns the device On, Off, and used to enter/return from Standby mode. Audio Output Socket Connect to external speaker (not provided). Traffic Antenna Socket For future use. SD Card Slot Stores map data (in some devices). Battery Power Indicator Shows charging status. -
Page 7: About Gps
About GPS The Global Positioning System (GPS) is a constellation of satellites that a GPS receiver uses to calculate geographical positions. To determine a position, data from at least three satellites is required. To determine altitude, the data from 4 or more satellites is required. -
Page 8: Features
Features Truck-Specific Routing The IntelliRoute® TND™ 500 uses Rand McNally proprietary road information to calculate the best route to your destination. Enter your truck information, such as length, width, weight, height and the IntelliRoute® TND™ 500 calcu- lates a route that meets your needs. You can calculate routes for either the shortest amount of time or the shortest distance. -
Page 9: Timers And Logs
Timers and Logs Record and monitor driving time and On/Off Duty time. Track odometer read- ings to better manage scheduled maintenance For more information, see: • “Select Driver Status” on page20. • “Timers and Logs” on page72. Points of Interest (POIs) IntelliRoute®... -
Page 10: Customer Support
Customer Support Call Toll Free: 877-IGO4TND (Toll Free) 877-446-4863 Service Hours: Monday through Friday, 8 a.m. to 7 p.m. CT (except official holidays) E-Mail: TNDSupport@randmcnally.com Rand McNally IntelliRoute ® 500 User’s Guide... -
Page 11: Getting Started
Getting Started What’s Included Your IntelliRoute® TND™ 500 includes: • IntelliRoute® TND™ 500 navigation device • Mount and Cradle • 12V Truck Charger with extended length cable • Home Charger (120/240V) • USB cable • Extra Fuse • Quick Start Guide For Sales Information Please Contact RoadTrucker Inc (www.RoadTrucker.com 8312 Sidbury Rd. -
Page 12: Important Safety Information
Important Safety Information Navigation Safety Caution: Use this navigation device at your own risk. Caution: Use this navigation device only when it is safe to do so. Caution: Look at the display only when it is safe to do so. Caution: Traffic regulations always have priority over any instructions from the navigation system. -
Page 13: Installation Safety
Installation Safety Caution: Make sure that the mount does not impair the driver’s driver’s visibility. Caution: Do not attach the mount within the airbag deployment zone. Caution: When installing the mount, make sure that it does not pose a risk in the event of an accident. -
Page 14: Device Safety
Device Safety Caution: Do not use sharp-edged objects on the device touch screen. Caution: Protect the device from moisture. The device is not waterproof and is not protected against water damage. Caution: Protect the device from extreme temperatures. Operating temperature for the device is between 32 degrees F to 120 degrees F. Caution: When parking the vehicle for an extended time, to avoid battery drain, hold down the power button for 10 seconds to power off the device. -
Page 15: Battery Power Indicator
Bright Red Device is plugged in and the battery is charging. Bright Green Device is plugged in and the battery is fully charged. Light Green Device is in Standby Mode. Charge the Battery First Time Use Battery Power Indicator Rand McNally IntelliRoute ®... -
Page 16: Charge With The Wall Charger
To maximize battery life, plug in the IntelliRoute® TND™ 500 for the first two (2) hours of use. Use the: • Home charger to power the device from wall outlet, or Charge with the Wall Charger • 12V vehicle charger to power the device from the battery, or •... -
Page 17: First Time Use
Note: Obey all local regulations governing the placement of the mount. Note: Do not place the mount in an airbag deployment area. Clean and dry the mounting area. Remove the suction cup protective film. Adjust the angle and secure the cradle to the mount using the thumbscrew. Pull the suction cup lever up to release suction. -
Page 18: Turn The Device On
Turn the Device On Power Key • Press and hold the Power Key for two (2) seconds, then release. (After 5-10 seconds, the Rand McNally splash screen displays as the device powers on.) Turn the Device Off • Press and hold the Power Key for five (5) seconds, then release. A message displays indicating that the device is powering off. -
Page 19: Basic Operations
Basic Operations Start the IntelliRoute Install TND Dock Window ® ™ Power Press and hold the device Key for two (2) seconds. (Device powers on in 5 seconds.) Install TND Dock On first use and occasionally on subsequent use, the Window displays. -
Page 20: The Main Menu
The Main Menu Truck Mode Car Mode Status Icons Icons shown in this area indicate device status. Displays when GPS connection is lost. When on battery power, displays battery level. Driver Status Select driver status. Note: Not available in Car mode. See “Select Truck or Car Mode” on page22. -
Page 21: Using Keyboards
Using Keyboard ABC Keyboard Software keyboards are used when entering text. Special Keys Return to previous window. View a list of valid options. Delete last character and move back one space. Add a space. For Sales Information Please Contact RoadTrucker Inc (www.RoadTrucker.com 8312 Sidbury Rd. -
Page 22: Basic Settings
Basic Settings Driver Status Field Driver Status Select Driver Status Note: Only available when in Truck mode. See “Select Truck or Car Mode” on page 22 When set to truck, a simplified set of menus display and routing is calculated for cars. -
Page 23: Volume Settings
Volume Settings Volume Controls Set the volume for spoken navigation instructions. You can select an option to increase the volume automatically as the vehicle speed increases. See “Device and Map Display Settings” on page 84. Increase Volume • Decrease Volume •... -
Page 24: Select Truck Or Car Mode
Select Truck or Car Mode Mode Setting Select the type of vehicle. The IntelliRoute® TND™ 500 calculates routes based on this type of vehicle. When Car is selected, some truck-related features will not be available. Main Menu From the Truck Tools > Preferences Device Tap on the tab. -
Page 25: Set The Type Of Route To Calculate
Set the Type of Route to Calculate Set Route Type IntelliRoute® TND™ 500 Set the to calculate the fastest route to a location. For more routing options, see “Routing Settings” on page 86 Main Menu From the Preferences Routing Tap on the tab. -
Page 26: Destinations
Destinations Ways to Search for Locations Find Addresses To find an address, you can: • “Search for an Address” on page 31 • “Search Near a City Center” on page 32 • “Search Near an Intersection” on page 33 Find Points of Interest (POIs) You can find Points of Interest (POIs) by: •... -
Page 27: Location Searches
Location Searches Truck Mode Destination Selection Window Main Menu Choose Destination To access this window from the , tap Back Tap to return to the Main Menu. New Location Tap to find a new address. History Tap to view a list of previous locations. Address Book Tap to view a list of saved locations. -
Page 28: Destination Auto-Complete
Destination Auto-Complete Enter the first few characters in a name and a short list displays a couple of names that start with the typed characters. On the keyboard, the only keys available are for the next valid characters in a search name. -
Page 29: About City And Street Names
About City and Street Names Some cities with common names, such as “Concord” have several types of names associated with a city. If a name does not display, continue typing characters until the name you are looking for displays in the list. Rand McNally IntelliRoute ®... -
Page 30: Select A City
Select a City First Use First Use Select City Name Window On first use, the displays. On the keyboard, type the first few characters in the city name. On the next use, the city name selected in the previous search displays. Tap on the city name to search for a location in the city. -
Page 31: Find Addresses
Find Addresses Location Selection Window Main Menu From the Destination > New Location • Tap Choose Address Tap to search for an address by entering the city, street and number. City Center Tap to search for an address in a city. Intersection Tap to search for an address by entering the city and two intersecting roads. -
Page 32: Search For An Address
Search for an Address From the Main Menu: Select City List Destination > New Location > Address Tap Choose Type the first few characters in the city name and tap Enter. Select City List displays. Tap on the city/state from the displayed list. Enter Type the first few characters in the street name and tap Select Street List... -
Page 33: Search Near A City Center
Search Near a City Center Main Menu From the Select Address List Choose Destination > New Location > City Center Enter Type the first few characters in the city name and tap Select Address List displays. Tap on the city/state name. Confirmation Window displays. -
Page 34: Search For An Intersection
Search For an Intersection Main Menu From the Select Address List Choose Destination > New Location > Intersection Enter Type the first few characters in the city name and tap Select Address List displays. Tap on the city/state name from the displayed list. Enter Primary Street Window displays. -
Page 35: Point Of Interest Searches
Point of Interest Searches Points of Interest Selection Window My Truck Tap to search for a point of interest near the current truck location. City Tap to search for a point of interest in a city. My Route Tap to search for a point of interest along the truck’s route. End of Day Tap to search for a point of interest near your end of day location. -
Page 36: Points Of Interest Category Window
Points of Interest Category Window Travel Center Tap to search for a point of interest near the current truck location. Parking & Rest Area Tap to search for a point of interest in a city. Weigh Station Tap to search for a point of interest along the truck’s route. CAT Scale Tap to search for a point of interest near your end of day location. -
Page 37: Types Of Points Of Interest (Pois)
Types of Points of Interest (POIs) Truck-Related POIs IntelliRoute® TND™ 500 offer thousands of Points of Interest. Truck- related POIs include Truckers Friend and Rand McNally locations that offer many amenities to address trucking professional needs. Consumer POIs are also available. -
Page 38: Select A Truck-Related Point Of Interest
Select a Truck-Related Point of Interest POI Category Window Perform a Point of Interest search. On the POI Category Window: Tap: Parking & Rest Area • , or Weigh Station • , or CAT Scale • , or Truck Dealer •... -
Page 39: Select And Filter Travel Center Amenities
Select and Filter Travel Center Amenities POI Category Window Truck-related Travel Center Points of Interest can include over 70 different types of amenities. To select only amenities that you are interested in, filter your search results. Perform a Point of Interest search. POI Category Window On the Travel Center... -
Page 40: Select A Consumer Point Of Interest
Select a Consumer Point of Interest POI Category Window Perform a Point of Interest search. POI Category Window On the More Select Category Window displays. Tap on a category. (For example, tap Restaurant.) If necessary, tap on a subcategory type.(For example, tap Bistro.) Select Point of Interest Window displays POI locations. -
Page 41: Find Points Of Interest (Pois)
Find Points of Interest (POIs) POI Category Window Search Near the Current Truck Location Main Menu From the Choose Destination > Points of Interest > My Truck POI Category Window displays. Tap: Travel Center • and filter for amenities. (See “Select and Filter Travel Center Amenities”... -
Page 42: Search In A City
Search In a City Main Menu From the Select Address List Choose Destination > Points of Interest > City Enter Type the first few characters in the city name and tap Select Address List displays. Tap on the city/state from the displayed list. POI Category Window displays. -
Page 43: Search Along The Route
Search Along the Route POI Category Window Create a route or load a trip. Main Menu From the Choose Destination > Points of Interest > My Route POI Category Window displays. Tap: Travel Center • and filter for amenities. (See “Select and Filter Travel Center Amenities”... -
Page 44: Search Near The Destination
Search Near the Destination POI Category Window Create a route or load a trip. Main Menu From the Choose Destination > Points of Interest > Destination POI Category Window displays. Tap: Travel Center • and filter for amenities. (See “Select and Filter Travel Center Amenities”... -
Page 45: Search Near End Of Day Location
Search Near End of Day Location POI Category Window Create a route or load a trip. Main Menu From the Choose Destination > Points of Interest > End of Day POI Category Window displays. Tap: Travel Center • and filter for amenities. (See “Select and Filter Travel Center Amenities”... -
Page 46: Find A Location By Tapping On The Map
Find a Location by Tapping on the Map Map Window Tap on the Map and Avoid the Location With a map displayed: The crosshairs ()(crosshairs.bmp) display over your current location. Touch and drag the map until the crosshairs are centered over the location. Tap on Map Location Window displays. -
Page 47: Tap On The Map And Route To The Location
Tap on the Map and Route to the Location Map Window With a map displayed: The crosshairs display over your current location. Touch and drag the map until the crosshairs are centered over the location. Tap on Map Location Window displays. -
Page 48: Rate A Truck-Related Point Of Interest
Rate a Truck-Related Point of Interest Confirmation Window Search for and select a Truck-related Point of Interest. (See “Select a Truck- Related Point of Interest” on page 37. Confirmation Window displays. Rating On the button, the top row indicates the community rating from fellow drivers for the Point of Interest. -
Page 49: Manage Destinations
Manage Destinations Set a Location as Home Note: Only available when in Car mode. Main Menu From the Choose Destination > Set as Home Note: This will set your current location as home. Rand McNally IntelliRoute ® 500 User’s Guide... -
Page 50: Save A Location In The Address Book
Save a Location in the Address Book Search for a Destination. Confirmation Window On the Save Entry Name Window displays. Type a the name of the location. Enter to save the location in the Address Book. Confirmation Window re-displays. Begin Route to navigate to the location. -
Page 51: Select A Location From The Address Book
Select a Location from the Address Book Main Menu From the Address List Choose Destination > Address Book All Addresses Tap on the tab. Address List displays. Tap on an address to select it. Confirmation Window displays. Begin Route to navigate to the location. See “Destination Confirmation Windows”... -
Page 52: Create An Address Book Group
Create an Address Book Group Address Book Group Tab You must create the group first, before you can add addresses to it. Main Menu From the Choose Destination > Address Book Address Book Window displays. Groups Tap on the tab. New Group Enter Name Window displays. -
Page 53: Select A Location From A Group
Select a Location From a Group Main Menu From the Groups List Choose Destination > Address Book Groups Tap on the tab. Groups List displays. Tap on the location. Confirmation Window displays. Group Address Window Begin Route to navigate to the location. See “Destination Confirmation Windows”... -
Page 54: Select A Location From The History List
Select a Location from the History List Main Menu From the Destination History List Choose Destination > History Destination History List displays. Tap on the destination to select it. Confirmation Window displays. Begin Route to navigate to the location. See “Destination Confirmation Windows” on page 61 for more options. Rand McNally IntelliRoute ®... - Page 55 This page intentionally left blank Rand McNally IntelliRoute ® 500 User’s Guide...
-
Page 56: Multi-Stop Routes
Multi-Stop Routes Multi-Stop Trips Window Create a Multiple Stop Route Main Menu From the Choose Destination > Multi-Stop Trips Multi-Stop Trips Window displays. New Trip Enter Name Window displays. Type the trip name. Enter Name Window To select a different color folder, tap Choose Folder Color Window displays. -
Page 57: Add Locations To A Multi-Stop Route
Add Locations to a Multi-Stop Route Route Stop Window Note: Add locations in the order you want to route to them. Main Menu From the Choose Destination > Multi-Stop Trips Multi-Stop Trips Window displays. Tap on the route. Route Stop Window displays. -
Page 58: Manage Routes
Manage Routes After all locations have been added to a multi stop route, you can run the optimizer wizard to organize your trip. Select a 1st stop from your address list. If there is no preference, tap Preference to allow the wizard to calculate using your current location. (continued on the following page) Rand McNally IntelliRoute ®... - Page 59 (continued from the previous page) Last Stop Select from your address list. If there is no preference, tap Preference Decide whether you want to return to your current location. Note: If you want to include your current location as a starting location, you can enter it in the list.
-
Page 60: Remove A Stop From A Route
Remove a Stop from a Route Main Menu From the Choose Destination > Multi-Stop Trips Multi-Stop Trips Window displays. Tap on the route. Route Stop Window displays. Tap on the next to the stop to be removed. A confirmation window displays. Route Stop Window re-displays with the stop removed. -
Page 61: Select And Run A Saved Route
Select and Run a Saved Route Main Menu From the Multi-Stop Route List Choose Destination > Multi-Stop Trips Multi-Stop Route List displays. Tap on the route to select it. Route Stop Window displays. Tap on a stop to run the route. Confirmation Window displays. -
Page 62: Delete A Route
Delete a Route Main Menu From the Multi-Stop Route List Choose Destination > Multi-Stop Trips Multi-Stop Trips Window displays. Tap on the (Button_DeleteStop.bmp) next to the route to be deleted. Multi-Stop Trips Window re-displays. The selected route has been removed. Rand McNally IntelliRoute ®... -
Page 63: Maps
Maps Destination Confirmation Windows Confirmation Window Button options on the change, based on the type of location selected. Address Confirmation Window Address Confirmation Window Destination address The selected location address. Begin Route Tap to begin routing to destination. Route Via Add this location as an interim stop between the origin and destination. -
Page 64: Consumer Point Of Interest (Poi) Confirmation Window
Consumer Point of Interest (POI) Confirmation Window Consumer Point of Interest (POI) Confirmation Window Button options always available on this window are: Destination address The selected location address. Begin Route Tap to begin routing to destination. Add to Multi-Point Add this location as an interim stop between the origin and destination. Save Add the location to the Address Book. -
Page 65: Truck-Related Point Of Interest (Poi) Confirmation Window
Truck-Related Point of Interest (POI) Confirmation Truck-Related Point of Interest (POI) ConfirmationWindow Window Destination address The selected location address. Begin Route Tap to begin routing to destination. Services Tap to view Trucker amenities at this location. Ratings Tap to rate amenities at this location. Add to Multi-Point Add this location as an interim stop between the origin and destination. -
Page 66: Address Book Confirmation Window
Address Book Confirmation Window Address Book Confirmation Window Destination address The selected location address. Begin Route Tap to begin routing to destination. Edit Entry Tap to edit the location address book entry. Create Note Tap to create a note about the location. Add to Multi-Point Add this location as an interim stop between the origin and destination. -
Page 67: Multi-Point Route Confirmation Window
Multi-Point Route Confirmation Window Multi-Point Route ConfirmationWindow Destination address The selected location address. Begin Route Tap to begin routing to destination. Services Tap to view Trucker amenities at this location. Ratings Tap to rate amenities at this location. Add to Multi-Point Add this location to a multi-point route. -
Page 68: Turn-By-Turn List
Turn-by-Turn List Turn-by-Turn List Window altitude Altitude of current vehicle location. Current speed. rise/set Times of sunrise and sunset. odom1,odom 2 Odometer readings Distance Distance to and type of next maneuver. Street name The street you will be on after performing the next maneuver. Up/Down Scroll up and down to view the list of maneuvers. -
Page 69: View The Turn-By-Turn List
View the Turn-by-Turn List While navigating a route: Route Map Window to display the turn-by-turn list. to view the instructions. To hide the turn-by-turn list tap again. Turn-by-Turn Window Rand McNally IntelliRoute ® 500 User’s Guide... -
Page 70: Route Map Window
Route Map Window Route Map Window Next Maneuver Tap to repeat spoken next maneuver instructions Road Name The name of street you will turn onto next. Miles/Time Tap to select current speed, destination arrival tIme, or time remaining to the destination. Turn-by-Turn slideout Tap to view the turn-by-turn list. -
Page 71: Detour Around Part Of The Route
Detour Around Part of the Route Route Map Window Use this procedure to recalculate a route to avoid the next several miles on the route. While navigating a route: Location Route Options Window displays. Detour Detour Window displays. On the left side of the window, tap the number of miles on the route to be Location Route Options Window avoided. -
Page 72: Detour Around A Specific Roadway
Detour Around a Specific Roadway Route Map Window Use this procedure to recalculate a route to avoid, if possible, a specific roadway. While navigating a route: Location Route Options Window displays. Detour Detour Window displays. On the right side of the window, tap to view a list of roads in the current route. -
Page 73: Cancel A Route
Cancel a Route While navigating a route: Route Map Window Location Route Options Window displays. Cancel Route Route Map Window The route is cancelled and the displays your current location. Location Route Options Window Location Route Options Window Rand McNally IntelliRoute ®... - Page 74 This page intentionally left blank Rand McNally IntelliRoute ® 500 User’s Guide...
-
Page 75: Truck Tools Window
Truck Tools Note: Truck Tools are not available when in Car mode. See “Select Truck or Car Mode” on page 22. Truck Tools Window Truck Tools Window Back Return to the Main Menu. Truck Info Enter truck information (weight, length, etc.). Timers and Logs View driving, on-duty, and maintenance timers or state logs. -
Page 76: View Timers And Odometer Readings
Timers and Logs View Timers and Odometer Readings Main Menu From the Timers Window Truck Tools > Timers and Logs > Timers Timers Tab displays. To reset a timer, tap on the timer. Timer Reset Window displays. Change To On the left, use the field to make corrections to mileage or hours. -
Page 77: View Driver Logs
View Driver Logs Main Menu From the Logs Window Truck Tools > Timers and Logs > Logs Logs Window displays. Under the appropriate month, tap on the state. State Log Window displays. Location Route Options Window State Log Window Rand McNally IntelliRoute ®... -
Page 78: Calculate A Quick Route
Calculate a Quick Route Quick Planner Window Note: This tool is not available for all locations. Use this tool to quickly estimate the mileage and time between 500 major cities in North America. Main Menu From the Truck Tools > QuickPlan Quick Planner Window displays. -
Page 79: View Rand Mcnally Motor Carriers Road Atlas Emergency Information
View Rand McNally Motor Carriers Road Atlas Emergency Information M.C.R.A. Info Window Main Menu From the Truck Tools > M. C. R. A Emergency Info M.C.R.A. Emergency Info Window displays. Select the appropriate tab. State List Province List displays. Tap on the appropriate state or province. Motor Carriers’... -
Page 80: Use The Calculator
Use the Calculator Calculator From the Main Menu: Truck Tools > Calculator • Rand McNally IntelliRoute ® 500 User’s Guide... -
Page 81: Use The Unit Converter
Use the Unit Converter Main Menu From the Conversion Types Window Truck Tools > Convertor Converter Window displays Tap on the first field and select the type of conversion to perform. Conversion Amount Window displays. Tap on the second field and enter the value to be converted. Enter Converter Window re-displays and show the converted value. -
Page 82: Send A Message To Rand Mcnally
Send a Message to Rand McNally Tell Rand McNally About Window You can send a message to Rand McNally about updates, such as road construction, updates to truck restricted road information, etc. To use this feature, you must install the TND Dock application on your computer. See “Install TND Dock Software”... -
Page 83: Send A Message On A Different Location
Send a Message on a Different Location Main Menu From the Tell Rand McNally About Window Truck Tools > Tell Rand Tell Rand McNally About Window displays. Enter a Different Location On the left side of the window, tap Select Address Window displays. -
Page 84: Send A Message On A Location On The Map
Send a Message on a Location on the Map Main Menu From the Tell Rand McNally About Window Truck Tools > Tell Rand Tell Rand McNally About Window displays. Enter a Different Location On the left side of the window, tap Map Window displays. -
Page 85: Customize
Customize Truck Information Note: Only available when in Truck mode. See “Select Truck or Car Mode” on page 22. Hazmat Type Specify the load hazardous material type. Options are: None Explosives, Gas, (not hazardous materials), Flammable, Flammable Solids, Organic, Poison, Radioactive, Corrosives, Other , and Weight... -
Page 86: Device And Map Display Settings
Device and Map Display Settings Warnings Select the type of speed warning to be issued. Options are: Audio, Visual, Audio & Visual None , or . (See “Warning Settings” on page 87 for more information on setting warnings.) Vehicle Type Truck Select the vehicle mode. - Page 87 About View device information. GPS Data View information on the current GPS fix. Align Screen Note: Calibrate the touch screen. If your TND seems to have buttons that are hard to hit, try this. This can happen sometimes after a software update from TND Dock. Brightness Set the brightness level for screen display.
-
Page 88: Set Device And Map Display Options
Set Device and Map Display Options Main Menu From the Device Settings Window Preferences Device Tap the tab. to view the options. Tap the option to change. Enter the new information. Back to save changes. Rand McNally IntelliRoute ® 500 User’s Guide... -
Page 89: Routing Settings
Routing Settings Note: When a specific type of roadway (Tollways, Ferries, or Freeways) or maneuver (U-turns) is set to Avoid, a returned route may still include them if the only legal route found contains these types of roads. Routing Fastest Select the type of route to be calculated. -
Page 90: Set Routing Options
Set Routing Options Main Menu From the Routing Settings Window Preferences Routing Tap the tab. to view the options. Tap on the option to change. Enter the new information. Back to save changes. Rand McNally IntelliRoute ® 500 User’s Guide... -
Page 91: Warning Settings
Warning Settings Note: Only available when in Truck mode. See “Select Truck or Car Mode” on page 22. Note: Warning Also see the option in “Device and Map Display Settings” on page 84 for information on setting how warnings will be issued (visual, audio, visual and audio, etc.) Use (TruckInfo_MinusButton.bmp) and (TruckInfo_PlusButton.bmp) to change warning settings. -
Page 92: Set Warning Options
Set Warning Options Main Menu From the Warnings Settings Window Truck Tools > Warnings to view the options. Tap the option to change. Enter the new information. Back to save changes. Rand McNally IntelliRoute ® 500 User’s Guide... - Page 93 This page intentionally left blank Rand McNally IntelliRoute ® 500 User’s Guide...
-
Page 94: Tnd Dock
TND Dock Install TND Dock Software Welcome to Rand McNally Setup Wizard Window Note: Cancel If a “Transfer Music” message displays, click to close the message and continue the installation. On the computer: Click Run Rand McNally TND Dock using the program provided on the Welcome to Rand McNally Setup Wizard device. -
Page 95: Set Up To Use Tnd Dock
Set Up to Use TND Dock Turn on your IntelliRoute® TND™ 500 and allow it to power up. Connect the device to your computer using the USB cable. Open the TND Dock Main Window Note: Cancel If a “Transfer Music” message displays, click to close the message and continue the installation. -
Page 96: Tnd Dock Main Window
TND Dock Main Window TND Dock Main Window Sign up for Road Construction Updates Click on this checkbox to sign up to automatically receive road construction updates. Update My GPS IntelliRoute® TND™ 500 Click to update your software. An exclamation mark indicates updates are available. -
Page 97: Intelliroute® Tnd™ 500
IntelliRoute TND 500 TND Dock Main Window Check for IntelliRoute TND 500 Software Updates TND Main Window On the Update My GPS An exclamation mark next to the button indicates that updates are available. Update My GPS Roll your mouse pointer over the... -
Page 98: View Intelliroute Tnd 500 Information
View IntelliRoute TND 500 Information These logs are part of our continuous improvement program and only contain information that can be used to diagnose software problems during device operation. No location, tracking or personal information is included. TND Main Window... -
Page 99: Backup Tnd Information
Backup TND Information The backup is created on your personal computer. Internet access is not required to use this feature. Rand McNally respects your privacy and cannot access or back up your personal information. TND Main Window On the Backup/Restore My TND Roll your mouse pointer over the button and TND Dock Backup Type Window... -
Page 100: Restore Gps Information
Restore GPS Information TND Main Window On the Backup/Restore My GPS Roll your mouse pointer over the button Restore My GPS TND Dock Restore Type Window and click . The displays. Click on the type of restor to be performed: Full Restore •... -
Page 101: View Manual
View Manual Note: Adobe Acrobat Reader is required to view the IntelliRoute® TND™ 500 User’s Guide TND Main Window On the Read Intelliroute TND Manual • Click on the button. The User Guide displays in an Adobe Acrobat Reader Window. Rand McNally IntelliRoute ®... -
Page 102: Sign Up For Road Construction Updates
Sign Up for Road Construction Updates TND Dock Main Window On the Sign Up for Road Construction Updates Click on the checkbox. Free Road Construction Updates Window displays. Enter your e-mail address in the provided fields. To receive additional offers and information, select: Receive Rand McNally product offers. -
Page 103: Tell Rand Mcnally
Tell Rand McNally TND Dock Main Window On the Tell Rand McNally Click on the button. Tell Rand Window displays. Here you wil see comments you have entered on your TND. Add Comment To add a comment, click and enter information in the provided fields. -
Page 104: Go To Websites
Go To Websites Note: Connection to the internet is required to access the websites. Rand McNally Consumer TND Dock Main Window On the Go to the Rand McNally Website • Click on the button. Rand McNally Consumer Home Page displays. Rand McNally Commercial Transportation TND Dock Main Window On the... -
Page 105: Index
Index charge the battery ............12 first time use ............... 12 with the USB cable ............12 about GPS ............... 2 with the vehicle charger ..........12 address ................30 with the wall charger ..........12 Address Book customer support ............. 5 create a group ............ - Page 106 keyboards Points of Interestsearch along the route ......42 ABC ................19 search in a city ............41 auto-complete ............27, 28 search near destination ..........43 Computer (QWERTY) ..........19 search near end of day ..........44 special keys ..............19 search near truck location ......
- Page 107 TND Dock User Guide ..............94 backup ..............92 check for updates ............ 90 what’s included ..............7 restore ..............93 windows view GPS info ............91 Confirmation ........59, 60, 61, 62, 63 view User Guide ............94 Destination Selection ..........26 install ................
Need help?
Do you have a question about the IntelliRoute TND 500 and is the answer not in the manual?
Questions and answers