Mitsubishi Electric XL5950U User Manual
Srgb
Hide thumbs
Also See for XL5950U:
- User manual (32 pages) ,
- Specifications (2 pages) ,
- Specification (2 pages)
Table of Contents
Advertisement
PLEASE READ
This manual is provided as a free service
by Projector.com.
We are in no way responsible for the
contents of the manual. We do not guarantee
its accuracy and we do not make any claim
of copyright. The copyright remains the
property of their respective owners.
ABOUT PROJECTOR.COM
Projector.com (http://www.projector.com) is
your review and buying guide resource for
DLP and LCD video projectors.
Visit the site to read the latest projector
news and reviews, read and comment on
projector specifications, download user
manuals and much more.
Advertisement
Table of Contents

Related Manuals for Mitsubishi Electric XL5950U


Summary of Contents for Mitsubishi Electric XL5950U
- Page 1 PLEASE READ This manual is provided as a free service by Projector.com. We are in no way responsible for the contents of the manual. We do not guarantee its accuracy and we do not make any claim of copyright. The copyright remains the property of their respective owners.
- Page 2 LCD PROJECTOR MODEL XL5950U XL5900U XL5950LU XL5900LU User Manual X L5950 X L5900 EN – 1...
- Page 3 CAUTION RISK OF ELECTRIC SHOCK DO NOT OPEN CAUTION: TO REDUCE THE RISK OF ELECTRIC SHOCK, DO NOT REMOVE COVER (OR BACK) NO USER-SERVICEABLE PARTS INSIDE REFER SERVICING TO QUALIFIED SERVICE PERSONNEL. The lightning flash with arrowhead symbol, within an equilateral triangle, is intended to alert the user to the presence of uninsulated “dangerous voltage”...
-
Page 4: Table Of Contents
Contents Important safeguards ................4 Overview ....................6 Using the remote control ..............8 Battery installation ......................8 Installation ....................9 Basic connections ................10 Projector + AV device ....................10 Projector + DVD player or HDTV decoder ..............10 Projector + computer ..................... 11 Preparing the projector for operation .......... -
Page 5: Important Safeguards
Important safeguards Power sources Please read all these instructions regarding your LCD This projector should be operated only from the projector and retain them for future reference. Follow type of power source indicated on the marking all warnings and instructions marked on the LCD pro- label. - Page 6 WARNING: tom plate may cause injury or damage to other equip- ment. Also, do not set the projector on the desk which Unplug immediately if there is something is easily affected by heat. wrong with your projector. Clean the air-filter once a month. Do not operate if smoke, strange noise or odor comes out of your projector.
-
Page 7: Overview
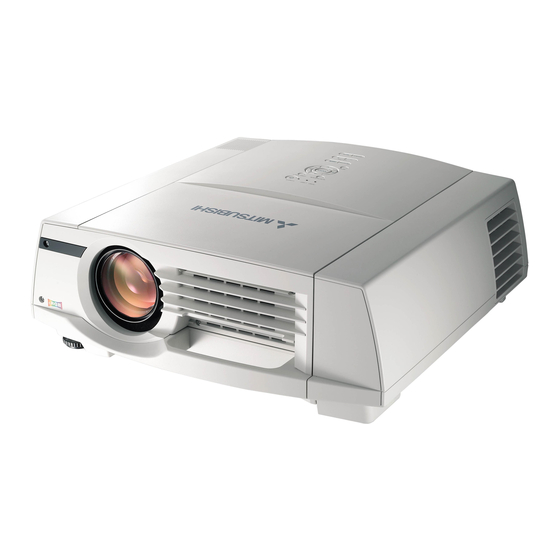
Overview Remote control sensor (Front) Lens Control area Air outlet grille Terminal panel Air inlet grille Easy-carry handle Speaker Kensington Security Lock Standard connector 10 Remote control sensor (Rear) Control area LAMP indicator TEMP (temperature) indicator AUTO POSITION button TEMP LAMP POWER Direction buttons... -
Page 8: Bottom Side
Bottom side Adjustment foot (Left/Right) Air inlet grille/Filter cover Lamp cover Caution: Do not replace the lamp immediately after using the projector because the lamp has got extremely hot. Laser aperture Remote control Transmission window Wired remote control jack Indicator POWER button KEYSTONE button ZOOM/FOCUS button... -
Page 9: Using The Remote Control
Using the remote control Battery installation Use two AA size batteries. 1. Remove the back cover of the remote control by pushing the battery compartment door in the direction of the arrow. 2. Load the batteries making sure that they are positioned correctly (+ to +, and - to -). •... -
Page 10: Installation
For XL5950U and XL5900U only. About for XL5950LU and XL5900LU, please refer to page 30. Distance from the screen : L Lens shift height... -
Page 11: Basic Connections
Basic connections This projector can be connected with various devices such as a VCR, video camera, videodisc player, and personal computer that have analog RGB output connectors. Important: • Make sure that the connected device is turned off before starting connection. •... -
Page 12: Projector + Computer
Projector + Computer For using the COMPUTER/COMPONENT VIDEO INPUT 2 (Mini D-SUB 15P) terminals To COMPUTER AUDIO IN PC audio cable (option) RS-232C RS-232C/MOUSE REMOTE REMOTE INPUT 1 To PC audio output INPUT 2 AUDIO VIDEO MAIN S-VIDEO VIDEO AUDIO To monitor port AC IN To COMPUTER IN... -
Page 13: Preparing The Projector For Operation
Preparing the projector for operation Getting ready for projection Adjusting the angle of projection 1. Attach the provided power cord to the projector. For the best projection, project the image on a flat 2. Plug the power cord in the wall outlet. screen installed at 90 degrees to the floor. -
Page 14: To Operate Projector Power On
To operate projector power ON RS-232C RS-232C/MOUSE REMOTE REMOTE INPUT 1 INPUT 2 AUDIO VIDEO MAIN S-VIDEO 2, 13 VIDEO AUDIO AC IN AUDIO 3, 11, 12 TEMP LAMP POWER 3, 11, 12 AUTO POSITION LENS SHIFT AUTO POSITION COMPUTER button KEYSTONE VIDEO... -
Page 15: Turning Off The Projector
To operate projector power ON (Continue) Turning off the projector AV mute Use the following procedure to turn off the power. The image and audio signals are temporarily muted by Don’t turn off the power by switching off the main pressing the MUTE button. -
Page 16: Menu Operation
Menu operation ± 30 IMAGE CONTRAST ± 30 YELLOW ± 30 BRIGHTNESS ± 30 GREEN ± 30 sRGB ON , OFF CYAN ± 30 COLOR MATRIX VIDEO BLUE ± 30 COMPUTER MAGENTA ± 30 USER SATURATION ± 5 RGB-TINT ± 15 COLOR TEMP. - Page 17 Menu operation (continued) 1 IMAGE CONTRAST ..Adjusts the picture contrast. The contrast becomes higher as the opt. XGA60 number increases. BRIGHTNESS ..Adjusts the image brightness. The image becomes brighter as IMAGE the number increases. CONTRAST sRGB ....Select ON to display an image emphasizing on the color BRIGHTNESS reproducibility.
- Page 18 3 FEATURE opt. MENU POSITION ..Use to select the position of the menu on the screen, (upper XGA60 left) or (lower right). FEATURE EXPAND MODE .. Select the mode for enlarging screen. See page 20. MENU POSITION FRAME POSI..Sets the position of sub screen. See page 20. EXPAND MODE VIDEO SIGNAL ...
-
Page 19: Picture Adjustment
Picture adjustment User memory for signal setting Color matrix This projector can memorize the maximum of 2 signal This feature adjusts the color balance in each color of menu settings. RGB (Red, Green, Blue), and their neutral colors (yellow, cyan, magenta) by using Color correction Memorizing the setting adjustment. -
Page 20: Color Temperature
Image flickers / Image is out of focus : Color temperature Adjust FINE SYNC. in SIGNAL menu. 1. Select COLOR TEMP in IMAGE menu. 2. Press the $ or % button to select USER SIGNAL-USER 3. Press the ENTER button. CLAMP POSITION CLAMP WIDTH COLOR TEMP.-USER... -
Page 21: Advanced Feature For Presentation
Advanced features for presentation Expand REAL screen display • During REAL mode, Press the $ or % buttons By pressing the EXPAND button on the remote con- for fine adjustment. trol, you can magnify the detailed image of the picture. •... -
Page 22: Mouse Remote Control
Mouse remote control By connecting to personal computer through the USB or SERIAL port, you can operate your computer with the projector remote control. Projector + computer with USB connector to USB port to USB USB cable RS-232C RS-232C/MOUSE REMOTE REMOTE INPUT 1 (option) -
Page 23: Lamp Replacement
Lamp replacement 8. Tighten up the screws The lamp is designed to project the image on the (b) using a Phillips LCD panels. When the lamp no longer functions, screwdriver (+). replace it with a new one. 9. Tighten up the screws Caution: of the lamp lid using a •... -
Page 24: Maintenance
Maintenance Caution: Cleaning the projector and the Be sure to turn off the projector and unplug the ventilation slots power cord from the wall outlet before you perform Use a soft cloth to clean the projector and the ventila- any maintenance on the projector. tion slots. -
Page 25: About The Terminal Cover (With Anti-Theft Alarm Device)
About the terminal cover (with Anti-Theft Alarm device) 3. Tighten the three screws that keep the terminal This projector includes a terminal cover with Anti- cover in place. Theft Alarm device. Once the terminal cover is 4. Install the projector in a specified location. installed, its Anti-Theft Alarm device will detect 5. -
Page 26: Troubleshooting
Troubleshooting The following offers solutions to some of the common problems you may encounter. We suggest that you consult this chart before contacting your dealer. PROBLEMS CAUSE POSSIBLE SOLUTIONS The power is off. • Remove the object. • The air inlet slots, outlet slots or air filter is clogged with dust or some objects. -
Page 27: Indicators
Indicators The projector has three indicators each of which shows the working condition of the projector. The following offers solutions to possible problems. If a problem persists, turn the projector off and consult your dealer. TEMP indicator LAMP indicator POWER indicator TEMP LAMP POWER... -
Page 28: Specifications
Temperature, humidity +41°F (+5°C) - +104°F (+40°C), 30~90% (performance guarantee) ) For XL5950U and XL5900U only. For XL5950LU and XL5900LU, please refer to page 30. ) For XL5950U and XL5900U only. Kensington Lock This projector has a Kensington Security Standard connector for use with a Kensington MicroSaver Security System. -
Page 29: Connectors
: For RS-232C/MOUSE terminal DDC Clock Dimensional drawings (mm) With Terminal cover 131.5* 131.5* * Factory-defaults of XL5950U and XL5900U * Factory-defaults of XL5950U and XL5900U What’s included in the box 1 Sticker for Anti-Theft Alarm 853C588-10 2 AC power cord 246C483-10... -
Page 30: Specification Of Rgb Signals In Each Computer Mode Of The Projector
Specification of RGB signals in each computer mode of the projector Signal mode resolution horizontal Vertical Normal mode Real mode (H x V) frequency (kHz) frequency (Hz) (H x V) (H x V) TV60 – 15.73 59.94 1024 x 768 –... -
Page 31: Specification Of The Attached Lens (For Xl5950Lu And Xl5900Lu)
Specifications (continued) Specification of the attached lens (for XL5950LU and XL5900LU) With Short Throw Zoom Lens (OL-X500SZ) F No. F2.0 - F2.3 Focal distance f=37 mm - 44 mm Zoom/Focus Electrical drive (Zoom ratio 1.2 : 1) Picture size 40 inch (81 cm X 61 cm) - 300 inch (610 cm X 457 cm) (aspect ratio 4:3) Width Distance from the screen : L Lens shift height... - Page 32 The above numbers are approximate, and may be slightly different from the actual measurements. • Projection not recommended in size will increase distortion and reduce the resolution. • The adjustable angle in the keystone adjustment with the lens differs from that with the XL5950U or XL5900U lens.
- Page 33 MENZ (BDT Ltd) :+44 (1506) 431927 (Warranty Registration) http://www.bdt.co.nz/projectors/warranty.asp E-mail :projector.info@meuk.mee.com 1 Parliament St, Lower Hutt, Wellington, New Zealand Russia (Mitsubishi Electric Europe B.V Moscow Representative Office) Sales Phone :+64-(0)4-560-9100 52, bldg.5, Kosmodamianskaya Nab, 113054, Moscow, Russian Federation :+64-(0)4-560-9133 Sales...
- Page 34 PLEASE READ This manual is provided as a free service by Projector.com. We are in no way responsible for the contents of the manual. We do not guarantee its accuracy and we do not make any claim of copyright. The copyright remains the property of their respective owners.
Need help?
Do you have a question about the XL5950U and is the answer not in the manual?
Questions and answers