Table of Contents
Advertisement
Quick Links
SERVICE MANUAL
RM-C303G
[AV-36F702]
CONTENTS
! SAFETY PRECAUTIONS
! SERVICE ADJUSTMENTS
★ OPERATING INSTRUCTIONS (APPENDED)
★ STANDARD CIRCUIT DIAGRAM (APPENDED)
COLOUR TELEVISION
AV-36F802
AV-36F702
RM-C301G
[AV-36F802]
COPYRIGHT © 2001 VICTOR COMPANY OF JAPAN, LTD.
®
PRELIMINARY
/Y
/Y
AV-36F802
AV-36F702
BASIC CHASSIS
AC
No. 51907
Oct. 2001
Advertisement
Chapters
Table of Contents
Troubleshooting

Related Manuals for JVC AV-36F802/Y


Summary of Contents for JVC AV-36F802/Y
-
Page 1: Colour Television
AV-36F802 AV-36F702 ® PRELIMINARY SERVICE MANUAL COLOUR TELEVISION BASIC CHASSIS AV-36F802 AV-36F702 RM-C303G RM-C301G [AV-36F702] [AV-36F802] CONTENTS ! SAFETY PRECAUTIONS ! SERVICE ADJUSTMENTS ★ OPERATING INSTRUCTIONS (APPENDED) ★ STANDARD CIRCUIT DIAGRAM (APPENDED) No. 51907 COPYRIGHT © 2001 VICTOR COMPANY OF JAPAN, LTD. Oct. - Page 2 AV-36F702 AV-36F802 SAFETY PRECAUTIONS 1. The design of this product contains special hardware, many circuits 10. Isolation Check and components specially for safety purposes. For continued pro- (Safety for Electrical Shock Hazard) After re-assembling the product, always perform an isolation check tection, no changes should be made to the original design unless authorized in writing by the manufacturer.
-
Page 3: Adjustment Items
AV-36F702 AV-36F802 SERVICE ADJUSTMENTS ADJUSTMENT PREPARATION 1. You can make the necessary adjustments for this unit with either the remote control unit or with the adjustment equipment and parts as given below. 2. Adjustment with the remote control unit is made on the basis of the initial setting values, however, the new setting values which set the screen to its optimum condition may differ from the initial settings. - Page 4 AV-36F702 AV-36F802 ADJUSTMENT LOCATIONS POWER SW PWB FRONT CONTROL PWB FRONT D101 S706 S704 S702 IC101 S705 S703 S702 : MENU S703 : CHANNEL– S704 : CHANNEL+ CN007 CN006 S705 : VOLUME– S701 S706 : VOLUME+ LINE FILTER MAIN PWB FRONT CN006 FRONT...
- Page 5 AV-36F702 AV-36F802 BASIC OPERATION OF SERVICE MENU 1. TOOL OF SERVICE MENU OPERATION Operate the SERVICE MENU with the REMOTE CONTROL UNIT. 2. SERVICE MENU ITEMS In general, basic setting (adjustments) items or verifications are performed in the SERVICE MENU. •...
- Page 6 AV-36F702 AV-36F802 SERVICE MENU (MAIN MENU) SCREEN PICTURE MODE SERVICE MENU PICTURE SOUND THEATER OTHERS LOW LIGHT HIGH LIGHT RF AFC VCO(CW) I2C BUS CTRL SELECT 1. BRIGHT SELECT 99999999 EXIT BY STATUS OPERATE BY EXIT BY [AV-36F702] 3-D Y/C MODE SOUND MODE OTHERS MODE (Only for AV-36F802)
- Page 7 AV-36F702 AV-36F802 (4) Setting method SETTING ITEM 1) UP / DOWN key of the MENU Select the SETTING ITEM. 2) LEFT / RIGHT key of the MENU Setting (adjust) the SETTING VALUE of the SETTING ITEM. When the key is released the SETTING VALUE will be stored (memorized). 3) EXIT key Returns to the previous screen.
- Page 8 AV-36F702 AV-36F802 INITIAL SETTING VALUE OF SERVICE MENU 1. Adjustment of the SERVICE MENU is made on the basis of the initial setting values; however, the new setting values which set the screen in its optimum condition may differ from the initial setting. 2.
- Page 9 AV-36F702 AV-36F802 Setting (Adjustment) item Variable range Initial setting value Remark R Y GAIN 000 / 001 CMP R Y GA 000 / 001 G Y PHASE 000 / 001 CMP G Y PH 000 / 001 CD MATRIX 000 — 003 CMP CD MAT 000 —...
- Page 10 AV-36F702 AV-36F802 Setting (Adjustment) item Variable range Initial setting value Remark H EHT 000 — 007 BTM PIN 000 — 031 V BLK LOW 000 — 003 V BLK UP 000 — 003 CAPTION IN 000 / 001 H BLK 000 / 001 SCREEN 000 / 001...
- Page 11 AV-36F702 AV-36F802 • SOUND MODE Setting (Adjustment) item Variable range Initial setting value Remark NOISE DET. 000 / 001 IN LEVEL 000 — 063 FH MONITOR 000 / 001 STEREO VCO 000 — 063 PILOT CAN. 000 / 001 FILTER 000 —...
- Page 12 AV-36F702 AV-36F802 • OTHERS MODE Setting (Adjustment) item Variable range Initial setting value Remark OSD POS. 000 — 007 CCD POS. 000 — 015 EOSEL 000 / 001 MENU COLOR 000 — –030 –010 MENU PICT. 000 — –030 –010 MENU BRI.
- Page 13 AV-36F702 AV-36F802 • 3-D Y/C MODE [Only for AV-36F802] Setting (Adjustment) item Variable range Initial setting value Remark YC 001 YC 002 YC 003 YC 004 YC 005 YC 006 YC 007 YC 008 YC 009 YC 010 YC 011 YC 012 YC 013 YC 014...
- Page 14 AV-36F702 AV-36F802 Setting (Adjustment) item Variable range Initial setting value Remark YC 048 YC 049 YC 050 000 / 001 YC 051 000 / 001 YC 052 YC 053 000 / 001 YC 054 000 / 001 YC 055 000 / 001 YC 056 000 / 001 YC 057...
- Page 15 AV-36F702 AV-36F802 Setting (Adjustment) item Variable range Initial setting value Remark YC 095 DBL 000 / 001 YC 096 DBL 000 / 001 YC 097 DBL 000 / 001 YC 098 DBL 000 / 001 YC 099 DBL YC 100 DBL YC 101 DBL 000 / 001 YC 102 DBL...
- Page 16 AV-36F702 AV-36F802 ADJUSTMENTS B1 POWER SUPPLY Measuring Item Test point Adjustment part Description instrument Check of DC Voltmeter R507 C504 1. Receive a black-and-white signal. side (B1) 2. Connect the DC Voltmeter to R507 C504 side (B1) and Q511 heatsink B1 POWER SUPPLY Q511...
- Page 17 AV-36F702 AV-36F802 ADJUSTMENT OF WHITE BALANCE Measuring Test point Adjustment part Item Description instrument WHITE Signal No.1 BRIGHT Note : generator BALANCE Set VIDEO STATUS to “STANDARD”. (LOW LIGHT) R CUTOFF G CUTOFF adjustment 1. Receive a black-and-white signal.(Color off) B CUTOFF 2.
- Page 18 AV-36F702 AV-36F802 Measuring Item Test point Adjustment part Description instrument No.8 P R DR Notes: Signal WHITE generator No.10 P B DR • Proceed to the following this adjustment after having completed the adjustments of WHITE BALANCE LOW LIGHT and BALANCE WHITE BALANCE HIGH LIGHT for the main picture.
- Page 19 AV-36F702 AV-36F802 ADJUSTMENT OF DEFLECTION Measuring Item Test point Adjustment part Description instrument V CENTER and Signal No.68 V CENTER generator No.78 TRAPEZ TRAPEZIUM adjustment 1. Receive a crosshatch signal. 2. Adjust the No.68 V CENTER of the PICTURE MODE to be the same between the CRT vertical center and crosshatch vertical center.
- Page 20 AV-36F702 AV-36F802 Measuring Item Test point Adjustment part Description instrument SIDE PIN and Signal No.76 SIDE PIN Note: generator No.82 TOP PIN Proceed to the following this adjustment after having completed the CORNER PIN adjsutment No.84 BTM PIN adjustments of FOCUS, V CENTER, TRAPEZIUM, V-SIZE and V-LINEARITY.
- Page 21 AV-36F702 AV-36F802 ADJUSTMENT OF CHROMA Measuring Item Test point Adjustment part Description instrument SUB COLOR Signal TP-B No.3 COLOR Notes: • Proceed to the following this adjustment after having completed the adjustment generator TP-E1 ( Oscilloscope [CRT SOCKET adjustment of CONTRAST. Remote PWB] •...
- Page 22 AV-36F702 AV-36F802 ADJUSTMENT OF MTS CIRCUIT Measuring Item Test point Adjustment part Description instrument MTS INPUT No.2 IN LEVEL 1. Select the No.2 IN LEVEL of the SOUND MODE. 2. Verify that the No.2 IN LEVEL is set at its initial setting value. LEVEL check MTS STEREO...
- Page 23 AV-36F702 AV-36F802 ADJUSTMENTS OF PURITY AND CONVERGENCE Note: The final adjustment of CONVERGENCE must be done after the FOCUS adjustment. (CONVERGENCE is changed by FOCUS adjustment.) When makes difference by FOCUS adjustment, should be WEDGE DEFLECTION reconfirming PURITY adjustment. YOKE PURITY ADJUSTMENT 1.
- Page 24 AV-36F702 AV-36F802 STATIC CONVERGENCE ADJUSTMENT 1. Input a crosshatch signal. 2. Using 4-pole convergence magnets, overlap the red and blue lines in the center of the screen (Fig. 4) and turn them to magenta (red/ blue). (FRONT VIEW) 3. Using 6-pole convergence magnets, overlap the magenta(red/blue) and green lines in the center of the screen and turn them to white.
- Page 25 AV-36F702 AV-36F802 HOW TO CHECK THE HIGH VOLTAGE HOLD DOWN CIRCUIT 1. HIGH VOLTAGE HOLD DOWN CIRCUIT After repairing the high voltage hold down circuit shown in Fig. 1. This circuit shall be checked to operate correctly. 2. CHECKING OF THE HIGH VOLTAGE HOLD DOWN CIRCUIT (1) Turn the POWER SW ON.
- Page 26 AV-36F702 AV-36F802 SELF CHECK FUNCTIONS 1. Outline This model has self check functions given below. When a malfunction has been detected, the POWER is turned off and the LED flashes to inform of the failure . The malfunction is detected by the signal input state of the control line connected to the microcomputer. 2.
- Page 27 JVC SERVICE & ENGINEERING COMPANY OF AMERICA DIVISION OF JVC AMERICAS CORP. Head office : 1700 Valley Road, Wayne, New Jersey 07470 (973)317-5000 East Coast : 10 New Maple Avenue, Pine Brook, New Jersey 07058 (973)396-1000 Midwest 705 Enterprise St. Aurora, Illinois 60504...
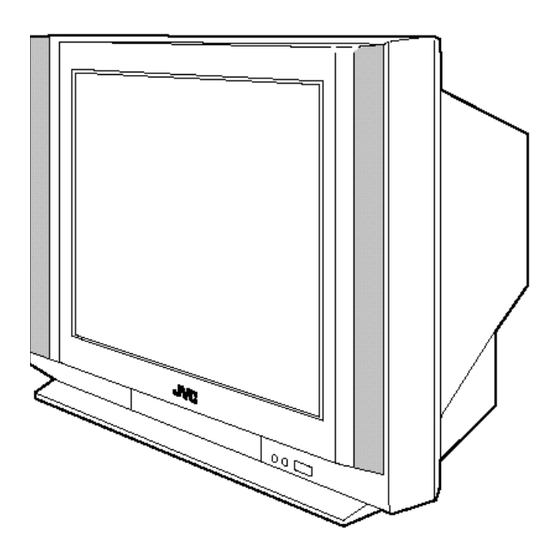
- Page 28 For models: COLOR TELEVISION AV-36F802 USER'S GUIDE AV-36F702 AV-32F802 AV-32F702 AV-27F802 AV-27F702 Illustration of AV-27F802 and RM-C301G IMPORTANT NOTE TO THE CUSTOMER In the spaces below, enter the model and serial number of your television (locat- ed at the rear of the television cabinet). Staple your sales receipt or invoice to the inside cover of this guide.
-
Page 29: Important Safety Precautions
Changes or modifications not approved by JVC could void the warranty. * When you don’t use this TV set for a long period of time, be sure to dis- connect both the power plug from the AC outlet and antenna for your safety. -
Page 30: Important Safeguards
IMPORTANT SAFEGUARDS CAUTION: Please read and retain for your safety. Electrical energy can perform many useful functions. This TV set has been engineered and manufactured to assure your personal safety. But improper use can result in potential electrical shock or fire hazards. In order not to defeat the safeguards incorporated in this TVset, observe the following basic rules for its installation, use and servicing. - Page 31 7 An outside antenna system should not be located in the vicinity of overhead power lines or other electric light or power circuits, or where it can fall into such power lines or circuits. When installing an outside antenna system, extreme care should be taken to keep from touching such power lines or circuits as contact with them might be fatal.
- Page 32 13 For added protection of the TV set during a lightning storm or when the TV set is to be left unattended for an extended period of time, unplug it from the wall outlet and disconnect the antenna.This will prevent damage to product due to lightning storms or power line surges. 14 A TVset and cart combination should be moved with care.
-
Page 33: Table Of Contents
Connecting to a Camcorder ..15 Connecting to JVC AV Compu Link ..6 Purity ....37 On/Off Timer . -
Page 34: Unpacking Your Tv
Unpacking Your Television Thank you for your purchase of a JVC Color Television. Before you begin setting up your new television, please check to make sure you have all of the following items. In addition to this guide, your television box should include:... -
Page 35: Quick Setup 1
The right and left buttons will turn the volume up or down.These buttons are also marked with four arrows and are also used with JVC's onscreen menu system. You will need to use these buttons later in the Quick Setup. -
Page 36: Making Basic Connections
Quick Setup 2 Step Two - Making Basic Connections Next you will need to connect your television to an antenna or cable system. The most basic antenna/cable connection is shown below. For more detailed connections, such as ones where a cable box is required, see pages 11 to 13. Cable/RF connector Illustration of AV-27F802 1) Connect an RF cable out from the wall outlet in to the RF Input on the back of the TV. -
Page 37: Plug In Menu
Your Quick Setup is now complete. You can now begin watching your television, or you can continue on in this guide for more information on connecting audio/video devices, programming your remote control, or using the JVC onscreen menu system to customize your television viewing experience. -
Page 38: Connections
Connections Cable and VCR Connections There are three basic types of antenna or cable connections: • If you have an antenna or have a cable system that does not require you use a cable box to select channels, please refer to Diagram #1. •... - Page 39 Connections Cable and VCR Connections - Continued Diagram #2 Illustration of AV-27F802 1) Connect the antenna or cable TV wire from the wall outlet, in to the RFInput of the cable box. 2) Connect an RF cable from the RFOutput of the cable box, in to the RFInput on the back of the VCR.
- Page 40 Connections Cable and VCR Connections - Continued Diagram #3 Illustration of AV-27F802 1) Connect the antenna or cable TV wire from the wall outlet, in to the RF Input of the two-way splitter. 2) Connect an RFcable from the one of the RFOutputs on the splitter, in to the cable box RF Input.
-
Page 41: Connecting To A Dvd Player
Connections Connecting to a DVD player Illustration of AV-27F802 1) Connect Green cable out from DVD player “Y”Component Output, in to TV“Y” Component Input. 2) Connect Blue cable out from DVDplayer “P ” Component Output, in to TV “P ” Component Input. -
Page 42: Connecting To An External Amplifier
Connections Connecting to an External Amplifier Illustration of AV-27F802 1) Connect the white audio cable from the TV’s Left Audio Output jack to the Amplifier’s Left Audio Input jack. 2) Connect the red audio cable from the TV’s Right Audio Output jack to the Amplifier’s Right Audio Input jack. -
Page 43: Connecting To Jvc Av Compu Link
Compu Link, the VCR or DVD player sends a signal to the television telling it to turn on and switch to the proper video input. • The AV Compu Link cable may be included with the JVC AV Compu Link accessory you wish to connect. If it is not, contact an authorized JVCService Center for part # EWP 805-012. -
Page 44: Remote Control
Tap the CH+ or CH– button to move through the channels one channel at a time. • To move rapidly through the channels using JVC’s Hyperscan feature, press and hold CH+ or CH–. The channels will zip by at a rate of five channels per second. -
Page 45: Remote Programming
Remote Programming Setting the CATV, VCR and DVD Codes You can program your remote to operate your cable box, satellite receiver, VCR or DVD player by using the instructions and codes listed below. If the equipment does not respond to any of the codes listed below or to the code search function, use the remote control sup- plied by the manufacturer. -
Page 46: Vcr Codes
Remote Programming VCR codes The remote control is prog rammed with VCR codes for power on, power off, play, stop, fast-forward, rewind, pause, record, channel up, and channel down operation. 1) Find the VCR brand from the list of codes shown below. 2) Slide the first 2-way selector switch to “TV”... -
Page 47: Dvd Codes
Remote Programming DVD codes The remote control is prog rammed with DVD codes for power on, power off, play, stop, fast-forward, rewind, previous chapter, next chapter, tray open/close, and still/pause operation. 1) Find the DVD player brand from the list of codes shown below. 2) Slide the first 2-way selector switch to “TV”... -
Page 48: Onscreen Menus
Onscreen Menus Using the Guide Certain symbols are used throughout this guide to help you learn about the features of your new television. The ones you will see most frequently are: Up and Down arrows mean press the C + or C –... -
Page 49: Plug In Menu
Plug In Menu Introduction The Plug In Menu comes up automatically when you first turn on the TV after plugging it in. The Plug In Menu helps you to get your TV ready to use by letting you set your preferences for: •... -
Page 50: Auto Clock Set
Plug In Menu Auto Clock Set Before you use any of your TV’s timer functions, you must first set the clock. You may precisely set your clock using the XDS time signal broadcast by most Public Broadcastingstations.To set the clock using the XDS signal: Enter the channel number of your local PBS station Press M To SETCLOCK... -
Page 51: Manual Clock Set
To save settings and exit • You can change the preferences you set in the Plug In Menu at any time using the regular JVC onscreen menu system. NOTE: You will have to reset the clock after a power interruption. You must set the clock before operat -... -
Page 52: Channel Summary
Channel Summary Channel Summary Channel Summary allows you to customize the line-up of channels received by your TV. You can add or delete channels from the line-up or prevent any unauthorized viewers from watching any or all 181 channels . Press the M button To CHANNEL SUMMARY... -
Page 53: V-Chip
V-Chip Your TV is equipped with V-Chip technology which enables TV Parental Guidelines (for United States and Canada) and Movie (MPAA) Guideline controls. V-Chip technology allows you to program your TV to receive, or not to receive, programs based on content according to the guidelines. -
Page 54: Us V-Chip Ratings
V-Chip US V-Chip Ratings U.S. PARENTAL RATING SYSTEMS Programs with the following ratings are appropriate for children. TV Y is Appropriate for All Children. Programs are created for very young viewers and should be suitable for all ages, including children ages 2 - 6. TV Y7 is for Older Children. -
Page 55: Setting Us V-Chip Ratings
V-Chip Setting US V-Chip Ratings Press the M button ToV-CHIP To operate (Lock icon will appear) Press Z to access the V-Chip menu V-CHIP ON OFF SET US TV RATINGS SET MOVIE RATINGS SET CANADIAN RATINGS ENG SET CANADIAN RATINGS FRE UNRATED VIEW BLOCK FINISH To turn V-Chip ON or OFF... - Page 56 V-Chip Setting ratings with the V-Chip button To access Rating information about a certain program, press the V-C button while viewing that program. A display like this will appear : PROGRAM IS RATED : TV-PG - V If you decide you want to block this category of viewing, press "0" while the above screen is visible, and all programs from that category will be blocked.
-
Page 57: Movie Ratings
V-Chip Movie Ratings NR – Not Rated. This is a film which has no rating. In many cases these films were imported from countries which do not use the MPAA ratings system. Other NR films may be from amateur producers who didn’t intend to have their film widely released. -
Page 58: Canadian V-Chip Ratings
V-Chip Canadian V-Chip Ratings E – Exempt. Exempt programming includes:news, sports, documentaries and other information programming, talk shows, music videos, and variety programming. C – Programming Intended for Children. Violence Guidelines:There will be no realistic scenes of violence. Depictions of aggressive behavior will be infrequent and limited to portrayals that are clearly imaginar y, comedic or unrealistic in nature. -
Page 59: Unrated Programs
V-Chip Unrated Programs Notes About Unrated Programs: Unrated programming refers to any programming which does not contain a rating signal. Programming on television stations which do not broadcast rating signals will be placed in the “Unrated Programming" category. Examples of Unrated programs: Emergency Bulletins Locally Originated Programming News... -
Page 60: Set Lock Code
V-Chip Set Lock Code Channel Guard and V-Chip settings are protected by a four-digit Lock Code. Your TV comes pre-set with a Lock Code of "0000". You may change the code to any four-digit number you wish. To change the Lock Code, follow the steps below. Press the M button To SETLOCK CODE... -
Page 61: Picture Settings
Picture Settings Tint Tint allows you to adjust the levels of red and green in your TV picture. Press the M button To TINT To increase the levels of green To increase the levels of red To move to the next setting Color The color function lets you make all the colors in the TV picture appear either more vivid or subtle. -
Page 62: Noise Muting
Picture Settings Noise Muting This feature inserts a blank blue screen over channels which are not broadcasting or are too weak to be received clearly. Press the M button To NOISE MUTING To turn Noise Muting ON or OFF • Noise Muting will not work during Auto Tuner Setup or when you operate Channel Summary. Set Video Status With Set Video Status, you can save your own set of picture quality adjustments as “Choice”... -
Page 63: Sound Settings
Sound Settings Bass You can increase or decrease the level of low-frequency sound in the TV’s audio with the Bass adjustment . Press the M button To BASS To increase the bass To decrease the bass To move to the next setting Treble Use Treble to adjust the level of high-frequency sound in your TV’s audio. -
Page 64: General Items
General Items Purity This helps clean up the picture so that it may not contain any “snow”. Press the M button To PURITY ------------- | ------------- To enter To adjust purity On/Off Timer The On/Off timer lets you program your television to turn itself on or off. You can use it as an alarm to wake up, to help you remember important programs, or as a decoy when you're not home. -
Page 65: Tv Speaker
General Items TV Speaker If your TV is connected to a stereo system, you can turn off the TV speakers and listen to the audio through your stereo. Press the M button To TVSPEAKER TV SPEAKER To turn the TV's speakers ONor OFF when finished •... -
Page 66: V4 Component-In
General Items V4 Component-In (AV-36F802, AV-32F802 & AV-27F802) / V2 Component-In (AV-36F702, AV-32F702 & AV-27F702) Get the best quality video from your DVD player by using this setting and the DVD inputs at the rear of the television. Set either to YES for component input (for DVD) or to NO for composite video input (for a regular VCR). -
Page 67: Button Functions
Button Functions Menu The M button allows you to access JVC’s onscreen menu system. Press M to activate the onscreen menu system. • See individual topics (like “Sound Settings”) for specific information on using menus. Exit and PIP Off Press the E button to leave a menu screen. -
Page 68: Video Status
Button Functions Video Status The V button gives you a choice of three TV picture display settings, including a IDEO TA TUS display of your own preferences. Standard – Resets the picture display to the factory settings. Choice – Displays the setting levels you specified on the "Set Video Status"Menu (see page 35). -
Page 69: Bbe
Button Functions BBE high definition audio adds natural, clear and extraordinary sound quality to any program. Turn BBE On or Off using the BBE button. 100+ Button Use the 100+ button to directly access channels above Channel 99. For example to move to channel 124, press100+, 2 (two), 4 (four). -
Page 70: Vcr Buttons
Move the selector switch to VCR to operate. • The remote is preset with the code 000 to control JVC-brand VCR’s. For any other manufac- turer’s brand VCR, please see the code chart and instructions on page 19. -
Page 71: Pip (Picture-In-Picture)
Button Functions - PIP PIP displays two separate pictures on screen. Your television has 2-Tuner PIP, meaning you can view pictures from two different channels simultaneously. A special set of PIP control but- tons are located on the upper part of the remote control. Descriptions of each button appear on this page. -
Page 72: Freeze
Button Functions - PIP Freeze Use the F button to lock a single, still image onto the PIP window. REEZE • If PIP is off when F is pressed, a snapshot of the main screen is taken and placed in REEZE the PIP window. -
Page 73: Troubleshooting
Troubleshooting... -
Page 74: Warranty
To determine if in-home service is ava i l a ble in your area, either contact the selling dealer (retail- er) or call 1-800-537-5722 to locate the nearest JVC authori zed service center. S e rvice loca- tions can also be obtained from our website h t t p : / / w w w. j v c s e rv i c e. c o m.In-home serv i c e, if ava i l- a bl e, will require clear access to the Te l evision by the service representative s.If in-home serv i c e... - Page 75 HEREIN. JVC SHALL NOT BE LIABLE FOR THE LOSS OF USE OF THE PRODUCT, INCONVENIENCE, OR ANY OTHER DA M AG E S , WHETHER DIRECT, I N C I D E N TAL OR CONSEQU E N T I A L...
-
Page 76: Authorized Service Centers
Please refer to qualified service personnel for repairs. Accessories To purchase accessories for your JVC product, you may contact your local JVC Dealer. From the 48 Continental United States call toll free: 1 (800) 882-2345 or on the web at www.JVC.com... -
Page 77: Search Codes
Search Codes Cable/Satellite Search Codes Function: 1) Slide the first 2-Way Mode Selector switch to CATV. 2) Press the TV P and R + buttons. Hold for at least three seconds and release. OWER ETURN 3) Press TV P , see if the CATV or Satellite box responds. OWER 4) If there was a response, press R +. -
Page 78: Specifications
Specifications Specifications subject to change without notice. - Page 79 JVC CANADA, INC. JVC COMPANY OF AMERICA 21 Finchdene Square Division of JVC Americas Corp. Scarborough, Ontario 1700 Valley Road Canada, M1X 1A7 Wayne, New Jersey, 07470...
-
Page 80: Schematic Diagrams
AV-36F702 AV-36F802 SCHEMATIC DIAGRAMS COLOR TELEVISION BASIC CHASSIS AV-36F702 AV-36F802 CD-ROM No. SML200201 RM-C303G RM-C301G [AV-36F702] [AV-36F802] No. 51907B COPYRIGHT © 2001 VICTOR COMPANY OF JAPAN, LTD. Dec. 2001... - Page 81 AV-36F702 AV-36F802 AV-36F702 AV-36F802 STANDARD CIRCUIT DIAGRAM q NOTE ON USING CIRCUIT DIAGRAMS • 1. SAFETY Type No indication : Ceramic capacitor The components identified by the symbol and shading are : Mylar capacitor critical for safety. For continued safety replace safety critical : Metalized mylar capacitor components only with manufactures recommended parts.
-
Page 82: Semiconductor Shapes
AV-36F702 AV-36F802 CONTENTS SEMICONDUCTOR SHAPES ..........................2-2 BLOCK DIAGRAM ................................2-3 CIRCUIT DIAGRAMS Model AV-36F702 AV-36F802 P.W.B. name MAIN PWB CIRCUIT DIAGRAM P2-7 MAIN, FRONT CONTROL AND POWER SW PWB CIRCUIT DIAGRAMS P2-11 PIP PWB CIRCUIT DIAGRAM — P2-13 AV SELECTOR PWB CIRCUIT DIAGRAM P2-15 P2-17 CRT SOCKET PWB CIRCUIT DIAGRAM... -
Page 83: Block Diagram
AV-36F702 AV-36F702 BLOCK DIAGRAMS AV-36F702 BLOCK DIAGRAM R, G, B TU001 R, G, B TUNER CF021 4.5MHz SCL0 SCL0 TRAP SDA0 SDA0 IC101 RGB DRIVE J601 COM_Y CF041 COM_CB COMPONENT 1 CHIP DECODER 4.5MHz BPF COM_CR VIDEO-IN CRT SOCKET PWB V. - Page 84 AV-36F802 AV-36F802 AV-36F802 BLOCK DIAGRAM R, G, B TU001 R, G, B TUNER CF021 RGB DRIVE IC101 J602 COMPONENT VC-R 1 CHIP DECODER VIDEO-IN CF041 VC-G IC601 VC-B VIDEO2/VIDEO4 CRT SOCKET PWB INPUT SELECT J601 COMPONENT VIDEO-IN V. OUT H. OUT AV SW PWB (2/2) V-PIP(TV) OSD-R...
-
Page 85: Circuit Diagrams
AV-36F702 AV-36F702 AV-36F802 AV-36F802 CIRCUIT DIAGRAMS MAIN PWB CIRCUIT DIAGRAM CN0L1 J601 Video 2 QNN0349-002 BSR_Y2 CNMD1 3DY/C IC651 ∗ C601 R601 IC151 REGULATOR LC601 47/25 GR&3DY/C ∗ NQR0169-001X R156 Y156 ∗ Y/C SW ∗ MAIN PWB ASS'Y Y154 R155 C150 ∗... - Page 86 AV-36F702 AV-36F702 AV-36F802 AV-36F802 MAIN PWB CIRCUIT DIAGRAM TO DAF INNER WJM0212-003A QJB003-033626 CN00P CN00A CN00K CN00Q CN008 CN009 IC401 Q440 ∗ 11.8 4.4V 60Vp-p(V) R407 R434 IC401 LA7841 8.2k V.OUT NRSA02J-0R0X Y401 R440 3.9V D432 ∗ C432 D402 D958 47/25 ∗...
-
Page 87: Av-36F702
AV-36F702 AV-36F702 AV-36F802 AV-36F802 MAIN, FRONT CONTROL AND POWER SW PWB CIRCUIT DIAGRAMS CN00C J810 QNS0001-001 CONTROL COMPULINK COMPULINK MAIN PWB ASS'Y SAC-1542-M2 R406 D810 MTZJ8.2C-T2 R827 J401 R769 R770 R774 R778 (AV-36F702) QNZ0453-001 6.8k 6.8k 6.8k 6.8k 3.6V CN002 4.3V QGB1505J1-35 Q701... - Page 88 AV-36F802 AV-36F802 PIP PWB CIRCUIT DIAGRAM [AV-36F802] AFC2 9V_VC TU001 TUNER-IF1 QAU0206-001 ADRS LOCK SCL SDA 4.6V 2.5V 2.4V 32.1V CF001 R011 R012 R002 C012 Y360 R001 C003 R003 Y002 10/50 R007 R004 L001 C004 C010 C011 10/50 C008 R005 47/25 AN7805F IC001...
- Page 89 AV-36F702 AV-36F702 AV SELECTOR PWB CIRCUIT DIAGRAM [AV-36F702] C_2L Y_2L IC501 Video1 R518 9V_VC VIDEO3 2.1Vp-p(H) J501 R210 L243 QNZ0454-001 R528 L201 L251 D522 VIDEO2 L244 IC201 TC90A53N S2_1 EF201 L242 3L DIGITAL COMB FILTER R558 C201 C252 C508 C236 C203 0.01 0.01...
- Page 90 AV-36F802 AV-36F802 AV SELECTOR PWB CIRCUIT DIAGRAM [AV-36F802] C_2L Y_2L IC501 R518 R210 Video1 9V_VC VIDEO3 2.1Vp-p(H) L243 R528 L201 D522 VIDEO4 EF201 L244 S2_1 L251 R558 C205 C508 C203 R519 LC501 C201 C209 C208 IC501 C206 L242 C236 C242 .47/50 AVSWGND VREFL...
- Page 91 AV-36F702 AV-36F702 AV-36F802 AV-36F802 CRT SOCKET PWB CIRCUIT DIAGRAM A90AJZ90X02 HEATER TP-B TP-G R325 R326 R327 L304 1/2WC L305 1/2WC L306 1/2WC SK001 QQL244K-470Z QQL244K-470Z QQL244K-470Z CRT SOCKET R311 R314 R312 CE42670-001 R315 R310 R313 C361 MAIN PWB 1/250 161V 167V Q311 159V...
- Page 92 AV-36F702 AV-36F702 AV-36F802 AV-36F802 DAF PWB CIRCUIT DIAGRAM R771 3WOMR QRL039J-223 C771 R765 R764 R763 R762 R761 CN0CP 10/50 D761 1/2W 1/2W 1/2W 1/2W 1/2W NZZ000000000429 NZZ000000000428 ES1F-LFG2 180k 180k 180k 180k 180k CN00K D771 C_Pluse MTZJ33A-T2 R755 D762 Q753 V_Amp R752 ES1F-LFG2...
- Page 93 AV-36F702 AV-36F702 AV-36F802 AV-36F802 LF PWB CIRCUIT DIAGRAM MAIN PWB CN00P CN0E3 QRE121J-5R6Y ! C903 R997 1/2W AC275V QFZ9067-104 QFZ9040-104 LF901 QQR0527-004 LINE FILTER C904 R999 AC125V 120 R1/2 QCZ9052-102 R998 2.7M R1/2 QRZ9041-275 Y901 C905 C902 0.047 AC275V QFZ9067-473 QFZ9040-473 LF902 QQR1159-001...
-
Page 94: Pattern Diagrams
AV-36F702 AV-36F702 PATTERN DIAGRAMS CAUTION: FOR CONTINUED PROTECTION AGAINST FIRE HAZARD, TP-91B (B1) TP-E1 MAIN PWB PATTERN DIAGRAM [AV-36F702] REPLACE ONLY WITH SAME TYPE AND RATED FUSE (S) AND ROHM'S MFR'S TYPE CP(S). L026 W331 C432 K941 J601 D521 FR521 L024 W234 W117... - Page 95 AV-36F802 AV-36F802 MAIN PWB PATTERN DIAGRAM [AV-36F802] CAUTION: FOR CONTINUED PROTECTION AGAINST FIRE HAZARD, TP-91B (B1) TP-E1 REPLACE ONLY WITH SAME TYPE AND RATED FUSE (S) AND ROHM'S MFR'S TYPE CP(S). L026 W331 C432 K941 J601 D521 FR521 L024 W234 W117 C035 W346...
-
Page 96: Crt Socket Pwb Pattern Diagram P2-29
AV-36F702 AV-36F802 AV-36F802 CRT SOCKET PWB PATTERN DIAGRAM PIP PWB PATTERN DIAGRAM [AV-36F802] FRONT W004 R335 R3 7 W001 FOCUS ADJ. C321 CKF1378-CU1 R334 R123 PIP TUNER/IF R310 W028 UL MARK R040 W053 C113 R331 R313 HS013 D351 C331 D301 Q107 L304 C118... -
Page 97: Av Selector Pwb Pattern Diagram P2-31
AV-36F702 AV-36F702 AV-36F802 AV-36F802 AV SELECTOR PWB PATTERN DIAGRAM FRONT CONTROL PWB PATTERN DIAGRAM R405 C446 R229 W199 Q218 R406 R230 R231 C251 C237 LC401 Y401 R242 L251 C244 L201 C243 C241 R245 C232 R246 R236 FRONT R247 Q219 R248 R269 C204 R216... -
Page 98: Lf, Daf And Power Sw Pwb Pattern Diagrams P2-33
AV-36F702 AV-36F702 AV-36F802 AV-36F802 LF, DAF AND POWER SW PWB PATTERN DIAGRAMS - LF - FRONT CKF1493-B01-1 UL MARK ISOLATED 00.12.20 NOZAKI R998 Y905 Y904 ISOLATED Y903 Y902 LIVE F901 125V 5A - DAF - R701 L701 T701 C701 FRONT Q751 CKF1455-A01-1 R755... -
Page 99: Channel Chart
AV-36F702 AV-36F802 CHANNEL CHART (US MODE CHANNEL MODE CHANNEL TUNER TUNER BAND BAND BAND BAND CATV REAL DISP. CATV REAL DISP. W+35 W+36 W+37 W+38 W+39 W+40 W+41 W+42 W+43 W+44 W+45 W+46 W+47 W+48 W+49 W+50 W+51 W+52 W+53 W+54 W+55 W+56... - Page 100 AV-36F702 AV-36F802 CHANNEL CHART (CA) MODE CHANNEL MODE CHANNEL TUNER TUNER BAND BAND BAND BAND CATV REAL DISP. CATV REAL DISP. W+35 W+36 W+37 W+38 W+39 W+40 W+41 W+42 W+43 W+44 W+45 W+46 W+47 W+48 W+49 W+50 W+51 W+52 W+53 W+54 W+55 W+56...
- Page 101 JVC SERVICE & ENGINEERING COMPANY OF AMERICA DIVISION OF JVC AMERICAS CORP. Head office : 1700 Valley Road, Wayne, New Jersey 07470 (973)317-5000 East Coast : 10 New Maple Avenue, Pine Brook, New Jersey 07058 (973)396-1000 Midwest 705 Enterprise St. Aurora, Illinois 60504...
-
Page 102: Parts List
AV-36F702 AV-36F802 PARTS LIST CAUTION q The parts identified by the symbol are important for the safety . Whenever replacing these parts, be sure to use specified ones to secure the safety . q The parts not indicated in this Parts List and those which are filled with lines --- in the Parts No. columns will not be supplied . q P. - Page 103 AV-36F702 AV-36F802 CONTENTS USING P.W. BOARD & REMOTE CONTROL UNIT ................. EXPLODED VIEW PARTS LIST ....................... EXPLODED VIEW ............................ [AV-36F702] PRINTED WIRING BOARD PARTS LIST MAIN PW BOARD ASS'Y ............................. 42 DAF PW BOARD ASS’Y ............................46 CRT SOCKET PW BOARD ASS’Y ........................46 FRONT CONTROL PW BOARD ASS’Y .......................
-
Page 104: Av-36F802
AV-36F702 AV-36F802 USING P.W. BOARD & REMOTE CONTROL UNIT Model AV-36F702 AV-36F802 P.W.B ASS’Y MAIN PW BOARD SAC-1542A-M2 SAC-1547A-M2 DAF PW BOARD SAC-2605A-M2 CRT SOCKET PW BOARD SAC-3513A-M2 FRONT CONTROL PW BOARD SAC-8507A-M2 POWER SW PW BOARD SAC-8601A-M2 LF PW BOARD SAC-9506A-M2 PIP PW BOARD —... -
Page 105: Exploded View Parts List
! T1502 QQH0110-001 Within MAIN PWB ! V01 A90AJZ90X02 Inc. DY QMPD200-200-JC POWER CORD CN90PW Within LF PWB LC30191-003A-A REMOCON WINDOW LC41193-001A-C JVC MARK LC20217-004B-A CONTROL KNOB A48457-4-S SPRING WJY0016-003A BRAIDED WIRE WJY0013-002A BRAIDED WIRE(SUB) (x2) LC20629-001B-A S.P HOLDER (x2) -
Page 106: Exploded View
AV-36F702 AV-36F802 EXPLODED VIEW CRT SOCKET PWB FRONT CONTROL PWB DAF PWB PIP PWB (Only for AV-36F802) T1502 POWER SW PWB MAIN PWB LF PWB AV SELECTOR 3D Y/C MODULE (Only for AV-36F802) No. 51907B... -
Page 107: Printed Wiring Board Parts List
AV-36F702 PRINTED WIRING BOARD PARTS LIST(AV-36F702) MAIN PW BOARD ASS’Y(SAC-1542A-M2) ! Symbol No. ! Symbol No. Part No. Part Name Description Local Part No. Part Name Description Local RESISTOR RESISTOR R1001 NRSA63J-473X MG R 47kØ 1/16W R1441 NRSA63J-103X MG R 10kØ... - Page 108 AV-36F702 ! Symbol No. ! Symbol No. Part No. Part Name Description Local Part No. Part Name Description Local RESISTOR CAPACITOR C1024 NCB31HK-103X C CAP. 0.01µF 50V K R1763 NRSA63J-103X MG R 10kØ 1/16W C1025 NCB31HK-102X C CAP. 1000pF 50V K R1764-68 NRSA63J-221X MG R...
- Page 109 AV-36F702 ! Symbol No. ! Symbol No. Part No. Part Name Description Local Part No. Part Name Description Local CAPACITOR COIL C1523 QEHR1EM-108Z E CAP. 1000µF 25V M L1001 QQL244K-560Z COIL 56µH C1524 QETN1EM-108Z E CAP. 1000µF 25V M L1012 QQLZ014-R39 PEAKING COIL C1525...
- Page 110 AV-36F702 ! Symbol No. ! Symbol No. Part No. Part Name Description Local Part No. Part Name Description Local DIODE OTHERS D1952-53 1SS133-T2 SI.DIODE K1920 QQR0872-002 FERRITE BEADS D1954-57 1SR35-400A-T2 SI.DIODE K1931-33 QQR0582-001Z BEADS CORE D1972 MTZJ15C-T2 ZENER DIODE K1935 QQR0582-001Z BEADS CORE D1973...
-
Page 111: Daf Pw Board Ass'y
AV-36F702 CRT SOCKET PW BOARD ASS’Y(SAC-3513A-M2) ! Symbol No. ! Symbol No. Part No. Part Name Description Local Part No. Part Name Description Local OTHERS RESISTOR Y1002-03 NRSA63J-0R0X MG R 0.0Ø 1/16W R3108 NRSA63J-0R0X MG R 0.0Ø 1/16W Y1150 NRSA63J-0R0X MG R 0.0Ø... -
Page 112: Front Control Pw Board Ass'y
AV-36F702 POWER SW PW BOARD ASS’Y(SAC-8601A-M2) ! Symbol No. ! Symbol No. Part No. Part Name Description Local Part No. Part Name Description Local DIODE RESISTOR D3301 1SS133-T2 SI.DIODE R8101 NRSA63J-561X MG R 560Ø 1/16W D3302 1SS133-T2 SI.DIODE R8107 NRSA63J-332X MG R 3.3kØ... -
Page 113: Av Selector Pw Board
AV-36F702 AV SELECTOR PW BOARD ASS’Y(SAC0S511A-M2) ! Symbol No. ! Symbol No. Part No. Part Name Description Local Part No. Part Name Description Local RESISTOR RESISTOR R0081 NRSA63J-102X MG R 1kØ 1/16W R0518 NRSA63J-333X MG R 33kØ 1/16W R0082 NRSA63J-682X MG R 6.8kØ... -
Page 114: Remote Control Unit Parts List (Rm-C303G-1A)
AV-36F702 ! Symbol No. ! Symbol No. Part No. Part Name Description Local Part No. Part Name Description Local CAPACITOR OTHERS J0501 QNZ0454-001 PIN JACK C0344-45 QENC1HM-225Z BP E CAP. 2.2µF 50V M J0502 QNN0349-001 PIN JACK C0371-72 QENC1HM-105Z E CAP. 1µF 50V M J0503... -
Page 115: [Av-36F802]
AV-36F802 PRINTED WIRING BOARD PARTS LIST(AV-36F802) MAIN PW BOARD ASS’Y(SAC-1547A-M2) ! Symbol No. ! Symbol No. Part No. Part Name Description Local Part No. Part Name Description Local RESISTOR RESISTOR R1001 NRSA63J-473X MG R 47kØ 1/16W R1435 NRSA63J-682X MG R 6.8kØ... - Page 116 AV-36F802 ! Symbol No. ! Symbol No. Part No. Part Name Description Local Part No. Part Name Description Local RESISTOR CAPACITOR R1754 NRSA63J-102X MG R 1kØ 1/16W C1024 NCB31HK-103X C CAP. 0.01µF 50V K R1755 NRSA63J-153X MG R 15kØ 1/16W C1025 NCB31HK-102X C CAP.
- Page 117 AV-36F802 ! Symbol No. ! Symbol No. Part No. Part Name Description Local Part No. Part Name Description Local CAPACITOR TRANSFORMER C1516 QCB32HK-561Z C CAP. 560pF 500V K T1501 CE42034-002 H.DRIVE TRANSF. ! T1502 C1521 QETN2EM-106Z E CAP. 10µF 250V M QQH0110-001 ! T1921 C1523...
- Page 118 AV-36F802 ! Symbol No. ! Symbol No. Part No. Part Name Description Local Part No. Part Name Description Local DIODE OTHERS ! FR1525 QRZ9017-4R7 4.7Ø 1/4W D1933 RU3YX-LFC4 SI.DIODE J1601-02 QNN0349-002 PIN JACK D1935 RU3YX-LFC4 SI.DIODE J1810 QNS0001-001 JACK D1937 RU3YX-LFC4 SI.DIODE K1401...
-
Page 119: Daf Pw Board Ass'y
AV-36F802 PIP PW BOARD ASS’Y(SAC0P501A-M2) ! Symbol No. ! Symbol No. Part No. Part Name Description Local Part No. Part Name Description Local OTHERS RESISTOR W1575-81 NRSA63J-0R0X MG R 0.0Ø 1/16W R0001-02 NRSA63J-103X MG R 10kØ 1/16W W1584-85 NRSA63J-0R0X MG R 0.0Ø... -
Page 120: Av Selector Pw Board Ass'y
AV-36F802 AV SELECTOR PW BOARD ASS’Y(SAC0S505A-M2) ! Symbol No. ! Symbol No. Part No. Part Name Description Local Part No. Part Name Description Local RESISTOR CAPACITOR R0081 NRSA63J-102X MG R 1kØ 1/16W C0157-58 QETN1HM-106Z E CAP. 10µF 50V M R0082 NRSA63J-682X MG R 6.8kØ... -
Page 121: Y/C Module Pw Board Ass'y
AV-36F802 ! Symbol No. ! Symbol No. Part No. Part Name Description Local Part No. Part Name Description Local OTHERS J0501 QNZ0454-001 PIN JACK J0502 QNN0349-001 PIN JACK J0503-04 QNN0348-001 PIN JACK W0003 NRSA63J-0R0X MG R 0.0Ø 1/16W W0011 NRSA63J-0R0X MG R 0.0Ø... -
Page 122: Packing Parts List
AV-36F702 AV-36F802 PACKING PACKING PARTS LIST ! Ref.No. Part No. Part Name Description Local CP30055-A02-A TOP COVER CP30056-004-A POLY BAG RM-C301G-2A RC HAND UNIT (AV-36F702) RM-C303G-1A RC HAND UNIT (AV-36F802) LC11157-002A-A CUSHION ASSY 4pcs in 1set LC10181-030A-A PACKING CASE LCT0821-001E-A INST BOOK [ENGLISH] CM36616-001-A... - Page 123 For models: COLOR TELEVISION AV-36F802 USER'S GUIDE AV-36F702 AV-32F802 AV-32F702 AV-27F802 AV-27F702 Illustration of AV-27F802 and RM-C301G IMPORTANT NOTE TO THE CUSTOMER In the spaces below, enter the model and serial number of your television (locat- ed at the rear of the television cabinet). Staple your sales receipt or invoice to the inside cover of this guide.
- Page 124 Changes or modifications not approved by JVC could void the warranty. * When you don’t use this TV set for a long period of time, be sure to dis- connect both the power plug from the AC outlet and antenna for your safety.
- Page 125 IMPORTANT SAFEGUARDS CAUTION: Please read and retain for your safety. Electrical energy can perform many useful functions. This TV set has been engineered and manufactured to assure your personal safety. But improper use can result in potential electrical shock or fire hazards. In order not to defeat the safeguards incorporated in this TVset, observe the following basic rules for its installation, use and servicing.
- Page 126 7 An outside antenna system should not be located in the vicinity of overhead power lines or other electric light or power circuits, or where it can fall into such power lines or circuits. When installing an outside antenna system, extreme care should be taken to keep from touching such power lines or circuits as contact with them might be fatal.
- Page 127 13 For added protection of the TV set during a lightning storm or when the TV set is to be left unattended for an extended period of time, unplug it from the wall outlet and disconnect the antenna.This will prevent damage to product due to lightning storms or power line surges. 14 A TVset and cart combination should be moved with care.
- Page 128 Connecting to a Camcorder ..15 Connecting to JVC AV Compu Link ..6 Purity ....37 On/Off Timer .
- Page 129 Unpacking Your Television Thank you for your purchase of a JVC Color Television. Before you begin setting up your new television, please check to make sure you have all of the following items. In addition to this guide, your television box should include:...
-
Page 130: Quick Setup 1
The right and left buttons will turn the volume up or down.These buttons are also marked with four arrows and are also used with JVC's onscreen menu system. You will need to use these buttons later in the Quick Setup. -
Page 131: Making Basic Connections
Quick Setup 2 Step Two - Making Basic Connections Next you will need to connect your television to an antenna or cable system. The most basic antenna/cable connection is shown below. For more detailed connections, such as ones where a cable box is required, see pages 11 to 13. Cable/RF connector Illustration of AV-27F802 1) Connect an RF cable out from the wall outlet in to the RF Input on the back of the TV. -
Page 132: Plug In Menu
Your Quick Setup is now complete. You can now begin watching your television, or you can continue on in this guide for more information on connecting audio/video devices, programming your remote control, or using the JVC onscreen menu system to customize your television viewing experience. -
Page 133: Connections
Connections Cable and VCR Connections There are three basic types of antenna or cable connections: • If you have an antenna or have a cable system that does not require you use a cable box to select channels, please refer to Diagram #1. •... - Page 134 Connections Cable and VCR Connections - Continued Diagram #2 Illustration of AV-27F802 1) Connect the antenna or cable TV wire from the wall outlet, in to the RFInput of the cable box. 2) Connect an RF cable from the RFOutput of the cable box, in to the RFInput on the back of the VCR.
- Page 135 Connections Cable and VCR Connections - Continued Diagram #3 Illustration of AV-27F802 1) Connect the antenna or cable TV wire from the wall outlet, in to the RF Input of the two-way splitter. 2) Connect an RFcable from the one of the RFOutputs on the splitter, in to the cable box RF Input.
-
Page 136: Connecting To A Dvd Player
Connections Connecting to a DVD player Illustration of AV-27F802 1) Connect Green cable out from DVD player “Y”Component Output, in to TV“Y” Component Input. 2) Connect Blue cable out from DVDplayer “P ” Component Output, in to TV “P ” Component Input. -
Page 137: Connecting To An External Amplifier
Connections Connecting to an External Amplifier Illustration of AV-27F802 1) Connect the white audio cable from the TV’s Left Audio Output jack to the Amplifier’s Left Audio Input jack. 2) Connect the red audio cable from the TV’s Right Audio Output jack to the Amplifier’s Right Audio Input jack. -
Page 138: Connecting To Jvc Av Compu Link
Compu Link, the VCR or DVD player sends a signal to the television telling it to turn on and switch to the proper video input. • The AV Compu Link cable may be included with the JVC AV Compu Link accessory you wish to connect. If it is not, contact an authorized JVCService Center for part # EWP 805-012. -
Page 139: Remote Control
Tap the CH+ or CH– button to move through the channels one channel at a time. • To move rapidly through the channels using JVC’s Hyperscan feature, press and hold CH+ or CH–. The channels will zip by at a rate of five channels per second. -
Page 140: Remote Programming
Remote Programming Setting the CATV, VCR and DVD Codes You can program your remote to operate your cable box, satellite receiver, VCR or DVD player by using the instructions and codes listed below. If the equipment does not respond to any of the codes listed below or to the code search function, use the remote control sup- plied by the manufacturer. -
Page 141: Vcr Codes
Remote Programming VCR codes The remote control is prog rammed with VCR codes for power on, power off, play, stop, fast-forward, rewind, pause, record, channel up, and channel down operation. 1) Find the VCR brand from the list of codes shown below. 2) Slide the first 2-way selector switch to “TV”... -
Page 142: Dvd Codes
Remote Programming DVD codes The remote control is prog rammed with DVD codes for power on, power off, play, stop, fast-forward, rewind, previous chapter, next chapter, tray open/close, and still/pause operation. 1) Find the DVD player brand from the list of codes shown below. 2) Slide the first 2-way selector switch to “TV”... -
Page 143: Onscreen Menus
Onscreen Menus Using the Guide Certain symbols are used throughout this guide to help you learn about the features of your new television. The ones you will see most frequently are: Up and Down arrows mean press the C + or C –... -
Page 144: Plug In Menu
Plug In Menu Introduction The Plug In Menu comes up automatically when you first turn on the TV after plugging it in. The Plug In Menu helps you to get your TV ready to use by letting you set your preferences for: •... -
Page 145: Auto Clock Set
Plug In Menu Auto Clock Set Before you use any of your TV’s timer functions, you must first set the clock. You may precisely set your clock using the XDS time signal broadcast by most Public Broadcastingstations.To set the clock using the XDS signal: Enter the channel number of your local PBS station Press M To SETCLOCK... -
Page 146: Manual Clock Set
To save settings and exit • You can change the preferences you set in the Plug In Menu at any time using the regular JVC onscreen menu system. NOTE: You will have to reset the clock after a power interruption. You must set the clock before operat -... -
Page 147: Channel Summary
Channel Summary Channel Summary Channel Summary allows you to customize the line-up of channels received by your TV. You can add or delete channels from the line-up or prevent any unauthorized viewers from watching any or all 181 channels . Press the M button To CHANNEL SUMMARY... -
Page 148: V-Chip
V-Chip Your TV is equipped with V-Chip technology which enables TV Parental Guidelines (for United States and Canada) and Movie (MPAA) Guideline controls. V-Chip technology allows you to program your TV to receive, or not to receive, programs based on content according to the guidelines. -
Page 149: Us V-Chip Ratings
V-Chip US V-Chip Ratings U.S. PARENTAL RATING SYSTEMS Programs with the following ratings are appropriate for children. TV Y is Appropriate for All Children. Programs are created for very young viewers and should be suitable for all ages, including children ages 2 - 6. TV Y7 is for Older Children. -
Page 150: Setting Us V-Chip Ratings
V-Chip Setting US V-Chip Ratings Press the M button ToV-CHIP To operate (Lock icon will appear) Press Z to access the V-Chip menu V-CHIP ON OFF SET US TV RATINGS SET MOVIE RATINGS SET CANADIAN RATINGS ENG SET CANADIAN RATINGS FRE UNRATED VIEW BLOCK FINISH To turn V-Chip ON or OFF... - Page 151 V-Chip Setting ratings with the V-Chip button To access Rating information about a certain program, press the V-C button while viewing that program. A display like this will appear : PROGRAM IS RATED : TV-PG - V If you decide you want to block this category of viewing, press "0" while the above screen is visible, and all programs from that category will be blocked.
-
Page 152: Movie Ratings
V-Chip Movie Ratings NR – Not Rated. This is a film which has no rating. In many cases these films were imported from countries which do not use the MPAA ratings system. Other NR films may be from amateur producers who didn’t intend to have their film widely released. -
Page 153: Canadian V-Chip Ratings
V-Chip Canadian V-Chip Ratings E – Exempt. Exempt programming includes:news, sports, documentaries and other information programming, talk shows, music videos, and variety programming. C – Programming Intended for Children. Violence Guidelines:There will be no realistic scenes of violence. Depictions of aggressive behavior will be infrequent and limited to portrayals that are clearly imaginar y, comedic or unrealistic in nature. -
Page 154: Unrated Programs
V-Chip Unrated Programs Notes About Unrated Programs: Unrated programming refers to any programming which does not contain a rating signal. Programming on television stations which do not broadcast rating signals will be placed in the “Unrated Programming" category. Examples of Unrated programs: Emergency Bulletins Locally Originated Programming News... -
Page 155: Set Lock Code
V-Chip Set Lock Code Channel Guard and V-Chip settings are protected by a four-digit Lock Code. Your TV comes pre-set with a Lock Code of "0000". You may change the code to any four-digit number you wish. To change the Lock Code, follow the steps below. Press the M button To SETLOCK CODE... -
Page 156: Picture Settings
Picture Settings Tint Tint allows you to adjust the levels of red and green in your TV picture. Press the M button To TINT To increase the levels of green To increase the levels of red To move to the next setting Color The color function lets you make all the colors in the TV picture appear either more vivid or subtle. -
Page 157: Noise Muting
Picture Settings Noise Muting This feature inserts a blank blue screen over channels which are not broadcasting or are too weak to be received clearly. Press the M button To NOISE MUTING To turn Noise Muting ON or OFF • Noise Muting will not work during Auto Tuner Setup or when you operate Channel Summary. Set Video Status With Set Video Status, you can save your own set of picture quality adjustments as “Choice”... -
Page 158: Sound Settings
Sound Settings Bass You can increase or decrease the level of low-frequency sound in the TV’s audio with the Bass adjustment . Press the M button To BASS To increase the bass To decrease the bass To move to the next setting Treble Use Treble to adjust the level of high-frequency sound in your TV’s audio. -
Page 159: General Items
General Items Purity This helps clean up the picture so that it may not contain any “snow”. Press the M button To PURITY ------------- | ------------- To enter To adjust purity On/Off Timer The On/Off timer lets you program your television to turn itself on or off. You can use it as an alarm to wake up, to help you remember important programs, or as a decoy when you're not home. -
Page 160: Tv Speaker
General Items TV Speaker If your TV is connected to a stereo system, you can turn off the TV speakers and listen to the audio through your stereo. Press the M button To TVSPEAKER TV SPEAKER To turn the TV's speakers ONor OFF when finished •... -
Page 161: V4 Component-In
General Items V4 Component-In (AV-36F802, AV-32F802 & AV-27F802) / V2 Component-In (AV-36F702, AV-32F702 & AV-27F702) Get the best quality video from your DVD player by using this setting and the DVD inputs at the rear of the television. Set either to YES for component input (for DVD) or to NO for composite video input (for a regular VCR). -
Page 162: Button Functions
Button Functions Menu The M button allows you to access JVC’s onscreen menu system. Press M to activate the onscreen menu system. • See individual topics (like “Sound Settings”) for specific information on using menus. Exit and PIP Off Press the E button to leave a menu screen. -
Page 163: Video Status
Button Functions Video Status The V button gives you a choice of three TV picture display settings, including a IDEO TA TUS display of your own preferences. Standard – Resets the picture display to the factory settings. Choice – Displays the setting levels you specified on the "Set Video Status"Menu (see page 35). -
Page 164: Bbe
Button Functions BBE high definition audio adds natural, clear and extraordinary sound quality to any program. Turn BBE On or Off using the BBE button. 100+ Button Use the 100+ button to directly access channels above Channel 99. For example to move to channel 124, press100+, 2 (two), 4 (four). -
Page 165: Vcr Buttons
Move the selector switch to VCR to operate. • The remote is preset with the code 000 to control JVC-brand VCR’s. For any other manufac- turer’s brand VCR, please see the code chart and instructions on page 19. -
Page 166: On/Move
Button Functions - PIP PIP displays two separate pictures on screen. Your television has 2-Tuner PIP, meaning you can view pictures from two different channels simultaneously. A special set of PIP control but- tons are located on the upper part of the remote control. Descriptions of each button appear on this page. -
Page 167: Freeze
Button Functions - PIP Freeze Use the F button to lock a single, still image onto the PIP window. REEZE • If PIP is off when F is pressed, a snapshot of the main screen is taken and placed in REEZE the PIP window. -
Page 168: Troubleshooting
Troubleshooting... -
Page 169: Warranty
To determine if in-home service is ava i l a ble in your area, either contact the selling dealer (retail- er) or call 1-800-537-5722 to locate the nearest JVC authori zed service center. S e rvice loca- tions can also be obtained from our website h t t p : / / w w w. j v c s e rv i c e. c o m.In-home serv i c e, if ava i l- a bl e, will require clear access to the Te l evision by the service representative s.If in-home serv i c e... - Page 170 HEREIN. JVC SHALL NOT BE LIABLE FOR THE LOSS OF USE OF THE PRODUCT, INCONVENIENCE, OR ANY OTHER DA M AG E S , WHETHER DIRECT, I N C I D E N TAL OR CONSEQU E N T I A L...
-
Page 171: Authorized Service Centers
Please refer to qualified service personnel for repairs. Accessories To purchase accessories for your JVC product, you may contact your local JVC Dealer. From the 48 Continental United States call toll free: 1 (800) 882-2345 or on the web at www.JVC.com... -
Page 172: Search Codes
Search Codes Cable/Satellite Search Codes Function: 1) Slide the first 2-Way Mode Selector switch to CATV. 2) Press the TV P and R + buttons. Hold for at least three seconds and release. OWER ETURN 3) Press TV P , see if the CATV or Satellite box responds. OWER 4) If there was a response, press R +. -
Page 173: Specifications
Specifications Specifications subject to change without notice. - Page 174 JVC CANADA, INC. JVC COMPANY OF AMERICA 21 Finchdene Square Division of JVC Americas Corp. Scarborough, Ontario 1700 Valley Road Canada, M1X 1A7 Wayne, New Jersey, 07470...
- Page 175 Pour le modèles: MANUEL D’INSTRUCTIONS AV-36F802 POUR TÉLÉVISEUR AV-36F702 EN COULEURS AV-32F802 AV-32F702 AV-27F802 AV-27F702 Illustration du modèle AV-27F802 et RM-C301G REMARQUE : Veuillez inscrire dans les espaces ci-dessous le modèle et le numero de série de votre téléviseur (situés à l’arrière du téléviseur). Agrafez votre reçu ou votre fac- ture à...
- Page 176 5) En cas de problème, débranchez l’appareil et appelez un technicien qualifié. N’essayez pas de réparer vous-même ou de retirer le panneau arrière. Les modifications ou changements non approuvés par JVC peuvent annuler la garantie. * Pour votre sécurité, quand vous n’utilisez pas ce téléviseur pendant une longue péri- ode, déconnectez-le du secteur et débranchez l’antenne .
- Page 177 IMPORTANTES RÈ G LES DE SÉ C URITÉ AVERTISSEMENT: Veuillez lire et retenir ce qui suit pour votre sé c urité . L’énergie électrique autorise de nombreuses applications utiles. Ce téléviseur a été conçu et fabriqué pour assurer la sécurité de l’utilisateur. Mais une utilisation incorrecte peut produire une électrocution ou un incendie .
- Page 178 7 Une antenne extérieure ne doit pas se trouver à proximité d’une ligne électrique, de poteaux d’éclairage public ou autres circuits électriques ou encore à un endroit où elle peut tomber sur de telles lignes ou de tels circuits. Au cours de l’installation d’une antenne extérieure, faites particulièrement attention à...
- Page 179 13 Pour encore mieux protéger votre téléviseur pendant un orage ou si vous ne l’utilisez pas pendant une longue période de temps, débranchez la prise secteur et déconnectez l’an- tenne.Vous évitez ainsi d’endommager le téléviseur en cas de foudre ou de surtensions.
- Page 180 Minuterie On/Off ..37 informatique AV de JVC ... 16 Haut-parleur TV ... 38 Sans Audio .
-
Page 181: Dé B Allage De Votre
Dé b alla ge de votre té l é v iseur Merci d’avoir acheté un téléviseur en couleur JVC. Avant de commencer l’installation de votre nouveau téléviseur, assurez-vous d’avoir les pièces suivantes. Outre ce guide, le carton de votre téléviseur doit comprendre : Deux Piles 1 Téléviseur... -
Page 182: Configuration Rapide 1
. Ces boutons sont également marqués de qua- tre flèches et ils s’utilisent également avec le système JVC de menus à l’écran. Vous devrez utiliser ces boutons plus tard dans la Section de configuration rapide. -
Page 183: Réalisation Des Connexiones De Base
Configuration rapide 2 Deuxiè m e é t ape – Ré a lisation des connexiones de base Vous devrez ensuite raccorder votre téléviseur à une antenne ou à un système de câblovision. La connexion la plus simple à une antenne ou à un système de câblovision est illustrée ci- après. -
Page 184: Le Plug In Menu
- sation du système JVC de menus à l’écran pour particulariser votre expérience d’écoute. La Configuration rapide... -
Page 185: Connexions
Connexions Connexions de câ b le et magné t oscope Il existe trois types de base de connexion d’antenne ou de câble: • Si vous avez une antenne ou un système de câble qui ne vous oblige pas à utiliser une boîte de câble pour sélectionner les canaux, veuillez vous reporter au sché... - Page 186 Connexions Connexions de câ b le et magné t oscope – suite Sché m a No. 2 Illustration du modèle AV-27F802 1) Raccordez le fil de câblovision ou d’antenne provenant de la sortie murale dans l’entrée HF de la boîte de câble. 2) Raccordez un câble HF provenant de la sortie HF de la boîte de câble dans l’entrée HF à...
- Page 187 Connexions Connexions de câ b le et magné t oscope – suite Sché m a No.3 Illustration du modèle AV-27F802 1) Raccordez le fil de câblovision ou d’antenne provenant de la sortie murale dans l’entrée HF du répartiteur à deux voies. 2) Raccordez un câble HF provenant de l’une des sorties HF du répartiteur à...
-
Page 188: Connexion À Un Lecteur De Dvd
Connexions Connexion à un Lecteur de DVD Illustration du modèle AV-27F802 1) Raccordez le câble vert provenant de la sortie composant « Y » du lecteur de DVD à l’en- trée du composant « Y » du téléviseur. 2) Raccordez le câble bleu provenant de la sortie composant « P »... -
Page 189: Connexion À Un Amplificateur Extérieur
Connexions Connexion à un Amplificateur Exté r ieur Illustration du modèle AV-27F802 1) Raccordez le câble audio blanc provenant du jack de sortie audio gauche du téléviseur au jack d’entrée audio gauche de l’amplificateur. 2) Raccordez le câble audio rouge provenant du jack de sortie audio droit du téléviseur au jack d’entrée audio droit de l’amplificateur. -
Page 190: Connexions Au Liaison Informatique Av De Jvc
• Si vous utilisez l’entrée 1 pour l’entrée vidéo de votre boîte de câble, utilisez le Code B mag- nétoscope pour sélectionner l’entrée 2 vidéo TV. • Pour raccorder un amplificateur ou un récepteur haute fidélité JVC en vue de l’obtention d’un cinéma domestique entièrement automatisé, reportez-vous aux consignes de raccordement de l’appareil haute fidélité... -
Page 191: Té L É C Ommande
à la fois. • Pour passer rapidement à travers les canaux à l’aide de la fonction Hyperscan de JVC, enfoncez et tenez les boutons CH+ ou CH–. Les canaux défileront au rythme de cinq par seconde. -
Page 192: Programmation De La
Programmation de la Té l é c ommande R é g l a ge des Codes CAT V, M ag n é t o s c o p e , et lecteur DV D Vous pouvez programmer votre télécommande de manière à actionner votre boîte de câbl e, récepteur satellite, magnétoscope ou lecteur de DVD en vous reportant aux instructions et aux codes apparaissant ci-après. -
Page 193: Codes De Magnétoscope
Programmation de la Té l é c ommande Codes de Magné t oscope La télécommande est programmée avec les codes magnétoscope pour la mise en marche et à l’arrêt, la lecture, l’arrêt, l’avance rapide, le rembobinage et le balayage de canaux vers le haut et vers le bas. -
Page 194: Codes De Lecteur Dvd
Programmation de la Té l é c ommande Codes de lecteur DVD La télécommande est programmée avec les codes DVD pour la mise en marche et à l’arrêt, la lecture, l’arrêt, l’avance rapide, le rembobinage, chapitre précédent, chapitre suivant, l’overture/la fermeture du plateau, et l’image fixe/la pause. 1) Repérez la marque de lecteur DVD à... -
Page 195: Les Menus À L' É C Ran
Les Menus à l’ É c ran Utilisation de ce Guide Les flèches montante et descendante signifient d’appuyer sur les boutons Channel Up ou Channel Down. Une pression des boutons de flèche montante ou descendante vous permet de : Les flèches montante et descendante signifient d’appuyer sur les boutons Channel Up ou Channel Down. -
Page 196: Plug In Menu
Plug In Menu Introduction Le Plug In Menu remonte automatiquement lorsque vous mettez le téléviseur en marche la première fois après l’avoir branché. Le Plug In Menu vous aide à préparer votre téléviseur à l’utilisation en vous permettant de fixer vos choix pour : •... -
Page 197: Régler Horloge Automatique
Plug In Menu Ré g ler Horloge Automatique Vous devez d’abord régler l’horloge a vant d’utiliser l’une quelconque des fonctions de minuterie de votre téléviseur. Vous pouvez régler votre horloge a vec précision à l’aide du signal horaire XDS diffusé par la plupart des stations PBS. Pour régler l’horloge à l’aide du signal XDS : Introduisez le numéro de canal de votre station PBS locale Appuyez sur M Pour RÉGLERHORLOGE... -
Page 198: Régler Horloge Manuel
Pour mettre les réglages en mémoire et quitter • Vous pouvez modifier les choix que vous avez définis dans le Plug In Menu à tout moment à l’aide du système de menus à l’écran JVC. REMARQUE : Vous devrez remettre l’horloge à l’heure après une panne secteur. Vous devez régler l’horloge... -
Page 199: Sommaire Canaux
Sommaire Canaux Sommaire Canaux Sommaire canaux vous permet de particulariser l’éventail de canaux reçus par votre téléviseur. Vous pouvez ajouter ou éliminer des canaux de la liste de balayage ou les verrouiller afin d’em- pêcher des spectateurs non autorisés de regarder un ou plusieurs parmi ces canaux (jusqu’à 181). -
Page 200: V-Chip
V-Chip Votre téléviseur est pourvu de la technologie puce V, ce qui permet aux parents d’imposer des Directives parentales pour la télévision (aux États-Unis et au Canada) et les films (MPAA). La technologie de la puce V vous permet de programmer votre téléviseur de manière à recevoir, ou à ne pas recevoir, certains programmes sur la base de leur contenu conformément aux directives. - Page 201 V-Chip Fixer Cotes Té l é v iseur (Systè m es Amé r icains) SYSTÈ M ES AMÉ R ICAINS DE COTES PARENTALES Les programmes possè d ant les cotes suivantes sont approprié s pour les enfants. TV Y est approprié pour tous les enfants. Les programmes sont réalisés pour de très jeunes spectateurs et ils devraient convenir à...
- Page 202 V-Chip Fixer Cotes Té l é v iseur Appuyez sur le bouton M Vers V-CHIP Pour exécuter (l’icône de verrouillage aparaît) Appuyez sur Z pour accéder au menu Puce V V-CHIP ON OFF FIXER COTES TÉlÉVISEUR FIXER COTES FILM SYST CLASSIFICAT CAN ANG SYST CLASSIFICAT CAN FRA NONCOTÉ...
- Page 203 V-Chip Fixer cotes avec le bouton V-Chip Pour accéder aux informations de cote au sujet d’un programme particulier, appuyez sur le bouton de la puce V tout en regardant ce programme. Le message suivant apparaît : LE PROGRAMME EST COTÉ : TV-PG - V Si vous décidez que vous voulez bloquer cette catégorie d’écoute, appuyez sur «...
- Page 204 V-Chip Fixer Coté s Film NR - Non coté . Il s’agit d’un film non coté. Ces films sont souvent importés de pays qui n’utilisent pas le système de cotes MPAA. D’autres films non cotés peuvent être l’oeuvre de réalisateurs amateurs qui n’avaient pas l’intention de diffuser leur film dans le grand public.
- Page 205 V-Chip Cotes Canadiennes de puce V E – Exempté e s. Les programmes exempts comprennent : les informations, les émissions sportives, les documentaires et autres programmes d’information, les débats, les vidéos de musique, et les programmes de variétes. G – Gé n é r al. Directives de violence :il n’y aura aucune scène réaliste de violence.
- Page 206 V-Chip Programmes Non Coté Remarques au sujet des progranmmes non coté s : La programmation non cotée désigne tout programme qui ne contient pas de signal de cote. Les programmes des postes de télévision qui ne transmettent pas de signaux de cote seront dans la catégorie «...
-
Page 207: Régler Code Verrouiller
V-Chip Ré g ler Code Verrouiller Les réglages de canal réservé et de puce V sont protégés par un code de verrouillage à quatre chiffres. Votre téléviseur est offert préréglé avec un code de verrouillage de 0000. Vous pouvez changer le code à tout numéro à quatre chiffres que vous désirez. Pour changer le code de verrouillage, suivez les étapes ci-après. -
Page 208: Ré G Lages De I' I Mage
Ré g la ges de l’ I ma ge Teinte La teinte vous permet de régler les niveaux de rouge et de vert dans l’image de votre téléviseur. Appuyez sur le bouton M Pour TEINTE Pour augmenter le vert Pour augmenter le rouge Pour passer à... -
Page 209: Bruit Réduit
Ré g la ges de l’ I ma ge Bruit Ré d uit Cette fonction insère un écran bleu vide par-dessus les canaux qui ne transmettent pas ou qui sont trop faibles pour être reçus clairement. Appuyez sur le bouton M Pour BRUITRÉDUIT Pour activer ou inhibiter le Bruit Réduit •... -
Page 210: Ré G Lages Du Son
Ré g la ges du Son Basse La fonction de réglage de niveau Basse vous permet de monter ou de réduire le niveau des sons à basse fréquence du téléviseur. Appuyez sur le bouton M Pour BASSE Pour augmenter le niveau des graves Pour diminuer le niveau des graves Pour passer à... -
Page 211: É L É M Ents Gé N É R Aux
É l é m ents Gé n é r aux Purete Ceci aide à nettoyer l’image pour y enlever la « neige ». Appuyez sur le bouton M Pour PURETE ------------- | ------------- Pour introduisez Pour réglage purete Minuterie On/Off Faites savoir à... -
Page 212: Sans Audio
É l é m ents Gé n é r aux H. Parleur TV Si votre téléviseur est raccordé à une chaîne stéréophonique, vous pouvez mettre les haut-par- leurs du téléviseur hors service et écouter avec les haut-parleurs de votre chaîne. Appuyez sur le bouton M Pour H. -
Page 213: Entrée De Composant
É l é m ents Gé n é r aux Entré e de Composant Obtenez la meilleure qualité visuelle de votre lecteur de DVD en utilisant ce réglage et les entrées DVD à l’arrière du téléviseur. Mettez à la position OUI pour entrée de composant (pour DVD) ou NON pour entrée vidéo composée (pour un magnétoscope régulier). -
Page 214: Fonctions Des Boutons
Fonctions des Boutons Menu Le bouton M vous permet d’accéder au système de menus à l’écran JVC. Appuyez sur pour activer le système de menus à l’écran. • Reportez-vous aux sections individuelles (telles que « Réglages du son ») pour obtenir des informations précises sur l’utilisation des menus. -
Page 215: Video Status (Statut Vidéo)
Fonctions des Boutons Video Status (Statut Vidé o ) Le bouton V vous permet de sélectionner l’un de trois réglages d’affichage d’image, IDEO TA TUS y compris un affichage de vos propres préférences. Standard – Réinitialise les réglages de l’image aux niveaux standard usine. Choix –... -
Page 216: Bbe
Fonctions des Boutons L’audio à haute définition BBE ajoute un son naturel, clair et de très haute qualité à tout pro- gramme. Activez ou inhibitez BBE à l’aide du bouton BBE. Bouton 100+ Le bouton 100+ permet d’accéder directement aux canaux au-dessus de 99. Ainsi, pour passer au canal 124 ;appuyez sur le 100+, 2 (deux), 4 (quatre). -
Page 217: Boutons Magnétoscope
• La télécommande est préréglée avec le code 000 pour commander les lecteurs DVD de mar- que JVC. Pour un lecteur DVD de toute autre marque, reportez-vous à la liste de codes et aux instructions figurant à la page 20. -
Page 218: Pip (Image-Sur-Image)
Fonctions des Boutons - PIP PIP affiche deux images distinctes à l’écran. Votre téléviseur possède la PIP à deux syntonisa- teurs, ce qui signifie que vous pouvez voir, simultanément, les images provenant de deux canaux distincts. Une série spéciale de boutons de commande PIP est située sur la partie supérieure de la télécommande. -
Page 219: Freeze
Fonctions des Boutons - PIP Freeze Utilisez le bouton Freeze pour bloquer une seule image fixe sur la fenêtre PIP. • Si la fonction PIP est inhibée lorsqu’on appuie sur Freeze, un instantané de l’écran principal est pris et placé dans la fenêtre PIP. •... -
Page 220: Guide De Dépannage
Guide de Dé p anna ge... -
Page 221: Garantie
VOUS DEVEZ : • rapporter vos produits à un centre de service agréé JVC, accompagnés d'une copie de votre facture. Pour connaître le centre de service JVC agréé le plus proche de vous, appelez au numéro sans frais (800) 252-5722 (É.U. SEULEMENT). - Page 222 également avoir d'autres droits qui var i- ent d'un état à l'autre . Si vous avez des questions concernant votre produit JVC, veuillez vous mettre en contact avec notre Service clientèle :...
-
Page 223: Centres De Réparations Agréés
États-Unis, veuillez composer le 1 (800) 537-5722 pour votre cen- tre de service agréé le plus proche ou visitez notre site Web à www.JVC.com N’oubliez pas de conserver votre facture pour vous prévaloir du service sous couvert de garantie. -
Page 224: Codes De Recherche
Codes de Recherche Fonction des Codes de Recherche de Boî t e de Câ b le ou d’ A ntenne Parabolique : 1) Faites glisser l’interrupteur sélecteur de mode à deux voies à la position CATV. 2) Appuyez sur les boutons TV P et R + pendant au moins trois secondes, puis OWER... - Page 225 Spé c ifications Spécifications soumises à modification sans prévais.
- Page 226 JVC COMPANY OF AMERICA JVC CANADA, INC. Division of JVC Americas Corp. 21 Finchdene Square 1700 Valley Road Scarborough, Ontario Wayne, New Jersey, 07470 Canada, M1X 1A7...
-
Page 227: Service Manual
AV-36F702 AV-36F802 SERVICE MANUAL COLOR TELEVISION BASIC CHASSIS AV-36F702 AV-36F802 RM-C303G RM-C301G [AV-36F702] [AV-36F802] CONTENTS SPECIFICATIONS ............................2 SAFETY PRECAUTIONS ........................3 FEATURES ..............................4 MAIN DIFFERENCE LIST ........................5 FUNCTIONS .............................6 SPECIFIC SERVICE INSTRUCTIONS ....................7 SERVICE ADJUSTMENTS ........................13 ¤ STANDARD CIRCUIT DIAGRAM (APPENDIX) .................. 2-1 PARTS LIST ............................37 No. -
Page 228: Specifications
AV-36F702 AV-36F802 SPECIFICATIONS Items Contents Dimensions (W × H × D) 37-7/8” × 30-1/2” × 24-1/2” / 96.2cm × 77.3cm × 62.1cm ················································································································································································································ Mass 149.6 lbs / 68.0 kg ················································································································································································································ TV RF System CCIR(M) ················································································································································································································ Color Sound System NTSC, BTSC System (Multi Channel Sound) ················································································································································································································... -
Page 229: Safety Precautions
AV-36F702 AV-36F802 SAFETY PRECAUTIONS 1. The design of this product contains special hardware, many circuits 10. Isolation Check and components specially for safety purposes. For continued pro- (Safety for Electrical Shock Hazard) tection, no changes should be made to the original design unless After re-assembling the product, always perform an isolation check authorized in writing by the manufacturer. -
Page 230: Features
AV-36F702 AV-36F802 FEATURES • • Full-flat CRT (cathode ray tube) reproduces fine textured picture in 3 LINE Digital Y/C Separation circuit improved picture quality. every detail. [AV-36F802] • • C bus control utilizes single chip ICs. Component input terminal for taking best advantage of Component •... -
Page 231: Main Difference List
AV-36F702 AV-36F802 MAIN DIFFERENCE LIST Model AV-36F702 AV-36F802 Part name MAIN PWB SAC-1542A-M2 SAC-1547A-M2 PIP PWB — SAC0P501A-M2 AV SELECTOR PWB SAC0S511A-M2 SAC0S505A-M2 3D Y/C MODULE PWB — SAC-0Y501A No. 51907B... -
Page 232: Functions
AV-36F702 AV-36F802 FUNCTIONS FRONT PANEL ON TIMER POWER FRONT PANEL DOOR OPENED REMOTE CONTROL UNIT REAR PANEL (RM-C301G-2A) (RM-C303G-1A) [AV-36F702] [AV-36F802] [AV-36F702] TV CATV TV CATV POWER POWER CHANNEL ON/MOVE INPUT SOURCE FREEZE SWAP INPUT VIDEO STATUS VIDEO STATUS DISPLAY DISPLAY SLEEP TIMER 100+... -
Page 233: Specific Service Instructions
AV-36F702 AV-36F802 SPECIFIC SERVICE INSTRUCTIONS DISASSEMBLY PROCEDURE REMOVING THE REAR COVER REMOVING THE DAF PW BOARD • After removing the rear cover and chassis. 1. Unplug the power supply cord. 1. Lift the right side of the DAF PWB while pressing the PWB stopper 2. - Page 234 AV-36F702 AV-36F802 FRONT CABINET SPEAKER CRT SOCKET PWB FRONT CONTROL PWB CLAW (x4) DAF PWB CLAW PWB STOPPER CHASSIS BASE POWER SW PWB CLAW MAIN PWB STOPPER LF PWB REAR COVER STOPPER D (x4) [AV-36F702] (x6) [AV-36F802] (x9) (x3) Fig.1 No.
- Page 235 AV-36F702 AV-36F802 REMOVING THE CRT * Replacement of the CRT should be performed by 2 or more persons. • CRT CHANGE TABLE After removing the rear cover, chassis etc., 1. Putting the CRT change table on soft cloth, the CRT change table should also be covered with such soft cloth (shown in Fig.
- Page 236 AV-36F702 AV-36F802 MEMORY IC REPLACEMENT 1. Memory IC This model use a memory IC. This memory IC stores data for proper operation of the video and deflection circuits. When replacing, be sure to use an IC containing this (initial value) data. 2.
- Page 237 AV-36F702 AV-36F802 TABLE 1 (System Constant setting) Setting value Setting item Setting content AV-36F702 AV-36F802 AV-27F802 AV-32F802 AV-36F802 AV-27F702 AV-32F702 AV-36D502 AV-32D502 AV-27D502 AV-36F702 AV-36F702 AV-36F802 MODEL AV-32D302 AV-36D302 AV-32D202 AV-36D202 AV-36230 AV-32230 AV-36260 AV-32260 AV-27260 PURITY V-CHIP CAN V-CHIP TABLE 2 (User setting value) Setting item Setting value...
-
Page 238: Replacement Of Chip Component
AV-36F702 AV-36F802 REPLACEMENT OF CHIP COMPONENT CAUTIONS 1. Avoid heating for more than 3 seconds. 2. Do not rub the electrodes and the resist parts of the pattern. 3. When removing a chip part, melt the solder adequately. 4. Do not reuse a chip part after removing it. SOLDERING IRON 1. -
Page 239: Service Adjustments
AV-36F702 AV-36F802 SERVICE ADJUSTMENTS ADJUSTMENT PREPARATION 1. You can make the necessary adjustments for this unit with either the remote control unit or with the adjustment equipment and parts as given below. 2. Adjustment with the remote control unit is made on the basis of the initial setting values, however, the new setting values which set the screen to its optimum condition may differ from the initial settings. - Page 240 AV-36F702 AV-36F802 ADJUSTMENT LOCATIONS POWER SW PWB FRONT CONTROL PWB FRONT D101 S706 S704 S702 IC101 S705 S703 S702 : MENU S703 : CHANNEL– S704 : CHANNEL+ CN007 CN006 S705 : VOLUME– S701 S706 : VOLUME+ LINE FILTER MAIN PWB FRONT CN006 FRONT...
- Page 241 AV-36F702 AV-36F802 BASIC OPERATION OF SERVICE MENU 1. TOOL OF SERVICE MENU OPERATION Operate the SERVICE MENU with the REMOTE CONTROL UNIT. 2. SERVICE MENU ITEMS In general, basic setting (adjustments) items or verifications are performed in the SERVICE MENU. •...
- Page 242 AV-36F702 AV-36F802 SERVICE MENU (MAIN MENU) SCREEN PICTURE MODE SERVICE MENU PICTURE SOUND THEATER OTHERS LOW LIGHT HIGH LIGHT RF AFC1 RF AFC2 VCO(CW) I2C BUS CTRL SELECT 1. BRIGHT SELECT 99999999 EXIT BY STATUS OPERATE BY EXIT BY [AV-36F702] 3-D Y/C MODE SOUND MODE OTHERS MODE...
- Page 243 AV-36F702 AV-36F802 (4) Setting method SETTING ITEM 1) UP / DOWN key of the MENU Select the SETTING ITEM. 2) LEFT / RIGHT key of the MENU Setting (adjust) the SETTING VALUE of the SETTING ITEM. When the key is released the SETTING VALUE will be stored (memorized). 3) EXIT key Returns to the previous screen.
- Page 244 AV-36F702 AV-36F802 INITIAL SETTING VALUE OF SERVICE MENU 1. Adjustment of the SERVICE MENU is made on the basis of the initial setting values; however, the new setting values which set the screen in its optimum condition may differ from the initial setting. 2.
- Page 245 AV-36F702 AV-36F802 Setting (Adjustment) item Variable range Initial setting value Remark R Y GAIN 000 / 001 CMP R Y GA 000 / 001 G Y PHASE 000 / 001 CMP G Y PH 000 / 001 CD MATRIX 000 — 003 CMP CD MAT 000 —...
- Page 246 AV-36F702 AV-36F802 Setting (Adjustment) item Variable range Initial setting value Remark H EHT 000 — 007 BTM PIN 000 — 031 V BLK LOW 000 — 003 V BLK UP 000 — 003 CAPTION IN 000 / 001 H BLK 000 / 001 SCREEN 000 / 001...
- Page 247 AV-36F702 AV-36F802 • SOUND MODE Setting (Adjustment) item Variable range Initial setting value Remark NOISE DET. 000 / 001 IN LEVEL 000 — 063 FH MONITOR 000 / 001 STEREO VCO 000 — 063 PILOT CAN. 000 / 001 FILTER 000 —...
- Page 248 AV-36F702 AV-36F802 • OTHERS MODE Setting (Adjustment) item Variable range Initial setting value Remark OSD POS. 000 — 007 CCD POS. 000 — 015 EOSEL 000 / 001 MENU COLOR 000 — –030 –010 MENU PICT. 000 — –030 –010 MENU BRI.
- Page 249 AV-36F702 AV-36F802 • 3-D Y/C MODE [Only for AV-36F802] Setting (Adjustment) item Variable range Initial setting value Remark YC 001 YC 002 YC 003 YC 004 YC 005 YC 006 YC 007 YC 008 YC 009 YC 010 YC 011 YC 012 YC 013 YC 014...
- Page 250 AV-36F702 AV-36F802 Setting (Adjustment) item Variable range Initial setting value Remark YC 048 YC 049 YC 050 000 / 001 YC 051 000 / 001 YC 052 YC 053 000 / 001 YC 054 000 / 001 YC 055 000 / 001 YC 056 000 / 001 YC 057...
- Page 251 AV-36F702 AV-36F802 Setting (Adjustment) item Variable range Initial setting value Remark YC 095 DBL 000 / 001 YC 096 DBL 000 / 001 YC 097 DBL 000 / 001 YC 098 DBL 000 / 001 YC 099 DBL YC 100 DBL YC 101 DBL 000 / 001 YC 102 DBL...
- Page 252 AV-36F702 AV-36F802 ADJUSTMENTS B1 POWER SUPPLY Measuring Item Test point Adjustment part Description instrument Check of DC Voltmeter R507 C504 1. Receive a black-and-white signal. side (B1) 2. Connect the DC Voltmeter to R507 C504 side (B1) and Q511 heatsink B1 POWER SUPPLY Q511...
- Page 253 AV-36F702 AV-36F802 ADJUSTMENT OF WHITE BALANCE Measuring Test point Adjustment part Item Description instrument WHITE Signal No.1 BRIGHT Note : generator BALANCE Set VIDEO STATUS to “STANDARD”. (Low Light) R CUTOFF Remote G CUTOFF adjustment 1. Receive a black-and-white signal.(Color off) control unit B CUTOFF 2.
- Page 254 AV-36F702 AV-36F802 Measuring Item Test point Adjustment part Description instrument No.8 P R DR Notes: Signal HIGH LIGHT generator No.10 P B DR • Proceed to the following this adjustment after having completed the adjustments of LOW LIGHT WHITE BALANCE and HIGH LIGHT WHITE WHITE BALANCE for the main picture.
- Page 255 AV-36F702 AV-36F802 ADJUSTMENT OF DEFLECTION Measuring Item Test point Adjustment part Description instrument V CENTER and Signal No.68 V CENTER Note: generator No.78 TRAPEZ Proceed to the following this adjustment after having completed the TRAPEZIUM adjustment adjustments of SUB BRIGHT and SUB CONTRAST. Remote control unit 1.
- Page 256 AV-36F702 AV-36F802 Measuring Item Test point Adjustment part Description instrument SIDE PIN and Signal No.76 SIDE PIN Note: generator No.82 TOP PIN Proceed to the following this adjustment after having completed the CORNER PIN adjsutment No.84 BTM PIN adjustments of FOCUS, SUB BRIGHT, SUB CONTRAST, V CENTER, Remote TRAPEZIUM, V-SIZE and V-LINEARITY.
- Page 257 AV-36F702 AV-36F802 ADJUSTMENT OF CHROMA Measuring Item Test point Adjustment part Description instrument SUB COLOR Signal TP-B No.3 COLOR Notes: • Proceed to the following this adjustment after having completed the adjustment generator TP-E1 ( [CRT SOCKET adjustment of CONTRAST. Oscilloscope PWB] •...
- Page 258 AV-36F702 AV-36F802 ADJUSTMENT OF MTS CIRCUIT Measuring Item Test point Adjustment part Description instrument MTS INPUT Remote No.2 IN LEVEL 1. Select the No.2 IN LEVEL of the SOUND MODE. LEVEL control unit 2. Verify that the No.2 IN LEVEL is set at its initial setting value. check MTS STEREO Signal...
- Page 259 AV-36F702 AV-36F802 ADJUSTMENTS OF PURITY AND CONVERGENCE Note: The final adjustment of CONVERGENCE must be done after the FOCUS adjustment. (CONVERGENCE is changed by FOCUS adjustment.) When makes difference by FOCUS adjustment, should be WEDGE DEFLECTION reconfirming PURITY adjustment. YOKE PURITY ADJUSTMENT 1.
- Page 260 AV-36F702 AV-36F802 STATIC CONVERGENCE ADJUSTMENT 1. Input a crosshatch signal. 2. Using 4-pole convergence magnets, overlap the red and blue lines in the center of the screen (Fig. 4) and turn them to magenta (red/ blue). (FRONT VIEW) 3. Using 6-pole convergence magnets, overlap the magenta(red/blue) and green lines in the center of the screen and turn them to white.
- Page 261 AV-36F702 AV-36F802 HOW TO CHECK THE HIGH VOLTAGE HOLD DOWN CIRCUIT 1. HIGH VOLTAGE HOLD DOWN CIRCUIT After repairing the high voltage hold down circuit shown in Fig. 1. This circuit shall be checked to operate correctly. 2. CHECKING OF THE HIGH VOLTAGE HOLD DOWN CIRCUIT (1) Turn the POWER SW ON.
- Page 262 AV-36F702 AV-36F802 SELF CHECK FUNCTIONS 1. Outline This model has self check functions given below. When a malfunction has been detected, the POWER is turned off and the LED flashes to inform of the failure . The malfunction is detected by the signal input state of the control line connected to the microcomputer. 2.
- Page 263 JVC SERVICE & ENGINEERING COMPANY OF AMERICA DIVISION OF JVC AMERICAS CORP. Head office : 1700 Valley Road, Wayne, New Jersey 07470 (973)317-5000 East Coast : 10 New Maple Avenue, Pine Brook, New Jersey 07058 (973)396-1000 Midwest 705 Enterprise St. Aurora, Illinois 60504...
Need help?
Do you have a question about the AV-36F802/Y and is the answer not in the manual?
Questions and answers