Table of Contents
Advertisement
Available languages
Available languages
Quick Links
Advertisement
Table of Contents

Related Manuals for Axis P33-V Series


Summary of Contents for Axis P33-V Series
- Page 1 INSTALLATION GUIDE Pendant Kit for AXIS P33-V Network Camera Series...
-
Page 2: Contact Information
• find answers to resolved problems in the FAQ database. Search by product, category, or phrase • report problems to Axis support staff by logging in to your private support area • chat with Axis support staff (selected countries only) •... -
Page 3: Installation Steps
Accessories in www.axis.com Please read through the entire guide before proceeding with the installation. For all other aspects of using the Axis network camera, please see the Installation Guide and User’s Manual, available from www.axis.com/techsup Installation steps •... -
Page 4: Package Contents
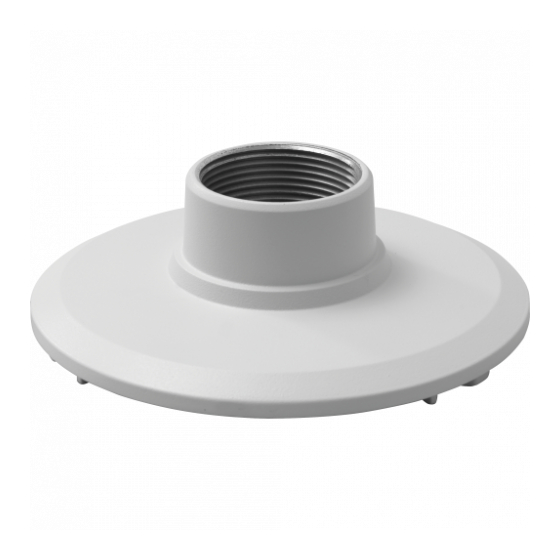
Page 4 Pendant Kit Installation Guide Package contents • 1 Pendant adapter • 2 M4x8 screws • 1 M4x12 screw 2 M4x8 screws Logotype arrow points to where the logo will appear Pendant adapter when the installation (bottom) is complete mm, 1.75 in Pendant adapter (side view) -
Page 5: Install Pendant Kit
Pendant Kit Installation Guide Page 5 Install pendant kit 1. Install the mount of your choice with necessary cables threaded through it according the instructions included with the mounting kit. 2. Attach the pendant adaptor to the mount and secure it using a stop screw. - Page 6 Page 6 Pendant Kit Installation Guide 3. Attach the camera to the pendant chassis with 2 M4x8 screws. 4. Attach the necessary cables and follow the instructions in the camera’s Installation Guide for adjusting the lens.
- Page 7 Pendant Kit Installation Guide Page 7 5. Place the dome cover and attach it by tightening the captive screws.
-
Page 9: Guide D'installation Du Kit De Suspension
Veuillez lire l’intégralité de ce guide avant de procéder à l’installation. Pour plus d’informations sur tous les autres aspects liés à l’utilisation de la caméra réseau Axis, reportez-vous au guide d’installation et au manuel de l’utilisateur, disponible sur le site web www.axis.com/techsup Procédure d’installation... -
Page 10: Contenu De L'emballage
Page 10 Guide d’installation du kit de suspension Contenu de l’emballage • 1 adaptateur de suspension • 2 vis M4x8 • 1 vis M4x12 2 vis M4x8 La flèche de logo pointe vers l’endroit où le logo apparaîtra Adaptateur de suspension lorsque l’installation (dessous) sera terminée... -
Page 11: Installation Du Kit De Suspension
Guide d’installation du kit de suspension Page 11 Installation du kit de suspension 1. Installez le montage de votre choix avec les câbles nécessaires conformément aux instructions incluses avec le kit de montage.. 2. Fixez l’adaptateur de suspension au support de montage et attachez-le en utilisant une vis de butée. - Page 12 Page 12 Guide d’installation du kit de suspension 3. Fixez la caméra au châssis de suspension avec les 2 vis M4x8. 4. Fixez les câbles nécessaires et suivez les instructions du Guide d’installation de la caméra pour le réglage de l’objectif.
- Page 13 Guide d’installation du kit de suspension Page 13 5. Placez le couvercle du dôme et fixez-le en serrant les vis captives.
-
Page 15: Installationshandbuch Für Hängemontageset
Halterungen finden Sie unter "Zubehör" auf "www.axis.com". Bitte lesen Sie zunächst das Handbuch vollständig durch, bevor Sie mit der Installation beginnen. Weitere Hinweise zur Verwendung der Axis Netzwerk-Kamera finden Sie im Installationshandbuch und im Benutzerhandbuch, die auf unserer Website unter www.axis.com/techsup zur Verfügung stehen. - Page 16 Installationshandbuch für Hängemontageset Paketinhalt • 1 Hängemontage-Adapter • 2 M4x8-Schrauben • 1 M4x12-Schraube 2 M4x8-Schrauben LOGOTYPE-Pfeil zeigt auf die Stelle, an der dax AXIS-LOGO Hängemontage-Adapter nach der Montage (Unterseite) sichtbar ist. mm, 1.75 in Hängemontage-Adapter (Seitenansicht) mm (.98 in.) mm (.98 in.)
-
Page 17: Hängemontageset Installieren
Installationshandbuch für Hängemontageset Seite 17 Hängemontageset installieren 1. Montieren Sie die gewünschte Halterung mit den durchgezogenen Kabeln gemäß den im Lieferumfang des Montagesatzes enthaltenen Anweisungen. 2. Bringen Sie den Hängemontage-Adapter an der Halterung an und sichern Sie ihn mit einer Arretierschraube. - Page 18 Seite 18 Installationshandbuch für Hängemontageset 3. Befestigen Sie die Kamera mit zwei M4x8-Schrauben am Hängemontagegehäuse. 4. Schließen Sie die erforderlichen Kabel an und stellen Sie das Objektiv gemäß den Anweisungen im Installationshandbuch Ihrer Kamera ein.
- Page 19 Installationshandbuch für Hängemontageset Seite 19 5. Befestigen Sie die Kuppelabdeckung mit den unverlierbaren Schrauben.
-
Page 21: Procedura Di Installazione
Leggere tutta la guida prima di procedere con l'installazione. Per altre informazioni relative all'utilizzo delle telecamere di rete di Axis, vedere la Guida all'installazione e la Guida per l'utente disponibili sul sito web www.axis.com/techsup. Procedura di installazione •... -
Page 22: Contenuto Della Confezione
Pagina 22 Guida all'installazione del pendant kit Contenuto della confezione • 1 adattatore per soffitti • 2 viti M4x8 • 1 vite M4x12 2 viti M4x8 La freccia con logo Adattatore per soffitti indica il punto (lato inferiore) in cui deve essere visibile al termine dell'installazione mm, 1.75 in... -
Page 23: Installazione Del Kit Per Il Montaggio Su Soffitti Mobili
Guida all'installazione del pendant kit Pagina 23 Installazione del kit per il montaggio su soffitti mobili 1. Installare l'accessorio di montaggio desiderato dopo avervi infilato i cavi in conformità alle istruzioni fornite con il kit di montaggio. 2. Fissare l'adattatore per soffitti mobili all'accessorio di montaggio e bloccarlo in posizione mediante una vite di blocco. - Page 24 Pagina 24 Guida all'installazione del pendant kit 3. Fissare la telecamera allo chassis del soffitto utilizzando 2 viti M4x8. 4. Fissare i cavi necessari e seguire le istruzioni riportate nella Guida all'installazione della telecamera per regolare l'obiettivo.
- Page 25 Guida all'installazione del pendant kit Pagina 25 5. Montare la copertura della cupola e fissarla in posizione serrando le viti prigioniere.
-
Page 27: Guía De Instalación Del Kit De Soporte Colgante
Accesorios, en www.axis.com. Lea detenidamente toda la guía antes de iniciar la instalación. Para cualquier otra cuestión relativa al uso de la cámara de red Axis, consulte la Guía de instalación y el Manual del usuario, disponibles en www.axis.com/techsup. -
Page 28: Contenido Del Paquete
Página 28 Guía de instalación del kit de soporte colgante Contenido del paquete • 1 Adaptador colgante • 2 tornillos M4x8 • 1 tornillo M4x12 La flecha de logotipo 2 tornillos M4x8 indica el lugar en el que aparecerá el logotipo una vez que la instalación Adaptador colgante haya finalizado... -
Page 29: Instalación Del Kit De Soporte Colgante
Guía de instalación del kit de soporte colgante Página 29 Instalación del kit de soporte colgante 1. Instale el montaje que haya elegido con los cables necesarios insertados de acuerdo con las instrucciones incluidas con el kit de montaje. 2. Inserte el adaptador colgante en el montaje y fíjelo mediante el tornillo de retención. - Page 30 Página 30 Guía de instalación del kit de soporte colgante 3. Fije la cámara al chasis colgante mediante los dos tornillos M4x8. 4. Conecte los cables necesarios y siga las instrucciones que se incluyen en la Guía de instalación de la cámara para ajustar el objetivo.
- Page 31 Guía de instalación del kit de soporte colgante Página 31 5. Coloque la cubierta del domo y fíjela apretando los tornillos cautivos.
- Page 34 Ver.3.00 Installation Guide Printed: February 2014 Pendant Kit for AXIS P33-V Series Part No. 55467 © Axis Communications AB, 2009-2014...
Need help?
Do you have a question about the P33-V Series and is the answer not in the manual?
Questions and answers