Table of Contents
Advertisement
Advertisement
Table of Contents

Related Manuals for Husqvarna Viking Sapphire 960Q


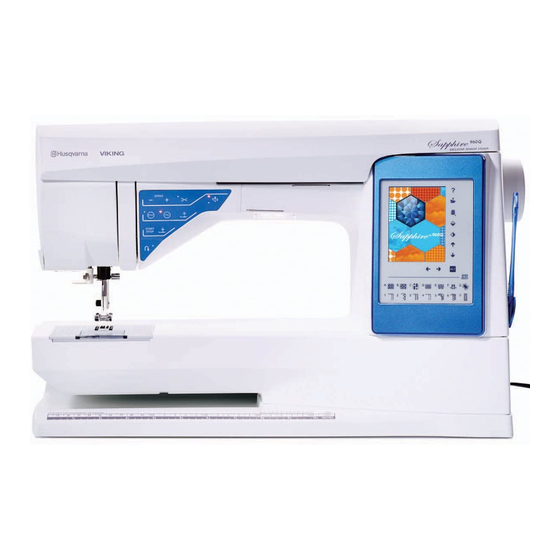
Summary of Contents for Husqvarna Viking Sapphire 960Q
- Page 1 User’s Guide K E E P I N G T H E W O R L D S E W I N G ™...
-
Page 2: Important Safety Instructions
This household sewing machine is designed to comply with IEC/EN 60335-2-28 and UL1594 IMPORTANT SAFETY INSTRUCTIONS When using an electrical appliance, basic safety precautions should always be followed, including the following: Read all instructions before using this household sewing machine. DANGER –... -
Page 3: Table Of Contents
TABLE OF CONTENTS ........3:4 ................3:4 Getting to know your machine ......3:4 ..........3:4 MACHINE OVERVIEW SEWING ADVISOR ........3:4 ................1:6 ™ COLOR TOUCH SCREEN ..............1:6 ................3:5 ..............1:7 Toolbar ................3:5 ACCESSORIES SET MENU ............1:7 ..............3:6 ............1:7 ..............3:7 Presser Feet ..............1:8 ..............3:8 STITCHES 1:10 ALPHABETS 1:16 .............3:8... - Page 4 Program PROGRAM EDIT YOUR STITCH OR LETTERING PROGRAM Tabs in Program mode ...........5:3 ..........5:3 SEWING A STITCH PROGRAM SAVE TO MY STITCHES TO RE-LOAD A STITCH PROGRAM PROGRAM POP-UP MESSAGES File Manager FILE MANAGER AVAILABLE MEMORY BROWSE FILE MANAGER List/Thumbnail View .............6:3 MY FILES ...................6:3 ..............6:3...
-
Page 5: Getting To Know Your Machine
GETTING TO KNOW YOUR MACHINE This section of the User’s Guide will give you an overview of your machine, its accessories and stitches. -
Page 6: Machine Overview
MACHINE OVERVIEW Pre-Tension Thread guide Thread tension discs Thread slots Thread tension disc for bobbin winding Thread cutter tape measure 13. Function button panel 18. Thread cutter for bobbin winding connectors for power cord and foot control REAR SIDE 26. Free arm NEEDLE AREA socket needle threader... -
Page 7: Accessories 1:7
ACCESSORY BOX The accessory box features special compartments for presser feet and bobbins, plus space for needles and other easily accessible. presser feet and bobbin tray ACCESSORIES INCLUDED ACCESSORIES 42. Edge/Quilting guide 43. 2 spool caps, large 47. 6 ™ ACCESSORIES INCLUDED - Not in the Picture Foot control Power cord... -
Page 8: Presser Feet
PRESSER FEET Utility Foot A zigzag stitching with a stitch length longer than 1.0. Decorative Stitch Foot B Buttonhole Foot C For manual buttonholes. This foot has guide lines to determine buttonhole length. The middle measures a 5 / 8 cording for corded buttonholes. - Page 9 Quilter’s 1/4” Piecing foot P Clear Open Toe Foot For satin stitch Embroidery/Darning Foot R This foot is used for Side Motion Foot S This foot is used for side-motion/ Sensor One-Step Buttonhole Foot 5 / 8 Self-Adhesive Glide Plates Used for plastic-coated fabrics, leather, etc.
- Page 10 STITCHES A – Utility Stitches Stitch Presser Stitch Stitch name Application Foot center needle position For seams in tricot and stretch fabric. left needle position For seams which are subject to considerable strain. Triple stitched for reinforcement. Use to reinforce needle position the needle to any of 29 positions.
- Page 11 Presser Foot Reinforce pockets, shirts openings, belt loops as well as at lower end of a zipper. For securing belt loops. fabrics. For mending small tears. Round End For blouses and children’s garments. Tip: For jeans buttonholes, increase length and width of the buttonhole. Use thicker thread. Foot/C For tailored jackets, coats, etc.
- Page 12 A - Utility B - Satin Stitches 1:12...
- Page 13 C - Heirloom Stitches For hemstitching, smocking and sewing on lace, trims and D - Quilt Stitches 1:13 ETTING TO KNOW YOUR MACHINE...
- Page 14 E - Vintage Stitches F - Decorative Stitches 1:14...
- Page 15 G - Omnimotion stitches H - Specialty stitches for detailed information. 1:15 ETTING TO KNOW YOUR MACHINE...
- Page 16 J - Tapering stitches These stitches can be used for tapering. ALPHABETS Block Brush Line Script Cyrillic and Hiragana 1:16...
-
Page 17: Set Up
SET UP This section of the User’s Guide will help you get started with your machine. Learn how to thread your machine, wind the bobbin, change needle and presser foot. -
Page 18: Unpacking
UNPACKING cord and a foot control cord. 4. Wipe the machine, particularly around the needle and Note: Your HUSQVARNA VIKING ® SAPPHIRE ™ 960Q sewing machine is adjusted to provide the best stitch result at normal room temperature. Extreme hot and cold temperatures can affect the sewing result. -
Page 19: Pack Away After Sewing
USB PORT Note: Make sure that the USB stick you use has the format FAT32. CONNECT TO AND REMOVE FROM USB PORT Insert the do not force it into the port! PACK AWAY AFTER SEWING Press the Unplug the cord from the wall socket and then from the machine. -
Page 20: Spool Pins
SPOOL PINS Your machine has two spool pins; a main spool pin and an auxiliary spool pin. The spool pins are designed for all types of thread. The main spool pin is adjustable and can Use the horizontal position for regular sewing threads and specialty threads. -
Page 21: Threading The Upper Thread
THREADING THE UPPER THREAD the up position. Place the thread on the spool pin and the spool cap on the spool as described on page 2:4. Spool pin in horizontal position: pre-tension Spool pin in vertical position: Instead of bringing the thread into the pre-tension thread tension Continue threading in the direction indicated by the Take the thread down and behind the last guide just... -
Page 22: Threading For Twin Needle
THREADING FOR TWIN NEEDLE sure the presser foot is raised and the needle is in the up position. Lift the spool pin up and all the way to the right. Lock the spool pin in the spool cap. For spools smaller than the medium size spool cap, place a felt pad under the thread spool. -
Page 23: Bobbin Winding
When the bobbin is full, it will stop winding. Release the foot control or touch the start/stop button to stop bobbin winder spindle to the left and the pop-up will Note: When using earlier version of HUSQVARNA VIKING ® close. -
Page 24: Changing The Needle Plate
CHANGING THE NEEDLE PLATE needle plate. With feed teeth lowered, place the needle plate so that INSERTING THE BOBBIN Place the bobbin in the bobbin case. The bobbin only drops in one way; with the logo facing up. The thread unreels from the left of the bobbin. -
Page 25: Changing The Needle
CHANGING THE NEEDLE Use the hole in the multipurpose tool to hold the needle. Loosen the needle screw. Insert the new needle using the multipurpose tool. from you until it will go no further. Tighten the needle screw. NEEDLES The sewing machine needle plays an important role in used sizes. -
Page 26: Threads 2:10
THREADS STABILIZERS Tear-Away Stabilizers different purposes. All Purpose Sewing Thread with the fabric when embroidering. Tear away excess stabilizer after stitching. sewing garments and projects. Iron-on Tear-Away Iron-on tear-away is a totally stable stabilizer that has a slick Embroidery Thread side that will iron on to fabric. -
Page 27: How To Update Your Machine
HOW TO UPDATE YOUR MACHINE ® retailer for updates and upgrades for your machine and User’s Guide. UPDATE INSTRUCTIONS web site at ® machine. following the instructions on the web site. your machine on. The update starts automatically and you can release the Note: It might take up to one minute before the process bar appears and you can release the reverse button. - Page 28 2:12...
-
Page 29: Settings & Functions
SETTINGS & FUNCTIONS This section of the User’s Guide will guide you through the basic settings and function buttons of your machine. Learn how to navigate the functions and settings on the Interactive Color Touch Screen and how to use the function buttons on the sewing machine head. -
Page 30: Function Buttons
FUNCTION BUTTONS Selective Thread Cutter Speed + and - Needle Stop Up/Down STOP Sensor Foot Up and Extra Lift Start/Stop Sensor Foot Down and Pivot Reverse SPEED + AND - NEEDLE STOP UP/DOWN sewing speed. or down. The setting of the needle stop position is changed at the same time. -
Page 31: Fix
FUNCTION BUTTONS Selective Thread Cutter Speed + and - Needle Stop Up/Down STOP Sensor Foot Up and Extra Lift Start/Stop Sensor Foot Down and Pivot Reverse SENSOR FOOT DOWN AND PIVOT presser foot will be completely lowered. The machine and continues with the selected stitch. Touch FIX while REVERSE sewing and your machine sews a few tie-off stitches and stops automatically. -
Page 32: Overview Touch Area
OVERVIEW TOUCH AREA ® ™ will not change its appearance. Quick Help Save to My Stitches/ My Files Delete Mirror End-to-End Mirror Side-to-Side Function arrows Function arrows Exclusive SEWING ADVISOR ™ QUICK HELP MIRROR END-TO-END/MIRROR SIDE-TO-SIDE Note: Buttonholes cannot be mirrored. ALT AND FUNCTION ARROWS The arrows on your touch area can change function SAVE TO MY STITCHES/MY FILES... -
Page 33: Color Touch Screen
COLOR TOUCH SCREEN Start Menu START MENU windows. TOOLBAR Start Menu Stitch Menu Stitch Menu Stitch Font Menu Stitch Font Menu Program a font is selected, you will automatically enter the Program mode. File Manager Program SET Menu Touch the Program icon to go to Program window. You can combine stitches and/or letters and numbers to create stitch fonts from the machine. -
Page 34: Set Menu
SET MENU SET Menu after turning off the machine. Sewing Settings Stitch Settings MACHINE SETTINGS Machine Settings Information icon The information icon opens a window which contains information. Language Information icon language by touching it. Audio Repeat Lock Screen If there is the possibility of bumping into the screen and changing the stitch or settings while sewing, it is easy to lock the screen. - Page 35 STITCH SETTINGS pressure and balance a stitch or buttonhole. These settings If another stitch is selected or the same stitch is selected default number is shown in black, if the number has been changed it will be shown in red. Balance When sewing on special fabrics or doing a specialty adjusted.
- Page 36 SEWING SETTINGS Twin Needle Touch the Twin Needle icon to open a list for twin needle width selections. When a twin needle size is selected, the width of all stitches The setting is kept until you turn the twin needle width to off. Stitch Width Safety presser foot.
-
Page 37: Sewing 4:1
SEWING program and sew them. -
Page 38: Tabs 4:2
Sewing Information TABS Stitch Menu where you can make changes to your stitch such as the length and width and see what is recommended for the different categories of stitches and the stitches that are found in each one. STITCH MENU TAB the tab a stitch selection menu will open. -
Page 39: Sewing Information Tab
SEWING INFORMATION TAB Your machine will choose the best stitch settings for the three parts. Exclusive SEWING AVISOR ™ setting ™ Sewing recommendations setting you ™ will see what needle to use, if stabilizer and/or glide sole is needed. Stitch adjustment such as thread tension, set your machine to free-motion stitch width, needle position, length, density, button sew- on and buttonhole length. - Page 40 Free Motion Technique will appear allowing you to choose between two options: Free Motion Floating You can use presser foot R or an optional foot. The feed teeth will lower automatically. Thread tension When sewing free motion at low speed the presser foot will raise and lower with each stitch to hold the fabric on Stitch ReStart...
- Page 41 STITCH ALTERING Your machine will set the best settings for each selected stitch. You can make your own adjustments on the selected stitch. The setting changes will only affect the selected stitch. Your changed settings will be reset to default when selecting another stitch.
- Page 42 Buttonhole size When sewing a buttonhole with the button and set the button size on screen. Note: There is a guide in front of your machine where you can measure the size of the button. Buttonhole size Button Sew On When sewing a button, you can set the number of stitch repeats.
-
Page 43: Exclusive Sewing Advisor Feature
EXCLUSIVE SEWING ADVISOR ™ FEATURE Your new sewing machine has the HUSQVARNA VIKING ® Exclusive SEWING ADVISOR ™ feature. It is always active in and is located at the bottom of the Touch Screen. When beginning a sewing project, touch your fabric type and weight, then touch the technique you desire. -
Page 44: Sewing Techniques
SEWING TECHNIQUES : sews two pieces of fabric together. SEAM OVERCAST SEAM OVERCAST at one time. BASTE gathering and marking. BLIND HEM Your machine selects the best stitch possible for the fabric you select. fabric type and weight. ™ BUTTONHOLE feature selects the best buttonhole possible for your fabric. -
Page 45: Sewing Techniques
SEWING TECHNIQUES SEAM allowance that will usually be pressed open. In most cases, stitch before sewing the seam. stretch stitch makes a stretchy seam that is suitable for sewing together pieces of light stretch fabric. FABRIC SELECT feature selects a straight ™... - Page 46 OVERCAST ™ feature will select the best stitch length and stitch width for the fabric weight and recommend the presser foot and needle. FABRIC SELECT feature selects a three- ™ Place the edge of a single thickness of fabric under presser automatically.
- Page 47 SEAM AND OVERCAST the edges all at one time. There are a number of different feature will select the best one for ™ your fabric and make all adjustments automatically. FABRIC SELECT feature. ™ recommended. in position under the presser foot with the wire guide on the foot along the edge of the fabric.
-
Page 48: Blind Hem
BASTE and marking. feature automatically sets a ™ long stitch length and reduces the tension so the threads are FABRIC SELECT Place the fabrics right sides together. Put the fabric in position under the presser foot. : 5/8'' SEAM ALLOWANCE automatically. - Page 49 ™ stretch fabrics, stitches that stretch are selected. Jeans Hem The needle can hit the tipped foot and break. Use the multipurpose tool to balance the height of the hem as you sew. FABRIC SELECT needle. Touch needle up/down to select the needle down position. with the needle in the fabric and raises the presser foot.
- Page 50 PERFECTLY BALANCED SENSOR ONE-STEP BUTTONHOLE ™ feature will select the best buttonhole and stitch settings for your fabric. Fabric should be interfaced and/or stabilized where buttonholes are to be sewn. You can also select your buttonhole directly from the FABRIC SELECT Sensor One-Step Buttonhole Foot socket...
-
Page 51: Manual Buttonhole
When sewing buttonholes without satin stitches or when Note: If you are sewing buttonholes in a very narrow area, snap on the standard foot C and sew your buttonhole according to the instructions below. 2. Sewing direction for buttonholes without satin stitches or satin stitch buttonholes sewn with presser foot C MANUAL BUTTONHOLE To sew a manual buttonhole, use buttonhole foot C. - Page 52 MANUAL BARTACK automatically and stitch. straight stitches. threads. SPECIAL SEWING TECHNIQUES feet and accessories. This is indicated by the optional presser foot icon. DECORATIVE TAPERING STITCHES Touch the Tapering icon to open a pop-up where you can select the tapering angle of your stitch. Touch the tab on the left to set what angle the beginning of your stitch icon to close the popup.
-
Page 53: Free Motion Quilting
FREE MOTION QUILTING Free Motion Floating When sewing free motion at a low speed, the foot will raise and lower with each stitch to hold the fabric on the stitch plate while the stitch is being formed. When sewing at a manually. -
Page 54: Sewing Pop-Up Messages
SEWING POP-UP MESSAGES Bobbin Thread Low When the bobbin thread is running low, a pop-up message plan when you want to change your bobbin. If you want to continue sewing just touch the foot control without touching the ok in the pop-up. Remove Sensor One-Step Buttonhole Foot for all other sewing. -
Page 55: Program
PROGRAM This section of the Users Guide will help you make beautiful combinations of stitches and letters to decorate your fabric. -
Page 56: Program
PROGRAM Sewing Information You can combine stitches and/or letters and numbers to Stitch Menu Font Menu icon on the Touch the Program length Navigation selected stitch or letter will be marked in red. Inserted stitch program using the arrows on the screen. When changing a stitch in Program mode, it is only Cursor combination. -
Page 57: Edit Your Stitch Or Lettering Program
EDIT YOUR STITCH OR LETTERING Sewing Information Tab PROGRAM Stitch Menu Font Menu TABS IN PROGRAM MODE the stitches that you can program. The third tab is the Font Delete Mirror End- to-End Insert a Stitch or Letter Mirror Side- to-Side insert. -
Page 58: Sewing A Stitch Program
SEWING A STITCH PROGRAM at the top right corner in the program window. You can Save to My also press on the foot control and the stitch will load and Stitches you will start to sew. Delete Adjust the Entire Program To adjust the entire program, close the program window. -
Page 59: To Re-Load A Stitch Program
TO RE-LOAD A STITCH PROGRAM another stitch and then re-opening the Program mode, your mode is closed, the stitch program will be loaded and ready to be sewn. U-menu and make changes to the programmed stitch in Program mode. Note: If the machine is turned off the program disappears from the Program Mode. -
Page 61: File Manager
FILE MANAGER sewing machine. -
Page 62: Available Memory
FILE MANAGER Start Menu open, organize, add, File Manager SET Menu AVAILABLE MEMORY check how much memory is used in the built-in memory, Information icon shows how much memory is used. -
Page 63: Browse File Manager
BROWSE FILE MANAGER Folder Touch any of these icons to display their contents in the selection area. LIST/THUMBNAIL VIEW the current folder listed in alphabetical order. For each List/Thumbnail view Drop Down Menu MY FILES Move up one organized. folder level OPEN A FOLDER the folder will be shown in the selection area. -
Page 64: Organize
ORGANIZE CREATE A NEW FOLDER Touch the create new folder icon to create a new folder. your folder. MOVE A FILE OR FOLDER storage location. COPY A FILE OR FOLDER place. List/Thumbnail view RENAME A FILE OR FOLDER To change the name of a folder, touch the folder then Create a new folder opens where you can change the name. -
Page 65: Maintenance
MAINTENANCE machine and also a troobleshooting guide. -
Page 66: Cleaning The Machine
CLEANING THE MACHINE To keep your sewing machine operating well, clean it often. Wipe the exterior surface of your machine with a soft cloth with your machine. Cleaning the Bobbin Area needle plate as shown in the picture and gently turn the teeth with the brush found with the accessories. -
Page 67: Troubleshooting
TROUBLESHOOTING ® retailer who will be happy to help you. Have Your Sewing Machine Serviced Regularly by your Local Authorized Dealer! General Problems ® Thread cutter does not cut the thread? Remove stitch plate and clean lint from bobbin area. Enable Selective Thread cutter Auto in the SET Menu. - Page 68 Is the bobbin wound correctly? Wind a new bobbin. The Machine Skips Stitches Insert a new needle. Did you insert the needle properly? Insert needle correctly as described in chapter 2. Did you thread the machine properly? Check how the machine is threaded. Is the needle too small for the thread? Change the needle.
- Page 69 Index Carrying case ................1:7 Changing the Needle ............2:9 Changing the needle plate ............2:8 Changing the Presser Foot ..........2:8 ................1:7 Check Needle Thread ............4:18 ...............1:7 ............7:2 ............. 2:3 Cleaning the machine ............7:2 ...................6:2 ........7:2 ............5:3 ............1:9 ..........5:4 ..............3:5 ..................4:5 Connecting the foot control cord ........2:2 ..........
- Page 70 ...........6:4 FIX ................3:2, 3:3, 5:3 ............4:18 ................3:8 ..............1:6 Foam ..................1:8 ..............3:6 ..............6:4 ..............2:8 ..............5:2, 5:3 ............1:6, 2:4, 2:7 Foot control ................1:7 .............4:15 Foot control cord ..............2:2 ..............1:7 Free arm .................1:6 ...............5:3 Free motion ................1:9 .......3:4 ..........4:4, 4:17 ..............5:3 ............4:17 ............6:4...
- Page 71 ..........7:2 Plastic ..................1:8 Pop-up messages ...........1:9 ..........3:3 ................6:4 ............3:7 Program ..................5:5 ...........3:3 ..................4:18 Power cord ................1:7 ..1:6, 1:9, 2:5, 4:6, 4:14 ......1:6 Connect ..................2:2 ............3:8 Presser feet and bobbin holder ...........1:7 Presser Foot ..............1:6, 1:8 ................4:4 ............3:2, 3:3, 3:6, 7:3 Changing ..................
- Page 72 ...............2:9 .................1:8 ..................1:7 ..............1:10 ................1:6 ................6:4 Vertical spool pin ........... 2:4, 2:5, 2:6 ..............1:14 Tab ...................4:2 Vinyl ..................1:8 Tabs in Program mode ............5:3 ................2:5 Tape measure .................1:6 Warranty card .................1:7 Tapering ..................4:4 ............2:10 ............1:16, 4:16 Width balance adjustment ...........3:7 ..............4:16 ..............2:7 ............2:10...
-
Page 73: Intellectual Property
Intellectual Property Patents protecting this product are listed on a label positioned underneath the Please note that on disposal, this product must be safely to electrical/electronic products. If in doubt please contact your retailer for guidance. CE - Authorised Representative SVP Worldwide... - Page 74 www. h usqv a r nav ik ing. co m www.husqvarnaviking.com...