Table of Contents
Advertisement
Available languages
Available languages
Advertisement
Chapters
Table of Contents

Related Manuals for AEG L98690FL


Summary of Contents for AEG L98690FL
- Page 1 L98690FL EN WASHING MACHINE USER MANUAL ES LAVADORA MANUAL DE INSTRUCCIONES...
-
Page 2: Table Of Contents
CONTENTS 4 SAFETY INFORMATION 6 ENVIRONMENT CONCERNS 6 TECHNICAL INFORMATION 7 PRODUCT DESCRIPTION 7 INTERIOR ACCESSORIES 8 CONTROL PANEL 13 WASHING PROGRAMMES 18 BEFORE FIRST USE 18 USING THE APPLIANCE 18 ACTIVATING THE APPLIANCE AND SETTING A PROGRAMME 19 LOADING THE LAUNDRY 20 FILLING THE DETERGENT AND ADDITIVES 21 STARTING A PROGRAMME 22 AT THE END OF THE PROGRAMME... - Page 3 ENGLISH FOR PERFECT RESULTS Thank you for choosing this AEG product. We have created it to give you impeccable performance for many years, with innovative technologies that help make life simpler – features you might not find on ordinary appliances. Please spend a few minutes reading to get the very best from it.
-
Page 4: Safety Information
SAFETY INFORMATION Before the installation and use, read this manual carefully: • For your safety and the safety of your property • To help the environment • For the correct operation of the ap- pliance. Always keep these instructions with the appliance also if you move or give it to GENERAL SAFETY a different person. -
Page 5: Electrical Connection
ENGLISH WARNING! • Do not connect the appliance to new Do not look directly into the pipes or pipes not used for a long beam of the lamp. time. Let the water flow for some mi- nutes, then connect the inlet hose. To replace the internal lamp, •... -
Page 6: Environment Concerns
ENVIRONMENT CONCERNS PACKAGING MATERIALS The symbol on the product or on its packaging indicates that this product Recycle the materials with the symbol may not be treated as household waste. Instead it should be taken to the Put the packaging in applicable con- appropriate collection point for the tainers to recycle it. -
Page 7: Product Description
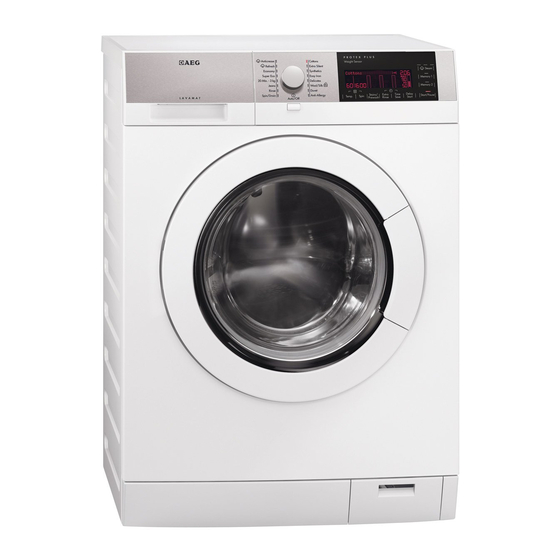
ENGLISH PRODUCT DESCRIPTION Worktop Feet for the appliance level Detergent dispenser Water drain hose Control panel Water inlet hose Door handle Mains cable Internal lamp Transit bolts Rating plate Feet for the appliance level Drain pump INTERIOR ACCESSORIES Spanner To remove the transit bolts. Plastic caps To close the holes on the rear side of the cabinet after the removal of... -
Page 8: Control Panel
CONTROL PANEL Auto Off button Ahorra Tiempo touch button Programme knob Aclarado Extra touch button Display Manchas/Prelavado/Remojo touch button Vapor touch button Spin reduction touch button (Cen- Memoria touch buttons trif.) Inicio/Pausa touch button Temperature touch button (Temp.) Inicio/Diferido touch button TOUCH SCREEN –... - Page 9 ENGLISH DISPLAY The text bar: • Guides you in the use of the appliance. • Shows the programme status and phase. • Shows alarm messages. Refer to 'Troubleshooting' . The symbols appear on the display when the related phase or function is set. Child lock Door locked You cannot open the door when the symbol is on.
- Page 10 • The time of delay – When you set the delayed start the time of the programme end in- creases by steps of 30 minutes till 10 hours and by steps of one hour till 20 hours. • The end of the programme The display shows a zero.
-
Page 11: Hard
ENGLISH Rinse hold 1) Only available for Spin/Drain programme. The default temperature of the programme. Cold wash VAPOR BUTTON INICIO/DIFERIDO BUTTON Touch button to set the steam level. Touch button to delay the start of a This is possible only with programmes programme from 30 minutes to 20 where the steam function is available. -
Page 12: Permanent Extra Rinse
PRELAVADO • The appliance has a malfunction. To deactivate/activate the acoustic Use this function for heavy soil. signals, touch button and button The appliance adds a prewash phase to at the same time for 6 seconds. the main wash. If you deactivate the acoustic The programme duration increases. -
Page 13: Washing Programmes
ENGLISH WASHING PROGRAMMES Programme Temperature Type of load Programme Functions Weight of load description Algodón 95° - Cold White and col- Wash Spin Reduc- oured cotton Rinses tion with heavy level Long spin Agua en cuba of soil. Manchas Maximum load 9 Prelavado Remojo Aclarado Ex-... - Page 14 Programme Temperature Type of load Programme Functions Weight of load description Delicados 40° - Cold Delicate fabrics Wash Spin Reduc- Rinses as acrylics, vis- Rinses tion Short spin cose, polyester Short spin Agua en cuba items with nor- Prelavado mal soil. Manchas Maximum load 4 Remojo...
- Page 15 ENGLISH Programme Temperature Type of load Programme Functions Weight of load description Tejidos Grue- 60° - Cold Items like pants, Wash Spin Reduc- shirts or jackets Rinses tion in Jeans and also Short spin Agua en cuba jersey realized Prelavado with hi-tech ma- Remojo terials.
-
Page 16: Consumption Values
STEAM PROGRAMMES Type of load Load Programme Cotton and synthetic items. up to 1.5 Kg Vapor Refresco This cycle removes odour from the laundry. Steam does not remove animal odours. Cotton and synthetic items. up to 1.5 Kg Vapor Anti-arrugas This programme helps to dew- rinkle the laundry. - Page 17 ENGLISH Standard programmes for the are the most efficient programmes in terms of combined energy and water Energy Label consumption consumption for washing that type of values cotton laundry. They agree with EN60456. The cotton 60 °C economy and cotton 40 °C economy are the standard cotton The actual water temperature programmes for normally soiled cotton...
-
Page 18: Before First Use
BEFORE FIRST USE 1. To activate the drain system, put 2 CLOCK SETTING litre of water in the main wash com- After you set the language, the display partment of the detergent dispens- tells to set the clock: • The hour digits flash. 2. -
Page 19: Loading The Laundry
ENGLISH 4. The display shows the default tem- to set a delayed start. The display perature and spin. If it is necessary, shows the symbol of the set func- touch button and button tion and the digit ( ) shows the change the water temperature and delayed time. -
Page 20: Filling The Detergent And Additives
FILLING THE DETERGENT AND ADDITIVES The detergent compartment for the prewash phase and the soak programme. Add the detergent for prewash and soak before the start of the programme. The detergent compartment for the washing phase. If you use a liquid detergent, put it immediately before you start the programme. -
Page 21: Starting A Programme
ENGLISH 3. To use powder detergent, turn the flap up. 4. To use liquid detergent, turn the flap down. With the flap in the position DOWN: – Do not use gelatinous or thick liquid detergents. – Do not put more liquid deter- gent than the limit showed in the flap. -
Page 22: At The End Of The Programme
2. Change the function set. The appliance adjust automat- 3. Touch button again. The wash- ically the cycle time to the ing programme continues. laundry you have put in the drum to have perfect washing OPEN THE DOOR results in the minimum neces- sary time. - Page 23 ENGLISH The washing programme is 2. Touch button . The appliance completed, but there is water in the drains the water and spins. drum: 3. When the programme is comple- – The drum turns regularly to prevent ted and the door lock symbol goes the creases in the laundry.
-
Page 24: Helpful Hints And Tips
HELPFUL HINTS AND TIPS THE LAUNDRY LOAD DETERGENTS AND ADDITIVES • Divide the laundry in: white, col- • Only use detergents and additives oured, synthetics, delicates and wool. specially made for washing machines. • Obey the washing instructions that • Do not mix different types of deter- are on the laundry care labels. -
Page 25: English
ENGLISH Water hardness table Water hardness Level Type °dH °T.H. mmol/l Clarke soft 0-15 0-1.5 medium 8-14 16-25 1.6-2.5 10-16 hard 15-21 26-37 2.6-3.7 17-25 very hard > 21 > 37 >3.7 >25... -
Page 26: Care And Cleaning
CARE AND CLEANING WARNING! CAUTION! Do not use alcohol, solvents or chemical products. Disconnect the appliance from the mains supply before you clean it. MAINTENANCE WASH DESCALING With the low temperature programmes it is possible that some detergent stays The water we use contains limescale. If in the drum. -
Page 27: Detergent Dispenser
ENGLISH DETERGENT DISPENSER To clean the dispenser: 1. Press the lever. 2. Pull the dispenser out. 3. Remove the top part of the liquid additive compartment. 4. Clean all the parts with water. 5. Clean the dispenser recess with a brush. -
Page 28: To Clean The Drain Pump
To clean the drain pump: 1. Open the drain pump door. 2. Pull the flap out to remove it. 3. Put a container below the recess of the drain pump to collect the water that flows out. 4. Press the two levers and pull for- ward the drainage duct to let the water flow out. -
Page 29: Emergency Drain
ENGLISH 9. Clean the filter under the water tap and put it back in the pump into the special guides. 10. Make sure that you tighten correct- ly the filter to prevent leakages. 11. Put the flap back and close the drain pump door. -
Page 30: Frost Precautions
When you drain the water with the 2. Close the water tap. emergency drain procedure, you must 3. Remove the water inlet hose activate again the drain system: 4. Put the two ends of the inlet hose 1. Put 2 litres of water in the main in a container and let the water wash compartment of the deter- flow out of the hose. -
Page 31: Troubleshooting
ENGLISH TROUBLESHOOTING The start of the appliance does not oc- WARNING! cur or it stops during operation. Deactivate the appliance before Try to find a solution to the problem you do the checks. before you contact the service centre (refer to the table). With some problems, the acoustic signals operate and the display shows an alarm message. - Page 32 PROBLEM WITHOUT ALARM MESSAGE Problem Possible cause Possible solution The appliance A washing programme Set the drain programme. does not drain without the drain phase the water. is set. The function Rinse Hold Set the drain programme. is on. The spin phase The spin phase is off.
- Page 33 ENGLISH Problem Possible cause Possible solution You did not remove the Remove the packaging and/or packaging and/or the the transit bolts. Refer to 'Instal- transit bolts. lation'. The load is very small. Add more laundry in the drum. The appliance fills The end of the drain Make sure that the drain hose is with water and...
-
Page 34: Installation
INSTALLATION UNPACKING 1. Use the gloves. Remove the exter- nal film. If necessary, use a cutter. 2. Remove the cardboard top. 3. Remove the polystyrene packaging materials. 4. Remove the internal film. 5. Open the door. Remove the poly- styrene piece from the door seal and all the items from the drum. - Page 35 ENGLISH 6. Put the front piece on the floor be- hind the appliance. Carefully put down the appliance with the rear side on it. Make sure not to dam- age the hoses. 7. Remove the polystyrene protection from the bottom. 8.
-
Page 36: Positioning And Levelling
12. Replace the plastic spacers with the plastic caps. You can find these caps in the user manual bag. WARNING! We recommend that you keep Remove all the packaging and the packaging and the transit the transit bolts before you in- bolts for when you move the ap- stall the appliance. -
Page 37: Water Drainage
ENGLISH THE INLET HOSE • Connect the hose to the appliance. Turn the inlet hose only left or right. Loose the ring nut to set it in the cor- rect position. • Connect the water inlet hose to the cold water tap with 3/4 thread. CAUTION! Make sure that there are no leaks from the couplings. - Page 38 With the plastic hose guide. • On the edge of a sink. • Make sure that the plastic guide can- not move when the appliance drains. Attach the guide to the water tap or the wall. • To a stand pipe with vent-hole. Refer to the illustration.
- Page 39 ENGLISH You can extend the drain hose to maximum 400 cm. Contact the service centre for the other drain hose and the extension.
- Page 40 ÍNDICE DE MATERIAS 42 INFORMACIÓN SOBRE SEGURIDAD 45 ASPECTOS MEDIOAMBIENTALES 45 INFORMACIÓN TÉCNICA 46 DESCRIPCIÓN DEL PRODUCTO 46 ACCESORIOS INTERNOS 47 PANEL DE MANDOS 52 PROGRAMAS DE LAVADO 57 ANTES DEL PRIMER USO 57 UTILIZACIÓN DEL APARATO 57 ACTIVACIÓN DEL APARATO Y AJUSTE DE UN PROGRAMA 58 CARGAR LA COLADA 59 INTRODUCCIÓN DEL DETERGENTE Y LOS...
- Page 41 ACCESORIOS Y CONSUMIBLES En la página web de AEG, encontrará todo lo necesario para la perfecta limpieza y funcionamiento de todos sus electrodomésticos AEG. Junto con una amplia gama de accesorios diseñados y fabricados conforme a los elevados estándares de calidad característicos de la marca, desde utensilios de cocina especializados a cestos de...
-
Page 42: Información Sobre Seguridad
INFORMACIÓN SOBRE SEGURIDAD Antes de instalar y usar el aparato, lea quierda hasta que la ranura esté en atentamente este manual: posición vertical. • Por su seguridad y la de su hogar • Para respetar el medio ambiente • Por el correcto funcionamiento del aparato. - Page 43 ESPAÑOL LÁMPARA INTERIOR • Asegúrese de no provocar daños en los tubos de agua. Este aparato cuenta con una luz interna • No conecte el aparato a tuberías que se enciende y se apaga al abrir y nuevas o que no se hayan utilizado cerrar la puerta.
- Page 44 (solo para electrodomésticos de carga frontal).
-
Page 45: Aspectos Medioambientales
ESPAÑOL ASPECTOS MEDIOAMBIENTALES MATERIALES DE EMBALAJE El símbolo que aparece en el aparato o en su embalaje, indica que Recicle los materiales con el símbolo este producto no se puede tratar como un residuo normal del hogar. Se deberá Coloque el material de embalaje en los entregar, sin coste para el poseedor, contenedores adecuados para reciclar- bien al distribuidor, en el acto de la... -
Page 46: Descripción Del Producto
DESCRIPCIÓN DEL PRODUCTO Encimera Pata para nivelación del aparato Dosificador de detergente Tubo de desagüe Panel de control Conexión de agua Tirador de la puerta Cable de alimentación Lámpara interior Pasadores de transporte Placa de características Pata para nivelación del aparato Bomba de desagüe ACCESORIOS INTERNOS Llave inglesa... -
Page 47: Panel De Mandos
ESPAÑOL PANEL DE MANDOS Tecla Auto Off Tecla táctil Ahorra Tiempo Selector de programas Tecla táctil Aclarado Extra Pantalla Tecla táctil Manchas/Prelavado/Re- mojo Tecla táctil Vapor Tecla táctil de reducción del centri- Teclas táctiles Memoria fugado (Centrif.) Tecla táctil Inicio/Pausa Tecla táctil de Temperatura (Temp.) Tecla táctil Inicio/Diferido PANTALLA TÁCTIL... - Page 48 PANTALLA La barra de texto: • Le guía en el uso del aparato. • Muestra el estado y la fase del programa. • Muestra mensajes de alarma. Consulte "Solución de problemas". Los símbolos aparecen en la pantalla cuando se ajusta la fase o función corres- pondiente.
- Page 49 ESPAÑOL • Hora del inicio diferido – Cuando define un inicio diferido, la hora del final del programa au- menta en casos de 30 minutos hasta las 10 horas y en pasos de una hora hasta las 20 horas. • Final del programa En la pantalla aparece un cero.
- Page 50 Agua en la cuba 1) Solo disponible para el programa Centrifugado/Descarga . Temperatura predeterminada del programa. Ciclo Frío TECLA VAPOR TECLA INICIO/DIFERIDO Pulse la tecla para ajustar el nivel de Pulse la tecla para retrasar el inicio vapor. Sólo es posible con programas de un programa entre 30 minutos y 20 que tienen disponible la función de va- horas.
- Page 51 ESPAÑOL PRELAVADO al mismo tiempo durante 6 segun- dos. Use esta función para suciedad intensa. Si se desactivan las señales El aparato añade una fase de prelavado acústicas, siguen funcionando al lavado principal. únicamente cuando se pulsan La duración del programa aumenta. los botones y cuando se produ- ce un fallo.
-
Page 52: Programas De Lavado
PROGRAMAS DE LAVADO Programa Temperatura Tipo de carga Descripción Funciones Peso de la carga del programa Algodón 95° - Frío Algodón blanco Lavado Reducción del y de color con Aclarados centrifugado suciedad intensa. Centrifugado Agua en cuba Carga máxima 9 largo Manchas Prelavado... - Page 53 ESPAÑOL Programa Temperatura Tipo de carga Descripción Funciones Peso de la carga del programa Delicados 40° - Frío Tejidos delica- Lavado Reducción del Aclarados dos como acríli- Aclarados centrifugado Centrifugado cos, viscosa o Centrifugado Agua en cuba corto poliéster con su- corto Prelavado ciedad normal.
- Page 54 Programa Temperatura Tipo de carga Descripción Funciones Peso de la carga del programa Tejidos Grue- 60° - Frío Prendas como Lavado Reducción del los pantalones, Aclarados centrifugado las camisas o las Centrifugado Agua en cuba chaquetas de te- corto Prelavado la vaquera y jer- Remojo séis de materia-...
- Page 55 ESPAÑOL 8) Use un detergente especial para temperaturas muy bajas. 9) Ajuste este programa para obtener unos buenos resultados de lavado y reducir el consumo de energía. Se amplía la duración del programa de lavado. PROGRAMAS DE VAPOR Tipo de carga Carga Programa Prendas de algodón y sintéti-...
- Page 56 2) La información sobre consumo que se muestra en este gráfico es puramente indicativa. Puede variar en función de la cantidad y el tipo de colada, de la temperatura del suministro de agua y de la temperatura ambiente. los programas más eficaces en cuanto a Programas estándar para los consumo de agua y energía para el la- valores de consumo de...
-
Page 57: Pulse La Tecla
ESPAÑOL ANTES DEL PRIMER USO 1. Para activar el sistema de desagüe, AJUSTE DE LA HORA vierta 2 litros de agua en el com- Tras seleccionar el idioma, la pantalla le partimento de lavado principal del pedirá que ajuste el reloj: dosificador de detergente. - Page 58 3. El indicador del botón 5. Si es necesario, pulse los otros bo- parpa- tones para agregar funciones o es- dea en color rojo. tablecer un inicio diferido. La pan- 4. La pantalla muestra el centrifugado talla muestra el símbolo de la fun- y la temperatura por defecto.
- Page 59 ESPAÑOL Asegúrese de que no queden prendas fuera del tambor entre el sello y la puerta. Podría provocar fugas de agua y dañar la colada. INTRODUCCIÓN DEL DETERGENTE Y LOS ADITIVOS El compartimento de detergente para la fase de prelavado y el programa de remojo.
-
Page 60: Pulse La Tecla
Compruebe la posición de la tapa 1. Tire del depósito dosificador hasta el tope. 2. Presione la palanca hacia abajo pa- ra extraer el dosificador. 3. Para usar detergente en polvo, gire la tapa hacia arriba. 4. Para usar detergente líquido, gire la tapa hacia abajo. -
Page 61: Inicio Del Programa
ESPAÑOL Antes de pulsar la tecla para iniciar el aparato, puede cance- No puede ajustar el inicio diferi- lar o cambiar el ajuste del inicio do con el programa de Vapor. diferido. INICIO DEL PROGRAMA 1. Pulse la tecla 1. Pulse la tecla para iniciar el pro- . -
Page 62: Al Final Del Programa
AL FINAL DEL PROGRAMA 1. El aparato se para automáticamen- 8. Deje la puerta entreabierta para evitar la formación de moho y olo- res desagradables. 2. Actúan las señales acústicas, si es- tán activadas. 9. Cierre la toma de agua. 3. -
Page 63: Consejos Útiles
ESPAÑOL CONSEJOS ÚTILES CARGAR LA COLADA Existen quitamanchas especiales. Utili- ce el quitamanchas especial adecuado • Divida la colada en: ropa blanca, ro- al tipo de mancha y tejido. pa de color, ropa sintética, prendas delicadas y prendas de lana. DETERGENTES Y ADITIVOS •... - Page 64 Tabla de dureza del agua Dureza agua Nivel Tipo °dH °T.H. mmol/l Clarke blanda 0-15 0-1.5 intermedio 8-14 16-25 1.6-2.5 10-16 dura 15-21 26-37 2.6-3.7 17-25 muy dura > 21 > 37 >3.7 >25...
-
Page 65: Mantenimiento Y Limpieza
ESPAÑOL MANTENIMIENTO Y LIMPIEZA ADVERTENCIA PRECAUCIÓN No utilice alcohol, disolventes ni otros productos químicos. Desconecte el aparato de la fuente de alimentación antes de limpiarlo. LAVADO DE MANTENIMIENTO DESCALCIFICACIÓN Con los programas a baja temperatura, El agua corriente que utilizamos suele es posible que quede algo de deter- contener cal. - Page 66 DOSIFICADOR DE DETERGENTE Para limpiar el dosificador: 1. Presione la palanca. 2. Tire del dosificador hacia fuera. 3. Retire la parte superior del com- partimento de aditivo líquido. 4. Limpie todas las piezas con agua. 5. Limpie el hueco del dosificador con un cepillo.
- Page 67 ESPAÑOL Para limpiar la bomba de desagüe: 1. Abra la puerta de acceso a la bom- 2. Tire de la tapa para extraerlo. 3. Coloque un recipiente debajo del hueco de la bomba para recoger el agua que salga. 4. Presione las dos palancas y tire del conducto de desagüe para que sal- ga el agua.
- Page 68 9. Limpie el filtro con agua corriente y vuelva a colocarlo en la bomba en las guías especiales. 10. Asegúrese de que lo aprieta co- rrectamente para evitar fugas. 11. Vuelva a colocar la compuerta y cierre la puerta de la bomba. EL FILTRO DEL TUBO DE •...
- Page 69 ESPAÑOL Vuelva a colocar el conducto de desa- 2. Cierre la toma de agua. güe y cierre la compuerta de la bomba. 3. Retire la manguera de entrada de Cuando se desagua con el procedi- agua. miento de drenaje de emergencia, se 4.
-
Page 70: Solución De Problemas
SOLUCIÓN DE PROBLEMAS El aparato no se pone en marcha o se ADVERTENCIA detiene durante el funcionamiento. Apague el aparato antes de rea- Intente encontrar una solución al pro- lizar las comprobaciones. blema antes de ponerse en contacto con el centro de servicio (consulte la ta- bla). - Page 71 ESPAÑOL PROBLEMA SIN MENSAJE DE ALARMA Problema Posible causa Posible solución El aparato no de- Se ha ajustado un pro- Ajuste el programa de desagüe. sagua. grama de lavado sin la fase de desagüe. La función Agua en la cu- Ajuste el programa de desagüe.
- Page 72 Problema Posible causa Posible solución No ha retirado el emba- Retire el embalaje o los pasado- laje o los pasadores de res de transporte. Consulte el transporte. apartado "Instalación". La carga es muy peque- Añada más colada en el tambor. ña.
- Page 73 ESPAÑOL INSTALACIÓN DESEMBALAJE 1. Utilice los guantes. Retire la pelícu- la externa. Si es necesario, utilice un cúter. 2. Retire la cubierta de cartón. 3. Retire los materiales del embalaje de poliestireno. 4. Retire la película interna. 5. Abra la puerta. Retire la pieza de poliestireno de la junta de la puer- ta y todos los elementos del tam- bor.
- Page 74 6. Coloque la pieza frontal en el suelo detrás del aparato. Baje con cuida- do el aparato sobre el lado poste- rior. Tenga cuidado para no dañar los tubos. 7. Retire la protección de poliestireno de la base. 8. Levante el aparato hasta la posi- ción vertical.
- Page 75 ESPAÑOL 12. Cambie los separadores de plásti- co por los tapones de plástico. En- contrará los tapones en la bolsa del manual de instrucciones. ADVERTENCIA Se recomienda guardar el em- Retire todo el embalaje y los pa- balaje y los pasadores de trans- sadores de transporte antes de porte para cuando traslade el instalar el aparato.
- Page 76 EL TUBO DE ENTRADA • Conecte el tubo al aparato. Gire el tubo de entrada solo a la derecha o a la izquierda. Suelte la tuerca anular para ajustarla en la posición correcta. • Conecte el tubo de entrada de agua fría a una toma de agua fría con rosca de 3/4.
- Page 77 ESPAÑOL DESAGÜE Hay distintos procedimientos para co- nectar el tubo de desagüe: Con la guía de plástico. • En el borde de un fregadero. • Asegúrese de que la guía de plástico no se mueva cuando el aparato desa- gua. Acople la guía al grifo de agua o a la pared.
- Page 78 • Directamente a un tubo de desagüe integrado en la pared de la habita- ción y apretando con una brida. Puede extender el tubo de de- sagüe hasta un máximo de 400 cm. Póngase en contacto con el servicio técnico para el otro tu- bo de desagüe y la extensión.
- Page 79 ESPAÑOL...
- Page 80 132938941-A-152011...
Need help?
Do you have a question about the L98690FL and is the answer not in the manual?
Questions and answers