Table of Contents
Advertisement
Advertisement
Table of Contents

Related Manuals for AEG L9FEB969C


Summary of Contents for AEG L9FEB969C
- Page 1 L9FEB969C User Manual Washing Machine USER MANUAL...
-
Page 2: Table Of Contents
8. THE WATER SOFTENER (SOFT WATER)............16 9. CONTROL PANEL....................19 10. PROGRAMMES....................26 WI-FI - CONNECTIVITY SETUP..............30 12. DAILY USE....................... 33 13. HINTS AND TIPS....................37 14. CARE AND CLEANING..................39 15. TROUBLESHOOTING..................45 16. CONSUMPTION VALUES................50 My AEG Care app... -
Page 3: Safety Information
ENGLISH FOR PERFECT RESULTS Thank you for choosing this AEG product. We have created it to give you impeccable performance for many years, with innovative technologies that help make life simpler – features you might not find on ordinary appliances. Please spend a few minutes reading to get the very best from it. - Page 4 Children between 3 and 8 years of age and persons • with very extensive and complex disabilities shall be kept away from the appliance unless continuously supervised. Children of less than 3 years of age should be kept •...
-
Page 5: Safety Instructions
ENGLISH Old hose sets must not be reused. • If the mains power supply cable is damaged, it must • be replaced by the manufacturer, its Authorised Service Centre or similarly qualified persons to avoid an electrical hazard. Before any maintenance operation, deactivate the •... - Page 6 • Do not put flammable products or by our Authorised Service Centre. items that are wet with flammable • Connect the mains plug to the mains products in, near or on the appliance.
-
Page 7: Product Description
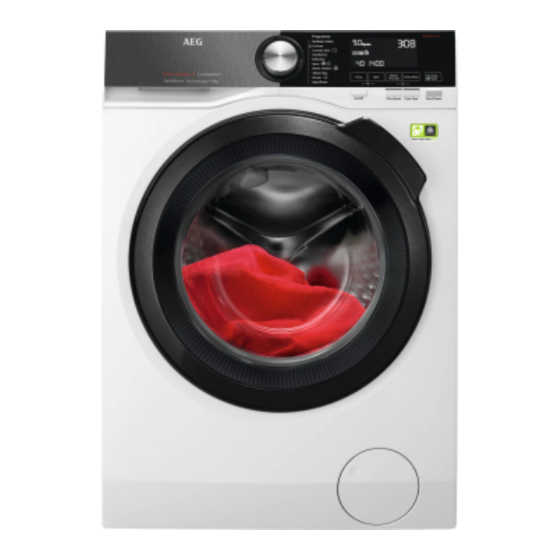
ENGLISH including heat pumps, piping and • Disconnect the appliance from the related equipment including hoses, mains electrical and water supplies. valves, filters and aquastops, printed • Cut off the mains electrical cable circuit boards, electronic displays, close to the appliance and dispose of pressure switches, thermostats and sensors, software and firmware •... - Page 8 3.2 Appliance overview 12 13 Worktop Feet for levelling the appliance Detergent dispenser and salt Drain hose compartment Inlet hose connection Control panel Mains cable Door handle Transit bolts Internal light Hose support Rating plate Drain pump filter The rating plate reports the model name (A), product number (B), electrical ratings (C) and serial number (D).
-
Page 9: Technical Data
ENGLISH Compartment for washing phase: Maximum level for detergent/ powder detergent, stain remover. additives quantity. When using liquid When selecting a prewash detergent, make sure phase, put the detergent/ that the special additive in a dosing ball container for liquid inside the drum. -
Page 10: Installation
5. INSTALLATION 4. Open the door and remove the WARNING! polystyrene piece from the door seal Refer to Safety chapters. and all the items from the drum. 5.1 Unpacking WARNING! Remove all the packaging and the transit bolts before installing the appliance. - Page 11 ENGLISH Attach the sound barriers at a room temperature. 13. Pull up the appliance in vertical position. CAUTION! Do not use alcohol, solvents or chemical products. 9. Make sure to identify the different 14. Remove the power supply cable and sizes and the positions of the sound the drain hose from the hose holders.
- Page 12 We recommend that you keep the packaging and the transit bolts for any movement of the appliance. The appliance must be level and stable. 5.2 Installation on suspended A correct adjustment of the flooring appliance level prevents the vibration, noise and the...
- Page 13 ENGLISH It is possible to connect the drain hose in different ways: 1. Make a U shape with the drain hose 45º 45º and put it around the plastic hose 20º 20º guide. 2. On the edge of a sink - Fasten the guide to the water tap or to the wall.
-
Page 14: Accessories
6. ACCESSORIES 6.1 Available in Only appropriate www.aeg.com/shop or from accessories approved by authorised dealer AEG ensure the safety standards of the appliance. If Read carefully the instructions supplied unapproved parts are used, with the accessory. any claims will be... -
Page 15: Before First Use
If you install the appliance on a plinth under the washing machine. that is not an accessory supplied by Verify the compatible AEG, secure the appliance in the fixing stacking kit by checking the plates. depth of your appliances. Read carefully the instructions supplied with the accessory. -
Page 16: The Water Softener (Soft Water)
8. THE WATER SOFTENER (SOFT WATER) 8.1 Introduction display shows the default level C04 and the indicator goes on. It The water contains harsh minerals. The means the water softener is active higher the content of these minerals the during washing only. - Page 17 ENGLISH completely. The indicator How to deactivate the water go off and the appears in softener the display. Once you have entered the menu by 2. Touch the Start/Pause button to pressing Stains/Prewash and the Plus confirm your choice and exit the Steam buttons: menu.
- Page 18 Only use special salt for dishwasher and/or washing machine. The proper salt can be ordered from the web site! Other types of salts are less efficient and over time could damage the water softener technology permanently. WARNING! Do not use fine salt! 4.
-
Page 19: Control Panel
ENGLISH If you usually run very short cycles, the regeneration process may not occur: you could see that salt has not been used, since it is consumed during regeneration phase only. To ensure the regeneration process run a Cottons or a Synthetics programme once a week or every two weeks at least. - Page 20 Programme For selecting the desired washing programme. Refer to "Pro‐ dial grammes" chapter for more details. It provides information about the setting programme. Refer to Display "Display" paragraph for more details. Press this button repeatedly to activate one of the two options or both.
- Page 21 ENGLISH With this option you can decrease the programme duration: • If your laundry is normally or lightly soiled, it may be advisable to shorten the washing programme. Touch this button once to decrease the duration. • In case of smaller load, touch this button twice to set an extra Time Save quick programme.
- Page 22 Press this button repeatedly to activate one of the two options. The relevant indicator goes on in the display. • Stains Select this option to pre-treat heavily soiled or stained laundry using stain remover. Pour the stain remover into compartment .
- Page 23 ENGLISH When you set a programme, the appliance automatically selects the default spin speed. Touch this button repeatedly to: • Change the spin speed. The display shows only the spin speeds availa‐ ble for the set programme. • Set No spin option. This option set with Spin/Drain option (if present) performs the drain phase only.
- Page 24 With this option you can prevent that the children play with the control panel. To activate/deactivate this option, touch the Stains/Prewash and the Extra Rinse buttons simultaneously until the indicator comes on/goes off on the display. You can activate this option: Child Lock •...
- Page 25 ENGLISH 9.2 Display Maximum load indicator. The icon flashes during laundry load estima‐ tion (refer to "ProSense load detection" paragraph). Maximum laundry indicator. It flashes when the laundry load exceeds the maximum declared load of the selected programme. Salt Salt refilling indicator. The compartment needs salt refilling: the com‐...
-
Page 26: Programmes
Anti-crease phase indicator. Child safety lock indicator. Time saving indicator. Temperature indicator. The indicator appears when a cold wash is set. Spin speed indicator. Rinse hold indicator. No spin indicator. Available with Spin/Drain programme only, if present. Quiet indicator. - Page 27 ENGLISH Programme Programme description Delicate fabrics such as acrylics, viscose and mixed fab‐ rics requiring gentler washing. Normally and lightly soiled Delicates items. Machine washable wool, hand washable wool and other fabrics with «hand washing» care symbol Wool Special programme for a single feather/down jacket or du‐ vet, also with synthetic filling.
- Page 28 Programme Default tempera‐ Reference spin Maximum load ture speed Temperature Spin speed range range 40 °C 1600 rpm 9 kg Eco 40-60 1600 rpm - 400 rpm 60 °C - 30 °C 40 °C 1200 rpm 4 kg 60 °C - Cold...
- Page 29 ENGLISH ■ ■ ■ ■ ■ ■ ■ ■ ■ Spin ■ ■ ■ ■ ■ ■ ■ Rinse Hold ■ ■ ■ ■ Quiet ■ ■ ■ ■ Stains ■ ■ ■ Prewash ■ ■ ■ ■ ■ ■ Extra Rinse ■...
-
Page 30: Wi-Fi - Connectivity Setup
Programme Universal Liquid Uni‐ Liquid for Delicates Special versal coloureds woollens powder Cottons ▲ ▲ ▲ Eco 40-60 ▲ ▲ ▲ Synthetics ▲ ▲ ▲ Delicates ▲ ▲ Wool ▲ ▲ Down Jack‐ ▲ ▲ ▲ 20 Min. - 3 kg ▲... - Page 31 The access point will be open for about 3 connection in the appliance. If not, minutes. read the next paragraph 'Configuring 5. Configure the "My AEG" app on your the appliance wireless connection'. smart device and follow the 4. Start the application. Select the...
- Page 32 2. Touch the Start/Pause button to Every time you switch the activate the Remote Start before the appliance on, the appliance takes 45 seconds to connect indicator stops blinking. to the network automatically. The indicators appear on the When the indicator...
-
Page 33: Daily Use
ENGLISH 12. DAILY USE WARNING! CAUTION! Refer to Safety chapters. Washing heavily oiled, greasy stains could cause damage rubber parts of the 12.1 Activating the appliance washing machine. 1. Connect the mains plug to the mains socket. 12.3 Filling the detergent and 2. - Page 34 4. Close the detergent dispenser. 3. Close the detergent dispenser. 12.4 Setting a programme 1. Turn the programme dial to select the desired washing programme. The related programme indicator comes The indicator of the Start/Pause button flashes. The display shows the maximum...
- Page 35 ENGLISH After touching the Start/Pause button, The drain pump can operate the maximum declared load indicator shortly before the appliance goes off, the indicator flashes, the fills water. ProSense starts the laundry load detection: 12.6 Starting a programme with the delay start 1.
- Page 36 E.g. the washing or pre wash phase is If the ProSense phase is already carried out and the water filling is already running: started, the new programme When the phase ends the relevant starts without repeating the indicator stops flashing and is steady on.
-
Page 37: Hints And Tips
ENGLISH In the display all washing phase 1. If necessary, touch the Spin button to indicators become steady and the time decrease the spin speed proposed by the appliance. area shows . 2. Touch the Start/Pause button: The indicator of the Start/Pause button •... - Page 38 13.1 The laundry load • Divide the laundry into: white, coloured, synthetics, delicates and wool. • Follow the washing instructions on the laundry care labels. • Do not wash white and coloured items together. • Some coloured items can discolour with the first wash.
-
Page 39: Care And Cleaning
ENGLISH • The choice and quantity of detergent • sudsing, will depend on: type of fabric • reduced washing effect, (delicates, woollens, cottons, etc), the • inadequate rinsing, colour of clothes, size of the load, • a greater impact for the environment. degree of soiling, wash temperature 13.4 Ecological hints and hardness of the water used. - Page 40 14.5 Maintenance wash Remove any foreign objects (such as metal clip, buttons, coins, etc) that you The repeated and prolonged use of low may find in the door seal, the filters and temperature and short programmes can the drum. Refer to 'Door seal with double...
- Page 41 ENGLISH 2. Remove the insert for the softener Always follow the and, if inserted, the container for instructions that you find on liquid detergent. the packaging of the product. Do not clean the drum with acidic descaling products, scouring products containing chlorine or iron or steel.
- Page 42 Clean the drain pump if: • The appliance does not drain the water. • The drum does not turn. • The appliance makes an unusual noise because of the blockage of the drain pump. • The display shows the alarm code WARNING! •...
- Page 43 ENGLISH 11. Put the filter back into the special guides by turning it clockwise. Make sure that you tighten the filter correctly to prevent leakages. 5. When the bowl is full of water, turn the filter back and empty the container.
- Page 44 1. Remove the inlet hose from the tap and clean the filter. 45° 20° 14.11 Emergency drain If the appliance cannot drain the water, carry out the same procedure, described 2.
-
Page 45: Troubleshooting
ENGLISH 15. TROUBLESHOOTING WARNING! Refer to Safety chapters. 15.1 Alarm Codes and Possible failures The appliance does not start or it stops during operation. First try to find a solution to the problem (refer to the tables). WARNING! Deactivate the appliance before carrying out any check. With some problems, the display shows an alarm code and the Start/Pause button may flash continuously: If the appliance is overloaded, remove some items... - Page 46 • Make sure that the sink spigot is not clogged. • Make sure that the drain hose has no kinks or bends. The appliance does • Make sure that the drain filter is not clogged. Clean the filter, if not drain the water.
- Page 47 ENGLISH Problem Possible solution • Set the spin programme. If the drain programme is not availa‐ The spin phase does ble in the programme dial, it can be set via App’. not operate or the • Make sure that the drain filter is not clogged. Clean the filter, if washing cycle lasts necessary.
- Page 48 Problem Possible solution • Make sure that the wireless signal reaches the appliance. Try to move the home router as near the appliance as possible or The App cannot fre‐ consider purchasing a wireless range extender. quently connect to the •...
- Page 49 ENGLISH After the check, activate the appliance. The programme continues from the point of interruption. If the problem occurs again, contact the Authorised Service Centre. The necessary data for the service centre are on the rating plate. 15.2 Emergency door opening In case of power failure or functioning failure the appliance door remains...
-
Page 50: Consumption Values
5. Run a cotton or synthetic cycle, without reducing time, to restore the water softener function. 16. CONSUMPTION VALUES 16.1 Introduction This user manual reports two different tables in order to favour a gradual passage from a regulation to the other: •... - Page 51 ENGLISH 16.3 According to Commission Regulation Eu 2019/2023 Eco 40-60 pro‐ Litres h:mm °C gramme Full load 0.730 3:40 1551 Half load 0.535 2:45 1551 Quarter load 0.265 2:45 1551 1) The performance results and low energy consumption are guaranteed by the use of softened water. To maintain this achievement over time, it is essential to set the right water hardness level by following the user manual instructions and use salt regularly for regenerating the resins.
- Page 52 Off Mode (W) Left On Mode (W) 0.30 0.30 Power consumption in networked stand‐ Time to networked standby (min.) by (W) 2.00 The information given in the chart above is compliant with the EU Commission regulation 1015/2010 implementing directive 2009/125/EC and EU commission regulation No.
- Page 56 The software included in this product contains copyrighted software that is licensed under the BSD, Apache 2.0 and others. It is possible to display the complete copy of the licenses in the My AEG Care app that can be downloaded from the corresponding App store from the License menu section.
Need help?
Do you have a question about the L9FEB969C and is the answer not in the manual?
Questions and answers