Table of Contents
Advertisement
Advertisement
Table of Contents

Related Manuals for AEG SANTO 70312-1 KG


Summary of Contents for AEG SANTO 70312-1 KG
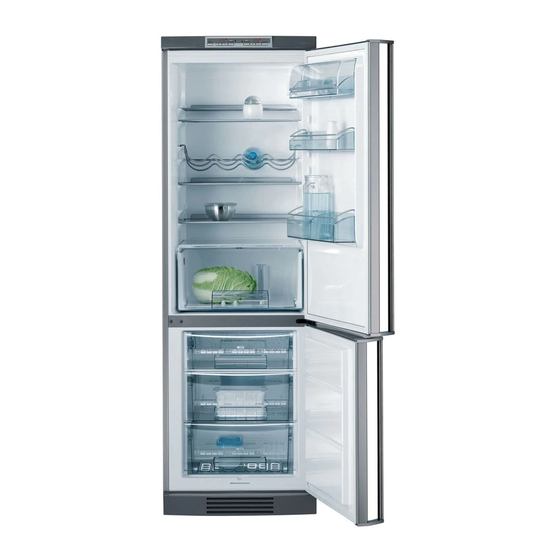
- Page 1 SANTO 70312-1 KG Fridge-freezer Operating Instructions...
- Page 2 In the event of a malfunction, these operating instructions contain infor- mation on how to rectify faults yourself, see the “Something Not Working” section. For futher assistance contact your local AEG service Force Centre, see the chapter “Service and Spare Parts.
-
Page 3: Table Of Contents
Contents Safety ..........4 Disposal . -
Page 4: Safety
Safety The safety aspects of our refrigerators/freezers comply with accepted tech- nical standards and the German Appliance Safety Law. Nevertheless, we consider it our obligation to make you aware of the following safety infor- mation: Intended use • The refrigerator is intended for use in the home. It is suitable for the coo- ling, freezing and storing of frozen food, as well as for making ice. -
Page 5: Disposal
Warning! Before disposing of old appliances make them inoperable. Remo- ve plug from mains, sever the power cable, remove or destroy any snap or latch closures, to prevent small children being trapped inside. The symbol on the product or on its packaging indicates that this product may not be treated as household waste. - Page 6 Service • Under no circumstances should you attempt to repair the appliance your- self. Repairs carried out by inexperienced persons may cause injury or serious malfunctioning. Contact your local AEG Service Force Centre. Disposal Appliance Packaging Information All materials are environmentally sound! The plastics can be recycled and are identified as follows: >PE<...
-
Page 7: Operation And Control Panel Fridge
Operation and control panel - Fridge Mains pilot indicator (green) Fridge button ON/OFF Temperature setting button (for warmer temperatures) Temperature display Temperature setting button (for colder temperatures) COOLMATIC function "ON" indicator (yellow) COOLMATIC button Temperature setting buttons The temperature is adjusted using the “C“ and “E“ buttons. These buttons are connected to the temperature display. -
Page 8: Starting Up - Setting The Temperature
• During normal operation, the temperature currently present in the fridge (ACTUAL temperature) is displayed. • When the temperature is being adjusted a flashing display indicates the fridge temperature currently set (DESIRED temperature). Starting Up - Setting the Temperature Plug the mains plug into the mains socket. Press ON/OFF button. -
Page 9: Interior Accessories
To turn on the holiday function, press button (C). Press button (C) continuosly until the letter “H” (Holiday) appears on the temperature indicator. The temperature indicator can modify the displayed temperature up to +8°C, 1° at a tim. 8°C will be followed by the letter “H”. Now the refrigerator is in the “holiday”... -
Page 10: Drawer
Drawer The drawer is suitable for storing fruit and vegetables. There is a separator inside the drawer that can be placed in different posi- tions to allow for the subdivision best suited to personal needs. There is a grille on the bottom of the drawer to separate the fruit and vegetables from any humidity that may form on the bottom... -
Page 11: Operating And Indicator Panel Freezer
Operating and indicator panel freezer FROSTMATIC function "ON" indicator (yellow) FROSTMATIC button Temperature setting button (for warmer temperatures) Temperature display Temperature setting button (for colder temperatures) Alarm reset button Alarm reset light Temperature setting buttons The temperature is adjusted using the “J“ and “L“ buttons. These buttons are connected to the temperature display. -
Page 12: Starting Up - Setting The Temperature
DESIRED temperature means: The temperature that has been selected for inside the freezer. The DESIRED temperature is indicated by flashing numbers. ACTUAL temperature means: The temperature display indicates the current temperature inside the freezer. The ACTUAL temperature is indicated with illuminated numbers. Temperature display The temperature display can indicate several pieces of information. -
Page 13: Alarm Reset Button
FROSTMATIC The FROSTMATIC function accelerates the freezing of fresh food and, at the same time, protects foodstuffs already stored from undesirable warming. The FROSTMATIC function is switched on by pressing the FROSTMATIC but- ton. The yellow light illuminates. If the FROSTMATIC function is not ended manually, the appliance switch off the FROSTMATIC function after 48 hours. -
Page 14: Freezing And Storing Frozen Food
Freezing and storing frozen food You can use your freezer for freezing fresh food yourself. Important! • The temperature in the freezer compartment must be –18 °C or colder before freezing food. • Please observe the freezing capacity given on the rating plate. The free- zing capacity is the maximum quantity of fresh food that can be frozen within a period of 24 hours. -
Page 15: Preparation Of Ice Cubes
Preparation of Ice Cubes Fill the ice cube tray 3/4 full with cold water, place it in the freezer com- partment and leave to freeze. To loosen the frozen cubes, either bend the ice cube tray or hold it under running water for a few seconds. -
Page 16: Defrosting
Defrosting Refrigerator Frost is automatically eliminated from the evaporator of the refrigerator compartment every time the motor compressor stops, during normal use. The defrost water drains out through a trough into a special container at the back of the appliance, over the motor compressor, where it evaporates. Freezer The freezer compartment, however, will become progrssively covered with frost. -
Page 17: Cleaning And Care
Cleaning and Care For hygienic reasons the appliance interior, including interior accessories, should be cleaned regularly. Warning! • The appliance should not be connected to the mains during cleaning. Danger of electrical shock! Before cleaning switch the appliance off and remove the plug from the mains, or switch off or turn out the circuit breaker or fuse. -
Page 18: Energy Saving Tips
After cleaning wipe with fresh water and rub dry. Accumulation of dust at the condenser increases energy consumption. For this reason carefully clean the condenser at the back of the appliance once a year with a soft brush or a vacuum cleaner. Check the water drain hole on the rear wall of the fridge. -
Page 19: What To Do If
What to do if ... Correcting Malfunctions A malfunction may only be caused by a minor fault that you can rectify yourself using the following instructions. Do not perform any other work on the appliance if the following information does not provide assistance in your specific case. -
Page 20: Changing The Light Bulb
Malfunction Possible Cause Remedy Appliance is not level. Readjust the feet. Unusual noises. The appliance is touching the Move the appliance slightly. wall or other objects. The compressor does not start This is normal, no error has The compressor starts after a immediately after changing occurred. -
Page 21: Service And Spare Parts
Please note that a valid purchase receipt or guarantee documentation is required for in-guarantee service calls. Customer Care Department For general enquiries concerning your AEG appliance or for futher information on AEG products, please contact our Customer Care Department by letter or telephone at the address below or visit our website at www.aeg.co.uk. -
Page 22: Guarantee Conditions
GUARANTEE CONDITIONS Standard guarantee conditions We, AEG, undertake that if within 12 months of the date of the purchase this AEG applian- ce or any part thereof is proved to be defective by reason only of faulty workmanship or materials, we will, at our discretion repair or replace the same FREE OF CHARGE for labour, materials or carriage on condition that: ·... -
Page 23: Installation - Electrical Connection
Installation Electrical Connection Any electrical work required to install this appliance should be carried out by a qualified electrician or competent person. WARNING – THIS APPLIANCE MUST BE EARTHED The manufacturer declines any liability should these safety measures not be observed. Before switching on, make sure the electricity supply voltage is the same as that indicated on the appliance rating plate. -
Page 24: Positioning - Rear Spacer
Positioning This appliance should only be installed at a location where the ambient temperature corresponds to the climate classification indicated on the rat- ing plate, which is located at the left on the inside of the appliance. The following table shows which ambient temperature is correct for each climate classification: SN +10°C to + 32°C +16°C to + 32°C... -
Page 25: Reversing The Door
Reversing the door The side at which the door hangs can be changed from the right side (fac- tory supplied) to the left side, if the installation site requires. Warning! When changing the side at which the door opens, the appliance may not be connected to the mains. -
Page 26: Regulations, Standards, Guidelines
Dismantle the handles, by sliding the handle-cover, by unscrewing its side and middle screws and reassemble them on the opposite side. Cover the holes left open with the plugs contained in the documentation pack. Regulations, Standards, Guidelines This appliance was designed for household use and was manufactured in accordance with the appropriate standards. - Page 27 To buy accessories, consumables and spare parts at our online shop please visit: http://www.aeg-electrolux.co.uk...
- Page 28 AEG Hausgeräte GmbH Postfach 1036 D-90327 Nürnberg http://www.aeg.hausgeraete.de © Copyright by AEG 2223 338-01 05/06 Subject to change without notice...
Need help?
Do you have a question about the SANTO 70312-1 KG and is the answer not in the manual?
Questions and answers