Table of Contents
Advertisement
Before operating the unit, read these operating instructions thoroughly and keep them for future reference.
85264181212002
Operating Instructions
Split System Air Conditioner
Model No.
Indoor Units
CS-KE18NKU
CS-KE24NKU
This air conditioner uses the refrigerant R410A.
1006 Kadoma, Kadoma City, Osaka, Japan
Outdoor Units
CU-KE18NKU
CU-KE24NKU
CV6233187235
Advertisement
Table of Contents

Related Manuals for Panasonic CS-KE18NKU


Summary of Contents for Panasonic CS-KE18NKU
-
Page 1: Operating Instructions
Operating Instructions Split System Air Conditioner Model No. Indoor Units Outdoor Units CS-KE18NKU CU-KE18NKU CS-KE24NKU CU-KE24NKU This air conditioner uses the refrigerant R410A. Before operating the unit, read these operating instructions thoroughly and keep them for future reference. 1006 Kadoma, Kadoma City, Osaka, Japan... -
Page 2: Table Of Contents
FEATURES This air conditioner is an inverter type unit that automatically adjusts capability as appropriate. Details on these functions are provided below; refer to these descriptions when using the air conditioner. • Microprocessor Controlled Operation • Auto. Flap Control The interior compartment of the remote controller contains This automatically sets the flap to the optimum position several features to facilitate automatic operation, easy during heating, cooling, and drying operation. -
Page 3: Installation Location
INSTALLATION LOCATION • We recommend that this air conditioner be installed properly by qualified installation technicians in accordance with the Installation Instructions provided with the unit. • Before installation, check that the voltage of the electric supply in your home or office is the same as the voltage shown on the nameplate. - Page 4 • To prevent possible hazards from insulation failure, the unit must be grounded. • Do not clean inside the indoor and outdoor units by users. Engage authorized dealer or specialist for cleaning. • In case of malfunction of this appliance, do not repair by yourself. Contact to the sales dealer or service dealer for a repair.
-
Page 5: Names Of Parts
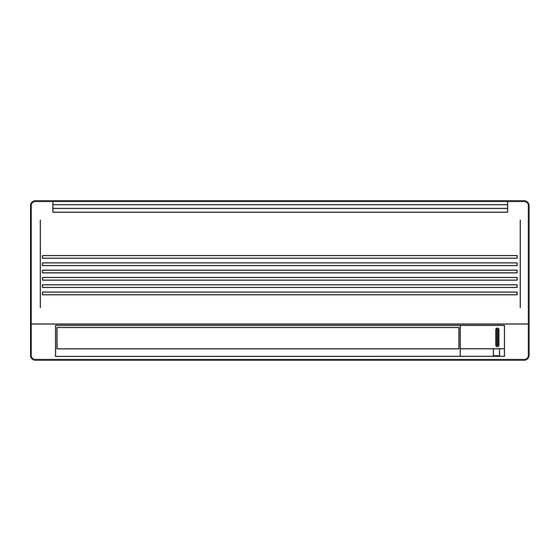
NAMES OF PARTS Air Intakes INDOOR UNIT Air Outlet Remote Controller Drain Hose Refrigerant Tubes OUTDOOR UNIT Air Outlet This illustration is based on the external view of a standard model. NOTE Consequently, the shape may differ from that of the air conditioner which you have selected. -
Page 6: Unit Display And Operation Button
UNIT DISPLAY AND OPERATION BUTTON INDOOR UNIT IMPORTANT OPERATION lamp TIMER lamp Avoid using radio equipment QUIET lamp QUIET such as mobile phone near (within 4 ft. (1.2 m)) the remote control receiver. Some radio OPERATION button equipment may cause malfunction of the unit. - Page 7 REMOTE CONTROLLER (DISPLAY) Displayed when transmitting data Displayed when indoor unit sensor is in use Displayed when setting temperature Displayed when temperature is shown Displayed when setting timer Displayed when the time display is set to 12-hour time. Symbols (1) Operation mode (4) Timer 24-hour clock with ON/OFF AUTO .........
-
Page 8: Remote Controller
REMOTE CONTROLLER Sensor Transmitter (Cover closed) Display ON/OFF operation button QUIET button 1 HR. TIMER button Temperature setting buttons (TEMP.) MODE selector button FAN SPEED selector button NIGHT SETBACK button FLAP button HIGH POWER button ON TIME Advance button OFF TIME Advance button setting setting... - Page 9 REMOTE CONTROLLER (CONTINUED) MODE selector button Use this button to select AUTO, HEAT, DRY, COOL or FAN mode. (AUTO) : When this setting is selected, the air conditioner calculates the difference between the thermostat setting and the room temperature and automatically switches to the ‘‘COOL’’...
-
Page 10: Using The Remote Controller
REMOTE CONTROLLER (CONTINUED) Temperature Display Selector This switches the temperature display between °C and °F. button Time Display Selector button This switches the time display between 24-hour time and 12-hour time. ACL button (ALL CLEAR) Puts the remote controller into pre-operation status. Always press this button after replacing the batteries. - Page 11 USING THE REMOTE CONTROLLER (CONTINUED) How to Use the Remote When using the remote controller, always point the unit’s transmitter head directly Controller at the air conditioner’s receiver. Air Conditioner (Indoor unit) Receiver (Transmitter head) Remote Controller Remote Controller Installation The remote controller may be operated either from a non-fixed position or from a Position wall-mounted position.
-
Page 12: Operation With The Remote Controller
OPERATION WITH THE REMOTE CONTROLLER 1. Automatic Operation This unit automatically switches between cooling operation and heating operation according to the difference between the room temperature and the temperature setting. STEP 2 STEP 1 NOTE Check that the circuit breaker on the power panel is turned on. Once mode is selected and the unit is preset by following the steps below, you can have the air conditioner automatically bring the room to the desired... -
Page 13: Manual Operation
OPERATION WITH THE REMOTE CONTROLLER (CONTINUED) 2. Manual Operation STEP 2 STEP 3 STEP 1 STEP 4 STEP 5 NOTE Check that the circuit breaker on the power panel is turned on. If the automatic operation settings of the unit do not meet your needs, press the setting buttons as described below and change the settings as desired. -
Page 14: Adjusting The Fan Speed
OPERATION WITH THE REMOTE CONTROLLER (CONTINUED) • Choose the best position in the room for the remote controller, which also acts NOTE as the sensor for room comfort and transmits the operating instructions. Once you’ve found this best position, always keep the remote controller there. •... -
Page 15: Night Setback Mode
OPERATION WITH THE REMOTE CONTROLLER (CONTINUED) 5. Night Setback Mode Night Setback Mode is used for saving energy. Press the NIGHT SETBACK button while unit is operating. (except AUTO and FAN mode) mark appears in the display. To release the night setback function, press the NIGHT SETBACK button again. NOTE Pressing the MODE selector button cancels Night Setback mode. -
Page 16: Quiet Mode
OPERATION WITH THE REMOTE CONTROLLER (CONTINUED) 6. QUIET Mode QUIET Mode is used to reduce the fan sound of the indoor unit. Press the QUIET button. mark appears in the display. To cancel, press QUIET button again. • In QUIET Mode, the fan rotates at a slower speed than the fan speed setting. •... -
Page 17: Special Remarks
SPECIAL REMARKS ‘‘DRY’’ ( ) Operation How it works? • Once the room temperature reaches the level that was set, the unit’s operation frequency is changed automatically. • During DRY operation, the fan speed automatically runs at lower speed for providing a comfortable breeze. -
Page 18: Setting The Timer
SETTING THE TIMER In the descriptions below, the following settings are used for the temperature and NOTE time indicator selector button on the bottom front section of the remote controller. • Temperature: °F • Time: AM, PM 1. How to set the present (Example) To set to 10:30 pm. - Page 19 SETTING THE TIMER (CONTINUED) 3. How to set the ON time (Example) To start operation at 7:10 am. Operation Indication 1. Press the ON TIME setting The timer indication is button once. displayed, and the present ON time is shown. 2.
-
Page 20: Using The 1-Hour Off Timer
USING THE 1-HOUR OFF TIMER 1. 1-Hour OFF Timer This function causes the unit to operate for one hour and then stop, regardless of whether the unit is on or off when this button is pressed. indicator in the display indicates that this function is operating. Setting procedure: Regardless of whether the unit is operating or stopped, press the 1 HR. -
Page 21: Adjusting The Airflow Direction
ADJUSTING THE AIRFLOW DIRECTION 1. Horizontal The horizontal airflow can be adjusted by moving the vertical vanes with your hands to the left or right. When the humidity is high, the vertical vanes should be in the front CAUTION position during the cooling or dehumidifying operation. If the vertical vanes are positioned all of the way to the right or left, condensation may begin to form around the air vent and drip down. -
Page 22: Operation Without The Remote Controller
OPERATION WITHOUT THE REMOTE CONTROLLER INDOOR UNIT If you have lost the remote controller or it has trouble, follow the steps below. When the air conditioner is not running Each time the OPERATION button is pressed, the type of operation conducted is indicated by the changing color of the OPERATION lamp. - Page 23 CARE AND CLEANING (CONTINUED) Filter The filter behind the air intake grille should be checked and cleaned at least once every two weeks. How to remove the filter 1. Grasp both ends of the air Air intake grille intake grille, and remove it by opening towards the front and pulling towards you.
-
Page 24: Wired Remote Controller
CARE AND CLEANING (CONTINUED) Cleaning the main unit • Wipe clean using a soft, dry cloth. and remote controller • To remove stubborn dirt, moisten a cloth in warm water no hotter than 104 °F, wring thoroughly, and then wipe. •... -
Page 25: Troubleshooting (Before Calling For Service)
TROUBLESHOOTING (BEFORE CALLING FOR SERVICE) If your air conditioner does not work properly, first check the following points before requesting service. If it still does not work properly, contact your dealer or service center. Trouble Possible Cause Remedy Air conditioner does not run at all. 1. -
Page 26: Specifications
SPECIFICATIONS Outdoor Unit Indoor Unit Model No. CU-KE18NKU CS-KE18NKU Power Source Single-phase, 208-230 V, 60 Hz 5.15 [1.20 ~ 5.15] Cooling Capacity BTU/h 17,500 [4,000 ~ 17,500] 6.00 [1.30 ~ 6.00] Heating Capacity BTU/h 20,400 [4,400 ~ 20,400] Outdoor (Hi) –...
Need help?
Do you have a question about the CS-KE18NKU and is the answer not in the manual?
Questions and answers