Vulcan-Hart GH30 Installation & Operation Manual
Gh series heavy duty gas ranges
Hide thumbs
Also See for GH30:
- Replacement parts catalog (54 pages) ,
- Installation & operation manual (48 pages) ,
- Service manual (16 pages)
Table of Contents
Advertisement
Quick Links
GH SERIES HEAVY
DUTY GAS RANGES
MODELS
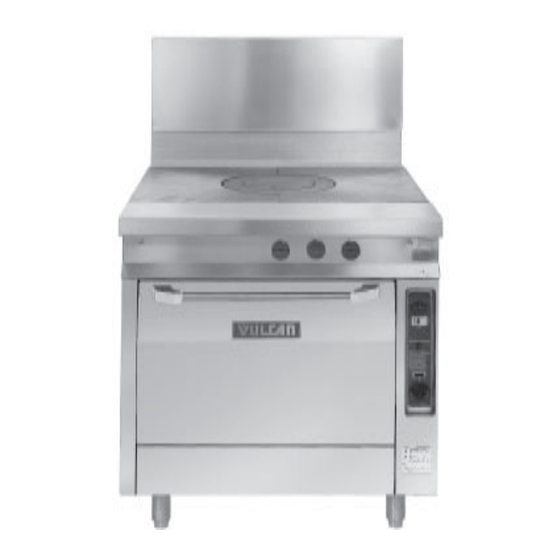
GH30
GH45
GH3/72
GH6
GH60
GH60T
GH72
GH72/45
GH45/72
GH60/45
GH60T45
GH60/72
GH60T72
GHM30
GHM45
GHM3/72
GHM6
GHM60
GHM60T
GHM72
GHM7245
GHM4572
GHM6045
GHM6T45
GHM6072
GHM6T72
GHX45
GHX60
GHX60T
GHXM45
GHXM60
GHXM60T
GHX72
GHXM72
V U L C A N - H A R T C O M P A N Y , P . O . B O X 6 9 6 , L O U I S V I L L E , K Y 4 0 2 0 1 - 0 6 9 6 , TEL. (502) 7 7 8 - 2 7 9 1
FORM 31107 Rev. B (October 2001)
ML-52141
ML-52142
ML-126406
ML-126402
ML-52144
ML-52171
ML-52145
ML-52176
ML-52180
ML-52174
ML-52186
ML-52175
ML-52188
ML-52151
ML-52152
ML-126408
ML-126404
ML-52154
ML-52172
ML-52155
ML-52179
ML-52181
ML-52177
ML-52187
ML-52178
ML-52189
ML-52217
ML-52218
ML-52223
ML-52220
ML-52221
ML-52224
ML-52219
ML-52222
INSTALLATION &
OPERATION MANUAL
MODEL GH30
www.vulcanhart.com
Advertisement
Table of Contents

Related Manuals for Vulcan-Hart GH30


Summary of Contents for Vulcan-Hart GH30
- Page 1 ML-52154 GHM60T ML-52172 GHM72 ML-52155 GHM7245 ML-52179 GHM4572 ML-52181 GHM6045 ML-52177 GHM6T45 ML-52187 GHM6072 ML-52178 GHM6T72 ML-52189 MODEL GH30 GHX45 ML-52217 GHX60 ML-52218 GHX60T ML-52223 GHXM45 ML-52220 GHXM60 ML-52221 GHXM60T ML-52224 GHX72 ML-52219 GHXM72 ML-52222 V U L C A N - H A R T C O M P A N Y , P . O . B O X 6 9 6 , L O U I S V I L L E , K Y 4 0 2 0 1 - 0 6 9 6 , TEL. (502) 7 7 8 - 2 7 9 1 FORM 31107 Rev.
-
Page 2: Important For Your Safety
IMPORTANT FOR YOUR SAFETY THIS MANUAL HAS BEEN PREPARED FOR PERSONNEL QUALIFIED TO INSTALL GAS EQUIPMENT, WHO SHOULD PERFORM THE INITIAL FIELD START-UP AND ADJUSTMENTS OF THE EQUIPMENT COVERED BY THIS MANUAL. POST IN A PROMINENT LOCATION THE INSTRUCTIONS TO BE FOLLOWED IN THE EVENT THE SMELL OF GAS IS DETECTED. -
Page 3: Table Of Contents
TABLE OF CONTENTS CONFIGURATIONS OF MODEL GH SERIES HEAVY DUTY RANGES ......... 4 GENERAL ............................8 INSTALLATION ............................ 8 UNPACKING ..........................8 LOCATION ..........................8 INSTALLATION CODES AND STANDARDS ................. 9 ASSEMBLY ..........................10 LEVELING ..........................18 GAS CONNECTIONS ......................18 TESTING THE GAS SUPPLY SYSTEM ................ -
Page 4: Configurations Of Model Gh Series Heavy Duty Ranges
CONFIGURATIONS OF MODEL GH SERIES HEAVY DUTY RANGES WITH STANDARD AND CONVECTION OVENS GH45 GH30 GH72 GH3/72 GH45 FULL BODY 34" WIDE GH72/45 GH45/72 PL-53255 GH60/GH60T GH60/72/GH60T72 GH60/45/GH60T/45 – 4 –... - Page 5 CONFIGURATIONS OF MODEL GH SERIES HEAVY DUTY MODULAR RANGES GHM45 GHM30 GHM72 GHM6 GHM3/72 GHM45 GHM72/45 GHM45/72 GHM60 GHM60/72 GHM60/45 PL-53256 GHM60T GHM60T/72 GHM60T/45 – 5 –...
- Page 6 CONFIGURATIONS OF MODEL GH SERIES HEAVY DUTY EXPANDO RANGES MODEL GHX SERIES EXPANDO RANGES WITH CABINET GHX45 GHX72 GHX60 GHX60T GHX45 18" WIDE FULL BODY WITH CABINET MODEL GHXM SERIES MODULAR EXPANDO RANGES MODEL GHXM SERIES MODULAR EXPANDO RANGES GHXM45 GHXM60 GHXM72 GHXM60T...
- Page 7 CONFIGURATIONS OF GH SERIES HEAVY DUTY OVENS GHO1 SINGLE OVEN WORK TOP VIEW GHO1C SINGLE CONVECTION OVEN GHMO1 ON MODULAR STAND PL-51243 GHO2 DOUBLE STACKED OVEN – 7 –...
-
Page 8: General
(natural or propane) to make sure they agree with the specifications on the rating plate located on the lower left-hand corner of the front frame behind the bellcrank. If the supply and equipment requirements do not agree, do not proceed with the installation. Contact your dealer or Vulcan-Hart Company immediately. -
Page 9: Installation Codes And Standards
INSTALLATION CODES AND STANDARDS Your Vulcan range(s) must be installed in accordance with: In the United States: 1. State and local codes. -
Page 10: Assembly
ASSEMBLY Ranges Mounted on Casters When ranges are mounted on casters, you must use a connector (available from Vulcan-Hart) that complies with the Standard for Connectors of Movable Gas Appliances, ANSI-Z21.69 (latest edition), and a quick-disconnect device that complies with the Standard for Quick-Disconnect Devices Complying With Gas Fuel, ANSI-Z21.41 (latest edition) or CAN 1-6.9 (latest edition). - Page 11 Stockham, it must be replaced with a Ward union (Fig. 3). Failure to replace this union could result in a gas leak. If a Ward union is needed for installation, it must be ordered through the Vulcan-Hart Company Parts Depot (Part No. FP-088-89).
- Page 12 5. Replace back tops and backsplashes. 6. If front plates do not line up perfectly, adjust by means of bolts under front plate. Similar front adjustment is provided for the one-piece cast iron griddle (Model GH60) (Fig. 4). PL-40047-1 Fig. 4 Riser, Backguard and High Shelf Remove the shipping brackets on the corner of the range where a high shelf support casting is to be bolted.
- Page 13 Fig. 5 3. Carefully lift riser, backguard or high shelf over range (Fig. 6). 4. Carefully guide support channels into the two openings provided at the rear of the range (Fig. 7). Fig. 7 Fig. 6 – 13 –...
- Page 14 While lowering support channels into openings, be sure that the lower angle flange of the riser, backguard or high shelf is positioned outside the flue back (Fig. 8). Fig. 8 Once the backguard is setting in place on the range, install the left and right end caps. End caps simply slide on, in between the splasher and the backguard.
- Page 15 PL-41472 Fig. 11 Fig. 12 5. Replace back tops and top castings onto range (see Fig. 12). Shipping brackets removed in Step 2 are no longer required and may be discarded. 6. Replace riser, backguard or high shelf backsplash panel. Mounting is now complete. Thermostatically Controlled Griddle Installation Set metal brick supports and bricks in place.
- Page 16 2. Narrow Supports (2) — Place one on each side with smooth surface down and oval holes to outside (Fig. 14). PL-40049 Fig. 14 3. Triangle-shaped Bricks (4) — Place two each side (Fig. 15). PL-40050 Fig. 15 4. Large Bricks (2) — Set in center support as shown in Fig’s. 14 and 15. –...
- Page 17 5. The griddle plate is packaged separately from the range. Inspect bottom of griddle plate and ensure that the thermostat sensor holding bracket and hardware are attached. Loosen hardware so that plate is easily moved and tilts downward. On the top burner box front area of the range, find the coiled thermostat capillary and bulb assembly (Fig.
-
Page 18: Leveling
LEVELING Unlevel range(s) will create battery installation problems in lining up the manifolding system, and result in uneven cooked product. Using a carpenter's level, level the range(s) from front-to-rear and side-to- side. With range in its exact location or battery position, adjust leg heights. If installing a battery of equipment, begin with first unit in battery lineup. -
Page 19: Testing The Gas Supply System
(manifold) pressure of 6" (1.49 kPa) Water Column for natural gas supply, and outlet (manifold) pressure of 10" (2.49 kPa) Water Column for propane gas supply (available from Vulcan- Hart). The regulator must be adjusted to agree with the pressures indicated on the rating plate. When installing the regulator, follow instructions supplied by the regulator manufacturer. -
Page 20: Electrical Connections
Information on the construction and installation of ventilating hoods may be obtained from the standard for "Vapor Removal from Cooking Equipment," NFPA No. 96 (latest edition), available from the National Fire Protection Association, Batterymarch Park, Quincy, MA 02269. ELECTRICAL CONNECTIONS WARNING: ELECTRICAL AND GROUNDING CONNECTIONS MUST COMPLY WITH THE APPLICABLE PORTIONS OF THE NATIONAL ELECTRICAL CODE AND/OR OTHER LOCAL ELECTRICAL CODES. - Page 21 Standard Oven Pilot Before lighting oven, be sure that range top sections have been lit. 1. Open oven door and locate square pilot lighter cutout. 2. Using a taper, light oven pilot by depressing red ignition button (Fig.19) located on the side control panel above the thermostat knob.
-
Page 22: Adjustments
ADJUSTMENTS All adjustment procedures associated with pilot lighting should be performed by an authorized Vulcan-Hart installation or service person. The bypass (minimum burner) flame adjustment must be made at the time the range is installed. After adjustments are complete, replace oven control panel(s). Check identification so that each panel is returned to its respective range. -
Page 23: Operation
OPERATION WARNING: THE RANGE AND ITS PARTS ARE HOT. BE CAREFUL WHEN OPERATING, CLEANING OR SERVICING THE RANGE. BEFORE FIRST USE Seasoning of Cast Iron Hot Tops and Even-Heat Tops These tops are made of cast iron and should be seasoned prior to use. To season, pour a small amount of cooking oil (about one ounce [28 grams] per square foot [.09 square meters] of surface) over the top. -
Page 24: Controls
CONTROLS (Fig. 21) RANGE TOP BURNER When opened, allows gas to flow to the range section. To open VALVE KNOB valve, turn knob counterclockwise. To close valve, turn knob clockwise. OVEN BURNER VALVE KNOB When opened, allows gas to flow to the oven burner. To open valve, turn knob counterclockwise. -
Page 25: Inserting And Removing Standard And Convection Oven Racks
INSERTING AND REMOVING STANDARD AND CONVECTION OVEN RACKS Convection oven sections use different style racks and rack guides. On ovens provided with oven rack stops, it is necessary to place the rack, including the support hook, along the top of the side liner runners and slide the rack completely to the rear of the oven compartment until the rack drops into place (Fig. -
Page 26: Loading And Unloading Oven
LOADING AND UNLOADING OVEN Open the door and load as quickly as practical to conserve heat. Take care to avoid spilling liquids while loading. Close the door and refer to recipe for cooking time. Provide adequate space for product unloading. Rapid unloading will conserve heat and ensure proper preheating conditions for the next load, if applicable. -
Page 27: Cleaning
BEFORE CLEANING. Suggestions for Care and Cleaning Vulcan equipment is strongly constructed and is designed to give you long, satisfactory service at low cost, providing you give it proper care. Frequent cleaning and occasional adjusting should reward you with low operating and maintenance costs and faster, better service. - Page 28 2. Clean bottom drip pan. To remove drip pan, reach under and lift rear of pan about 1" (25.4 mm), slide pan to the rear about " (12.7 mm), and drop front end of pan free. Slide pan forward between the front legs. To replace pan, reverse this procedure. 3.
- Page 29 Range Tops Daily 1. Wipe top while still warm with a soft cloth or other grease absorbing material to remove spillovers, grease, etc., before they burn in. A crust on top of the range looks unsightly and slows down speed of cooking because it reduces the flow of heat to the utensil. Scrape the top if necessary. 2.
-
Page 30: Maintenance
To obtain service and parts information concerning this range, contact the Vulcan Service Agency in your area (refer to listing supplied with the range), or Vulcan-Hart Company Service Department at the address or phone number shown on the front cover of this manual. -
Page 31: Troubleshooting
TROUBLESHOOTING OVEN PROBLEM PROBABLE CAUSES Too Much Bottom Heat Insufficient heat input. Overactive flue. Uneven Bake Too low temperature. Improper operation. Side Burning Improper bypass setting. Fluctuating gas pressure. Too Much Top Heat Too high temperature. Faulty ventilation. Excessive heat input. Thermostat needs calibration. -
Page 32: Top Burner Operation
TOP BURNER OPERATION PROBLEM PROBABLE CAUSES Improper Burner Combustion Improper use, allowing improper ventilation. Excessive Valve Handle Temperatures Poor door fit. Sticking Top Burner Valves Oven door left open. Poor Ignition Insufficient gas input. Poor air-to-gas adjustment. Restriction in pilot orifice. Restriction in main burner ignition port.
Need help?
Do you have a question about the GH30 and is the answer not in the manual?
Questions and answers