Table of Contents
Advertisement
Advertisement
Table of Contents

Summary of Contents for HAMPTON BAY Antigua Plus
-
Page 2: Table Of Contents
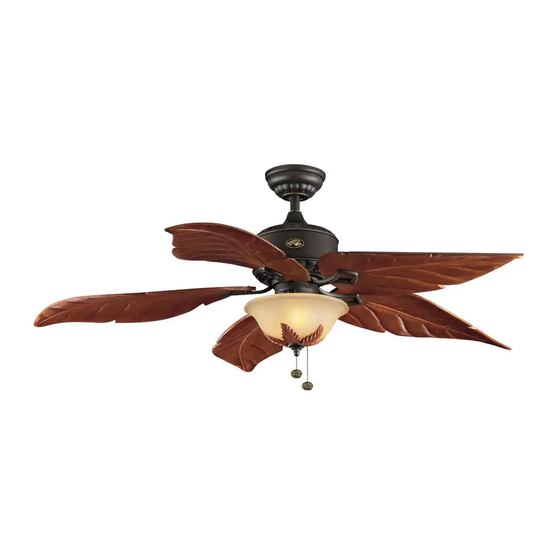
56” Antigua Plus Thank you for purchasing this Hampton Bay ceiling fan. This product has been manufactured with the highest standards of safety and quality. The finish Ceiling Fan by Hampton Bay of this fan is weather resistant, but over time will naturally weather and fade. -
Page 3: Safety Rules 1
READ AND SAVE THESE INSTRUCTIONS Avoid placing objects in path of the blades. To reduce the risk of electric shock, insure electricity has been turned off at the circuit breaker or fuse box To avoid personal injury or damage to the fan and other items, before beginning. -
Page 4: Unpacking Your Fan
Unpack your fan and check the contents. You should have the following items: Blade attachment hardware 1. Slide-On Mounting Plate (inside canopy) 8. Blade Bracket (Flange) Set (5) (15 screws) with blade bracket screws pre-installed 2. Downrod and Hanger Ball Assembly Electrical Hardware 9. -
Page 5: Tools Required
Figure 2 installation hanger bar as shown in Figure 4 MAY NOT BE ACCEPTABLE FOR FAN SUPPORT AND MAY NEED TO BE REPLACED. CONSULT A (available at your Hampton Bay retailer). LICENSED ELECTRICIAN IF IN DOUBT. Installing Your Fan 3. -
Page 6: Hanging The Fan
Hanging the Fan different procedures to follow for the two 3. Route the wires exiting the top of the fan motor through the decorative motor types of installation. REMEMBER collar cover then the canopy ring. Make sure turn pow- Standard Ceiling Mounting the slot openings are on top. -
Page 7: Close-To-Ceiling" Mounting
“Close-to-Ceiling” Mounting 4. Loosen, but do not remove, the set 6. Align the mounting holes with the holes screw on the collar on the top of the in the motor and fasten, using the three 1. Remove the canopy ring from the canopy motor housing. - Page 8 hook provided by utilizing one of the Follow the steps below to connect the fan holes at the outer rim of the ceiling canopy to your household wiring. Use the wire WHEN USING THE STANDARD BALL/DOWNROD (Figure 12). If using standard mounting, seat connecting nuts supplied with your fan.
- Page 9 Finishing the Fan Installation TO REDUCE THE RISK OF FIRE OR ELECTRIC SHOCK, DO NOT USE A WALL MOUNTED SOLID STATE SPEED CONTROL WITH THIS FAN. IT STANDARD CEILING MOUNTING WILL PERMANENTLY DAMAGE THE ELEC- TRONIC CIRCUITRY. WHEN USING THE STANDARD BALL/DOWNROD MOUNTING, THE TAB IN THE RING AT THE BOT- EACH WIRE NUT (WIRE CONNECTOR) SUP- TOM OF THE MOUNTING PLATE MUST REST IN...
- Page 10 Attaching the CLOSE-TO-CEILING MOUNTING 1. Carefully unhook the fan from the mount- Switch Housing ing plate and align the locking slots of the ceiling canopy with the two screws in the 1. Remove the three mounting screws on the mounting plate. Push up to engage the slots black bracket below the motor (Figure 15).
- Page 11 blade levels are unequal. Check this level by and rubber washer from the light fixture. the light fixture, direct the fan pull chain selecting a point on the ceiling above the tip 3. Remove the nut and washer from the top of through the side hole on the glass.
-
Page 12: Operating Your Fan
Turn on the power and check the operation of the fan. The pull chain controls the fan speeds as follows: 1 pull - High, 2 pulls - Medium, 3 pulls - Low and 4 pulls - Off Speed settings for warm or cool weather depend on factors such as room size, ceiling height, number of fans, and so on. -
Page 13: Care Of Your Fan
Troubleshooting Care of Your Fan Here are some suggestions to help you Problem Solution maintain your fan. Fan will not start Check main and branch circuit fuses or breakers 1. Because of the fan’s natural movement, Check line wire connections to the fan and switch wire connections in some connections may become loose. -
Page 14: Specifications
GROSS FAN SIZE SPEED VOLTS AMPS WATTS CUBE FEET WEIGHT WEIGHT 0.26 2507 25.1 27.3 56” 0.38 3996 2.60 High 0.47 5283 These are approximate measures. They do not include Amps and Wattage used by the light kit. Distributed by Home Depot U.S.A., Inc. 2455 Paces Ferry Rd. -
Page 15: Warranty Information 13
You must present a copy of the original Hampton Bay also warrants that all other fan parts, excluding any glass or acrylic blades, to be free purchase receipt to obtain warranty service.


Need help?
Do you have a question about the Antigua Plus and is the answer not in the manual?
Questions and answers