
Related Manuals for LG Dishwasher


Summary of Contents for LG Dishwasher
- Page 1 INSTALLATION MANUAL DISHWASHER Please read these instructions thoroughly before installing and operating the dishwasher. www.lg.com P/No. : 3828DD3003L...
-
Page 2: Table Of Contents
9 Step 6: Install 90° Elbow 9 Step 7: Slide Dishwasher Into Cabinet 10 Step 8: Level Dishwasher 11 Step 9: Secure Dishwasher to the Countertop 12 Step 10: Drain Line Connection 13 Step 11: Water Supply Connection 13 Step 12: Electrical Power Connection... -
Page 3: Important Safety Instructions
IMPORTANT SAFETY INSTRUCTIONS Please read this guide thoroughly before installation. IMPORTANT SAFETY INSTRUCTIONS WARNING When installing and using your dishwasher, follow basic precautions, including the following: • Disconnect electrical power before you start! • All electrical wiring and grounding must be done in accordance with nation and local codes. • If electrical supply is damaged, it must only be replaced by the manufacturer or its service agent or a similar qualified person in order to avoid a hazard. • This dishwasher must be connected to a hot water supply between 120°F (49°C) and 149°F (65°C). This tempera- ture range provides the best washing results and shortest cycle time. Temperature should not exceed 149°F (65°C) to prevent damage to dishes. • This appliance must be positioned near to an electrical power supply. • The appliance is to be connected to the water supply using new hoses. Old hoses should not be reused. -
Page 4: Installation Instructions
INSTALLATION INSTRUCTIONS PARTS SUPPLIED (See page 11 for installation of bracket) HOSE CLAMP WOOD SCREWS WIRE TIES MOUNTING BRACKETS MATERIALS YOU MAY NEED (not provided) ELECTRICAL CABLE WATER SUPPLY TUBE 90‘ ELBOW with ⁄ " N.P.T. FITTINGS RUBBER TEFLON™ external pipe threads FOR TUBE CONNECTOR TAPE... -
Page 5: Dishwasher Specifications
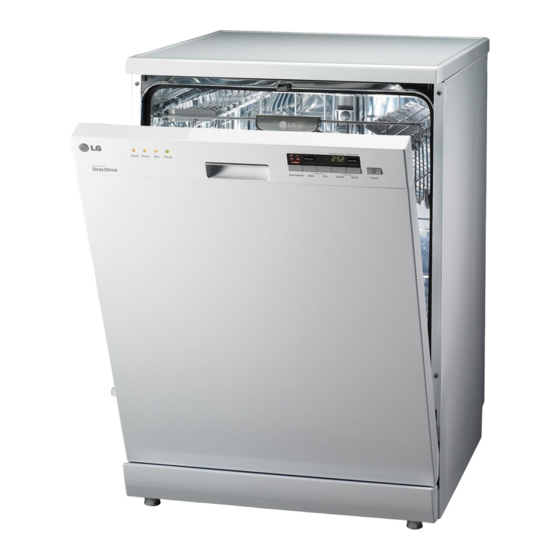
INSTALLATION INSTRUCTIONS DISHWASHER SPECIFICATIONS FULLY INTEGRATED SEMI-INTEGRATED SPECIFICATIONS PRODUCT DIMENSIONS y Power supply: 120V, 60Hz AC only y Water Pressure: 20-120 psi (140-830 kPa) y Product Dimension (WxDxH) 23 2/3" x 24 5/8" x 33 1/2" (603 mm x 625 mm x 851 mm) y Water Temperature: 120°F (49°C) Specifications are subject to change without notice. NOTE The features on your dishwasher may vary from the illustrations shown. 3.48” (88.3MM) 2.47” (62.7MM) -
Page 6: Step 1: Prepare Cabinet Opening
1. This dishwasher is designed to fit a standard dish- FIG. 1 washer opening as shown in Fig. 1. 2. Select a location as close to sink as possible for easy connections to water and drain lines. 3. To ensure proper drainage, the dishwasher should not be installed more than 10 ft. (3 m) from the sink. 4. If dishwasher is to be installed in a corner, a mini- mum of 2 in. (50 mm) is required between the dish- washer and an adjacent wall. 5. To allow for proper clearance of plumbing and elec- trical, use the template included with the literature to determine the clearance on the side of the cabi- net where the cabinet meets the back wall. Using a 2 1/2” diameter hole saw, drill a hole in the target area... -
Page 7: Step 2: Prepare Electrical Wiring
For personal safety, remove house fuse or open circuit breaker before installation. Do not use an extension cord or adapter plug with this dishwasher. Electrical and grounding connections must comply with the National Electrical Code/provincial and municipal code and/or other local codes. -
Page 8: Step 3: Prepare Water Supply Connection
NOTE Electrical supply The instructions for appliances connected to the water mains by detachable hose-sets shall state that Water the new hose-sets supplied with the appliance are supply line to be used and that old hose-sets should not be re- 6½" to 7¾" (165 mm to 197 mm) used. STEP 4: PREPARE THE DISHWASHER FIG. 6 FIG. 7 Remove the rear plastic shipping brace for clearance and Never move the dishwasher by the handle. This can cause ease of installation. damage to the dishwasher. FIG. 8 WARNING Don’t pull or lift with the handle; doing so can dam- age the door and hinges. Open door and grab body frame and top front opening of tub.. Always move the dishwasher by gripping the top frame. -
Page 9: Step 5: Remove Toe Kick
This will cause damage to the threads and the end re- Te on Elbow tape sult will be a leak. STEP 7: SLIDE DISHWASHER INTO CABINET FIG. 11 y Before sliding the unit into place you will need to at- tach the mounting brackets. See page 11 for mount- ing bracket instructions. y Before sliding the dishwasher into place, raise the dishwasher by adjusting the front and rear legs of the dishwasher to the approximate height of the opening. Although you will need to make fine tune adjustments Electrical after it is in place, this method will minimize those ad- Cable justments. y Slide the dishwasher carefully into the cabinet open- ing. Drain Hose... -
Page 10: Step 8: Level Dishwasher
INSTALLATION INSTRUCTIONS STEP 8: LEVEL DISHWASHER 1. Make sure that the 2. Make sure that the dishwasher is level. gap between the Place level on the door and the tub top front opening is equal on both of the tub from the left and right side to side. sides. 3. Make sure that the dishwasher is plumb. Place level on the front side of the cabinet. HOW TO ADJUST LEG y When adjusting the rear legs of the dishwasher, use a Phillips #2 screwdriver to make the adjustments. y To raise the back of the dishwasher, lower the legs turning the screw in the direction of the arrow printed on the base of the unit. To lower the rear of the dishwasher, turn the screw in the opposite direction of the arrow. NOTE The right and left side rear adjustments are opposite of each other. y For the front leg adjustments you can use a 1/4" ratchet without a socket. The ratchet can do directly onto the front leg and turned to the right to raise the front of the dishwasher. Turn the ratchet to the left to lower the front of the... -
Page 11: Step 9: Secure Dishwasher To The Countertop
INSTALLATION INSTRUCTIONS STEP 9: SECURE DISHWASHER TO THE COUNTERTOP For countertops made of wood or that will not be damaged by drilling, use Method 1. For countertops made of granite, marble, or other materials that could be damaged by drilling, use Method 2. IMPORTANT TIPS y Cover the filter hole with towels to prevent screws from falling down into the pump. y Use of a magnetic driver is recommended FIG. 12 FIG. 13 Installation Screw bracket METHOD 1 (Fig. 12) METHOD 2 (Fig. 13) 1. Insert the installation brackets into the slot. 1. Remove the plastic caps on the mounted bracket access holes. -
Page 12: Step 10: Drain Line Connection
For disposal or waste tee connections Hose Clamp Coupler Hose Clamp For air gap connections, cut o drain hose at dotted line * For drain hose installation, it is recommended to use the screw style clamp provided with this dishwasher in the sil- verware basket. CONNECTION TO DISPOSER OR WASTE TEE FIG. 14 Dishwasher Sink Drain Hose When installing the drain hose to a disposer, be sure that the plug on the disposer has been removed. -
Page 13: Step 11: Water Supply Connection
5. Replace the junction box cover. CAUTION Junction box Verify that the black wire is hot (120V). If not, or if you are unsure of the power supply, have it checked by a licensed electrician. STEP 13: FINAL CHECK 1. Turn on electrical power. 2. Turn on house water supply. 3. Run the dishwasher on a normal cycle to verify proper operation and check for leaks. 4. Replace the toekick panel. NOTE If during the final check of the dishwasher an error code appears, reference the chart below before calling for service. Codes: “OE” #1 It may be due to a kinked or pinched drain hose. To avoid this issue be sure to pull on the drain hose while you slide the dishwasher into place not allowing any slack behind the dishwasher. #2 The dishwasher drain hose was connected to a disposal. Verify that the knockout on the disposal has been removed. Codes: “IE” #1 Check to make sure the water supply line to the dishwasher has been turned on. - Page 14 ÍNDICE ÍNDICE IMPORTANTES INSTRUCCIONES DE SEGURIDAD 15 Instrucciones de Conexión a Tierra INSTRUCCIONES PARA LA INSTALACIÓN 16 Piezas Incluidas 16 Materiales Que Puede Necesitar 16 Herramientas Que Puede Necesitar 17 Especificaciones del lavavajillas 18 Paso 1: Prepare la Abertura del Gabinete 19 Paso 2: Prepare el Cableado Eléctrico 20 Paso 3: Prepare la Conexión de Suministro de Agua 20 Paso 4: Prepare el Lavavajillas...
- Page 15 IMPORTANTES INSTRUCCIONES DE SEGURIDAD Lea esta guía atentamente antes de la instalación. IMPORTANTES INSTRUCCIONES DE SEGURIDAD ADVERTENCIA Cuando instale o use su lavavajillas, siga precauciones básicas, incluyendo las siguientes: • ¡Desconecte la energía eléctrica antes de comenzar! • Todo el cableado eléctrico y la conexión a tierra debe efectuarse de acuerdo con los códigos nacionales y locales. • Si el suministro eléctrico está dañado, únicamente debe reemplazarlo el fabricante o su agente de servicio técnico o una persona calificada similar a fin de evitar riesgos. • Este lavavajillas debe conectarse a un suministro de agua caliente entre 120°F (49°C) y 149°F (65°C). Este rango de temperatura brinda los mejores resultados de lavado y el ciclo de tiempo más corto. La temperatura no debe superar los 149°F (65°C) para evitar daños a la vajilla.
-
Page 16: Herramientas Que Puede Necesitar
INSTRUCCIONES PARA LA INSTALACIÓN PIEZAS INCLUIDAS (Ver página 23 para la instalación del soporte) ABRAZADERA TORNILLOS PARA MADERA LAZOS DE ALAMBRE SOPORTES DE INSTALACIÓN MATERIALES QUE PUEDE NECESITAR (no incluidos) CABLE ELÉCTRICO TUBERÍA PARA CODO DE 90º con rosca americana ACCESORIOS CONECTOR DE CINTA DE... -
Page 17: Especificaciones Del Lavavajillas
INSTRUCCIONES PARA LA INSTALACIÓN ESPECIFICACIONES DEL LAVAVAJILLAS TOTALMENTE INTEGRADO SEMI-INTEGRADO ESPECIFICACIONES DIMENSIONES DEL PRODUCTO y Suministro de energía: únicamente corriente alterna de 120V a 60Hz 26 3/4 pulg. (680 mm) 24 5/8 pulg. (624mm) 23 3/4 pulg. (603 mm) y Presión de agua: 20–120 psi (140–830 kPa) y Dimensiones del producto (AxPxA) pulg. x 24 pulg. x 33 1/2 pulg. (603 mm x 625 mm x 851 mm) y Temperatura del agua: 120°F (49°C) Vista Posterior 33 2/5 pulg. -
Page 18: Paso 1: Prepare La Abertura Del Gabinete
INSTRUCCIONES PARA LA INSTALACIÓN Estas instrucciones de instalación están dirigidas para el uso de Instaladores Calificados. PASO 1: PREPARE LA ABERTURA DEL GABINETE FIG. 1 1. Este lavavajillas está diseñado para entrar en una abertura estándar para lavavajillas, como puede verse en la Fig. 1. 2. Seleccione una ubicación lo más cercana posible a un fregadero para una fácil conexión a las líneas de agua y de desagüe. 3. Para garantizar un desagüe adecuado, no debe instalarse el lavavajillas a más de 10 pies (3 m) del fregadero. - Page 19 INSTRUCCIONES PARA LA INSTALACIÓN Estas instrucciones de instalación están dirigidas para el uso de Instaladores Calificados. ADVERTENCIA Para seguridad personal, quite el fusible o apague el interruptor de circuitos antes de comenzar la instalación. No utilice un cable prolongador o un enchufe adaptador con este lavavajillas. Las conexiones eléctricas y a tierra deben cumplir con el Código Eléctrico Nacional/código provincial y municipal y otros códigos locales.
-
Page 20: Paso 4: Prepare El Lavavajillas
INSTRUCCIONES PARA LA INSTALACIÓN Estas instrucciones de instalación están dirigidas para el uso de Instaladores Calificados. PASO 3: PREPARE LA CONEXIÓN DE SUMINISTRO DE AGUA FIG. 5 Verifique que el suministro de agua de la vivienda esté cerrado antes de conectar las líneas de agua del lavavajillas. 1. Este lavavajillas debe conectarse a un suministro de agua caliente entre 120°F (49°C) y 149°F (65°C). Este rango de temperatura brinda los mejores resultados de lavado y el ciclo de tiempo más corto. Para evitar daños a la vajilla, la temperatura no debe superar los 149°F (65°C) . -
Page 21: Paso 6: Instale El Codo De
INSTRUCCIONES PARA LA INSTALACIÓN Estas instrucciones de instalación están dirigidas para el uso de Instaladores Calificados. NOTA Si en cualquier momento, el lavavajillas se pone en la espalda, tenga cuidado de no dañar la manguera de desagüe. PASO 5: QUITE LA PLACA DE PROTECCIÓN FIG. 9 y Quite los dos tornillos que sujetan la cubierta inferior al lavavajillas. y Quite la cubierta inferior de la base. -
Page 22: Paso 8: Nivele El Lavavajillas
INSTRUCCIONES PARA LA INSTALACIÓN PASO 8: NIVELE EL LAVAVAJILLAS 1. Asegúrese de que 2. Asegúrese de que el lavavajillas esté el espacio entre la nivelado. Coloque el puerta y el tambor nivel en la abertura sea igual en el frontal superior del lado izquierdo y el tambor de lado a derecho. lado. 3. Asegúrese de que el lavavajillas esté a plomo. Coloque el nivel en el lado frontal del gabinete. CÓMO AJUSTAR LAS PATAS y Al ajustar las patas traseras del lavavajillas, utilice un destornillador Phillips Nº 2 para realizar los ajustes. y Para elevar la parte posterior del lavavajillas, baje las patas girando el tornillo en la dirección que indica la flecha impresa en la base de la unidad. Para bajar la parte posterior del lavavajillas, gire el tornillo en la dirección contraria a la flecha. NOTA Los ajustes posteriores del lado derecho y el izquierdo son opuestos entre sí. -
Page 23: Paso 9: Asegure El Lavavajillas A La Encimera
INSTRUCCIONES PARA LA INSTALACIÓN PASO 9: ASEGURE EL LAVAVAJILLAS A LA ENCIMERA Para encimeras hechas de madera o que no se verán dañadas por la perforación, utilice el Método 1. Para encimeras hechas de granito, mármol u otros materiales que podrían dañarse con la perforación, utilice el Método 2. CONSEJOS IMPORTANTES y Cubra el orificio del filtro con toallas para evitar que caigan tornillos dentro de la bomba. y Se recomienda el uso de un destornillador magnético. FIG. 12 FIG. 13 MÉTODO 1 (Fig. 12) MÉTODO 2 (Fig. 13) 1. Inserte los soportes de instalación en la ranura. 1. Inserte los soportes de instalación en la ranura. 2. Doble los soportes para asegurarlos al tambor del 2. Doble los soportes para asegurarlos al tambor del lavavajillas. - Page 24 INSTRUCCIONES PARA LA INSTALACIÓN PASO 10: CONEXIÓN DE LA LÍNEA DE DESAGÜE 1. Si el extremo de la manguera de desagüe no entra en la REQUISITOS DE DESAGÜE línea de desagüe, utilice un adaptador resistente al calor y Cumplir con los códigos y ordenanzas locales. y al detergente (no incluido). Puede obtener uno en su y No superar una distancia de 10 pies (3 m) hasta el drenaje.
- Page 25 INSTRUCCIONES PARA LA INSTALACIÓN PASO 11: CONEXIÓN DEL SUMINISTRO DE AGUA FIG. 16 1. Antes de iniciar la conexión, cierre el suministro de agua. 2. Después de colocar el codo en la válvula de entrada, deslice la línea de agua flexible de acero inoxidable o tubería de cobre dentro del codo. 3. Ajuste la tuerca de compresión y verifique que la línea no esté torcida o sufra pellizcos. Línea de NOTA Codo suministro de agua Al probar el lavavajillas después de finalizar la instalación, puede aparecer el código IE en la pantalla. Puede deberse a que existe una línea que está torcida o a que se abrió el suministro de agua del lavavajillas. Verifíquelo antes de llamar al servicio técnico. PASO 12: CONEXIÓN DE ENERGÍA ELÉCTRICA FIG.
- Page 26 TABLE DES MATIÈRES TABLE DES MATIÈRES CONSIGNES DE SÉCURITÉ IMPORTANTES 27 Consignes relatives à la mise à la terre INSTRUCTIONS D’INSTALLATION 28 Pièces fournies 28 Matériel dont vous aurez peut-être besoin 28 Outils nécessaires 29 Spécifications du lave-vaisselle 30 Étape 1 : Préparer l’ouverture de l’armoire 31 Étape 2 : Préparer les câbles électriques 32 Étape 3 : Préparer le branchement de l’alimentation d’eau 32 Étape 4 : Préparer le lave-vaisselle...
-
Page 27: Consignes De Sécurité Importantes
CONSIGNES DE SÉCURITÉ IMPORTANTES Veuillez lire ce guide attentivement avant de procéder à l’installation. CONSIGNES DE SÉCURITÉ IMPORTANTES AVERTISSEMENT Lors de l’installation et de l’utilisation de votre lave-vaisselle, veuillez respecter les mesures de sécurité de bas, dont les suivantes : • Coupez le courant avant de commencer! • Tous les branchements et toutes les mises à la terre doivent être conformes aux normes locales. -
Page 28: Instructions D'installation
INSTRUCTIONS D’INSTALLATION PIÈCES FOURNIES (voir la page 35 pour l’installation du support) SERRAGE ATTACHES MÉTALLIQUES VIS À BOIS SUPPORTS D’INSTALLATION MATÉRIEL DONT VOUS AUREZ PEUT-ÊTRE BESOIN (non fourni) CÂBLE ÉLECTRIQUE TUYAU D’ALIMENTATION COUDE de 90° avec letage RACCORDS CONNECTEUR EN RUBAN POUR EN EAU extérieur NPT de 3/8 po POUR TUBE... -
Page 29: Spécifications Du Lave-Vaisselle
INSTRUCTIONS D’INSTALLATION SPÉCIFICATIONS DU LAVE-VAISSELLE TOTALEMENT INTÉGRÉ SEMI-INTÉGRÉ SPÉCIFICATIONS DIMENSIONS DU PRODUIT y Alimentation : 120 V, 60 Hz ca uniquement y Pression de l’eau : 20-120 psi (140-830 kPa) y Dimension du produit (LxPxH) 23 2/3 24 5/8 33 1/2 po x po x po (603 mm x 625 mm x 851 mm) y Température de l’eau d’arrivée : 120°F (49°C) Les caractéristiques peuvent faire l’objet de modifications sans préavis. REMARQUE Les spécifications de votre lave-vaisselle peuvent différer des illustrations ci-contre. -
Page 30: Étape 1 : Préparer L'ouverture De L'armoire
INSTRUCTIONS D’INSTALLATION Ces consignes d’installation sont destinées à être utilisées par des installateurs qualifiés. ÉTAPE 1 : PRÉPARER L’OUVERTURE DE L’ARMOIRE FIG. 1 1. Ce lave-vaisselle est conçu pour s’encastrer dans une ouverture standard pour lave-vaisselle comme l’indique la fig. 1. 2. Sélectionnez un endroit qui soit le plus proche possible de l’évier afin de faciliter les branchements aux tuyaux de vidange et d’eau. 3. Pour une vidange adéquate, le lave-vaisselle ne doit pas être installé à plus de 3 m de distance de l’évier. -
Page 31: Étape 2 : Préparer Les Câbles Électriques
INSTRUCTIONS D’INSTALLATION Ces consignes d’installation sont destinées à être utilisées par des installateurs qualifiés. AVERTISSEMENT Pour votre sécurité, retirez le fusible ou ouvrez le disjoncteur avant l’installation. N’utilisez pas de cordon de rallonge ou d’adaptateur de prise avec ce lave-vaisselle. Les mises à la terre et les raccordements électriques doivent être conformes au code électrique national/code provincial et municipal et/ ou aux normes locales. -
Page 32: Étape 3 : Préparer Le Branchement De L'alimentation D'eau
INSTRUCTIONS D’INSTALLATION Ces consignes d’installation sont destinées à être utilisées par des installateurs qualifiés. ÉTAPE 3 : PRÉPARER LE BRANCHEMENT DE L’ALIMENTATION D’EAU FIG. 5 Veillez à ce que l’alimentation en eau de la maison soit fermée avant de brancher le lave-vaisselle aux tuyaux d’alimentation d’eau. -
Page 33: Étape 5 : Retirer Le Panneau Inférieur
INSTRUCTIONS D’INSTALLATION Ces consignes d’installation sont destinées à être utilisées par des installateurs qualifiés. REMARQUE Si à tout moment le lave-vaisselle est couché sur le dos, prenez soin de ne pas endommager le tuyau de vidange. ÉTAPE 5 : RETIRER LE PANNEAU INFÉRIEUR FIG. 9 y Retirez les deux vis qui soutiennent le couvercle inférieur. y Retirez le couvercle inférieur de la base. y Retirez le tampon d’isolation de l’arrière du panneau d’accès. ÉTAPE 6 : INSTALLER LE COUDE DE 90° FIG. -
Page 34: Étape 8 : Mettre Le Lave-Vaisselle À Niveau
INSTRUCTIONS D’INSTALLATION ÉTAPE 8 : METTRE LE LAVE-VAISSELLE À NIVEAU 1. Veillez à ce que 2. Veillez à ce que le lave-vaisselle l’espace séparant la soit bien à niveau. porte et la cuve soit Placez le niveau sur le même des deux l’ouverture supérieur côtés. avant de la cuve des deux côtés. 3. Veillez à ce que le lave-vaisselle soit bien d’aplomb. Placez le niveau sur le côté avant de l’armoire. RÉGLAGE DU PIED y Pour régler les pieds arrière du lave-vaisselle, utilisez un tournevis cruciforme n° 2. y Pour les plans de travail en granit, marbre ou tout autre matériau ou qui risquent d’être endommagés par la perceuse, optez pour la méthode 2. REMARQUE Les réglages des pieds arrière de gauche et de droit se font dans le sens opposé l’un de l’autre. y Pour le réglage des pieds avant, vous pouvez utiliser une clé à rochet de 1/4 po sans la douille. La clé à rochet peut être di- rectement appliquée sur le pied avant et être tournée vers la droite pour soulever l’avant du lave-vaisselle. Tournez la clé à... -
Page 35: Étape 9 : Fixer Le Lave-Vaisselle Sur Le Plan De Travail
INSTRUCTIONS D’INSTALLATION ÉTAPE 9 : FIXER LE LAVE-VAISSELLE SUR LE PLAN DE TRAVAIL Pour les plans de travail en bois ou qui ne risquent pas d’être endommagés par la perceuse, optez pour la méthode 1. Pour les plans de travail en granit, marbre ou tout autre matériau ou qui risquent d’être endommagés par la perceuse, optez pour la méthode 2. ASTUCES y Recouvrez le trou du filtre avec des serviettes pour éviter que les vis ne tombent dans la pompe. y Nous vous recommandons d’utiliser un tournevis aimanté. FIG. 12 FIG. 13 MÉTHODE 1 (Fig. 12) MÉTHODE 2 (Fig. 13) 1. Insérez les supports d’installation dans la rainure. 1. Insérez les supports d’installation dans la rainure. 2. Pliez les supports pour les fixer à la cuve du lave- 2. Pliez les supports pour les fixer à la cuve du lave- vaisselle. -
Page 36: Étape 10 : Branchement Du Tuyau De Vidange
INSTRUCTIONS D’INSTALLATION ÉTAPE 10 : BRANCHEMENT DU TUYAU DE VIDANGE 1. Si l’extrémité du tuyau de vidange ne se raccorde pas EXIGENCES RELATIVES À LA VIDANGE au conduit de vidange, utilisez un adaptateur résistant y Respectez les normes et les réglementations locales. à la chaleur et au détergent (non fourni). Vous pouvez y Ne dépassez pas les 3 m de distance par rapport à la vous le procurer dans un magasin de plomberie. vidange. y Ne raccordez pas les conduits de vidange d’autres 2. Les 2 connexions types sont indiquées dans les figures appareils au tuyau de vidange du lave-vaisselle. -
Page 37: Étape 11 : Raccordement À L'alimentation D'eau
INSTRUCTIONS D’INSTALLATION ÉTAPE 11 : RACCORDEMENT À L’ALIMENTATION D’EAU FIG. 16 1. Avant d’effectuer le branchement à l’alimentation d’eau, coupez l’eau. 2. Après avoir installé le coude dans la soupape d’entrée, faites coulisser le tuyau d’eau en acier inoxydable flexible ou le tuyau en cuivre dans le coude. 3. Serrez l’écrou de compression et veillez à ce que le conduit ne soit pas coincé ou tordu. REMARQUE Pendant que vous testez le lave-vaisselle, une fois l’installation terminée, un code « IE » apparaît à l’écran. - Page 38 NOTE...
- Page 39 NOTE...
- Page 40 LG Customer Information Center 1-800-243-0000 1-888-542-2623 CANADA Register your product Online! www.lg.com...
Need help?
Do you have a question about the Dishwasher and is the answer not in the manual?
Questions and answers