
Related Manuals for Community R2-SERIES


Summary of Contents for Community R2-SERIES
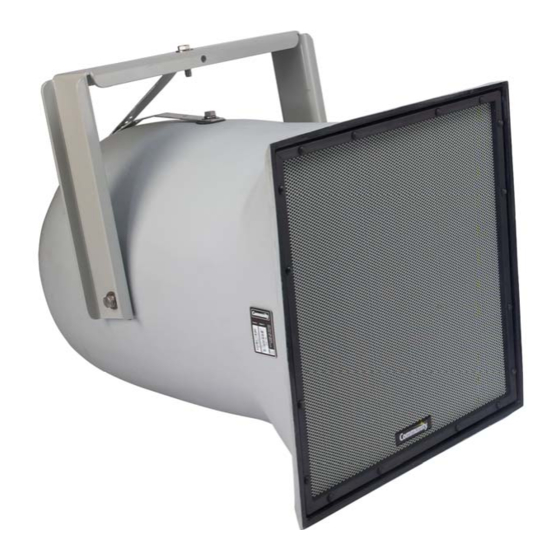
- Page 1 R2-SERIES INSTALLATION / OPERATION MANUAL Weather-Resistant, High-Fidelity, Full-Range Loudspeaker Systems www.communitypro.com...
-
Page 2: Ec Statement Of Conformity
E C S TAT E M E N T O F C O N F O R M I T Y This document confirms that the range of products of Community Professional Loudspeakers bearing the CE label meets all of the requirements in the EMC directive 89/336/EEC laid down by the Member States Council for adjustment of legal requirements. -
Page 3: Welcome To Community
A T R A D I T I O N O F E X C E L L E N C E A N D I N N O VAT I O N Since the founding of our company in 1968, Community has been a constant developer and innovator of loudspeaker technology. -
Page 4: Table Of Contents
NOTICE: Every effort has been made to insure that the information contained in this manual was complete and accurate at the time of printing. However, due to ongoing technical advances, changes or modifications may have occurred that are not covered in this manual. Community R2-Series Installation/Operation Manual — Page 4... -
Page 5: Important Safety Information
The terms IMPORTANT, WARNING, and DANGER are used throughout this manual to alert the reader to important safety considerations. If you have any questions or do not understand the meaning of these terms, do not proceed with installation. Contact your local dealer, distributor, or call Community directly for assistance. These terms are defined below: IMPORTANT: describes an operating condition or user action that may expose the equipment or user to potential damage or danger. -
Page 6: Unpacking And Inspection
Your Community dealer and the factory will try to help in any way they can, but it is the responsibility of the party receiving the shipment to file the damage claim. -
Page 7: Features
They can complement Community WET Series II products for projects needing a combination of both longer and shorter-throw applications. -
Page 8: Quick Start-Up / Features
WEATHER-STOP GRILLE Each enclosure is fitted with Community’s proprietary Weather-Stop™ protective grille. The grille consists of a corrosion-resistant outer layer of perforated steel with a proprietary zinc-rich epoxy dual-layer powder coat finish in light grey, a center layer of UV-resistant reticulated foam, and an inner layer of fine-mesh screen made from a UV-resistant synthetic material that blocks rain and fights rusting. -
Page 9: Figures And Drawings Figure 1: Physical Features
Mounted inside bass horn to form a triaxial system. Mounting Yoke The mounting yoke is included. See Figure 4A and 4B for assembly instructions. Top of enclosure is up for specified horizontal and vertical coverage. Community R2-Series Installation/Operation Manual — Page 9... -
Page 10: Coverage Patterns
These points should be taken into account when aiming the loudspeaker. For proper aiming, the R2-694 and R2- 474 loudspeakers will be tilted down about 5 degrees less than a loudspeaker with a symmetrical coverage pattern. Community R2-Series Installation/Operation Manual — Page 10... - Page 11 NOTE: To maintain weather-resistance, the R2 cabinet should be aimed at least 15 degrees below 0° geometric axis. Community R2-Series Installation/Operation Manual — Page 11...
-
Page 12: Choosing Power Amplification
There is no external indication of when the protection circuitry is active. For this reason it is strongly recommended as an additional precaution that an external electronic limiter be used prior to the amplifier (See “Operating Precautions”, page 22). Community R2-Series Installation/Operation Manual — Page 12... -
Page 13: Electrical Installation
These are recommended insulations: polyethyl- ene, neoprene, Teflon™, Silicon™, and Hypalon™. These insulations are not recommended because of poten- tially shorter life expectancy in outdoor environments: rubber, PVC (polyvinylchloride), polypropylene, polyure- thane, and nylon. Community R2-Series Installation/Operation Manual — Page 13... -
Page 14: Signal Processing
2. Do not attempt to boost any frequencies below 70 Hz with a graphic equalizer. Note that with the recommended high-pass filter, moderate amounts of boost from a simple bass control are acceptable. Community R2-Series Installation/Operation Manual — Page 14... -
Page 15: Physical Installation
(See FIGURE 3). It is recommended that any custom bracket be designed to utilize two mounting points on the opposite sides or top and bottom of the enclosure. Community R2-Series Installation/Operation Manual — Page 15... -
Page 16: Orienting An R2
120 dBA near the track. It is impractical and unsafe to try to page above these levels. It’s better to train announcers to wait until the crowd (or motor noise) quiets down and to repeat the page. For a larger view of chart, please see page 31. Community R2-Series Installation/Operation Manual — Page 16... -
Page 17: Installing The R2 Mounting Yoke
For outdoor installations wind loading must also be taken into account. It is recommended that a qualified and licensed structural engineer approve the mounting design. Figure 4A Community R2-Series Installation/Operation Manual — Page 17... - Page 18 2. Once the position of the yoke is determined, remove two supplied 1/2-13 stainless steel mounting bolts, with the lock, flat, and rubber washers from the mounting points where the yoke is to be attached. Community R2-Series Installation/Operation Manual — Page 18...
- Page 19 CAUTION: Any of the mounting bolts supplied with the R2 that are not used for mounting must be left in place with their rubber washers and firmly tightened to maintain the integrity of the weatherproofing. Community R2-Series Installation/Operation Manual — Page 19...
-
Page 20: Maintaining Weather-Resistance
The second area of responsibility is the loudspeaker itself. Community certifies its loudspeaker systems for suspension when they are properly installed according to our published guidelines. -
Page 21: Mechanical Installation
Community does offer in its catalog forged, rated eyebolts intended for rigging loudspeakers. However, these eyebolts are not rated for outdoor use and the shank is too long for the threaded inserts on R.25 and R.5 loud- speakers. -
Page 22: Operating Precautions
L I M I T I N G Community recommends use of a limiter to help prevent loudspeaker damage due to sudden transients (dropped microphones, etc.) or amplifier clipping. When used for this purpose, connect the limiter as the last item in the signal chain before the power amplifier (at the input to the power amplifier). -
Page 23: System Optimization
(or both). Note that R-Series loudspeakers are factory voiced to optimize their speech intelligibility and musical sound quality. For this reason, many designers find they can minimize overall system equalization and still achieve excellent voice intelligibility and musical sound quality. Community R2-Series Installation/Operation Manual — Page 23... -
Page 24: Technical Specifications
78 lbs (35.4 kg) 78 lbs (35.4 kg) 78 lbs (35.4 kg) 78 lbs (35.4 kg) * Community strives to improve its products on a continual basis. Specifications may therefore be subject to change without notice. Community R2-Series Installation/Operation Manual — Page 24... -
Page 25: Figure 5: R2 Dispersion
R2 SPECIFICATIONS FIGURE 5: R2 DISPERSION R2 Dimensions R2 Yoke Mounting Bracket (included) Community R2-Series Installation/Operation Manual — Page 25... -
Page 26: Wire Guide
FIGURE 6: R2 Wiring (Models R2-474Z, R2-694Z, R2-77Z and R2-94Z) (Note: The polarity reversal shown for the MF/HF is intentional.) MODEL R2-52Z WIRING FIGURE 7: R2-52Z Wiring (Note: The polarity reversal shown for the HF is intentional.) Community R2-Series Installation/Operation Manual — Page 26... -
Page 27: In Case Of Difficulty
Using an ohmmeter, measure the resistance of the input cable bass frequencies. is malfunctioning. (with the amplifier disconnected). If the meter reads 4–7 ohms, one driver may not be working. Replace as needed. Community R2-Series Installation/Operation Manual — Page 27... -
Page 28: Warranty / Service Information
Any driver or crossover service required is done from the front of the enclosure by removing the screws around the edge of the grille. For warranty repair, contact Community directly or ask us for the location of your nearest Authorized Service Center. - Page 29 This Community warranty is not extended by the length of time which an owner is deprived of the use of the product. Repairs and replacement parts provided under the terms of this warranty shall carry only the remaining portion of the warranty.
- Page 30 400 Hz to 8 kHz MF 1 x 2" MF 4 x 2" 75W RMS, 120W PGM, 11 ohms 300W RMS, 750W PGM, 11 ohms For voice-range announcement. For voice-range announcement and high-level paging. Community R2-Series Installation/Operation Manual — Page 30...
- Page 31 R-SERIES OPERATING DISTANCES For an explanation of recommended effective operating distances, see page 16. Community R2-Series Installation/Operation Manual — Page 31...
- Page 32 Community Professional Loudspeakers 333 East Fifth Street Chester, PA 19013-4511 USA TEL: 1-(610) 876-3400 FAX: 1-(610) 874-0190 www.communitypro.com © 2009 All Rights Reserved 06OCT2009...
Need help?
Do you have a question about the R2-SERIES and is the answer not in the manual?
Questions and answers