InFocus LP 240 User Manual
Infocus user's guide projector lp 240, lp 250
Hide thumbs
Also See for LP 240:
- User manual (39 pages) ,
- Technical specifications (4 pages) ,
- Replacement manual (2 pages)
Table of Contents
Advertisement
Advertisement
Table of Contents
Troubleshooting

Related Manuals for InFocus LP 240


Summary of Contents for InFocus LP 240
- Page 1 experience the value of projection ® 240/LP ® User’s Guide...
- Page 2 Computer, Inc. IBM and PS/2 are trademarks or registered trademarks of International Business Machines, Inc. Microsoft, PowerPoint, and Windows are trademarks or registered trademarks of Microsoft Corporation. InFocus and LP are trademarks or registered trademarks of InFocus Corporation. FCC Warning Note: This equipment has been tested and found to comply with the limits for a Class B digital device, pursuant to part 15 of the FCC Rules.
-
Page 3: Table Of Contents
Important Operating Considerations Do not place the projector on a tablecloth or other soft covering that may block the vents. Do not use a non-approved ceiling mount. In the unlikely event of the bulb rupturing, thoroughly clean the area behind the projector and discard any edible items placed in that area. -
Page 5: Introduction
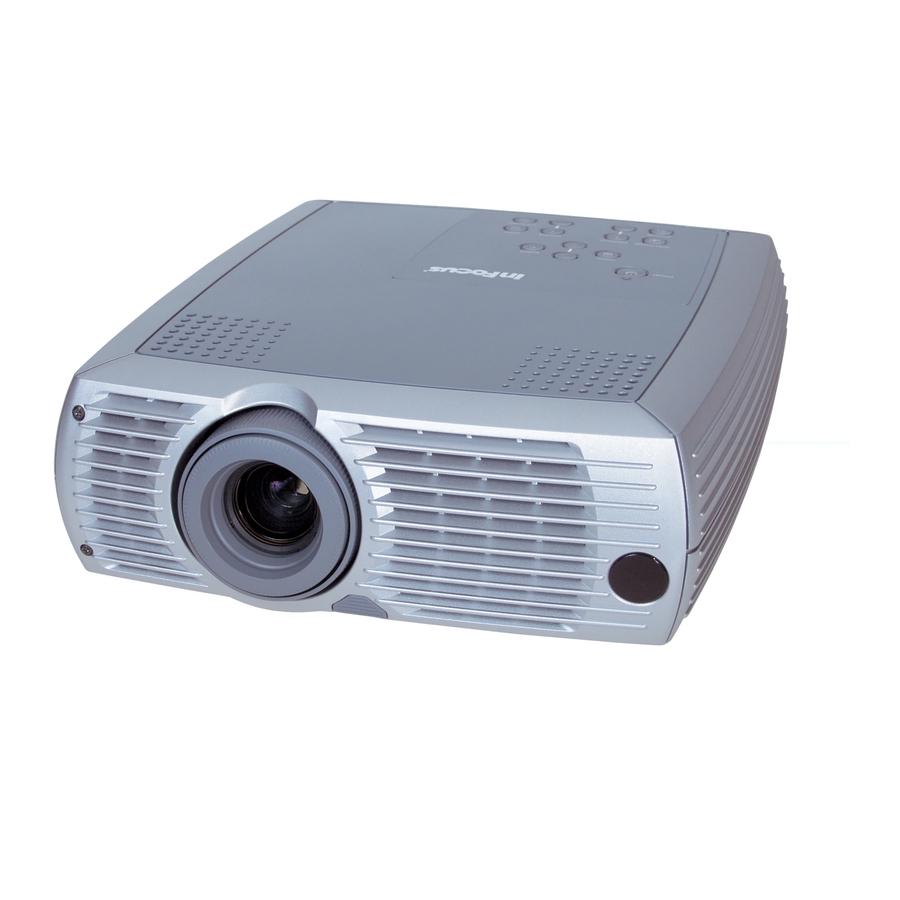
PS/2 mouse cable PS/2 mouse adapter Online Registration Register your projector online at www.infocus.com/register to receive product updates, announcements, and registration incentives. Projector components projector remote control receiver (IR) remote control documentation... -
Page 6: Connecting A Computer
Connect one end of the computer cable to the blue Computer In connector on the projector. Connect the other end to the video port on your computer. If you are using a desktop computer, you will need to disconnect the moni- tor cable from the computer’s video port first. -
Page 7: Displaying A Computer Image
Make sure your laptop’s external video port is active. Many laptops do not automatically turn on their external video port when a projector is connected. Usually a key combination like FN + F5 is used to turn the external display on and off. Refer to your computer’s documenta- tion to learn your computer’s key combination. -
Page 8: Using The Projector With Windows 98 For The First Time
Using the projector with Windows 98 for the first time The first time you connect a computer running Windows 98 to the projector, the computer recognizes the projector as “new hardware” and the Add New Hardware Wizard appears. Follow these instructions to use the Wiz- ard to load the correct driver (which was installed with your Windows operating system). -
Page 9: Adjusting The Image
Adjusting the image Adjust the height of the projector, if necessary, by pressing the release but- ton to extend the foot. Rotate the leveling foot, if necessary. Position the projector the desired distance from the screen at a 90 degree angle to the screen. -
Page 10: Connecting A Video Device
Plug the blue connector into the Audio In connector on the projector. connect power cable Connect the power cord to the connector on the back of the projector and to your electrical outlet. The Power LED on the keypad lights green. -
Page 11: Displaying A Video Image
Video button on the keypad. ? No video image? Get help on page 17. Adjust the height of the projector by pressing the release button to extend the foot. Rotate the leveling foot, if necessary. Position the projector the desired distance from the screen at a 90 degree angle to the screen. - Page 12 Adjust the zoom and focus. If the image is not square, adjust the keystone using the buttons on the key- pad. Press the top Keystone button to reduce the upper part of the image, and press the bottom Keystone button to reduce the lower part. Adjust the volume on the keypad or remote.
-
Page 13: Shutting Down The Projector
5 minutes. By default, this feature is off. See page 29. To turn off the projector, press the Power button and verify that you want to turn the projector off by pressing the Power button again within 3 seconds. - Page 14 Problem No startup screen Only startup screen appears Solution Plug power cord in Remove lens cap Press Power button Press the Computer button Activate laptop’s external port Restart laptop Result Correct image Computer image projected...
- Page 15 Problem No computer image, just the words “Signal out of range” Solution Adjust computer refresh rate in Control Panel>Display>Settings>Advanced >Adapter (location varies by operating system) You may also need to set a different resolution on your computer, as shown in the following problem, “Image fuzzy or cropped.”...
- Page 16 Image fuzzy or cropped Remote control not controlling my computer’s mouse Set your computer’s display resolution to the native resolution of the projector (Start>Settings>Control Panel>Display>Settings tab, select 800x600 for the LP240, 1024x768 for LP250) For a laptop, disable laptop monitor...
- Page 17 Image not centered on screen Image not square Move projector, adjust zoom, adjust height zoom Adjust horizontal or vertical position in Picture>Advanced menu Adjust keystone on keypad Correct image Square image...
- Page 18 Image not sharp Image does not fit 16:9 screen Image upside down Adjust Sharpness in the Picture>Advanced menu Change aspect ratio to 16:9 in Picture>Aspect ratio menu Turn on/off Ceiling in Settings>System menu Correct image Correct image Correct image...
- Page 19 Turn on/off Rear in Settings>System menu Adjust color, tint, color temperature, brightness, contrast in the menus Make sure vents aren’t blocked, turn off the projector and allow it to cool for a minute Correct image Correct image COLOR Lamp turns on...
-
Page 20: Still Having Problems
1-888-592-6800. Or, send us an e-mail at techsupport@infocus.com. In Europe, call InFocus in The Netherlands at (31) 20 579 2820. In Asia, call InFocus in Singapore at (65) 6334-9005. If lamp hours > 2000, lamp must be replaced. -
Page 21: Using The Remote Control
To use these buttons to control your computer’s mouse, you must connect a PS/2 or USB mouse cable to the projector. See page 6. When you do this for the first time, the Add New Hardware wizard may appear. -
Page 22: Using The Audio
Using the audio To use the projector’s speaker, connect your source to the Audio In connec- tor on the projector. To adjust the volume, use the Volume buttons on the keypad or remote. To mute the sound, press the Mute button on the remote. -
Page 23: Optimizing Computer Images
(page 30). • Two options, Power Save and Screen Save, are provided to automati- cally shut down the projector after several minutes of inactivity or dis- play a gray screen. This helps preserve lamp life (page 29). -
Page 24: Optimizing Video Images
Adjust the Room Lighting. Select Dark if you are in a dark room, Light if in a bright room (page 27). Customizing the projector You can customize the projector for your specific setup and needs. See page 29 to page 31 for details on these features. •... -
Page 25: Using The Menus
Settings menu provides set-up type adjustments that are not changed often, and the About menu provides a read-only display of infor- mation about the projector and source. Certain menu items may be grayed out until a particular source is con- nected. -
Page 26: Picture Menu
TV screens are usually 1.33:1, also known as 4:3. HDTV and most DVDs are 1.78:1, or 16:9. The default is 4:3. Select Native to see the unmodified input with no resizing by the projector. Select 16:9 to watch enhanced widescreen DVDs. - Page 27 User 1 preset. Room Lighting: This features optimizes the projector for your room’s light- ing conditions. Select Dark if you are in a dark room, Light if in a bright room.
-
Page 28: Advanced Menu
Advanced menu Sharpness: (video sources only) changes the clarity of the edges of a video image. Select a sharpness setting. Sharpness Advanced menu Color Temperature: changes the intensity of the colors. Select a listed value, or select User and individually adjust the intensity of the red, green, and blue color. -
Page 29: Settings Menu
Power button to display an image after 10 minutes have passed. This fea- ture also makes the projector go into the startup state after it is powered on, which allows you to turn ceiling mounted projectors on and off with a wall power switch. - Page 30 Effect: allows you to assign a different function to the Effect button on the remote, allowing you to quickly and easily use the effect. The default effect is About, which opens a window with projector and source information. Highlight an effect and press Select to choose a different one.
- Page 31 Reset Lamp: resets the lamp hours used counter in the About menu to zero. Do this only after changing the lamp. Service Info: provides information about the projector’s software version and the active source. Service Code: only used by authorized service personnel.
-
Page 33: Maintenance
Turn off the projector and unplug the power cord. Turn the projector upside down, loosen the screw on the filter, then gen- tly pry the filter up. Clean the filter using a vacuum cleaner on low power. -
Page 34: Replacing The Projection Lamp
Turn off the projector and unplug the power cord. Wait 60 minutes to allow the projector to cool thoroughly. Turn the projector upside down and remove the lamp door by pushing the tab forward (toward the lens). CAUTION: Never operate the projector with the lamp door removed. This disrupts the air flow and causes the projector to overheat. - Page 35 WARNING: To avoid burns, allow the projector to cool for at least 60 min- utes before you replace the lamp. WARNING: Do not drop the lamp module or touch the glass bulb! The glass may shatter and cause injury. WARNING: Be extremely careful when removing the lamp housing. In the unlikely event that the bulb ruptures, small glass fragments may be gener- ated.
-
Page 36: Cleaning The Lamp Housing Screens
Replace the lamp module and lamp door. Using the security lock The projector has a security lock for use with a PC Guardian Cable Lock System. See page 38 for ordering information. Refer to the information that came with the lock for instructions on how to use it. -
Page 37: Appendix
Ceiling Mount UL tested/listed ceiling mount with minimum capacity of 23 lbs (10.4 kg) Accessories ° C) at sea level ° Standard Accessories Part Number (ship with the projector) Soft Case 110-0563-xx Shipping Box 110-0566-xx Computer Cable 6 ft (1.8 m) 301361B Audio/Video Cable 6 ft (1.8 m) 301379B Audio Cable 6 ft (1.8 m) -
Page 38: Projected Image Size
Replacement Lamp Module for LP250 InFocus Presentation Remote MindPath RF PocketPoint Remote MindPath RF GyroPoint Remote Projected image size NOTE: Visit our website at www.infocus.com for an interactive image size Part Number calculator. CA-ATA-012 CASE-802 Range of distance to the screen for a given screen size for LP240... -
Page 39: Index
7 optimizing image 23 resolution, adjusting computer display resolution 16 connecting audio cable 6 computer 6 monitor cable 6 mouse cables 6 video device 10 contacting InFocus 20 Contrast 26 customer service contact information 20 customizing the projector 24... - Page 40 desktop computer, viewing image on monitor 6 Display Messages 29 displaying computer image 7 languages 31 onscreen menus 25 PiP 31 video image 11 drivers, installing 8 Effect button 30 elevator foot 9 Factory Reset 31 filters, cleaning 33 focussing the image 9 Freeze 30 Horizontal/Vertical Position 28 image...
- Page 41 Picture in Picture 31 Picture menu 26 PiP 31 Power button 22 power cord, connecting 6 Power Save 29 powering on the projector 7 presentation features 23 Presets 27 projecting from behind a wall 29 projecting from the ceiling 29 projector...
- Page 42 Tint 26 Tracking 28 troubleshooting 13 turning off the projector 13 turning on the projector 7 USB mouse, connecting 6 using the menus 25 video device, connecting 10 video image displaying 11 optimizing 24 volume adjsuting 12 zoom 9, 30...
- Page 43 Product found to be defective within the Limited Warranty period and to repair or replace defective parts with new parts or, at the option of InFocus, serviceable used parts that are equivalent or superior to new parts performance. Limited Warranty periods are as follows: •...
- Page 44 To Be Eligible For Limited Warranty Coverage Any person exercising a claim under this Limited Warranty must establish to the satisfaction of InFocus both the date of purchase and that the Product was purchased new. The sales receipt or invoice, showing the date of pur- chase of the Product is the proof of the date of purchase.
Need help?
Do you have a question about the LP 240 and is the answer not in the manual?
Questions and answers