Table of Contents
Advertisement
Advertisement
Table of Contents

Related Manuals for Kodak Pixpro SP1


Summary of Contents for Kodak Pixpro SP1
-
Page 1: User Manual
Digital Action Cam User Manual... -
Page 2: Before You Start
BEFORE YOU START Declaration of Conformity Responsible Party: JK Imaging Ltd. Address: 1411 W. 190th Street, Suite 550, Gardena, CA 90248, USA Company Website: www.kodakcamera.jkiltd.com For Customers in Canada This device complies with Industry Canada license-exempt RSS standard(s). Operation is subject to the following two conditions: (1) This device may not cause interference, and (2) this device must accept any interference, including interference that may cause undesired operation of the device. - Page 3 For Customers in the U.S.A. This equipment has been tested and found to comply with the limits for a Class B digital device, pursuant to Part 15 of the FCC Rules. These limits are designed to provide reasonable protection against harmful interference in a residential installation. This equipment generates, uses and can radiate radio frequency energy and, if not installed and used in accordance with the instructions, may cause harmful interference to radio communications.
-
Page 4: About This Manual
All trademarks mentioned in this manual are used for identification purposes only and are properties of their respective owners. This manual provides you with instructions on how to use your new KODAK PIXPRO Digital Action Cam. Every effort has been made to ensure that the contents of this manual are accurate. -
Page 5: Safety Notes
SAFETY NOTES Waterproof / Dustproof / Shockproof • Do not use or store this product in high temperature environment. / Freeze-proof • JIS / IEC waterproof grade 8 (IPX8). • Do not expose the lens to strong light sources (e.g. Daylight, etc.) for extended •... - Page 6 Waterproofing Notes: • If there is dust, sand or other foreign • Do not use the product below 10 meters materials on the waterproof rubber of the (32.8 feet) underwater. The product will rear cover and its contact surface, please remain waterproof for one hour at the wipe it with a clean, dry and lint free cloth depth of 10m (32.8 feet).
- Page 7 Battery Notes: • Do not let the battery come in contact • Use only the battery specified for this with metal objects (including coins) product. to avoid short circuiting, discharging, • If the battery overheats during charging excessive heat, or possible leakage. or use, stop charging or use immediately.
-
Page 8: Memory Card Notes
Memory Card Notes: • Do not directly edit the data on the • The memory card referred to in this memory card. Copy the data to your manual is Micro SD Card or Micro SDHC computer disk before editing. card. •... - Page 9 Other Notes: 2. If liquid crystal gets into your eye, flush • Do not disconnect the power or turn the the eye immediately with plenty of product off during the update process. clean water for at least 15 minutes and Doing so may cause incorrect data to be then seek for medical assistance.
-
Page 10: Table Of Contents
Contents BEFORE YOU START ............. 1 SAFETY NOTES ..............4 Contents .................. 9 GETTING READY ..............13 Accessories Included ..................13 Part Names .......................15 Installing and Dismantling the Lens Cover ............18 Installing Battery and Memory Card ..............20 Charging ......................22 Introduction to Various Button Functions ............23... - Page 11 Operation Method ..............25 Turn On / Off .....................25 Set your Language, Date and Time after the first power-on ......26 LCD Screen Display ..................27 Introduction to Basic Operation of Recording and Shooting ......28 LCD Screen Display under Playback Status ............30 Introduction to Basic Operation of Playback .............
- Page 12 Introduction to Mode Settings ................43 Movie Settings Introduction ................44 Still Settings Introduction ..................51 AP Settings Introduction ...................54 Smart Device APP Operating Method ........57 Position Service Function .................57 APP Home ......................59 Playback ......................59 Remote Viewfinder....................69 About ........................ 72...
- Page 13 Connection Port Introduction ..........73 Connect a Computer ..................73 HDMI Connected TV Output ................75 APPENDICES ...............76 Specifications ....................76 Prompts and Warning Messages ..............79 Trouble Shooting ....................83 Special Accessories...............84...
-
Page 14: Getting Ready
GETTING READY Accessories Included Your product box should contain the product you purchased along with the following accessories. If anything is missing or appears to be damaged, please contact your retailer. (Based on sales in different countries or regions, the shape of the AC adapter will vary. The actual product will prevail.) Quick Start Guide Service Card... - Page 15 Standard Lens Cover Underwater Lens Cover Standard Lens Cover has been installed on the product when leaving factory.
-
Page 16: Part Names
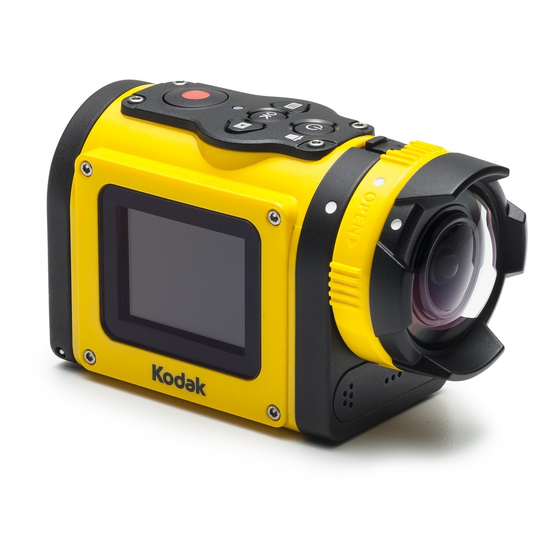
Part Names Alignment Point Standard Lens Cover Microphone Speaker Lens Cover Ring LCD Screen... - Page 17 Video Recording Button / Shooting Button 9 10 Status Indicator Menu Button / Direction Button (Upper) Power Button / Delete Button Lens Cover Buckle OK Button 13 12 Playback Button / Direction Button (Lower) Tripod Socket Location Hole 15 14...
- Page 18 Rear Cover Open Switch Rear Cover Rear Cover Lock Rear Cover Open Status Battery Lock Battery Compartment HDMI Port Micro SD Card Slot USB Port...
-
Page 19: Installing And Dismantling The Lens Cover
Installing and Dismantling the Lens Cover Two types of replaceable lens covers are Steps for dismantling the lens cover: provided for the product. 1. Hold the product with your left hand, and Standard Lens Cover: pull the lens buckle with your finger to the left end as illustrated in the picture. - Page 20 Steps for installing the lens cover: 1. Hold the product with your left hand, and Please select appropriate lens cover pull the lens buckle with your finger to the when taking videos and pictures, left end as illustrated in the photo, hold otherwise it will affect the image effect.
-
Page 21: Installing Battery And Memory Card
Installing Battery and Memory Card 1. Open the rear cover 2. Insert the battery into the battery compartment according to the negative First, set the rear cover lock to the right, and positive directions as illustrated in and push the open switch of the rear the following picture. - Page 22 3. Insert the memory card into the card slot 4. Close the battery cover according to the direction illustrated in First, rotate the back over around the the picture when the product is turned shaft direction to close upward. The rear off.
-
Page 23: Charging
Charging Please charge after the product is turned off. 3. You can also connect the product to your computer with a USB cable to charge the 1. Connect the product to the AC adapter battery. If you press and hold the power with a USB cable. -
Page 24: Introduction To Various Button Functions
Introduction to Various Button Functions Viewfinder status refers to viewfinder of recording and shooting. To save power, if the product is not operated for a period, it will automatically enter the LCD off status. Press any button can wake LCD. Button Name Menu Status... - Page 25 Movie Playback Button Name Single Photo Fast Forwarding / Playing Back Pausing Rewinding Short press: delete Short press: back to the initial state of the movie Power Button / Delete Button Press and hold: turn off the product Photo file: no action Normal speed Continue to OK Button...
-
Page 26: Operation Method
Operation Method Turn On / Off Turn on: When the power is off, press and hold for more than 2 seconds to turn on the product; or press and hold for more than 2 seconds to turn on the product and enter the playback status. -
Page 27: Set Your Language, Date And Time After The First Power-On
Set your Language, Date and Time after the first power-on 1. Press and hold the to turn on the product and enter the language selection screen; 2. Press to select language; 3. After pressing button to select desired language, the product will enter「Date / Time」 setting screen;... -
Page 28: Lcd Screen Display
LCD Screen Display 00:01:23 00:01:23 I N SD 1. Mode Display 8. Movie Size Display Some icons will automatically hide 2. Time Lapse Display 9. Still Size Display after a 2 second display. Press to display all current setting 3. Burst Shot Display 10. -
Page 29: Introduction To Basic Operation Of Recording And Shooting
Introduction to Basic Operation of Recording and Shooting 1. Enter the viewfinder status mode, and press to switch between recording mode and shooting mode; 2. Align the lens to the object to be recorded, and press for recording or shooting; 3. - Page 30 Under shooting mode status, when the product detects a human face, a green focus frame will appear. When two or more human faces are detected, a green main focus frame and a white secondary focus frame will appear. When the product rotates around the lens axis for 180°, the display screen on the LCD is positive display.
-
Page 31: Lcd Screen Display Under Playback Status
LCD Screen Display under Playback Status 1/1234 1/1234 1/1234 1/1234 00:01:23 00:01:23 2013 07-20 12:21 2013 07-20 12:21 00:01:23 00:01:23 2013 07-20 12:21 2013 07-20 12:21 1. Movie Display 10. White Balance Display Some icons will automatically 2. Field of View Display 11. -
Page 32: Introduction To Basic Operation Of Playback
Introduction to Basic Operation of Playback Single Photo: 1. When in viewfinder status mode, press to enter the playback status of video and pictures; 2. Display movie or picture files on the LCD screen; 3. Press to view the movies or pictures stored in the memory card or internal memory. -
Page 33: Movie Playback
Movie Playback: 1. Select movie to be played back, and press to start movie playback. 00:00:47 00:00:47 00:01:23 00:01:23 2. When playing back the movie, an operation guidance will appear on the screen. You can press buttons to perform the corresponding functions. Press : Movie playback rewind, multiple presses will fasten the speed: x2 / x4 / x8 / x16 Press... - Page 34 Movie playback rewind or forward: 00:00:47 00:00:47 00:01:23 00:01:23 Movie playback pause: 00:00:47 00:00:47 00:00:47 00:00:47 00:01:23 00:01:23 00:01:23 00:01:23 There will be no sound output during rewinding or forwarding.
- Page 35 Movie or Picture Delete: 1. Select the movies or photos to be deleted, and press to enter the Delete screen. Press to select 「Delete」, and press to confirm; 2. After a movie or a photo is successfully deleted, the LCD will display the next movie or photo.
- Page 36 Rotation: The direction sensor comes with the product can automatically adjust the direction during file playback according to the rotating direction detected during shooting, in order to ensure that what you see are positive images. The direction of rotation refers to the direction rotating around the lens center clockwise or counterclockwise.
-
Page 37: Introduction To The Setting Mode Of Menu Options
Introduction to the Setting Mode of Menu Options 1. Under the viewfinder status, press to enter first-level menu interface of the menu; 2. Press to select「Mode Settings」, 「Movie Settings」, 「Still Settings」, 「AP Settings」 and 「General Settings」; 3. Press to confirm, and to enter the corresponding secondary level menu interface; 4. -
Page 38: Menu Introduction
Menu Introduction First Level Mode Movie Settings Still Settings General Settings Menu Settings Settings Movie * Movie Size * Still Size * Sound Settings Shot * Time Lapse * Burst Shot * Power Off * Wireless Power * Loop recording * Field of View Saving * Field of View... -
Page 39: Introduction To General Settings
Introduction to General Settings Sound Settings 10 options in the 「General Settings」 of the first level menu: There are 4 options in the 「Sound Settings」: • 「Sound Settings」 • Volume 1 • 「Power Off」 • Volume 2 • 「Wireless Power Saving」 •... - Page 40 Date / Time The Power Off will be invalid during recording, movie playing back and Date and time can be set during the first wireless connecting. power on cycle. If you wish to change the date or time thereafter, please operate as Wireless Power Saving the following.
- Page 41 Language Format The language can be set during the first Format can clear all data stored in the power on cycle. If you wish to change the memory card or memory (including protected language thereafter, please operate as the movies and photos). following.
-
Page 42: Copy To Card
Reset Settings Copy to Card Reset Settings can recover all product Copy to Card is to copy the files in the settings to the factory defaults. internal memory to the memory card There are 2 options in the 「Reset There are 2 options in 「Copy to Card」: Settings」: •... - Page 43 FW Version The following operation needs to be followed to update the firmware: FW Version can display the current version. 1. Enter the FW Version interface, and When a new version is stored in the memory press to enter the tertiary level card, the firmware can be updated.
-
Page 44: Introduction To Mode Settings
Introduction to Mode Settings 2 options in the 「Mode Settings」 of the Mode Settings method of operation: first level menu: 1. After selecting options, press to confirm. • 「Movie」: for recording movies 2. Press to enter the viewfinder status, • 「Still」: for shooting photos and display your selected status. -
Page 45: Movie Settings Introduction
Movie Size Movie Settings Introduction Movie Size refers to the image resolution during recording. There are 8 options in First Level menu There are 7 options in「Movie Size」: 「Movie Settings」: • 「1080p30」 : 1920×1080 (30fps) • 「Movie Size」 • 「960p50」 : 1280×960 (50fps) •... - Page 46 When selecting 「WVGA120」, the sound cannot be recorded. When selecting 「WVGA120」, 「Time Lapse」, 「Loop recording」or「Motion detection」 cannot be enabled. When selecting「WVGA60」, 「Time Lapse」 or 「Loop recording」 cannot be enabled. The maximum recording time of a 4GB memory card: The maximum recording Movie Size Memory card volume time is about...
-
Page 47: Time Lapse
Time Lapse 2. Press , the LCD will display red font time countdown; Time Lapse enables the recording of an interval of time, and splices the frames 3. Press again to finish recording. together to present a condensed video which usually requires a long period of time 00:00:01 00:00:01 to complete. -
Page 48: Loop Recording
Loop recording 00:00:23 00:00:23 Loop recording allows for the recording of independent segments of movies according to selected time length from the beginning of recording. The product will continually record movies of the length selected until the record button is pressed to end recording. When the memory card is full, the product will overwrite the recorded files starting from the first movie circularly. -
Page 49: Motion Detection
Field of View Motion detection Motion detection means that if the product Field of View means the image receiving detects moving objects entering into the angle for the product. LCD screen, it will automatically start There are 4 options in 「Field of View」: recording. - Page 50 When the memory card is full, ① will 5. During recording, you may press the become red font and flashes for 2 to stop recording. seconds. When the Motion detection feature 15:00 15:00 00:00:00 00:00:00 is enabled, Time Lapse or Loop 00:00:00 00:00:00 recording setting cannot be performed.
-
Page 51: Wind Cut
Wind Cut White Balance Wind Cut refers to the reduction of noise White Balance means that the user adjusts caused by wind. the color temperature under different light sources to ensure that the colors are There are 2 options in 「Wind Cut」: reproduced correctly. -
Page 52: Still Settings Introduction
Still Settings Introduction There are 5 options in First Level menu 「Still Settings」: • 「Still Size」 • 「Burst Shot」 • 「Field of View」 • 「White Balance」 • 「Exit」... - Page 53 Still Size Burst Shot The Still Size indicates the number of pixels Burst Shot allows ten photos to be captured used to capture the images. A photo having continuously one single time before auto higher image resolution contains more pause. details and is capable of better meeting big- There are 2 options in「Burst Shot」: screen fine photo printing requirements.
-
Page 54: White Balance
Field of View White Balance White Balance means that the user adjusts Field of View means the image receiving angle range of the product. the color temperature under different light sources to ensure that the colors are There are 4 options in「Field of View」: reproduced correctly. -
Page 55: Ap Settings Introduction
AP Settings Introduction The action cam can be wirelessly connected 5. The action cam and the smart device can with your smart device. only be connected one to one. Please review the following items before your 6. When the temperature of the battery is first connection: higher than 65 °C : 1. - Page 56 SSID and WPA2 password messages are action cam; displayed in the interface. 3. Download the special APP installation AP mode package (APP name: PIXPRO SP1) from the device appropriate APP store, and install; SSID:PIXPRO-SP1_1234 WPA2-PSK:12345678 4. Click the icon of the APP to enable the APP.
- Page 57 3. If there is a need to turn off wireless, AP mode press button or press after selecting in the SSID interface so that the selection interface appears. Select , press to turn off wireless. AP mode 2. If connect APP failed, press to return to the SSID interface, select , press...
-
Page 58: Smart Device App Operating Method
This function is not supported for movie files. Android system: 1. When the APP is enabled for the first time, it may prompt that 「"PIXPRO SP1" would like to use your current location」. If the position service of the smart device is not enabled, you may select whether to enable the position service or not according to prompting in the interface. - Page 59 1. When the APP is enabled for the first time, if the position service is enabled, it will prompt whether to not 「"PIXPRO SP1 " would like to use your current location」; if the position service is disabled, it will prompt 「Turn on Location Services to allow "PIXPRO SP1" to determine your location」;...
-
Page 60: App Home
APP Home Playback Enter APP Home interface, and three Click 「playback」 in the APP Home to options are displayed: enter the playback state. There are three playback options in the • 「Playback」: enter playback state playback state: • 「Remote Viewfinder」: •... - Page 61 Index playback (action cam / smart 2. The index playback interfaces of the smart device and the action cam can device) be switched by shifting a red dot on the 1. In the APP Home, click 「playback」to interface of the smart device. enter the index playback state, and enter the photo album of the action cam in default.
- Page 62 Setting function Enter the selection interface after selecting , and click thumbnails so Click at the right upper corner of the that files can be selected. Clicking the interface so that the setting interface can same thumbnail for the second time will appear.
- Page 63 Download function Downloading will be continued after In the index playback interface of the action switching to the index interface of the cam, click to enter the download mode. smart device, and the downloading Select a file to begin downloading. progress bar will be displayed.
- Page 64 Delete function 2. In the index playback interface of the 1. In the index playback interface of the smart device, click to enter the action cam, click to enter the selection selection interface, select the files interface, select the files to be deleted, needing to be deleted, click to delete click...
- Page 65 Slide play function Clicking a photo in slide play will 1. In the index playback interface of the stop slide play and the single photo smart device, click to enter the interface will appear. selection interface; 2. Firstly, select the files to be played, and When playing movie in a slide, only then click to start slide play;...
- Page 66 Share function Transmission procedure is determined 1. In the index playback interface of the according to the settings of the smart smart device, click to enter the device. selection interface. 2. Select the files to be shared, and click to pop up the share option. 23:30 23:30 <...
- Page 67 Single Photo 1. Executable operations in single photo playback of the files at the action cam In the index playback interface, the single side: photo interface will appear if a single file is clicked. • : enter the viewfinder status Previous and next files can be selected to •...
- Page 68 Edit function: 2. Executable operations in single photo playback of the files on the smart device: 1. Editing photo files: • : share Click to enter the effect interface, where filter effects, brightness adjustment • : slide play and modeling effects can be set. •...
- Page 69 • Brightness adjustment effects: 2. Editing movie files: Click to enter the trim interface. : Off 23:30 23:30 : Auto < < 11 / 26 Trim • Modeling effects: : Off : centering on dot : centering on strip (lateral direction) First, click the effect your like and then click (Android system) /...
-
Page 70: Remote Viewfinder
Steps of movie trim: Remote Viewfinder ① According to the desired trim accuracy of the movie, click Click 「Remote Viewfinder」 in the APP increase or shorten the number of Home to enter the viewfinder status, and frames. control the action cam to shoot by using the smart device. -
Page 71: Video Mode
Video mode: Field of View: Ultra Wide Medium 23:30 Narrow Water Ring < AWB: 99:99 99:99 Daylight Cloudy Fluorescent Underwater Still Size: • : enter the index Burst Shot: Single playback state on the action cam. Burst Shot • : start video recording / The characteristics of these stop video recording parameters are the same as the action... -
Page 72: Shooting Mode
Video mode method of operation: 1. Click icons at the top of the interface to set corresponding parameters. 2. Click to start video recording, and click to stop video recording. 3. Click to enter the index playback state. In Wireless Power Saving enabled Shooting mode: state, a prompting message about breaking of wireless connection in 30... -
Page 73: About
About 23:30 Click「About」 in the APP Home, so that the < version of the APP can be checked. 9999 9999 • : enter the index playback state on the action cam. • : shoot photos • : switch to the video mode from the shooting mode... -
Page 74: Connection Port Introduction
Connection Port Introduction Connect a Computer The product can be connected to the The product supports Windows operating computer using a USB cable to allow for systems (Windows XP, Windows Vista , copying the files from the product into the Windows 7, and Windows 8) and the Mac computer. - Page 75 If connected to the computer USB port of 100mA, the product will have no response due to insufficient power supply. Pressing for more than 2 seconds will cause shut-down and stop of communication between the computer and the product. If a memory card is inserted in the product, only files in the memory card will be read. If needing to read the files in the internal memory, please pull out the memory card before connecting to the computer.
-
Page 76: Hdmi Connected Tv Output
HDMI Connected TV Output The product is capable of realizing movie and photo playback on a TV through HDMI. The HDMI connection defaults to automatic connection mode. Steps: 1. Open the rear cover of the product, connect one end of the HDMI cable (not included) to a TV which is up to the HDMI standard (the TV and the product both need to be turned on) and the other end to the cable to the HDMI port of the product;... -
Page 77: Appendices
APPENDICES Specifications 「Design and specifications are subject to change without notice.」 Active Pixels 14.24 Megapixels Total Pixels 15.31 Megapixels [1/2.33" MOS] Focal Length 3.0mm Equivalent to 35mm film 16.8mm F number F2.8 Lens Lens Construction 6 groups 6 elements Optical Zoom Fixed focus Focusing Range Normal: 60cm ~ ∞... - Page 78 (4:3) 14MP: 4320×3240 (16:9) 10MP: 4320×2432 Still Size 5MP: 2592×1944 Image Dimensions 1920×1080(30fps), 1280×960(50fps), 1280×960(30fps), Movie Size 1280×720(60fps), 1280×720(30fps), 840×480(60fps) High-Speed Movie: 848×480(120fps) Detection Features Face detection Waterproof Feature Up to 10 m underwater Shockproof Feature Up to 2 m Dustproof Feature Equivalent to JIS / IEC ( IP6X ) Freeze-proofing Feature...
- Page 79 Burst Shot Supported Playback Modes Single Photo White Balance Auto (AWB), Daylight, Cloudy, Fluorescent, Underwater Internal Memory: Approx. 100 MB Storage Media Micro SD / Micro SDHC Card (Up to 32GB Support) \ [ MMC Card not supported ] Support 27 languages: English, Chinese (simplified and traditional), Japanese, Language Korean, French, Spanish, Portuguese, Thai, Indonesian, Vietnamese, Italian, Support...
-
Page 80: Prompts And Warning Messages
Prompts and Warning Messages Message Description Reset Mode When using “Copy to card”, if the number of folders in the memory card exceeds the maximum number of folders (999), the copy and End the message after the access actions cannot be performed. product processing. - Page 81 Message Description Reset Mode When turning on the product or pressing The message will disappear the product detects that the internal memory is after 3 seconds. out of space. User should do nothing. The product will turn off Updating firmware. automatically after the update is completed.
- Page 82 Message Description Reset Mode The internal memory still cannot be recognized The message will disappear after format. in 2 seconds, and the screen of format or not will appear. Interruption logging problem is encountered in the period of writing in the memory card or Return to the viewfinder recording in the video recording or shooting status will be displayed in 2...
- Page 83 Message Description Reset Mode Connecting to the computer USB The display is ended after connection is succeeded. Connecting to the HDMI device It will shut down after Caution will appear before power off when the displaying for 2 seconds. battery of the product is already dead. A message appears to prompt The firmware cannot be updated when power updating after full charging and...
-
Page 84: Trouble Shooting
Trouble Shooting Problem Possible causes Solution Product does not The battery has been depleted. Charge the battery. turn on If the files or folders have reached the Copy the data to the Exceeded maximum maximum number (9999 for files, 999 computer disk, and format folder number for folders), the memory card cannot be... -
Page 85: Special Accessories
Special Accessories Let the action cam accommodate to your activity, there are different options of accessories available. Accessories bundle vary per distribution retailer. To purchase additional accessories separately, please contact your local retailer customer service support, or visit www. kodakcamera.jkiltd.com for more customer service details. Before using (especially in water or strenuous activity), please pay attention to make sure the product is tightly secured to prevent damage or loss to the product. - Page 86 For ease of assembly, please line up the marks on the base and pre-tightening handle per the diagrams below. Pre-tightening handle Mark...
- Page 88 Adhesive mount (flat) : accessory applicable to skateboard Adhesive mount (curved) : accessory applicable to helmet...
- Page 89 Installation Method: There are two types of adhesive mounts: flat and curved. You may select based on the shape of the object to be used. Both types can be assembled in the same way, taking the adhesive mount (flat) as an example: 1.
- Page 90 2. Tie one end of the rope to the adhesive mount, and the other end to the rear cover shaft. 3. Assemble the base, pre-tightening handle and adhesive mount according to the direction illustrated in the picture. First press the base into the adhesive mount, and then rotate and tighten the pre-tightening handle.
- Page 91 Handlebar mount: accessory applicable to bicycle Installation Method: 1. Set the handlebar clamp to the handlebar, and rotate the screw for fixing. Handlebar Clamp Screw...
- Page 92 2. Align the location pole of the base to the location hole of the action cam, and align the screw on the base to the tripod socket of the action cam. Rotate the screw for fixing. 3. Assemble the base, pre-tightening handle and handlebar clamp according to the direction illustrated in the picture.
- Page 93 Suction mount: accessory applicable to be attached to the automotive windshield (or smooth surface) Installation Method: 1. Align the location pole of the base to the location hole of the action cam, and align the screw on the base to the Tripod Socket of the action cam. Rotate the screw for fixing.
- Page 94 2. Assemble the base, pre-tightening handle and suction mount according to the direction illustrated in the Picture. First press the base into the suction mount, and then rotate and tighten the pre-tightening handle. Base Pre-tightening Handle Suction Mount 3. First, clean the suction mount and the windshield, and then attach the suction cup to the windshield (or smooth surface).
- Page 95 Vented helmet strap mount: accessory applicable to bicycle helmet Installation Method: 1. Expand the band first, and then thread both ends of the band into the helmet. Band...
- Page 96 2. Thread both ends of the band into the buckle, and then press the buckle clamp. Buckle Buckle Clamp 3. Align the location pole of the base to the location hole of the action cam, and align the screw on the base to the tripod socket of the action cam. Rotate the screw for fixing.
- Page 97 4. Assemble the base, pre-tightening handle and vented helmet strap mount according to the direction illustrated in the picture. First press the base into the vented helmet strap mount, and then rotate and tighten the pre-tightening handle. Base Pre-tightening Handle Buckle Adhesive Mount...
- Page 98 Head strap mount : accessory applicable to mount the action cam on your head Location Pole Installation Method: 1. Insert the angle bracket into the mount, align the location pole on the angle bracket to the location hole of the action cam, and align the screw on the angle bracket to the tripod socket of the action cam.
- Page 99 If you need to remove the mount, please use one hand to push forward the angle bracket (as directed by arrow ①), and use a pointed object to push the buckles in the two side holes by order with another hand (as directed by arrow ②) . Then remove the angle bracket out from the mount.
- Page 100 Surfboard adhesive mount: accessory applicable to surfboard Plane Support (Small) Plane Support (Large) Installation Method: 1. Align the location pole of the base to the location hole of the action cam, and align the screw on the base to the Tripod Socket of the action cam. Rotate the screw for fixing. 2.
- Page 101 3. Assemble the base, pre-tightening handle and plane support (large) according to the direction illustrated in the Picture. First press the base into the plane support (large), and then rotate and tighten the pre-tightening handle. Base Pre-tightening Handle Plane Support (Large) 4.
- Page 102 Extended Arm: You can add one or two extended arms (except head bank mount) to each kit, to help you to adjust the mounting angle of the action cam more flexibly. Extended Arm...
- Page 103 Licensed Product The Kodak trademark and trade dress are used under license from Kodak. © 2013 by JK Imaging Ltd. All rights reserved. JK Imaging Ltd. 1411 W. 190th Street, Suite 550, Gardena, CA 90248, USA www.kodakcamera.jkiltd.com Ver. 1...
Need help?
Do you have a question about the Pixpro SP1 and is the answer not in the manual?
Questions and answers